Attach or detach an Azure compute gallery to a lab plan in Azure Lab Services
Note
This article references features available in lab plans, which replaced lab accounts.
This article shows how to attach or detach an Azure compute gallery to a lab plan. If you use a lab account, see how to attach or detach a compute gallery to a lab account.
Important
To show a virtual machine image in the list of images during lab creation, you need to replicate the compute gallery image to the same region as the lab plan. You need to manually replicate images to other regions in the compute gallery.
Saving images to a compute gallery and replicating those images incurs extra cost. This cost is separate from the Azure Lab Services usage cost. Learn more about Azure Compute Gallery pricing.
Prerequisites
To change settings for the lab plan, your Azure account needs the Owner, Contributor, or Lab Services Contributor role on the lab plan. Learn more about the Azure Lab Services built-in roles.
To attach an Azure compute gallery to a lab plan, your Azure account needs to have the following permissions:
Azure role Scope Note Owner Azure compute gallery If you attach an existing compute gallery. Owner Resource group If you create a new compute gallery. If your Azure account is a guest user in Microsoft Entra ID, your Azure account needs to have the Directory Readers role to attach an existing compute gallery.
Learn how to assign an Azure role in Azure role-based access control (Azure RBAC).
Scenarios
Here are a couple of scenarios supported by attaching a compute gallery.
- A lab plan admin attaches a compute gallery to the lab plan. An image is uploaded to the compute gallery outside the context of a lab. The image is enabled on the lab plan by the lab plan admin. Then, lab creators can use that image from the compute gallery to create labs.
- A lab plan admin attaches a compute gallery to the lab plan. A lab creator (educator) saves the customized image of their lab to the compute gallery. Then, other lab creators can select this image from the compute gallery to create a template for their labs.
When you save a template image of a lab in Azure Lab Services, the image is uploaded to the compute gallery as a specialized image. Specialized images keep machine-specific information and user profiles. You can still directly upload a generalized image to the gallery outside of Azure Lab Services.
A lab creator can create a template VM based on both generalized and specialized images in Azure Lab Services.
Important
While using an Azure compute gallery, Azure Lab Services supports only images that use less than 128 GB of disk space on their OS drive. Images with more than 128 GB of disk space or multiple disks won't be shown in the list of virtual machine images during lab creation.
Attach a new compute gallery to a lab plan
Open your lab plan in the Azure portal.
Select Azure compute gallery on the menu.
Select the Create Azure compute gallery button.
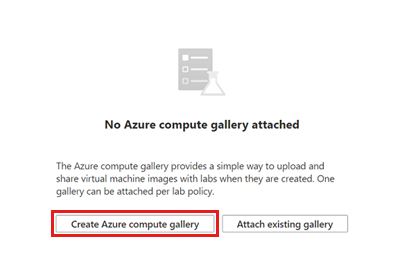
In the Create Azure compute gallery window, enter a name for the gallery, and then select Create.


Azure Lab Services creates the compute gallery and attaches it to the lab plan. All labs created using this lab plan can now use images from the attached compute gallery.
In the bottom pane, you see images in the compute gallery. There are no images in this new gallery. When you upload images to the gallery, you see them on this page.

Attach an existing compute gallery to a lab plan
If you already have an Azure compute gallery, you can also attach it to your lab plan. To attach an existing compute gallery, you first need to grant the Azure Lab Services service principal permissions to the compute gallery. Next, you can attach the existing compute gallery to your lab plan.
Configure compute gallery permissions
The Azure Lab Services service principal needs to have the Owner Azure RBAC role on the Azure compute gallery. There are two Azure Lab Services service principals:
| Name | Application ID | Description |
|---|---|---|
| Azure Lab Services | c7bb12bf-0b39-4f7f-9171-f418ff39b76a | Service principal for Azure Lab Services lab plans (V2). |
| Azure Lab Services | 1a14be2a-e903-4cec-99cf-b2e209259a0f | Service principal for Azure Lab Services lab accounts (V1). |
To attach a compute gallery to a lab plan, assign the Owner role to the service principal with application ID c7bb12bf-0b39-4f7f-9171-f418ff39b76a.
If your Azure account is a guest user, your Azure account needs to have the Directory Readers role to perform the role assignment. Learn about role assignments for external users.
Follow these steps to grant permissions to the Azure Lab Services service principal by using the Azure CLI:
Open Azure Cloud Shell. Alternately, select the Cloud Shell button on the menu bar at the upper right in the Azure portal.
Azure Cloud Shell is an interactive, authenticated, browser-accessible terminal for managing Azure resources. Learn how to get started with Azure Cloud Shell.
Enter the following commands in Cloud Shell:
Select the service principal object ID, based on the application ID:
az ad sp show --id c7bb12bf-0b39-4f7f-9171-f418ff39b76a --query "id" -o tsvSelect the ID of the compute gallery, based on the gallery name:
az sig show --gallery-name <gallery-name> --resource-group <gallery-resource-group> --query id -o tsvReplace the text placeholders
<gallery-name>and<gallery-resource-group>with the compute gallery name and the name of the resource group that contains the compute gallery. Make sure to remove the angle brackets when replacing the text.Assign the Owner role to service principal on the compute gallery:
az role assignment create --assignee-object-id <service-principal-object-id> --role Owner --scope <gallery-id>Replace the text placeholders
<service-principal-object-id>and<gallery-id>with the outcomes of the previous commands.


Learn more about how to assign an Azure role in Azure role-based access control (Azure RBAC).
Attach the compute gallery
The following procedure shows you how to attach an existing compute gallery to a lab plan.
Open your lab plan in the Azure portal.
Select Azure compute gallery on the menu.
Select the Attach existing gallery button.
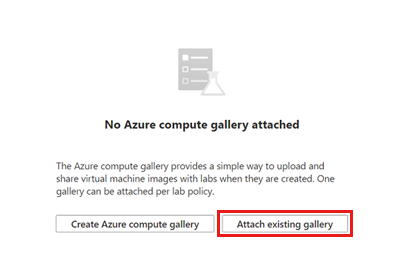
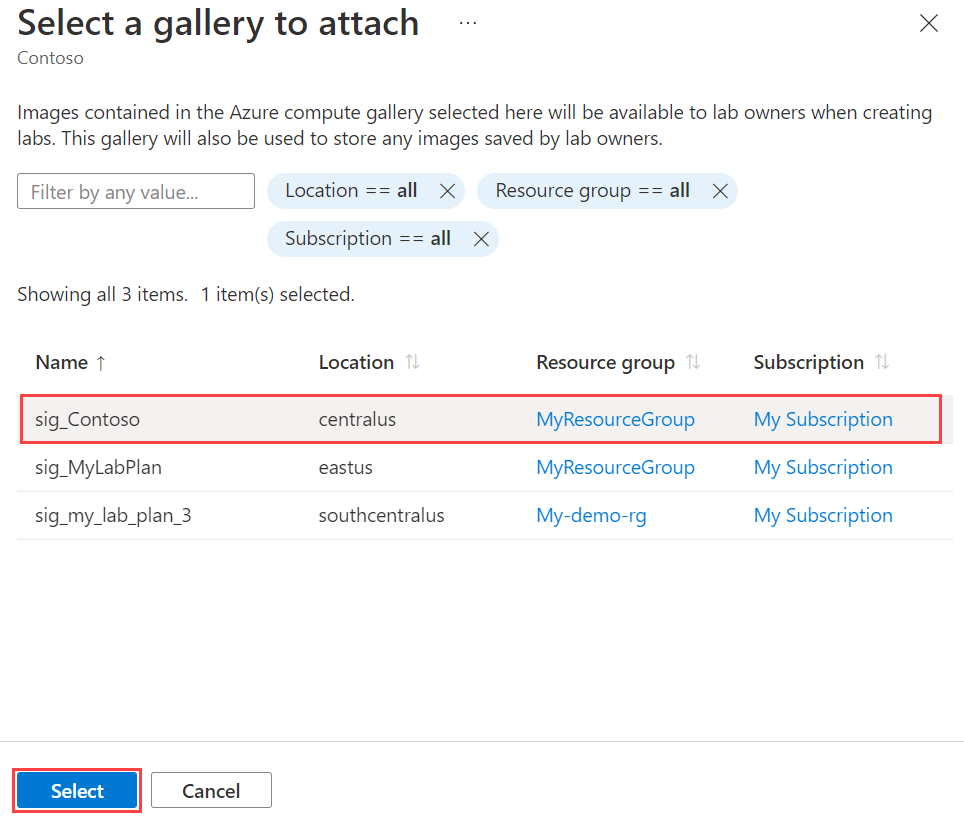
On the Attach an existing compute gallery page, select your compute gallery, and then select the Select button.
All labs created using this lab plan can now use images from the attached compute gallery.
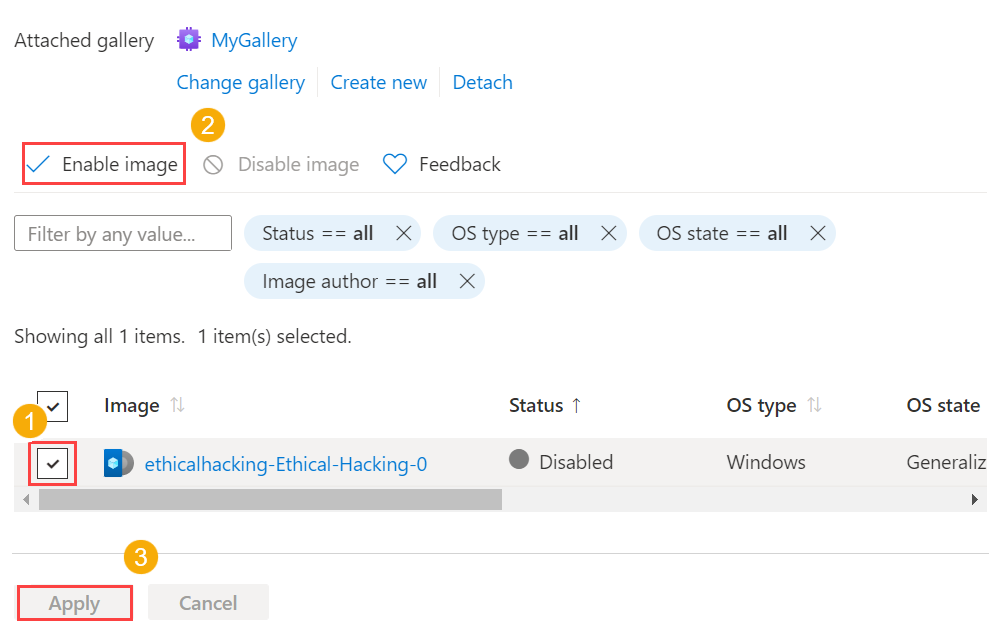
Enable and disable images
All images in the attached compute gallery are disabled by default.
To enable or disable images from a compute gallery:
Check the VM images in the list.
Select Enable image or Disable image, to enable or disable the images.
Select Apply to confirm the action.
Detach a compute gallery
To detach a compute gallery from your lab, select Detach on the toolbar. Confirm the detach operation.
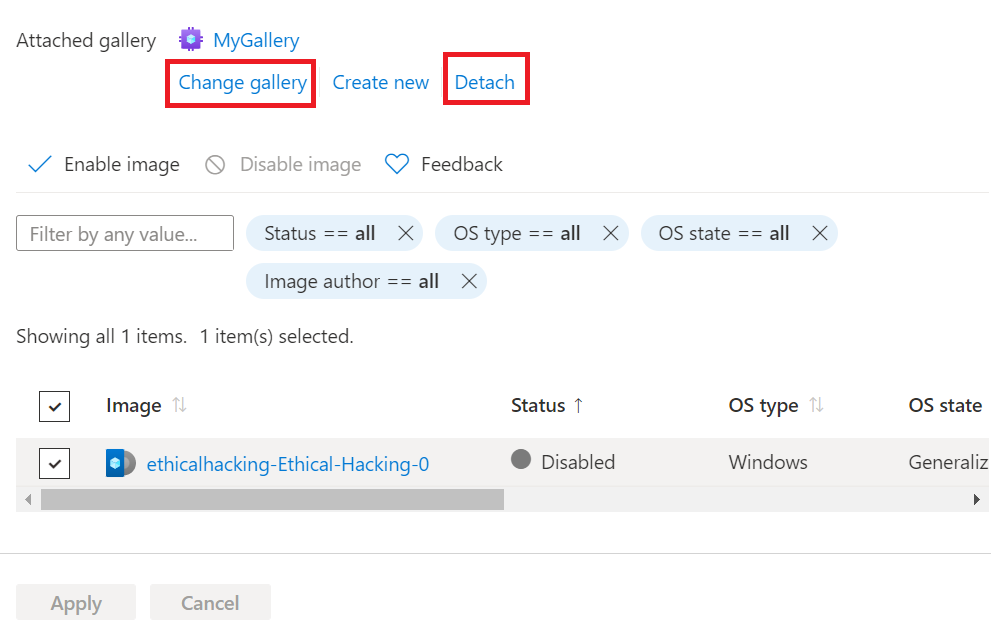
Only one Azure compute gallery can be attached to a lab plan. To attach another compute gallery, follow the steps to attach an existing compute gallery.
Next steps
To learn how to save a template image to the compute gallery or use an image from the compute gallery, see How to use a compute gallery.
To explore other options for bringing custom images to compute gallery outside of the context of a lab, see Recommended approaches for creating custom images.
For more information about compute galleries in general, see compute gallery.
Feedback
Coming soon: Throughout 2024 we will be phasing out GitHub Issues as the feedback mechanism for content and replacing it with a new feedback system. For more information see: https://aka.ms/ContentUserFeedback.
Submit and view feedback for