Discover and manage Microsoft Sentinel out-of-the-box content
The Microsoft Sentinel Content hub is your centralized location to discover and manage out-of-the-box (built-in) content. There you find packaged solutions for end-to-end products by domain or industry. You have access to the vast number of standalone contributions hosted in our GitHub repository and feature blades.
Discover solutions and standalone content with a consistent set of filtering capabilities based on status, content type, support, provider, and category.
Install content in your workspace all at once or individually.
View content in list view and quickly see which solutions have updates. Update solutions all at once while standalone content updates automatically.
Manage a solution to install its content types and get the latest changes.
Configure standalone content to create new active items based on the most up-to-date template.
If you're a partner who wants to create your own solution, see the Microsoft Sentinel Solutions Build Guide for solution authoring and publishing.
Important
Microsoft Sentinel is available as part of the public preview for the unified security operations platform in the Microsoft Defender portal. For more information, see Microsoft Sentinel in the Microsoft Defender portal.
Prerequisites
In order to install, update, and delete standalone content or solutions in content hub, you need the Microsoft Sentinel Contributor role at the resource group level.
For more information about other roles and permissions supported for Microsoft Sentinel, see Permissions in Microsoft Sentinel.
Discover content
The content hub offers the best way to find new content or manage the solutions you already installed.
For Microsoft Sentinel in the Azure portal, under Content management, select Content hub.
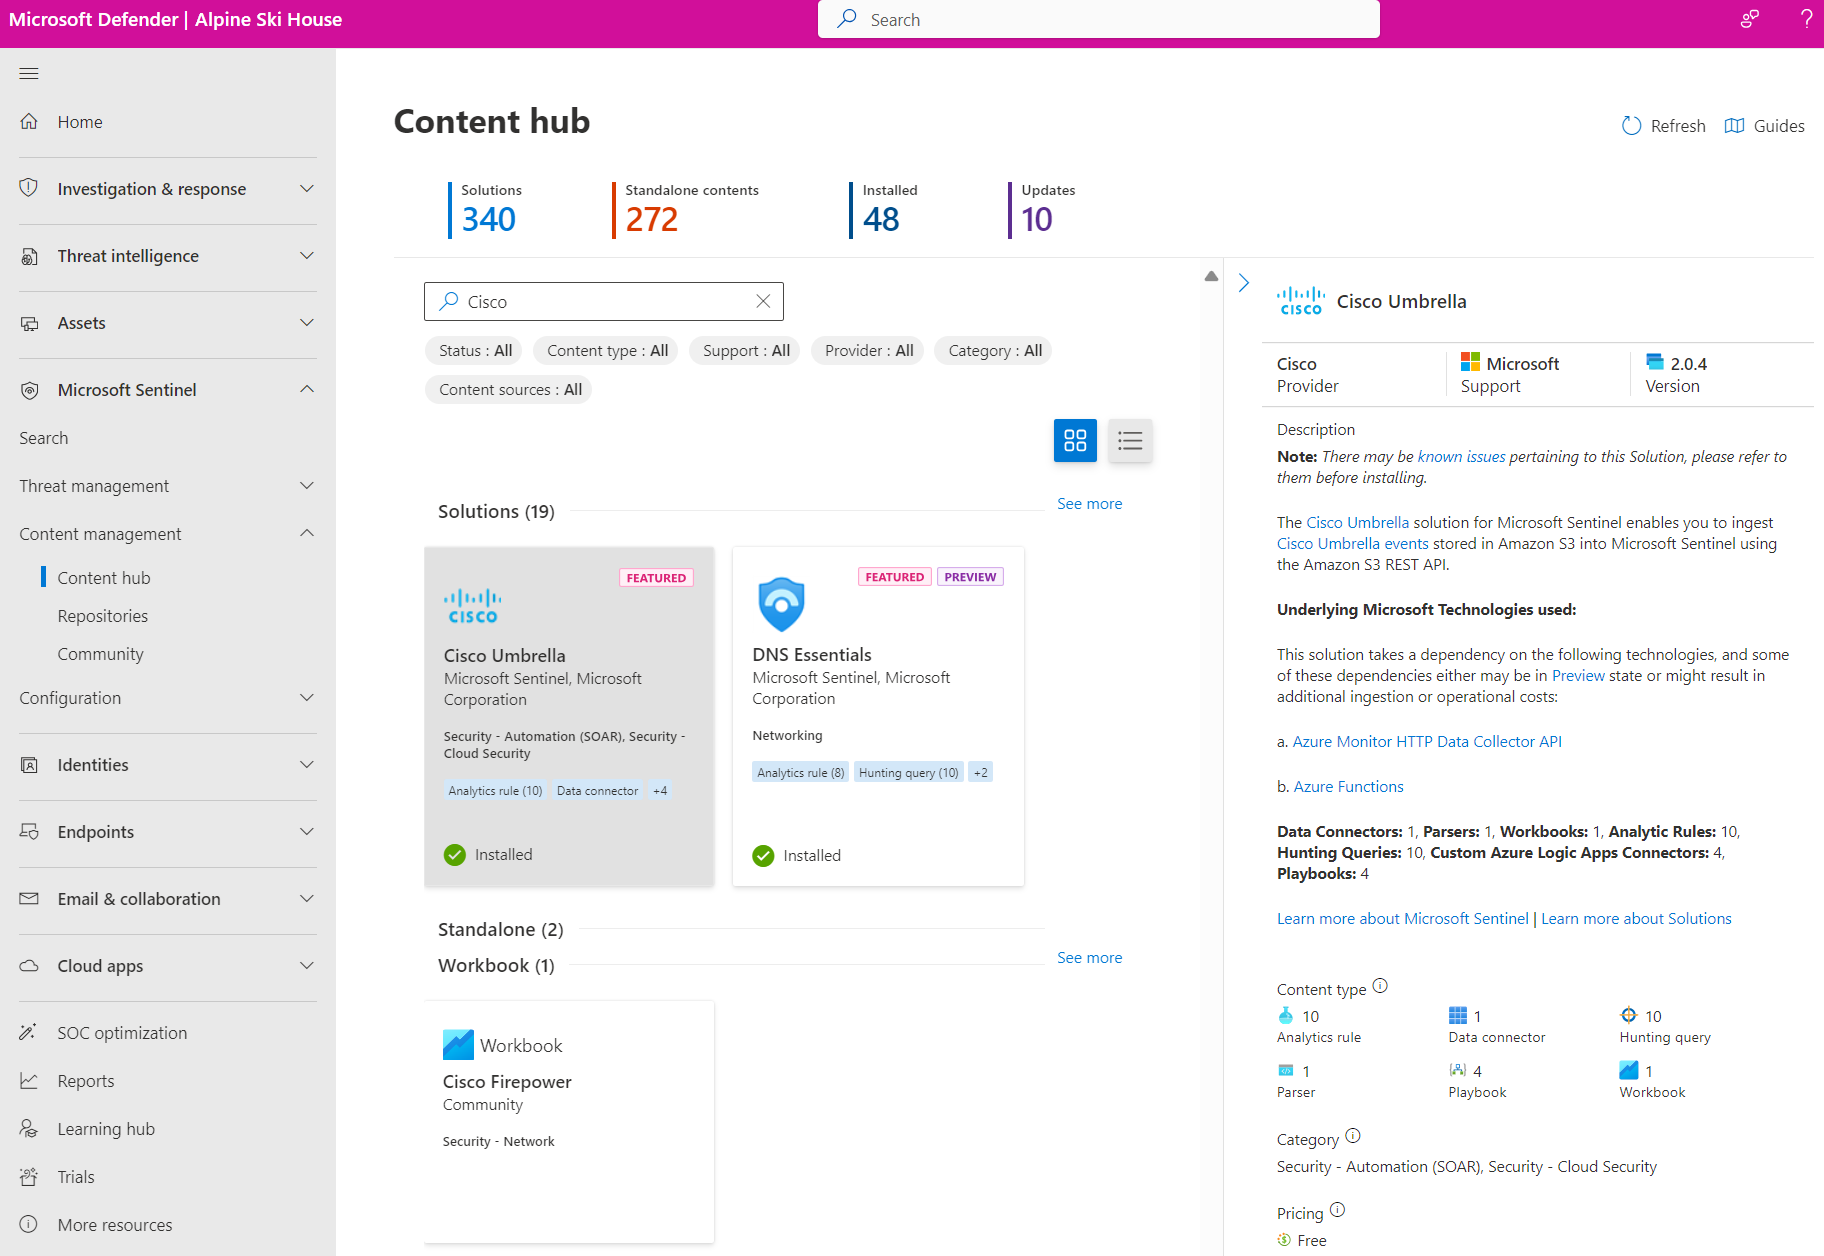
For Microsoft Sentinel in the Defender portal, select Microsoft Sentinel > Content management > Content hub.The Content hub page displays a searchable grid or a list of solutions and standalone content.
Filter the list displayed, either by selecting specific values from the filters, or entering any part of a content name or description in the Search field.
For more information, see Categories for Microsoft Sentinel out-of-the-box content and solutions.
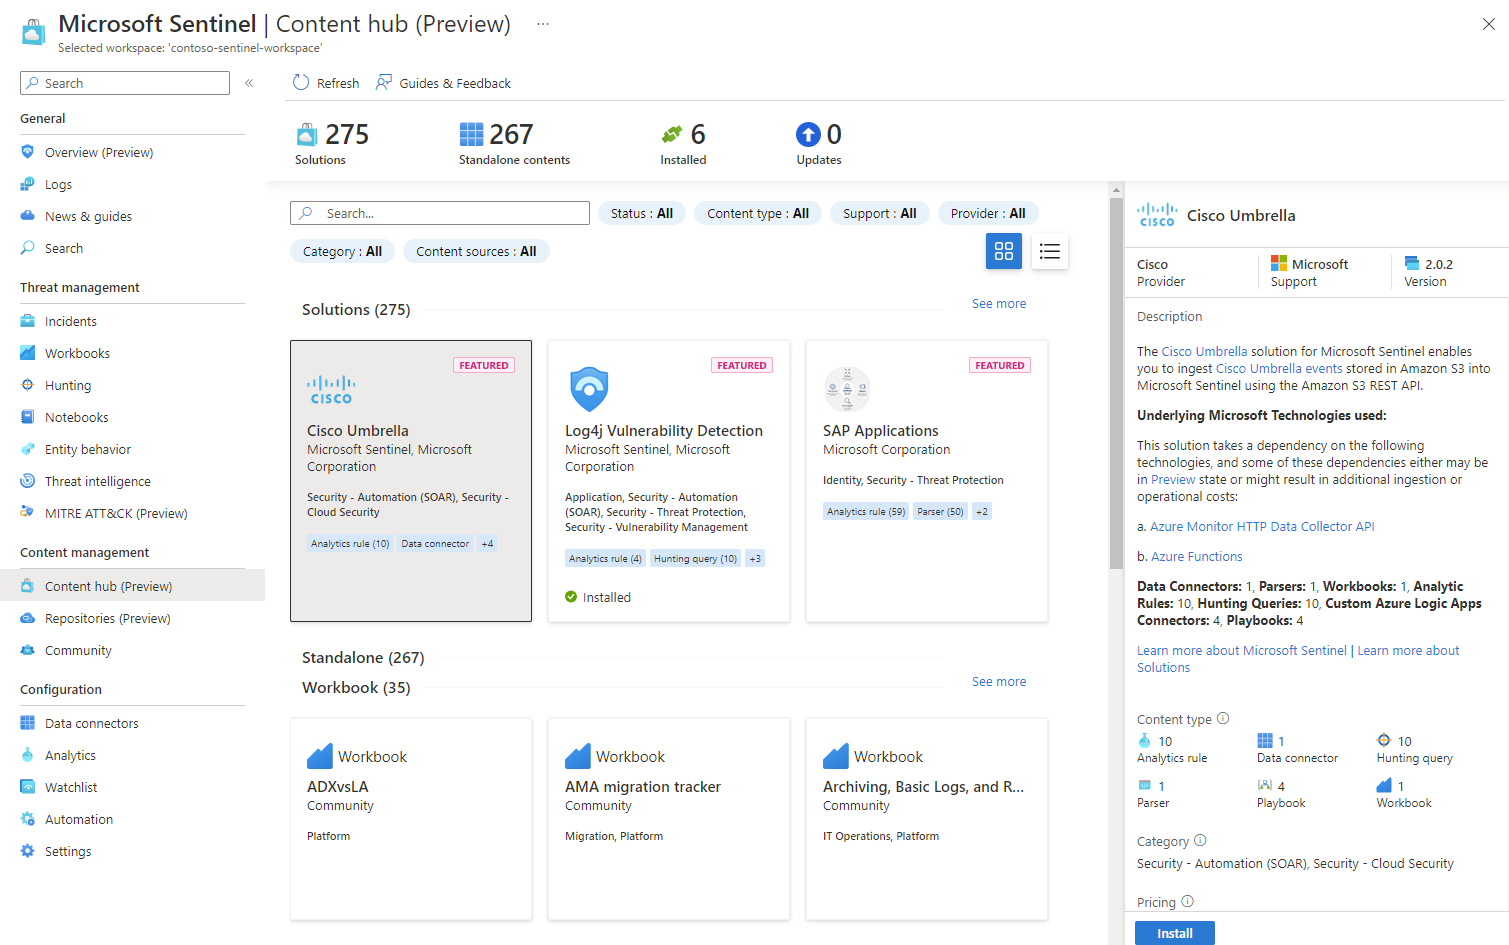
Select the Card view to view more information about a solution.
Each content item shows categories that apply to it, and solutions show the types of content included. For example, in the following image, the Cisco Umbrella solution lists one of its categories as Security - Cloud Security, and indicates it includes a data connector, analytics rules, hunting queries, playbooks, and more.
Install or update content
Install standalone content and solutions individually or all together in bulk. For more information on bulk operations, see Bulk install and update content in the next section.
If a solution that you deployed has updates since you last deployed it, the list view shows Update in the status column. The solution is also included in the Updates count at the top of the page.
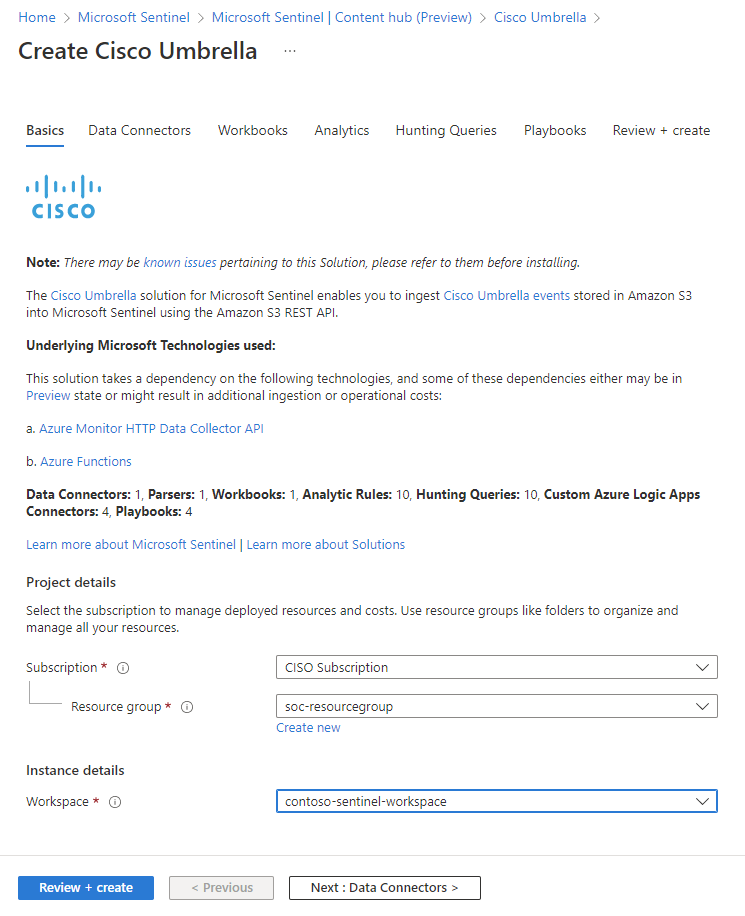
Here's an example showing the install of an individual solution.
In the Content hub, search for and select the solution.
On the solutions details pane, from the bottom right-hand side, select View details.
Select Create or Update.
On the Basics tab, enter the subscription, resource group, and workspace to deploy the solution. For example:
Select Next to go through the remaining tabs to learn about, and in some cases configure, each of the content components.
The tabs correspond with the content offered by the solution. Different solutions might have different types of content, so you might not see the same tabs in every solution.
You might also be prompted to enter credentials to a third party service so that Microsoft Sentinel can authenticate to your systems. For example, with playbooks, you might want to take response actions as prescribed in your system.
In the Review + create tab, wait for the
Validation Passedmessage.Select Create or Update to deploy the solution. You can also select the Download a template for automation link to deploy the solution as code.
Each content type within the solution might require more steps to configure. For more information, see Enable content items in a solution.
Bulk install and update content
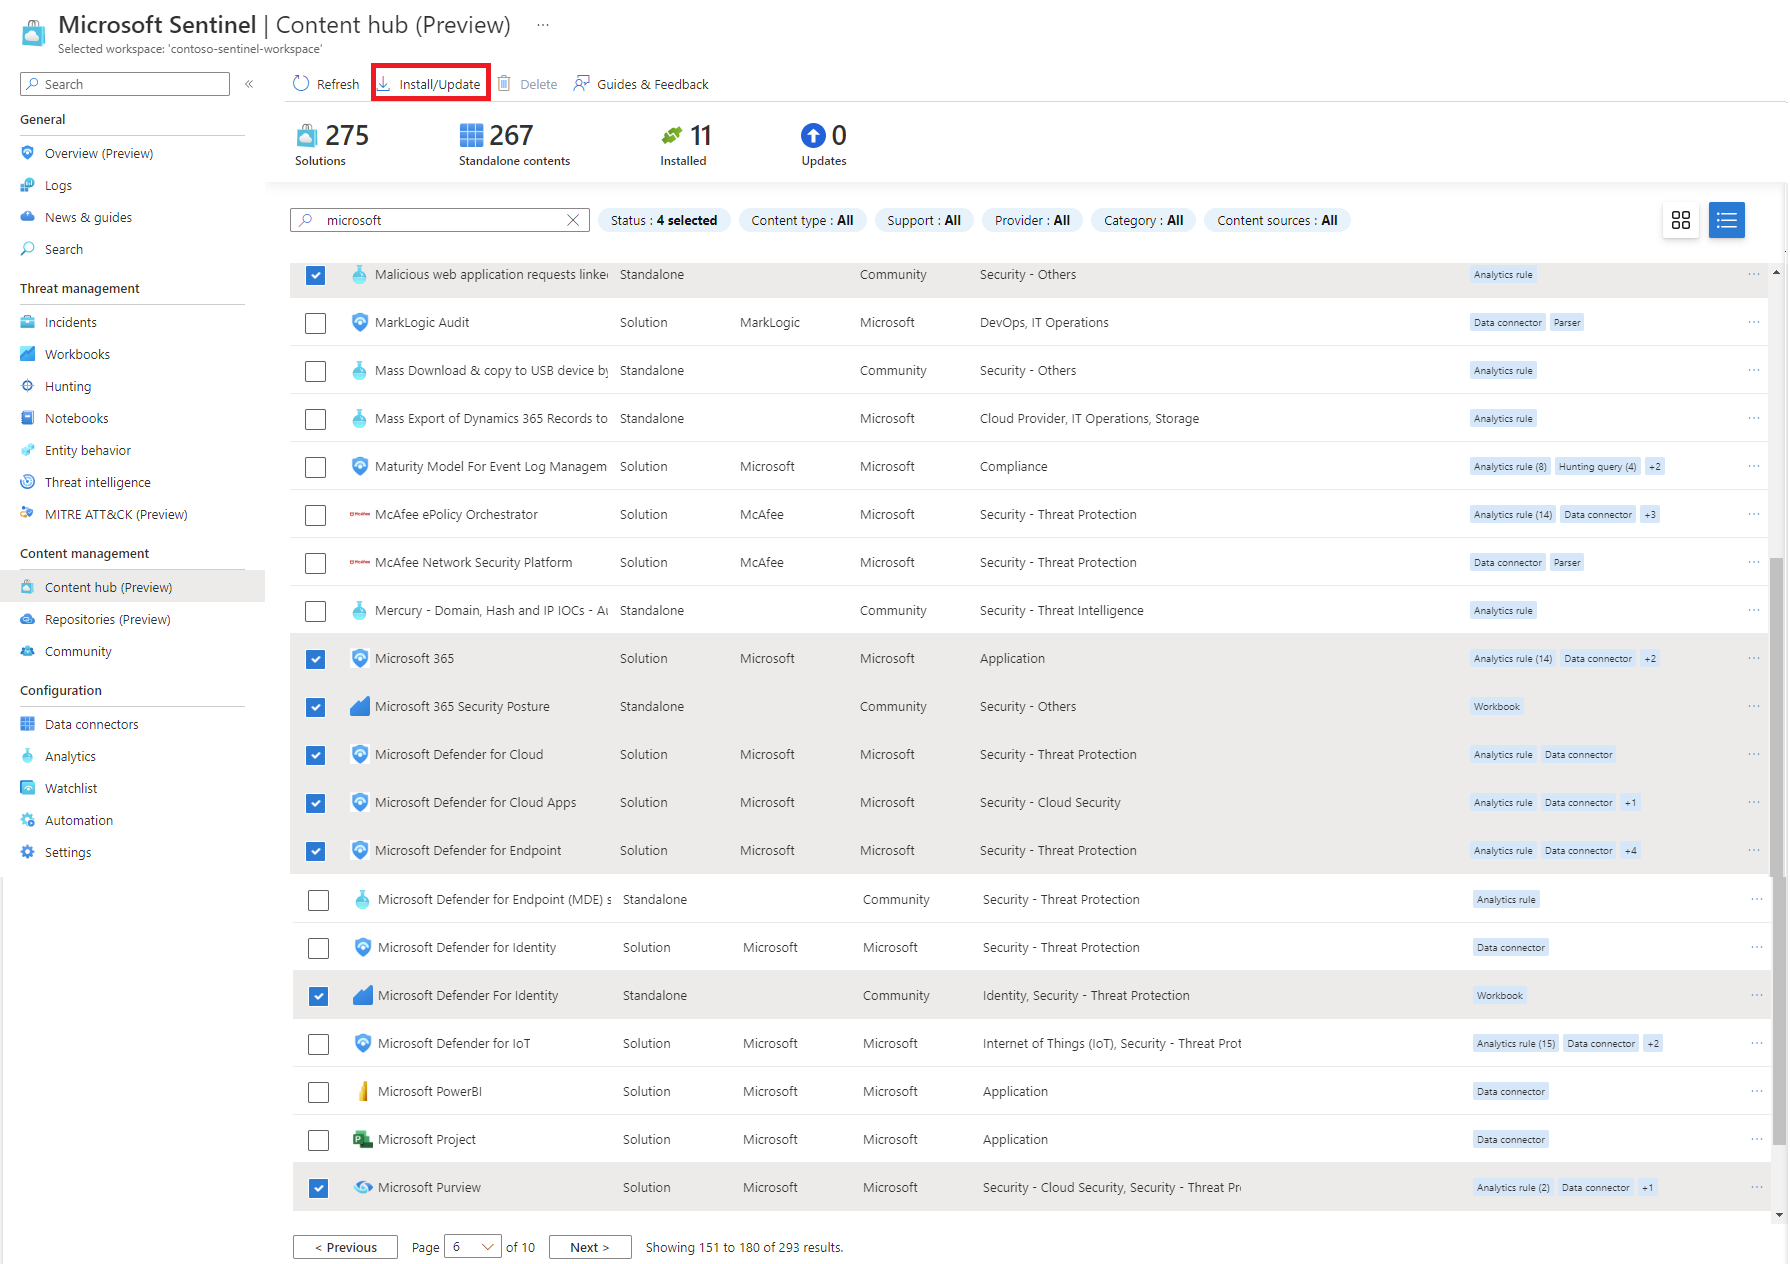
Content hub supports a list view in addition to the default card view. Select the list view to install multiple solutions and standalone content all at once. Standalone content is kept up-to-date automatically. Any active or custom content created based on solutions or standalone content installed from content hub remains untouched.
To install or update items in bulk, change to the list view.
Search for or filter to find the content that you want to install or update in bulk.
Select the checkbox for each solution or standalone content that you want to install or update.
Select the Install/Update button.
If a solution or standalone content you selected was already installed or updated, no action is taken on that item. It doesn't interfere with the update and install of the other items.
Select Manage for each solution you installed. Content types within the solution might require more information for you to configure. For more information, see Enable content items in a solution.

Enable content items in a solution
Centrally manage content items for installed solutions from the content hub.
In the content hub, select an installed solution where the version is 2.0.0 or higher.
On the solutions details page, select Manage.

Review the list of content items.

Select a content item to get started.


Manage each content type
The following sections provide some tips on how to work with the different content types as you manage a solution.
Data connector
To connect a data connector, complete the configuration steps.
Select Open connector page.
Complete the data connector configuration steps.
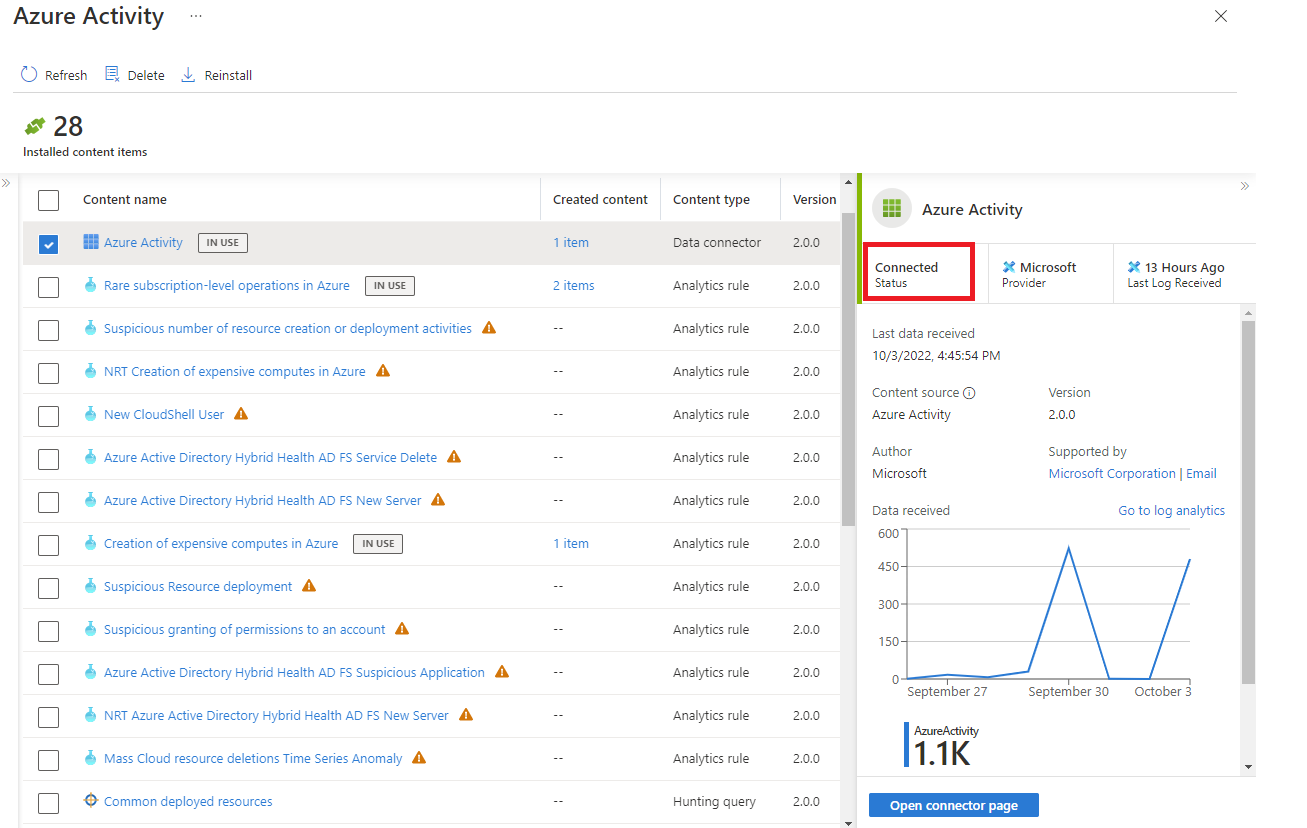
After you configure the data connector and logs are detected, the status changes to Connected.
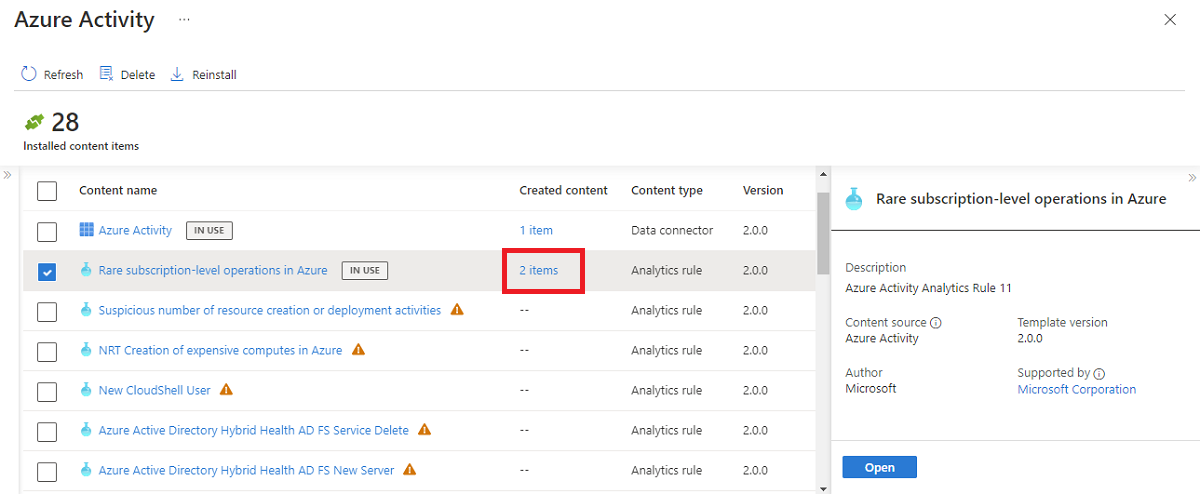
Analytics rule
Create a rule from a template or edit an existing rule.
View the template in the analytics template gallery.
If the template isn't used yet, select Open > Create rule and follow the steps to enable the analytics rule.
After you create a rule, the number of active rules created from the template is shown in the Created content column.
Select the active rules link to edit the existing rule. For example, the active rule link in the following image is under Content created and shows 2 items.

Hunting query
Run the provided hunting query or customize it.
To start searching right away, select Run query from the details page for quick results.
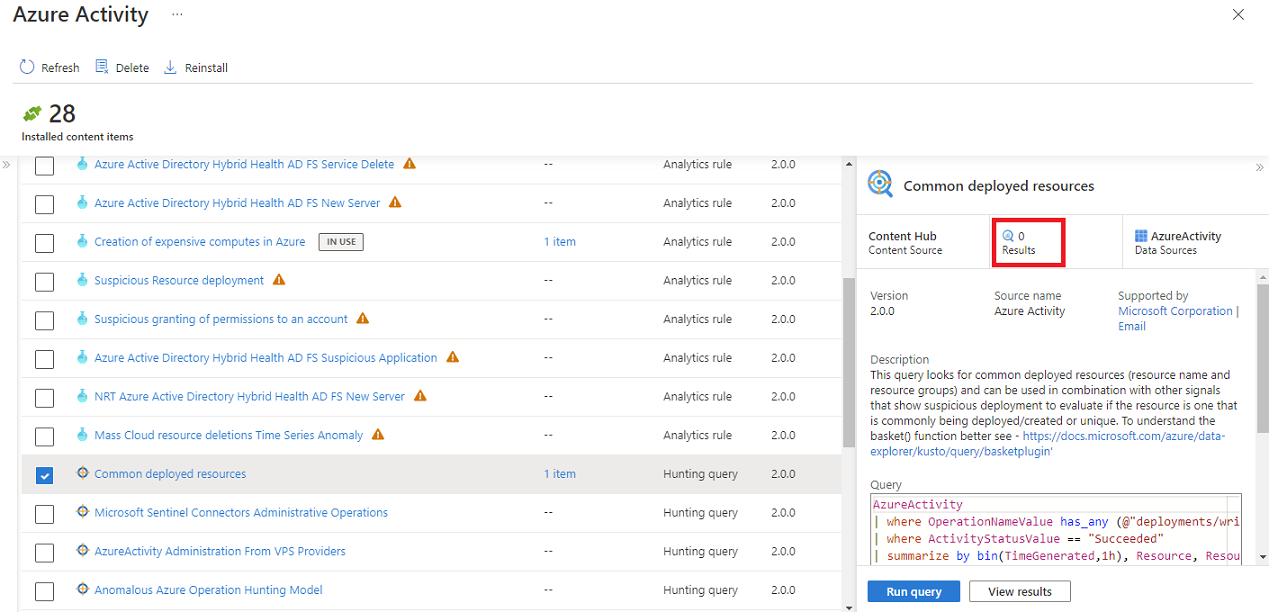
To customize your hunting query, select the link in the Content name column.
From the hunting gallery, you can create a clone of the read-only hunting query template by going to the ellipses menu. Hunting queries created in this way display as items in the content hub Created content column.

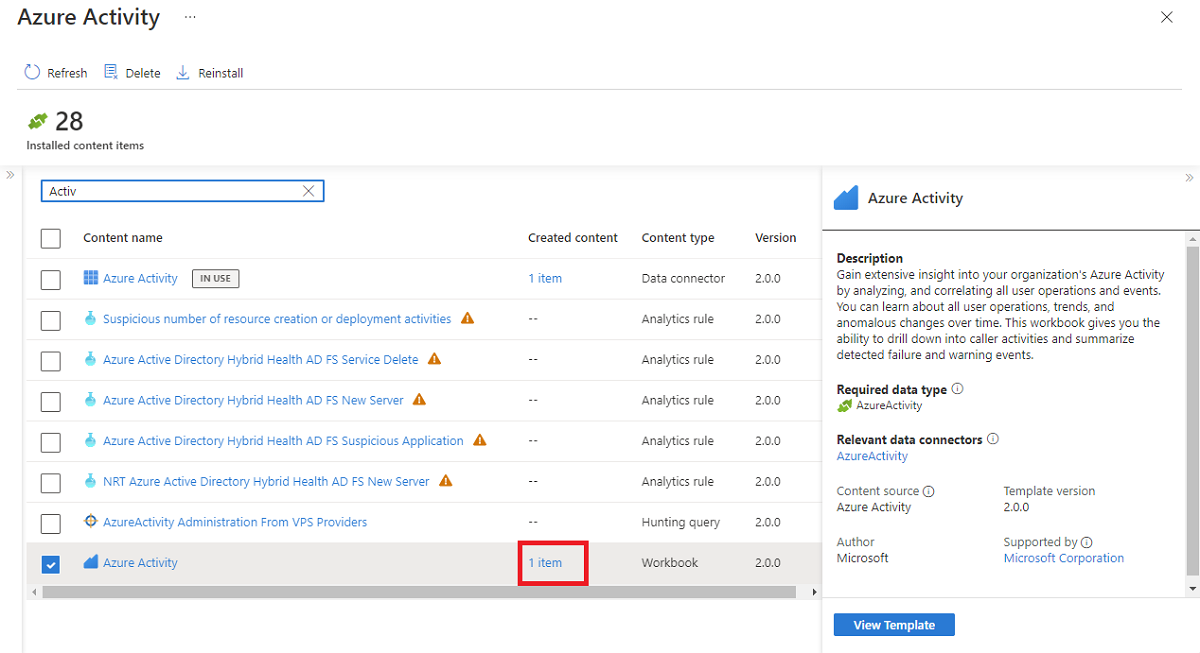
Workbook
To customize a workbook created from a template, create an instance of a workbook.
Select View template to open the workbook and see the visualizations.
Select Save to create an instance of the workbook template.
View your saved customizable workbook by selecting View saved workbook.
From the content hub, select the 1 item link in the Created content column to manage the workbook.

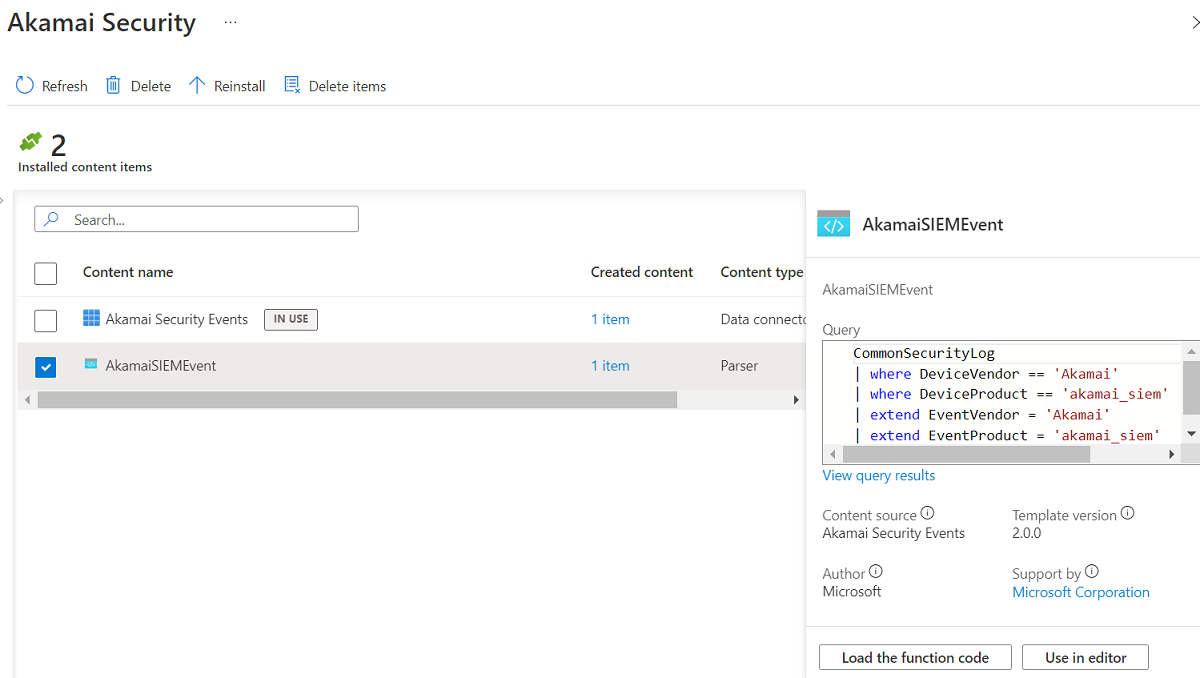
Parser
When a solution is installed, any parsers included are added as workspace functions in Log Analytics.
Select Load the function code to open Log Analytics and view or run the function code.
Select Use in editor to open Log Analytics with the parser name ready to add to your custom query.

Playbook
Create a playbook from a template.
Select the Content name link of the playbook.
Choose the template and select Create playbook.
After the playbook is created, the active playbook is shown in the Created content column.
Select the active playbook 1 item link to manage the playbook.


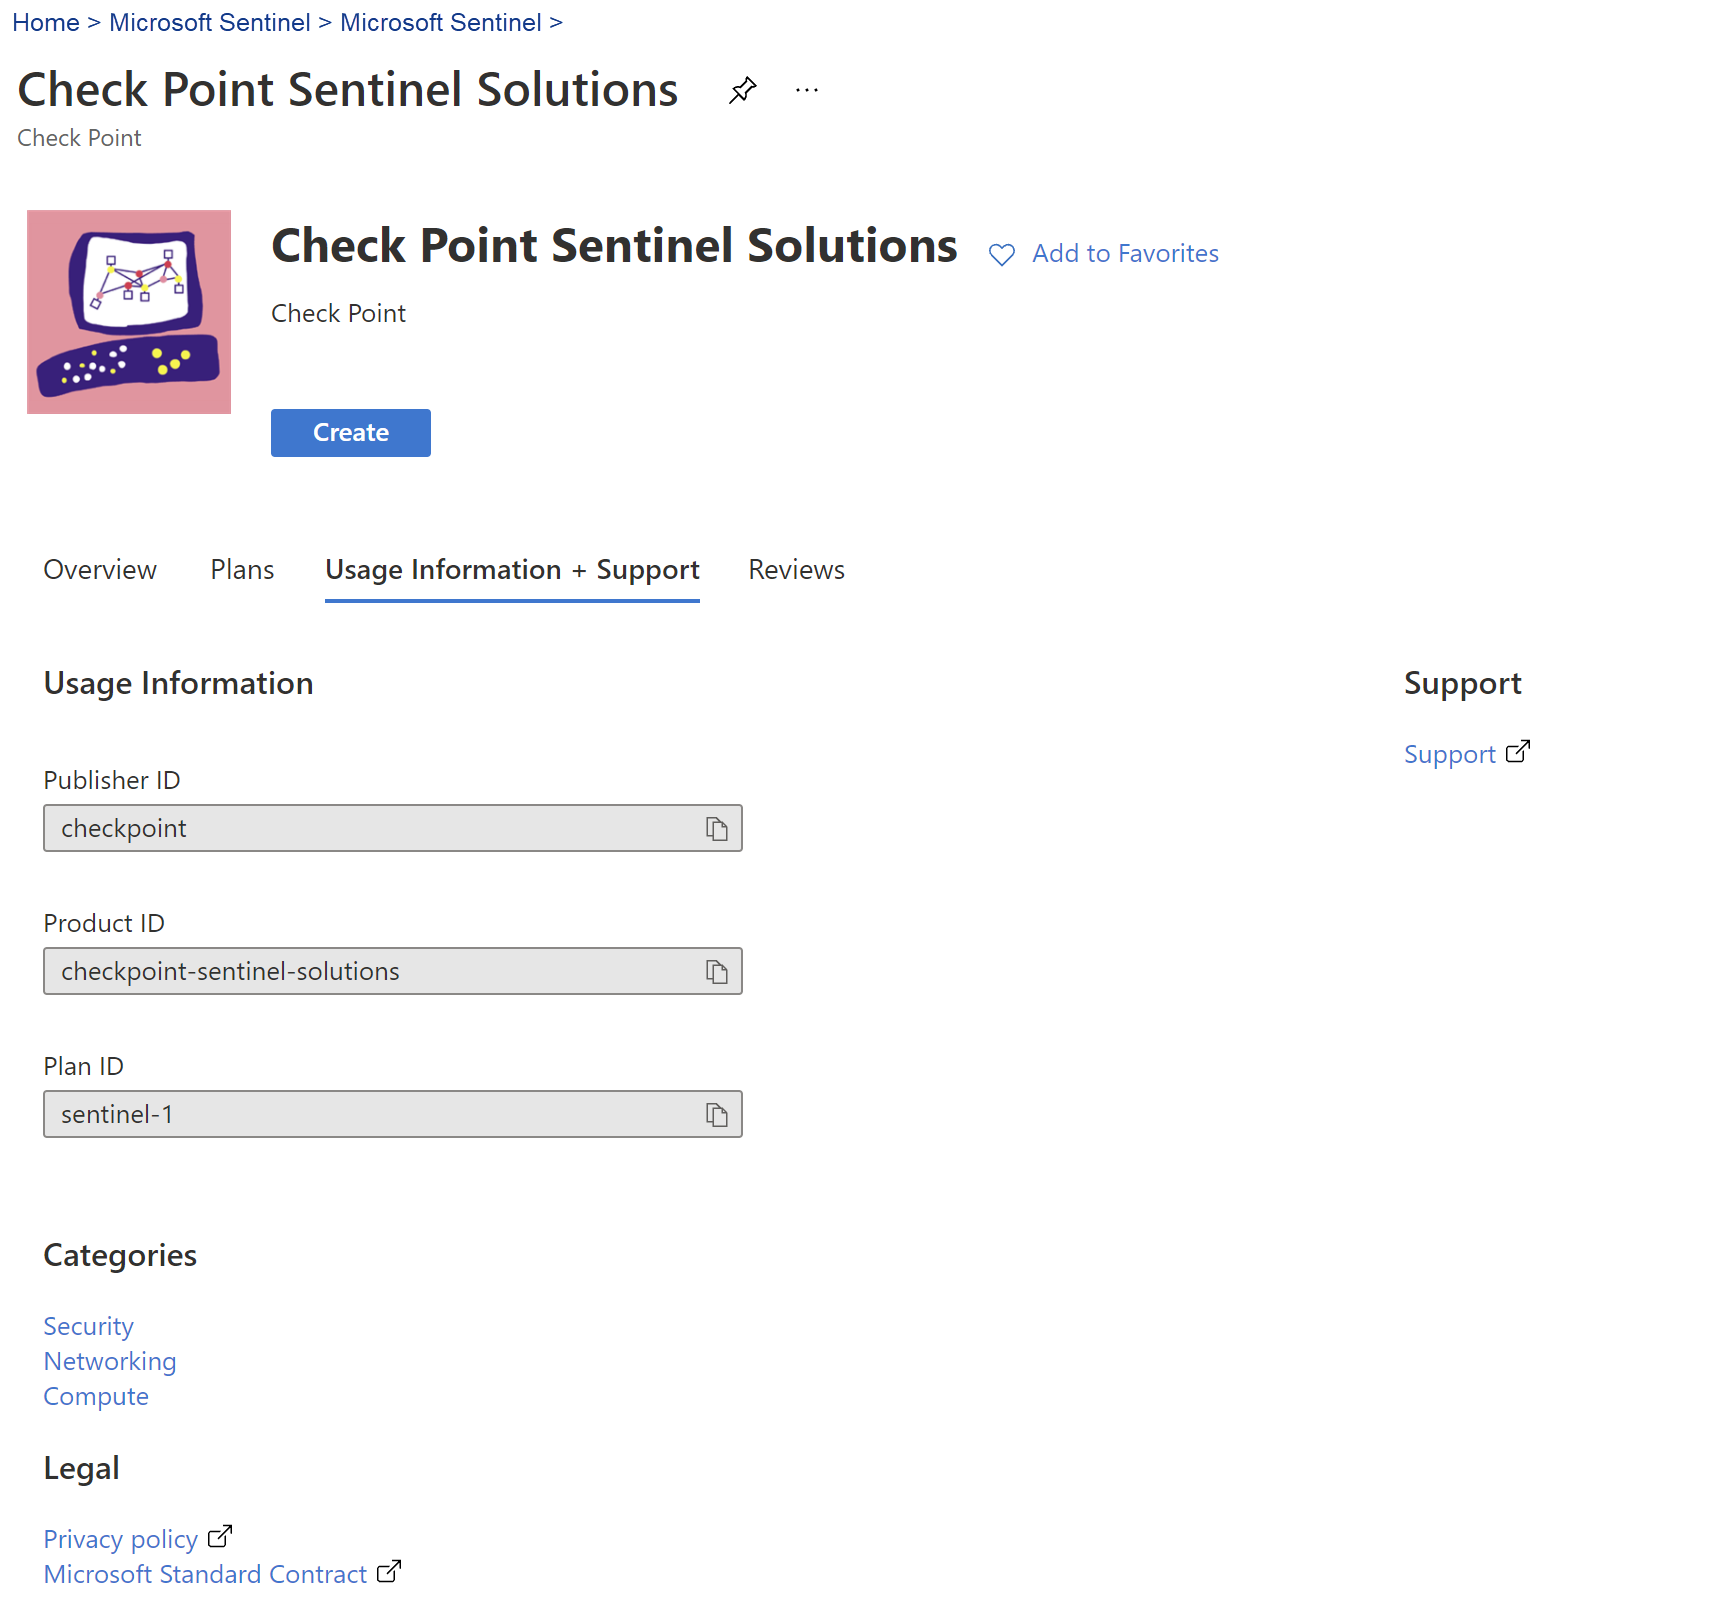
Find the support model for your content
Each solution and standalone content item explains its support model on its details pane, in the Support box, where either Microsoft or a partner's name is listed. For example:

When contacting support, you might need other details about your solution, such as a publisher, provider, and plan ID values. Find this information on the details page in the Usage information & support tab.
Next steps
In this document, you learned how to find and deploy built-in solutions and standalone content for Microsoft Sentinel.
- Learn more about Microsoft Sentinel solutions.
- See the full Microsoft Sentinel solutions catalog in the Azure Marketplace.
- Find domain specific solutions in the Microsoft Sentinel content hub catalog.
- Delete installed Microsoft Sentinel out-of-the-box content and solutions.
Many solutions include data connectors that you need to configure so that you can start ingesting your data into Microsoft Sentinel. Each data connector has its own set of requirements that are detailed on the data connector page in Microsoft Sentinel.
For more information, see Connect your data source.
Feedback
Coming soon: Throughout 2024 we will be phasing out GitHub Issues as the feedback mechanism for content and replacing it with a new feedback system. For more information see: https://aka.ms/ContentUserFeedback.
Submit and view feedback for