Upload scanned data
This article describes how to upload scanned data to the Movere portal.
By default, when you configure a scan, automatic uploading of scanned data to the Movere portal is enabled.
- With automatic uploads enabled, you can select to:
- Upload data directly from target devices (default).
- Upload from the Console, and disable uploading from scanned devices.
- If you don't enable automatic uploads, then you need to upload scans manually.
- If the target device can't upload scans using automatic uploads to the Cloud or to the Console device, then the Console pulls the payloads from target devices (every six hours from the start of the scan)
Learn more about data uploading.
Upload data automatically
By default, when you configure a scan, automatic uploading to the Movere portal is enabled.
- Set up a scan in the Movere Console.
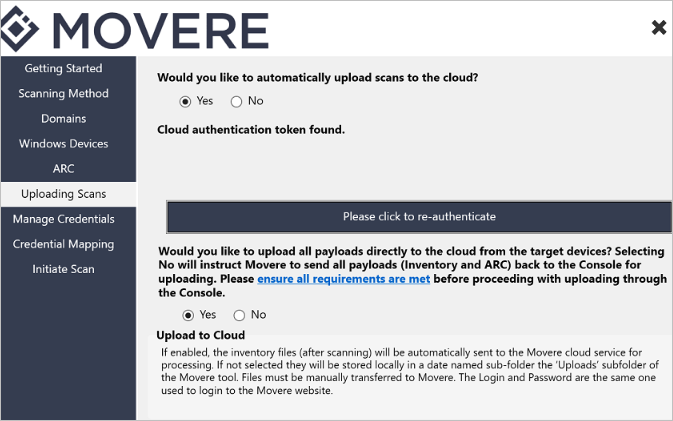
- On the Uploading Scans page in the Console, under Would you like to automatically upload scans to the cloud?, leave the default Yes setting for automatic uploading, or select No, to upload data manually to Movere.
Upload from target devices or the Console
With automatic uploading enabled, select where to upload the scans from.
Upload from target devices: The default setting uploads scans directly from target devices. With this setting enabled, Movere tries to upload data directly from the device three times. If it fails, the data is sent back to the Console, to try and upload it from there. Learn more about how this works.
Upload from the Console: Alternatively, you can specify that all payloads are uploaded via the Movere Console by default, disabling direct uploads from scanned devices.
Upload using pull mechanism: If uploading to the Console fails in the previous processes, then the Console pulls the payloads from the target device, using the File and Printer sharing mechanism. Learn More about how this works.
Note
If you upload data from the Console, we recommend scanning a maximum of 1000 devices per Console. This limitation reduces the load on the Console device, to help ensure successful scanning. In this scenario, we recommend that you install a separate Console for every 1000 devices that you want to scan.
Select as follows:
Set up a scan in the Movere Console.
On the Uploading Scans page in the Console, under Would you like to automatically upload scans to the cloud?, leave the default Yes setting.
Reauthenticate to Movere if indicated. This ensures that your authentication token is valid. If it's expired, enter credentials for a Customer Tenant account with Write access. This authenticates the account, and downloads a new token.txt file.
Under Would you like to upload all payload directly to the cloud from the target devices?:
- To upload directly from target devices, select Yes.
- To upload from the Movere Console, and not from target devices, select No. Scan payloads return to the Console over port 443 internally.
Upload data manually
Use this method if for some reason you don't want to upload data automatically to Movere.
To use this method, when you run a scan, don't enable automatic uploads on the Uploading Scans page in the Console.
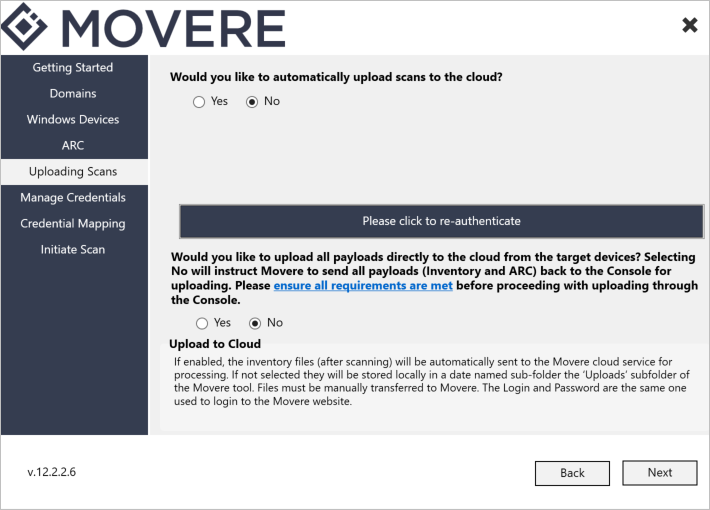
When automatic uploading isn't enable, the following occurs:
- Payloads are sent to the Console, and stored locally in the Mover Console > Uploads folder (usually C:\Movere\Console\Uploads)
- If there are scan files in the folder, you can select the Upload Scans option in the Uploading Scans page of the Console, to upload them manually.
- Credentials to manually transfer are the same as though used to sign in to the Movere portal.
- Note that resource consumption payloads are time sensitive, and must be uploaded within 24 hours after payload generation. If you upload after 24 hours, an upload success message is generated in the log files, but data in the payload isn't processed.
Next steps
Learn about uploading and storing data.