Create an access review of Azure resource and Microsoft Entra roles in PIM
The need for access to privileged Azure resource and Microsoft Entra roles by your users changes over time. To reduce the risk associated with stale role assignments, you should regularly review access. You can use Microsoft Entra Privileged Identity Management (PIM) to create access reviews for privileged access to Azure resource and Microsoft Entra roles. You can also configure recurring access reviews that occur automatically. This article describes how to create one or more access reviews.
Prerequisites
Using Privileged Identity Management requires licenses. For more information on licensing, see Microsoft Entra ID Governance licensing fundamentals .
For more information about licenses for PIM, see License requirements to use Privileged Identity Management.
To create access reviews for Azure resources, you must be assigned to the Owner or the User Access Administrator role for the Azure resources. To create access reviews for Microsoft Entra roles, you must be assigned to the Global Administrator or the Privileged Role Administrator role.
Using Access Reviews for Service Principals requires a Microsoft Entra Workload ID Premium plan in addition to a Microsoft Entra ID P2 or Microsoft Entra ID Governance license.
- Workload Identities Premium licensing: You can view and acquire licenses on the Workload Identities blade in the Microsoft Entra admin center.
Note
Access reviews capture a snapshot of access at the beginning of each review instance. Any changes made during the review process will be reflected in the subsequent review cycle. Essentially, with the commencement of each new recurrence, pertinent data regarding the users, resources under review, and their respective reviewers is retrieved.
Create access reviews
Tip
Steps in this article might vary slightly based on the portal you start from.
Sign in to the Microsoft Entra admin center as a user that is assigned to one of the prerequisite role(s).
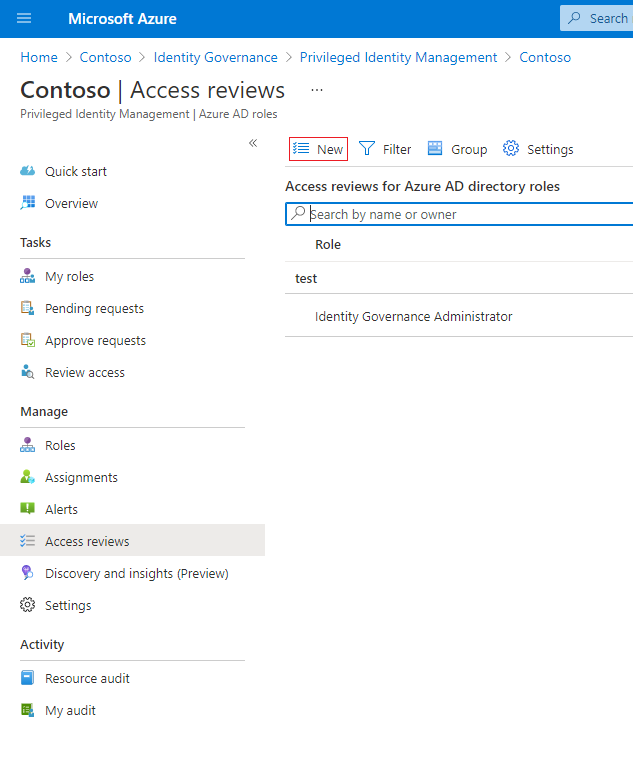
Browse to Identity governance > Privileged Identity Management.
For Microsoft Entra roles, select Microsoft Entra roles. For Azure resources, select Azure resources

For Microsoft Entra roles, select Microsoft Entra roles again under Manage. For Azure resources, select the subscription you want to manage.
Under Manage, select Access reviews, and then select New to create a new access review.
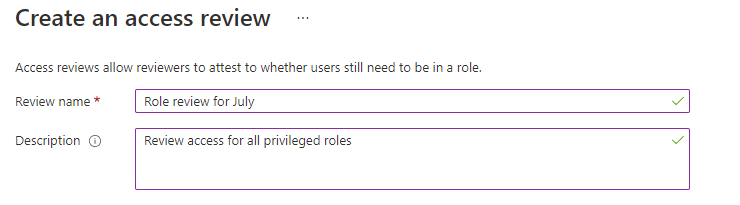
Name the access review. Optionally, give the review a description. The name and description are shown to the reviewers.
Set the Start date. By default, an access review occurs once, starts the same time it's created, and it ends in one month. You can change the start and end dates to have an access review start in the future and last however many days you want.
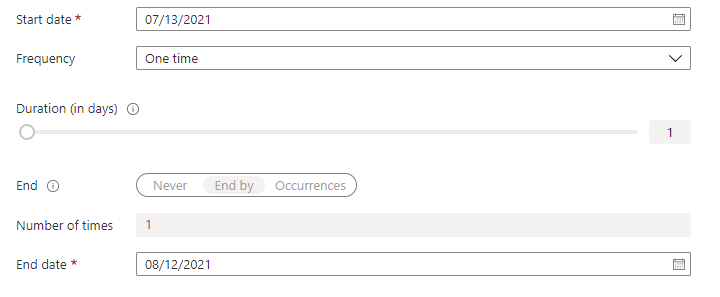
To make the access review recurring, change the Frequency setting from One time to Weekly, Monthly, Quarterly, Annually, or Semi-annually. Use the Duration slider or text box to define how many days each review of the recurring series will be open for input from reviewers. For example, the maximum duration that you can set for a monthly review is 27 days, to avoid overlapping reviews.
Use the End setting to specify how to end the recurring access review series. The series can end in three ways: it runs continuously to start reviews indefinitely, until a specific date, or after a defined number of occurrences has been completed. You, or another administrator who can manage reviews, can stop the series after creation by changing the date in Settings, so that it ends on that date.
In the Users Scope section, select the scope of the review. For Microsoft Entra roles, the first scope option is Users and Groups. Directly assigned users and role-assignable groups will be included in this selection. For Azure resource roles, the first scope will be Users. Groups assigned to Azure resource roles are expanded to display transitive user assignments in the review with this selection. You may also select Service Principals to review the machine accounts with direct access to either the Azure resource or Microsoft Entra role.

Or, you can create access reviews only for inactive users. In the Users scope section, set the Inactive users (on tenant level) only to true. If the toggle is set to true, the scope of the review will focus on inactive users only. Then, specify Days inactive with a number of days inactive up to 730 days (two years). Users inactive for the specified number of days will be the only users in the review.
Under Review role membership, select the privileged Azure resource or Microsoft Entra roles to review.
Note
Selecting more than one role will create multiple access reviews. For example, selecting five roles will create five separate access reviews.

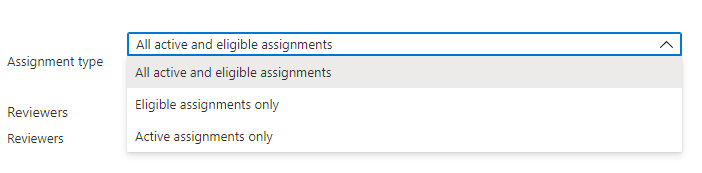
In assignment type, scope the review by how the principal was assigned to the role. Choose eligible assignments only to review eligible assignments (regardless of activation status when the review is created) or active assignments only to review active assignments. Choose all active and eligible assignments to review all assignments regardless of type.
In the Reviewers section, select one or more people to review all the users. Or you can select to have the members review their own access.

- Selected users - Use this option to designate a specific user to complete the review. This option is available regardless of the scope of the review, and the selected reviewers can review users, groups and service principals.
- Members (self) - Use this option to have the users review their own role assignments. This option is only available if the review is scoped to Users and Groups or Users. For Microsoft Entra roles, role-assignable groups will not be a part of the review when this option is selected.
- Manager – Use this option to have the user’s manager review their role assignment. This option is only available if the review is scoped to Users and Groups or Users. Upon selecting Manager, you will also have the option to specify a fallback reviewer. Fallback reviewers are asked to review a user when the user has no manager specified in the directory. For Microsoft Entra roles, role-assignable groups will be reviewed by the fallback reviewer if one is selected.

Upon completion settings
To specify what happens after a review completes, expand the Upon completion settings section.
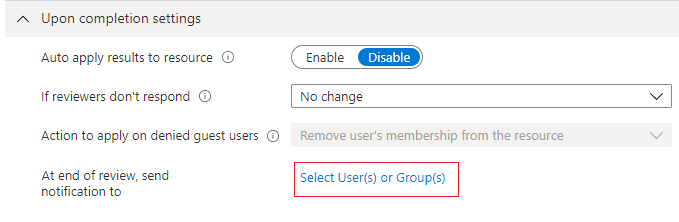
If you want to automatically remove access for users that were denied, set Auto apply results to resource to Enable. If you want to manually apply the results when the review completes, set the switch to Disable.
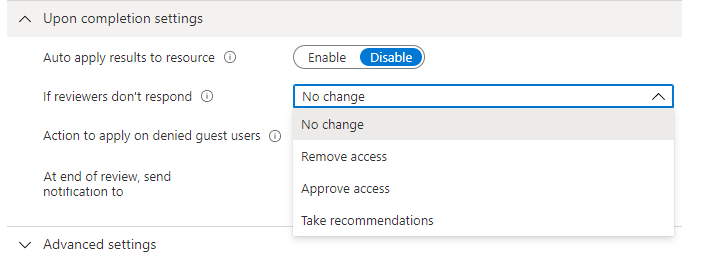
Use the If reviewer don't respond list to specify what happens for users that are not reviewed by the reviewer within the review period. This setting does not impact users who were reviewed by the reviewers.
- No change - Leave user's access unchanged
- Remove access - Remove user's access
- Approve access - Approve user's access
- Take recommendations - Take the system's recommendation on denying or approving the user's continued access
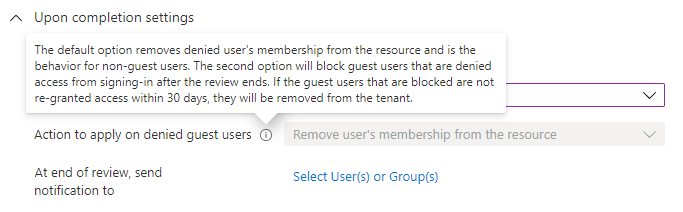
Use the Action to apply on denied guest users list to specify what happens for guest users that are denied. This setting is not editable for Microsoft Entra ID and Azure resource role reviews at this time; guest users, like all users, will always lose access to the resource if denied.
You can send notifications to additional users or groups to receive review completion updates. This feature allows for stakeholders other than the review creator to be updated on the progress of the review. To use this feature, select Select User(s) or Group(s) and add an additional user or group upon you want to receive the status of completion.
Advanced settings
To specify additional settings, expand the Advanced settings section.
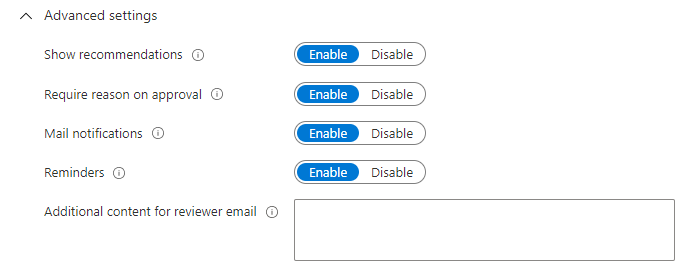
Set Show recommendations to Enable to show the reviewers the system recommendations based the user's access information. Recommendations are based on a 30-day interval period. Users who have logged in the past 30 days are shown with recommended approval of access, while users who have not logged in are shown with recommended denial of access. These sign-ins are irrespective of whether they were interactive. The last sign-in of the user is also displayed along with the recommendation.
Set Require reason on approval to Enable to require the reviewer to supply a reason for approval.
Set Mail notifications to Enable to have Microsoft Entra ID send email notifications to reviewers when an access review starts, and to administrators when a review completes.
Set Reminders to Enable to have Microsoft Entra ID send reminders of access reviews in progress to reviewers who have not completed their review.
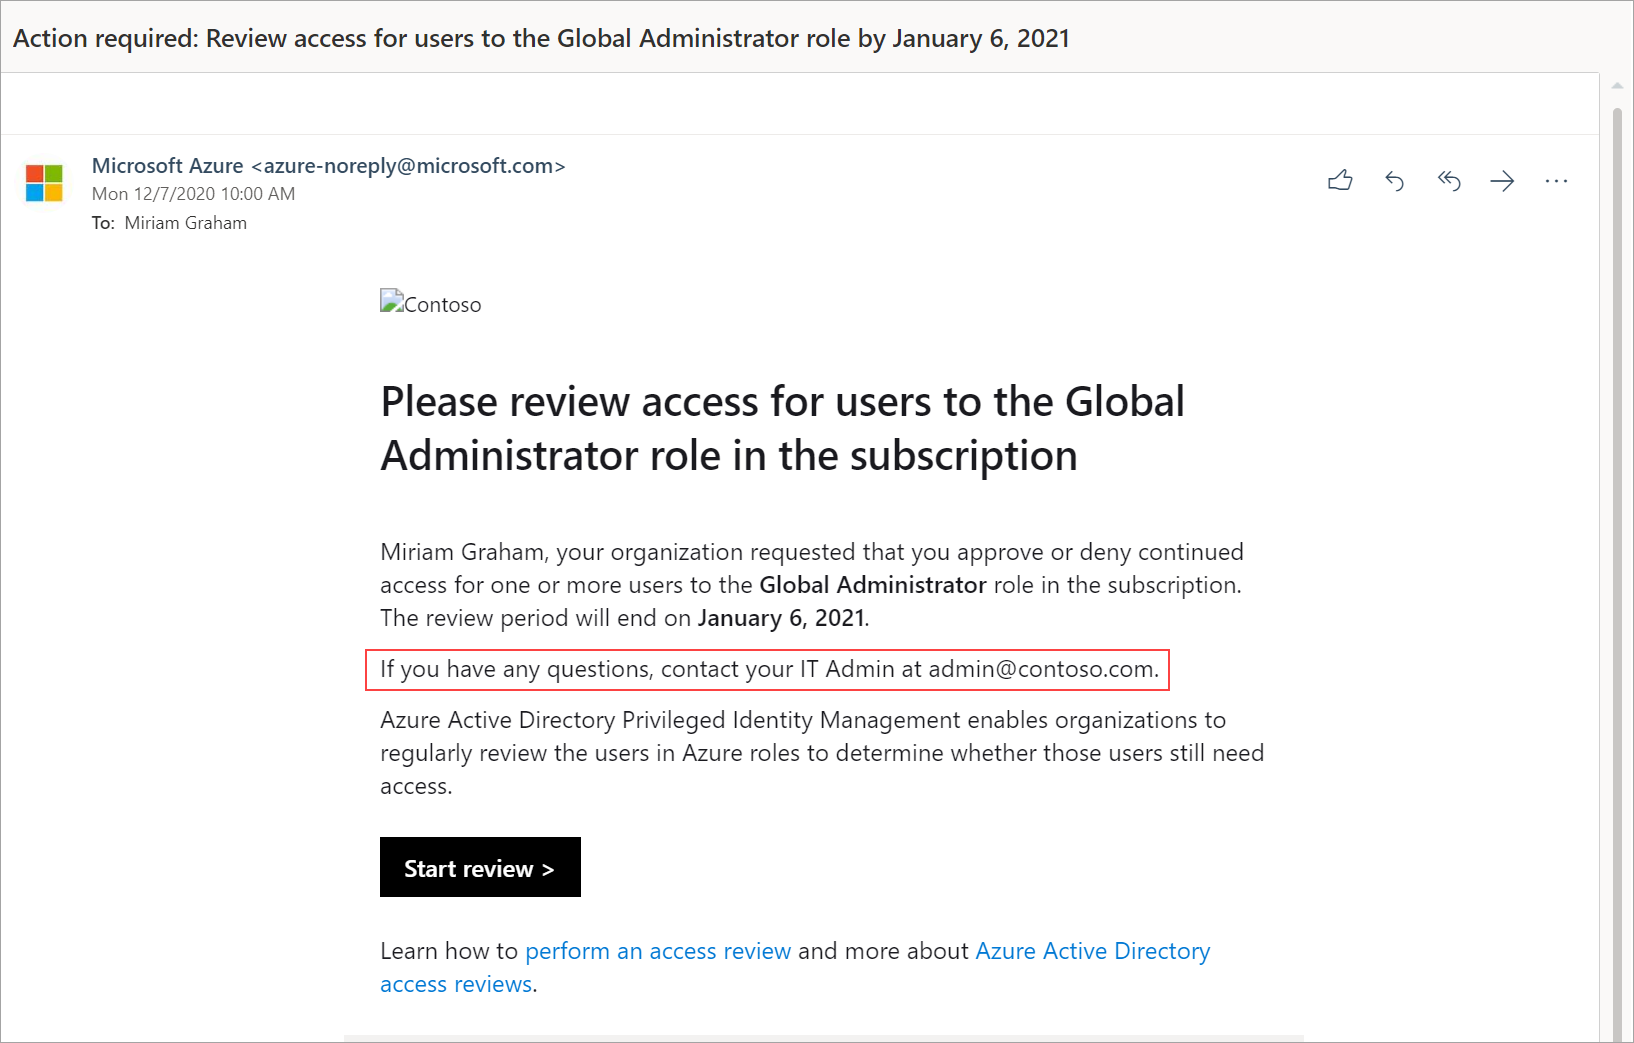
The content of the email sent to reviewers is auto-generated based on the review details, such as review name, resource name, due date, etc. If you need a way to communicate additional information such as additional instructions or contact information, you can specify these details in the Additional content for reviewer email which will be included in the invitation and reminder emails sent to assigned reviewers. The highlighted section below is where this information will be displayed.
Manage the access review
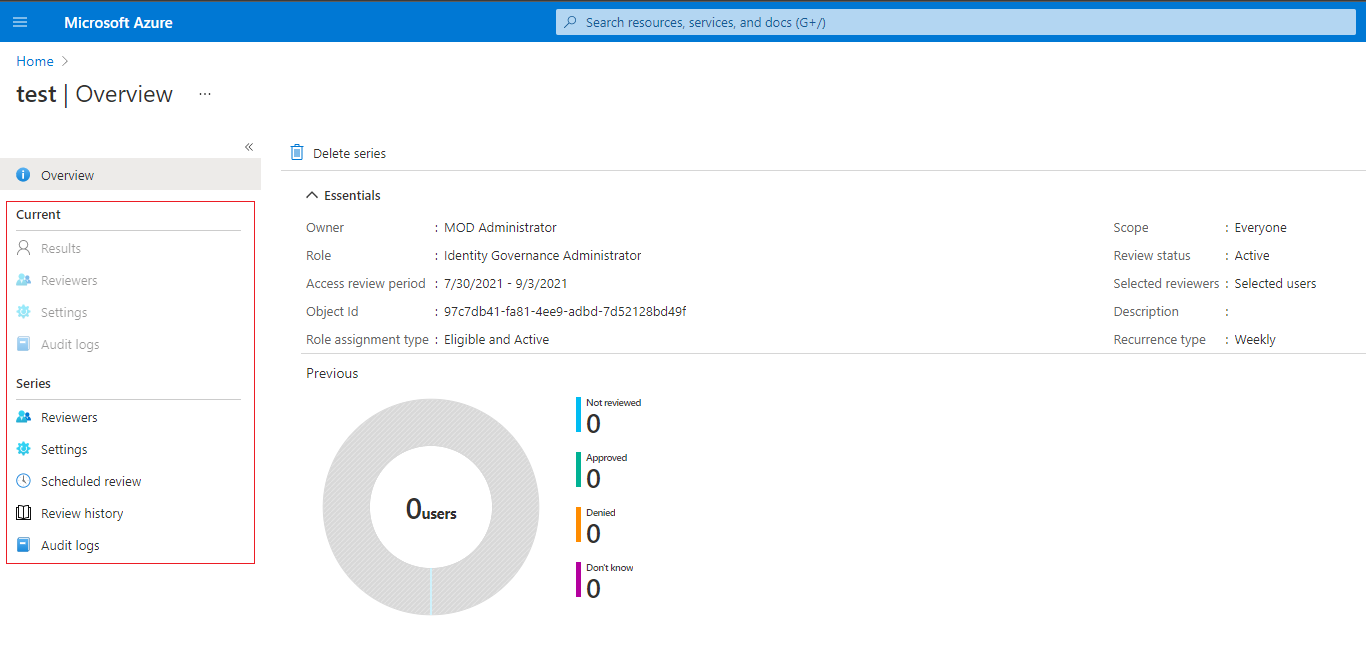
You can track the progress as the reviewers complete their reviews on the Overview page of the access review. No access rights are changed in the directory until the review is completed. Below is a screenshot showing the overview page for Azure resources and Microsoft Entra roles access reviews.

If this is a one-time review, then after the access review period is over or the administrator stops the access review, follow the steps in Complete an access review of Azure resource and Microsoft Entra roles to see and apply the results.
To manage a series of access reviews, navigate to the access review, and you will find upcoming occurrences in Scheduled reviews, and edit the end date or add/remove reviewers accordingly.
Based on your selections in Upon completion settings, auto-apply will be executed after the review's end date or when you manually stop the review. The status of the review will change from Completed through intermediate states such as Applying and finally to state Applied. You should expect to see denied users, if any, being removed from roles in a few minutes.
Impact of groups assigned to Microsoft Entra roles and Azure resource roles in access reviews
• For Microsoft Entra roles, role-assignable groups can be assigned to the role using role-assignable groups. When a review is created on a Microsoft Entra role with role-assignable groups assigned, the group name shows up in the review without expanding the group membership. The reviewer can approve or deny access of the entire group to the role. Denied groups will lose their assignment to the role when review results are applied.
• For Azure resource roles, any security group can be assigned to the role. When a review is created on an Azure resource role with a security group assigned, the users assigned to that security group will be fully expanded and shown to the reviewer of the role. When a reviewer denies a user that was assigned to the role via the security group, the user will not be removed from the group. This is because a group might have been shared with other Azure or non-Azure resources. Therefore the changes resulting from the denied access must be done by the administrator.
Note
It is possible for a security group to have other groups assigned to it. In this case, only the users assigned directly to the security group assigned to the role will appear in the review of the role.
Update the access review
After one or more access reviews have been started, you may want to modify or update the settings of your existing access reviews. Here are some common scenarios that you might want to consider:
Adding and removing reviewers - When updating access reviews, you may choose to add a fallback reviewer in addition to the primary reviewer. Primary reviewers may be removed when updating an access review. However, fallback reviewers are not removable by design.
Note
Fallback reviewers can only be added when reviewer type is manager. Primary reviewers can be added when reviewer type is selected user.
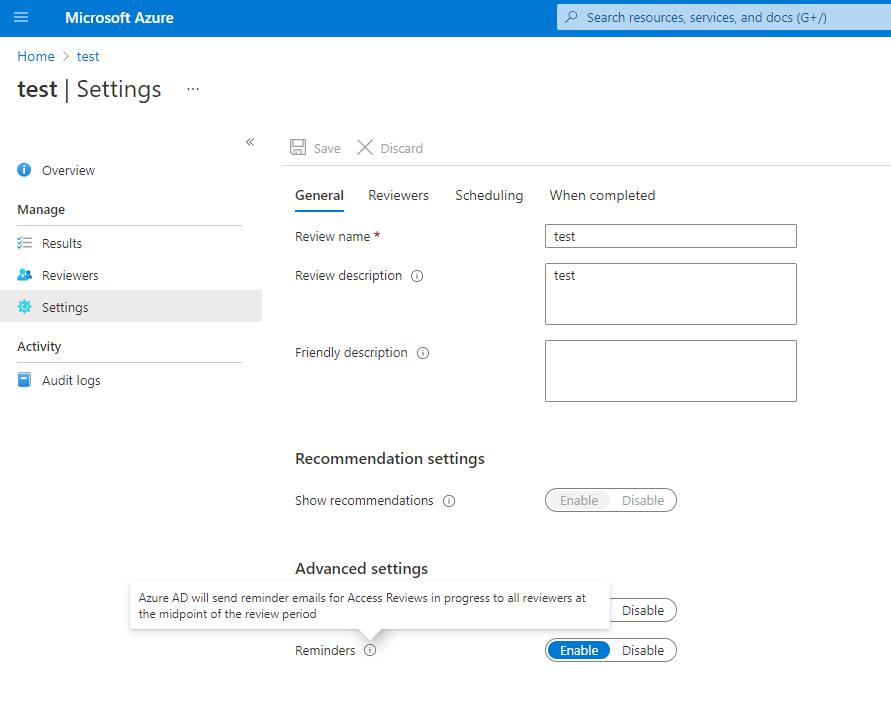
Reminding the reviewers - When updating access reviews, you may choose to enable the reminder option under Advanced Settings. Once enabled, users will receive an email notification at the midpoint of the review period, regardless of whether they have completed the review or not.
Updating the settings - If an access review is recurring, there are separate settings under "Current" versus under "Series". Updating the settings under "Current" will only apply changes to the current access review while updating the settings under "Series" will update the setting for all future recurrences.

Next steps
Povratne informacije
Uskoro: tokom 2024. postepeno ćemo ukidati probleme s uslugom GitHub kao mehanizam povratnih informacija za sadržaj i zamijeniti ga novim sistemom povratnih informacija. Za više informacija, pogledajte https://aka.ms/ContentUserFeedback.
Pošalјite i prikažite povratne informacije za