Migrirajte na Innovate Summit:
Saznajte kako migracija i modernizacija na Azure može povećati performanse, otpornost i sigurnost poslovanja, omogućavajući vam da u potpunosti prihvatite umjetnu inteligenciju.Registrirajte se
Ovaj preglednik više nije podržan.
Nadogradite na Microsoft Edge da iskoristite najnovije osobine, sigurnosna ažuriranja i tehničku podršku.
This quickstart steps through creating a SQL Server virtual machine (VM) in the Azure portal. Follow the article to deploy either a conventional SQL Server on Azure VM, or SQL Server deployed to an Azure confidential VM.
Select Azure SQL in the left-hand menu of the Azure portal. If Azure SQL is not in the list, select All services, then type Azure SQL in the search box.
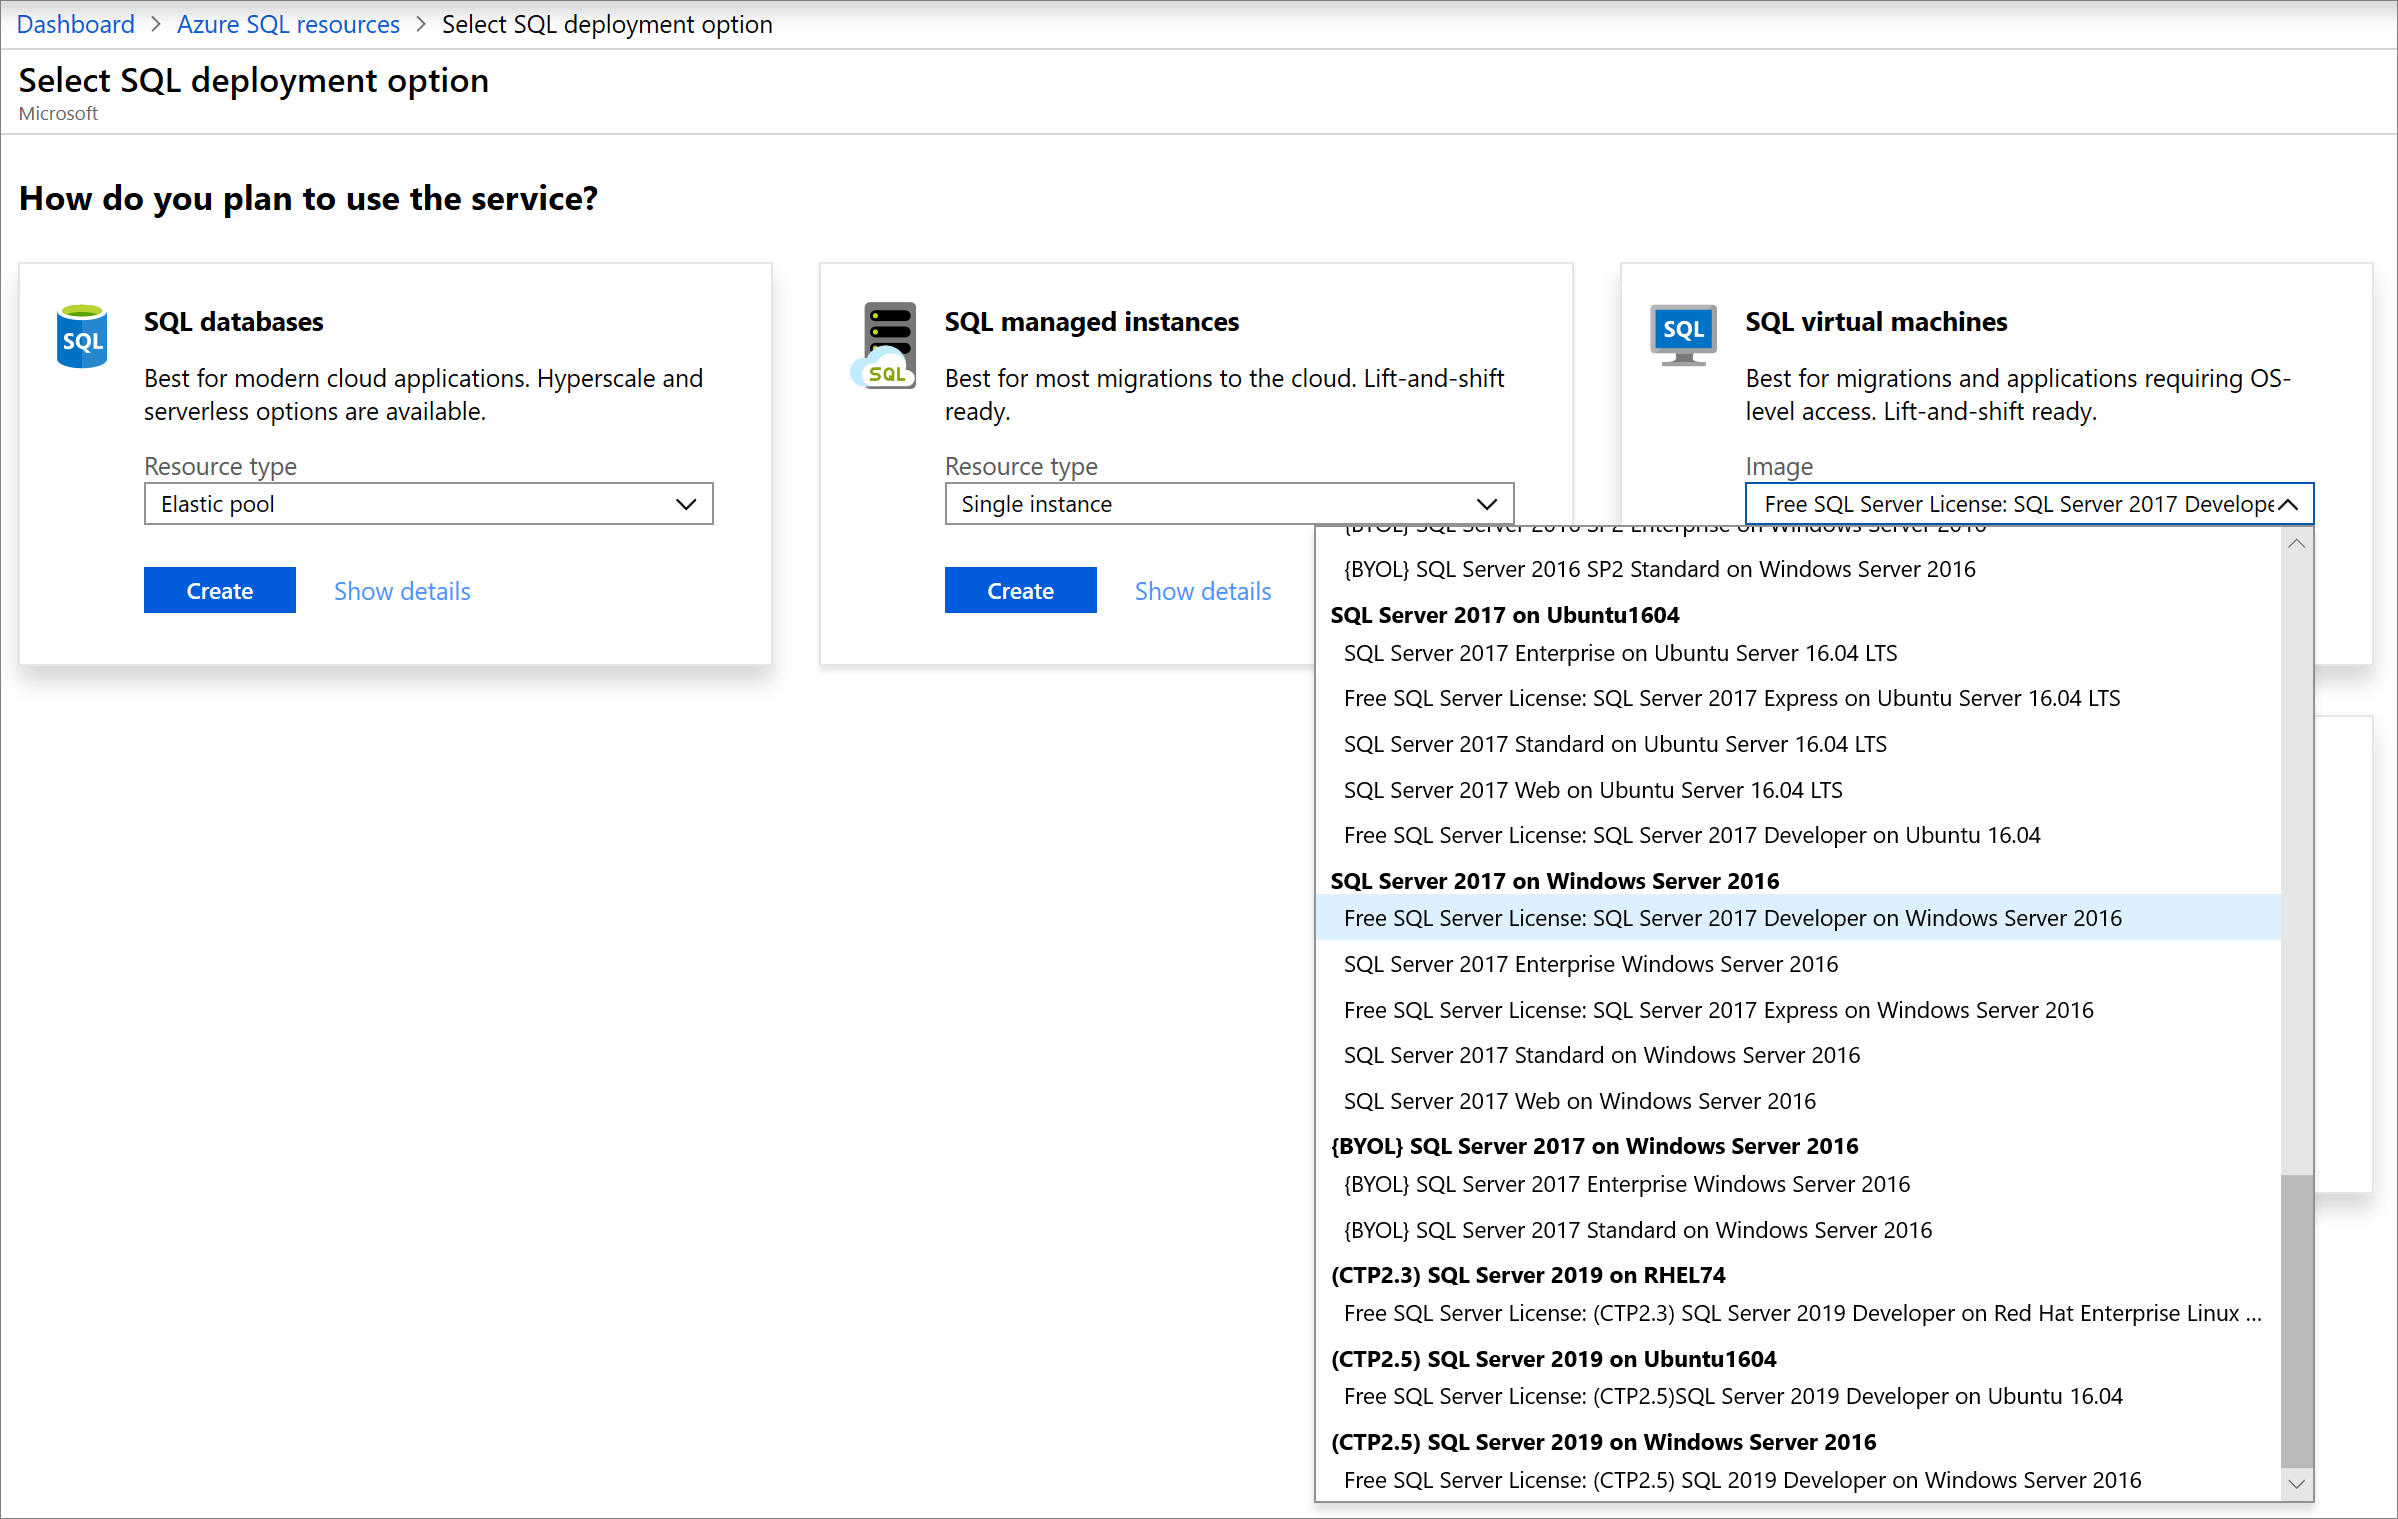
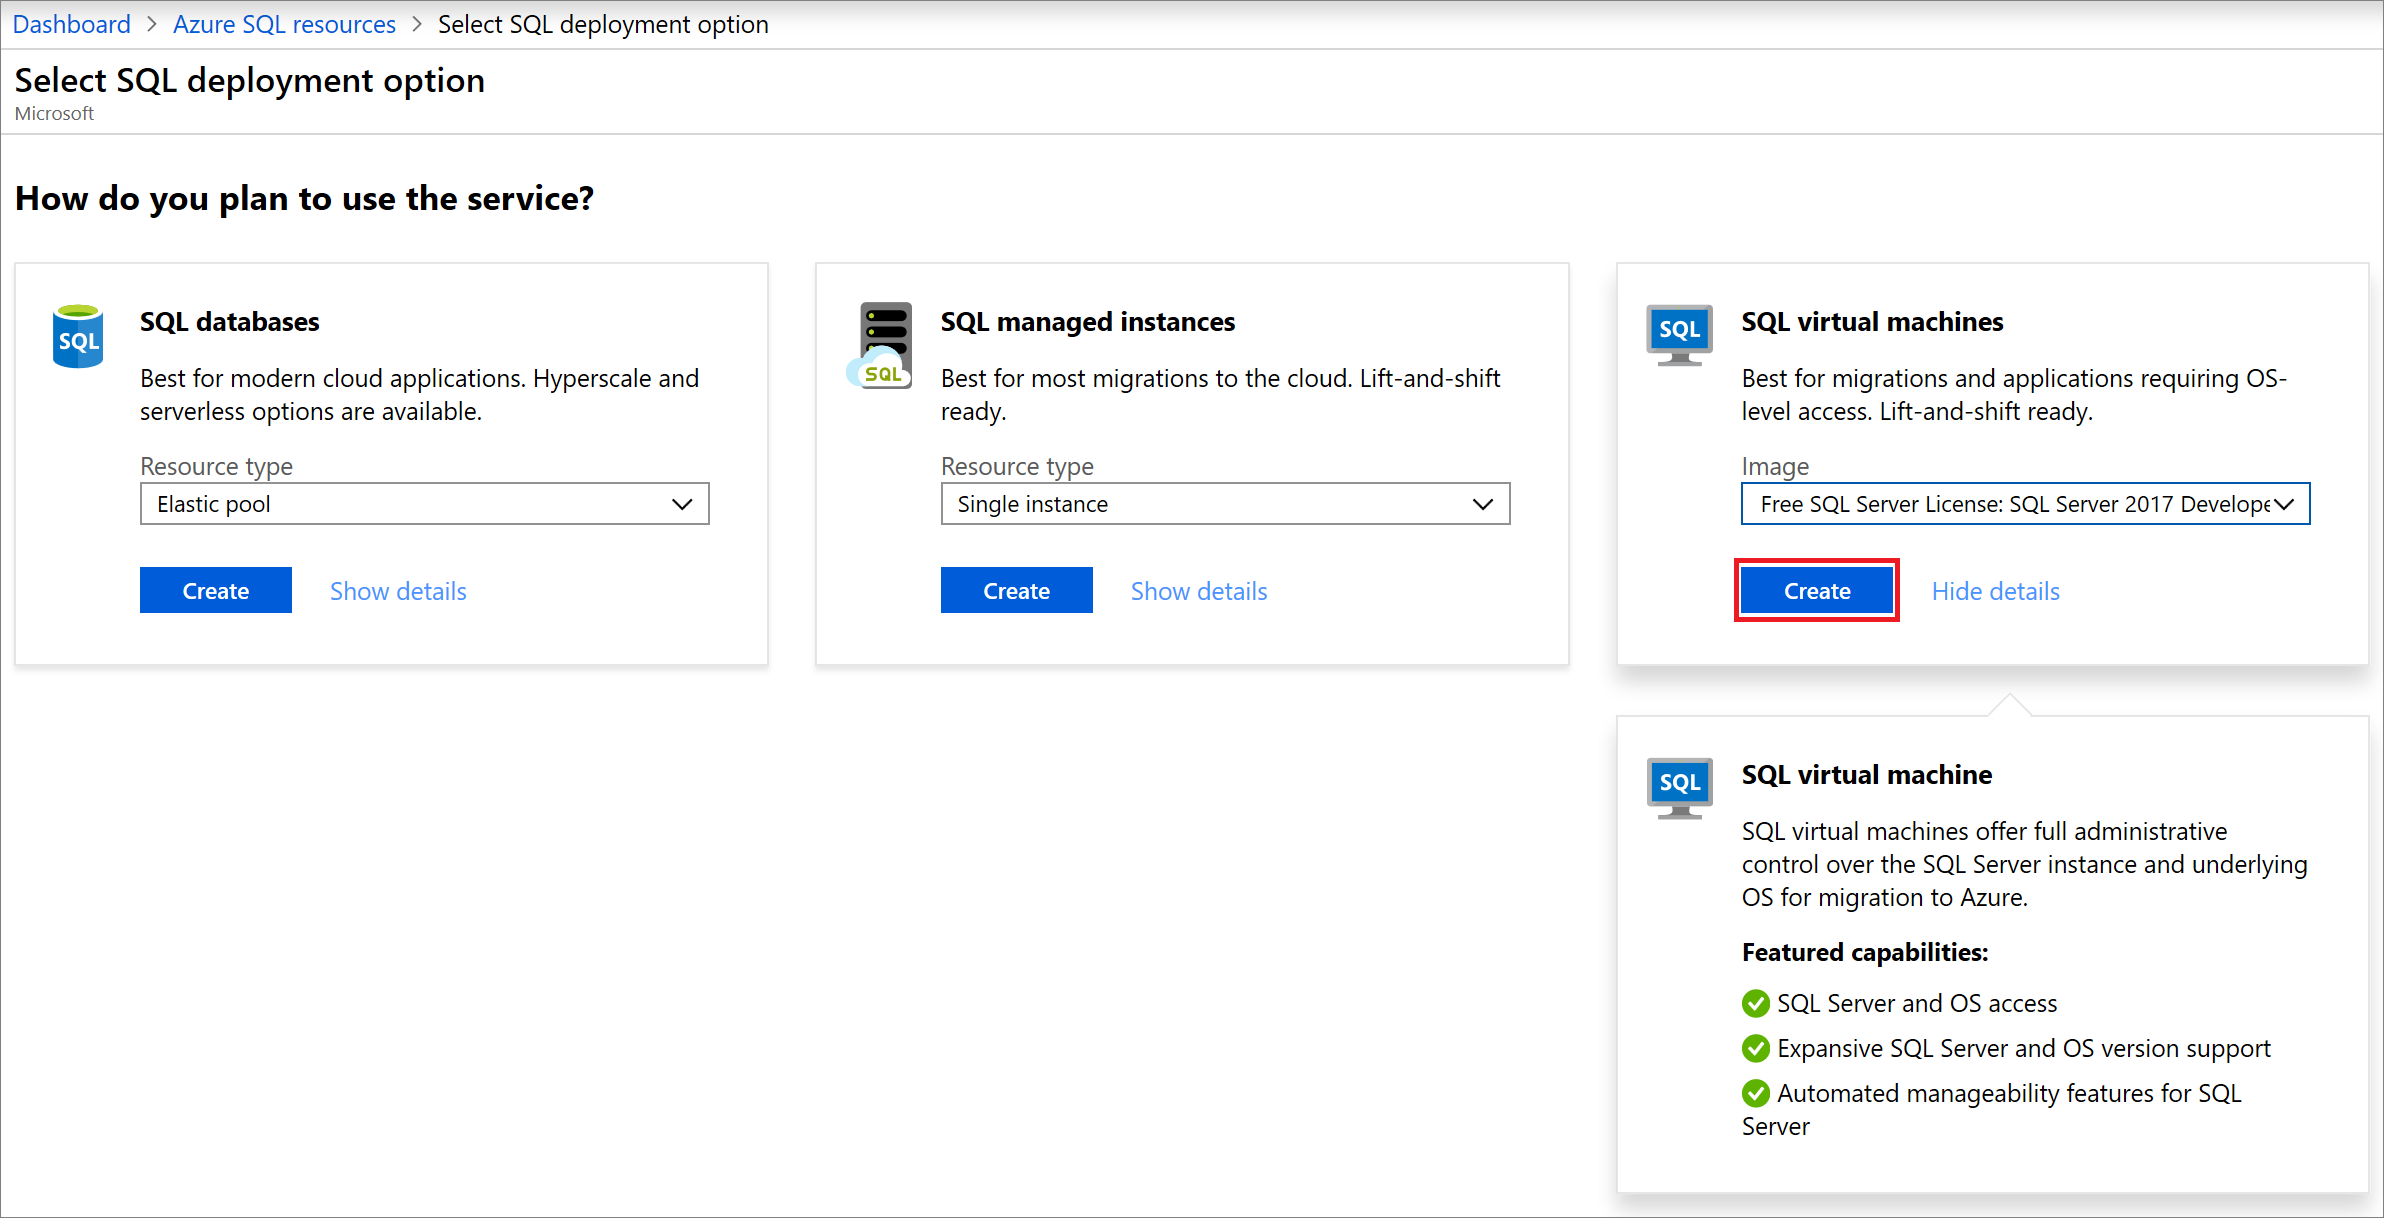
Select +Add to open the Select SQL deployment option page. You can view additional information by selecting Show details on the SQL virtual machines tile.
For conventional SQL Server VMs, select one of the versions labeled Free SQL Server License... from the drop-down. For confidential VMs, choose the SQL Server 2019 Enterprise on Windows Server 2022 Database Engine Only image from the drop-down.
Select Create.
Bilješka
SQL Server 2008 and SQL Server 2008 R2 are out of extended support and no longer available from the Azure Marketplace.
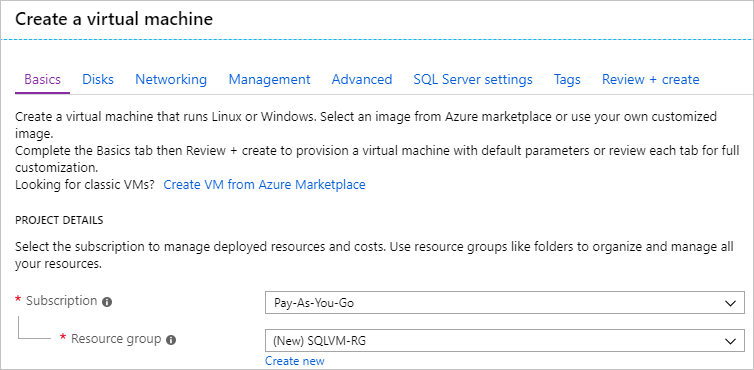
To deploy a conventional SQL Server on Azure VM, on the Basics tab, provide the following information:
In the Project Details section, select your Azure subscription and then select Create new to create a new resource group. Type SQLVM-RG for the name.
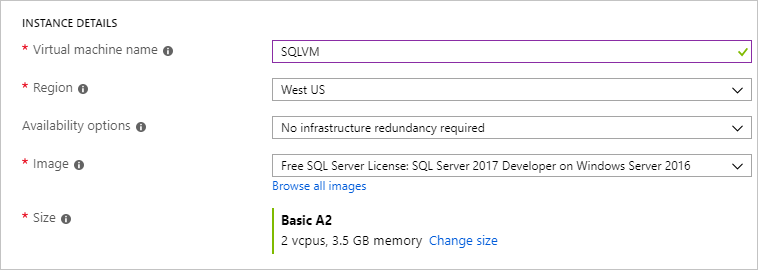
Under Instance details:
Type SQLVM for the Virtual machine name.
Choose a location for your Region.
For the purpose of this quickstart, leave Availability options set to No infrastructure redundancy required. To find out more information about availability options, see Availability.
In the Image list, select the image with the version of SQL Server and operating system you want. For example, you can use an image with a label that begins with Free SQL Server License:.
Choose to Change size for the Size of the virtual machine and select the A2 Basic offering. Be sure to clean up your resources once you're done with them to prevent any unexpected charges.
Under Administrator account, provide a username, such as azureuser and a password. The password must be at least 12 characters long and meet the defined complexity requirements.
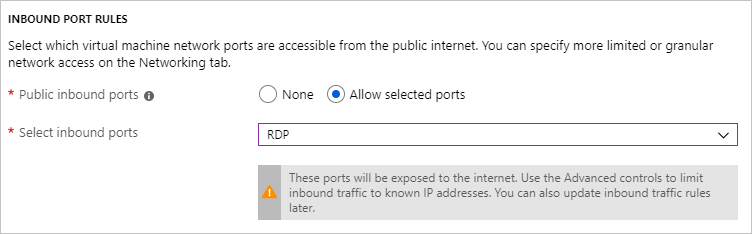
Under Inbound port rules, choose Allow selected ports and then select RDP (3389) from the drop-down.
To deploy your SQL Server to an Azure confidential VM, on the Basics tab, provide the following information:
In the Project Details section, select your Azure subscription and then select Create new to create a new resource group. Type SQLVM-RG for the name.
Under Instance details:
Type SQLVM for the Virtual machine name.
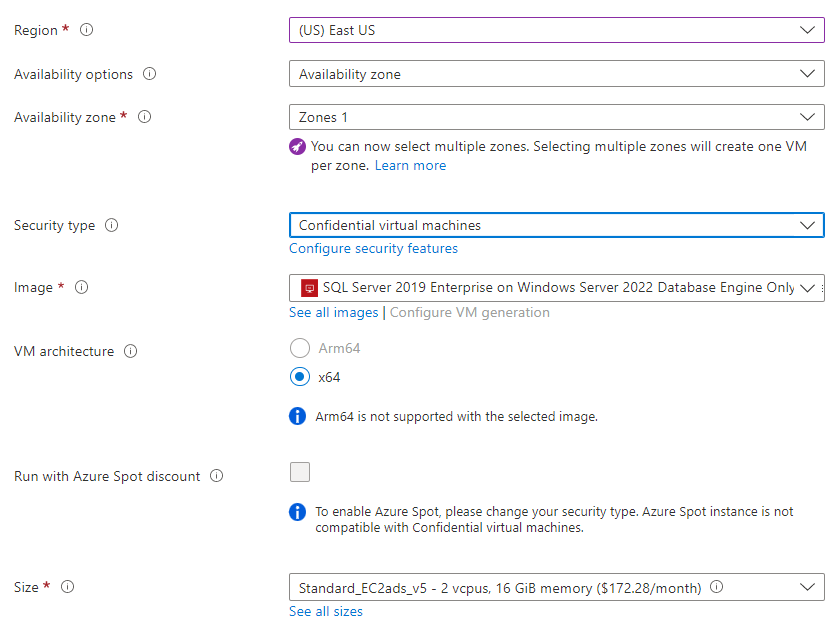
Choose a location for your Region. To validate region supportability, look for the ECadsv5-series or DCadsv5-series in VM products Available by Azure region.
For Security type, choose Confidential virtual machines from the drop-down. If this option is grayed out, it's likely the chosen region does not currently support confidential VMs. Choose a different region from the drop-down.
For the purpose of this quickstart, leave Availability options set to No infrastructure redundancy required. To find out more information about availability options, see Availability.
In the Image list, choose the SQL Server 2019 Enterprise on Windows Server 2022 Database Engine Only image. To change the SQL Server image, select See all images and then filter by Security type = Confidential VMs to identify all SQL Server images that support confidential VMs.
Leave the size at the default of Standard_EC2ads_v5. However, to see all available sizes, select See all sizes to identify all the VM sizes that support confidential VMs, as well as the sizes that do not.
Under Administrator account, provide a username, such as azureuser and a password. The password must be at least 12 characters long and meet the defined complexity requirements.
Under Inbound port rules, choose Allow selected ports and then select RDP (3389) from the drop-down.
Disks
Configure confidential OS disk encryption. This is optional for test VMs but recommended for production environments. For greater details, review the Quickstart: Deploy a confidential VM.
On the tab Disks, configure the following settings:
Under Disk options, enable Confidential compute encryption if you want to encrypt your VM's OS disk during creation.
For Confidential compute encryption type, select the type of encryption to use.
If Confidential disk encryption with a customer-managed key is selected, create a Confidential disk encryption set before creating your confidential VM.
(Optional) If necessary, create a Confidential disk encryption set as follows.
Select Review + create to create new disk encryption set. Wait for the resource creation to complete successfully.
Go to the disk encryption set resource in the Azure portal.
Select the pink banner to grant permissions to Azure Key Vault.
Važno
You must perform this step to successfully create the confidential VM.
SQL Server settings
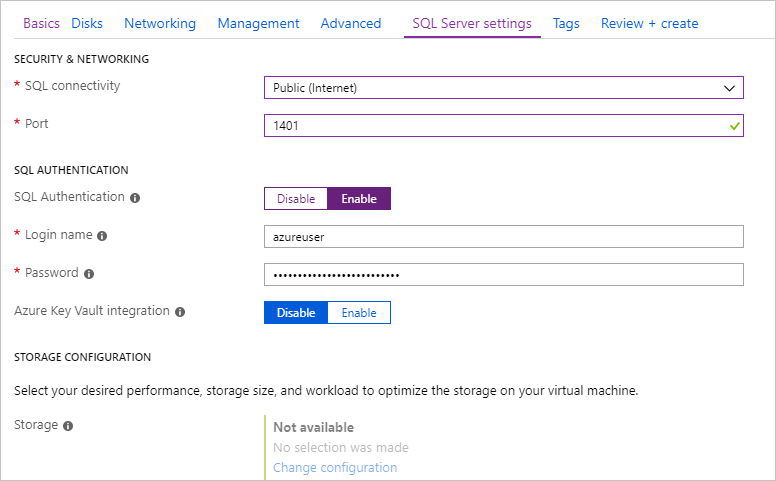
On the SQL Server settings tab, configure the following options:
Under Security & Networking, select Public (Internet) for SQL Connectivity and change the port to 1401 to avoid using a well-known port number in the public scenario.
Under SQL Authentication, select Enable. The SQL login credentials are set to the same user name and password that you configured for the VM. Use the default setting for Azure Key Vault integration. Storage configuration is not available for the basic SQL Server VM image, but you can find more information about available options for other images at storage configuration.
Change any other settings if needed, and then select Review + create.
Create the SQL Server VM
On the Review + create tab, review the summary, and select Create to create SQL Server, resource group, and resources specified for this VM.
You can monitor the deployment from the Azure portal. The Notifications button at the top of the screen shows basic status of the deployment. Deployment can take several minutes.
Connect to SQL Server
In the portal, find the Public IP address of your SQL Server VM in the Overview section of your virtual machine's properties.
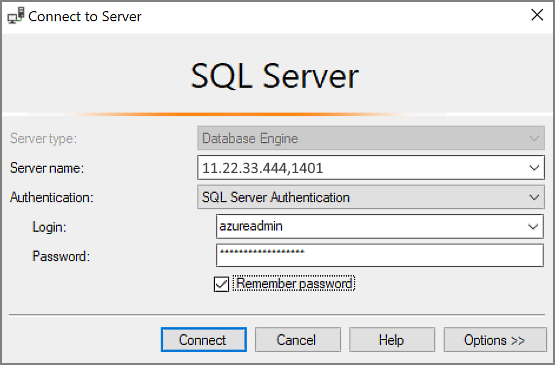
In the Connect to Server or Connect to Database Engine dialog box, edit the Server name value. Enter your VM's public IP address. Then add a comma and add the custom port (1401) that you specified when you configured the new VM. For example, 11.22.33.444,1401.
In the Authentication box, select SQL Server Authentication.
In the Login box, type the name of a valid SQL login.
In the Password box, type the password of the login.
Select Connect.
Log in to the VM remotely
Use the following steps to connect to the SQL Server virtual machine with Remote Desktop:
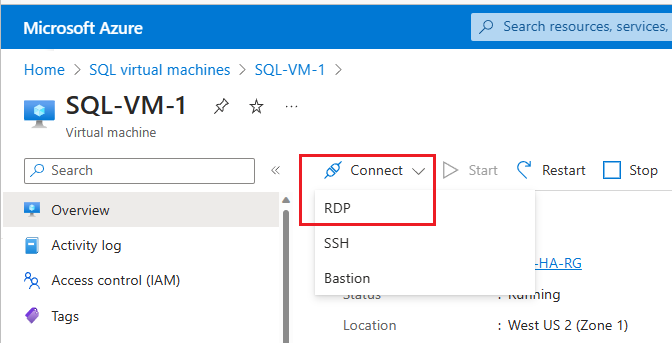
After the Azure virtual machine is created and running, select Virtual machine, and then choose your new VM.
Select Connect and then choose Connect via Bastion from the drop-down to go to the Bastion page for your VM.
Select Deploy Bastion and wait for the process to finish.
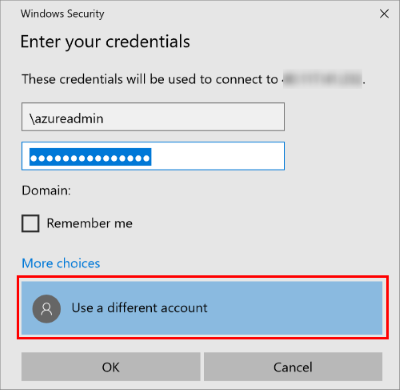
After Bastion is deployed successfully, choose the authentication type, enter authentication details, and then select Connect:
You may need to disable the pop-up blocker in your browser to open the Bastion session in a new browser tab.
After you connect to the SQL Server virtual machine, you can launch SQL Server Management Studio and connect with Windows Authentication using your local administrator credentials. If you enabled SQL Server Authentication, you can also connect with SQL Authentication using the SQL login and password you configured during provisioning.
Access to the machine enables you to directly change machine and SQL Server settings based on your requirements. For example, you could configure the firewall settings or change SQL Server configuration settings.
Clean up resources
If you do not need your SQL VM to run continually, you can avoid unnecessary charges by stopping it when not in use. You can also permanently delete all resources associated with the virtual machine by deleting its associated resource group in the portal. This permanently deletes the virtual machine as well, so use this command with care. For more information, see Manage Azure resources through portal.
Next steps
In this quickstart, you created a SQL Server virtual machine in the Azure portal. To learn more about how to migrate your data to the new SQL Server, see the following article.
Administer an SQL Server database infrastructure for cloud, on-premises and hybrid relational databases using the Microsoft PaaS relational database offerings.
Learn how to connect to your SQL Server virtual machine on Azure. This topic uses the classic deployment model. The scenarios differ depending on the networking configuration and the location of the client.