Manage Azure File share backups
This article describes common tasks for managing and monitoring the Azure File shares that are backed up by Azure Backup. You'll learn how to do management tasks in Backup center.
Azure Backup provides simple, reliable, and secure solution to configure protection for your enterprise file shares by using snapshot backup and vaulted backup (preview) so that you can recover your data in case of any accidental or malicious deletion.
Note
Vaulted backup for Azure File share is currently in preview.
Monitor Azure File share backup jobs
When you trigger a backup or restore operation, the backup service creates a job for tracking. You can monitor the progress of all jobs on the Backup Jobs blade.
To open the Backup Jobs blade:
Go to Backup center and select Backup Jobs under the Monitoring section.
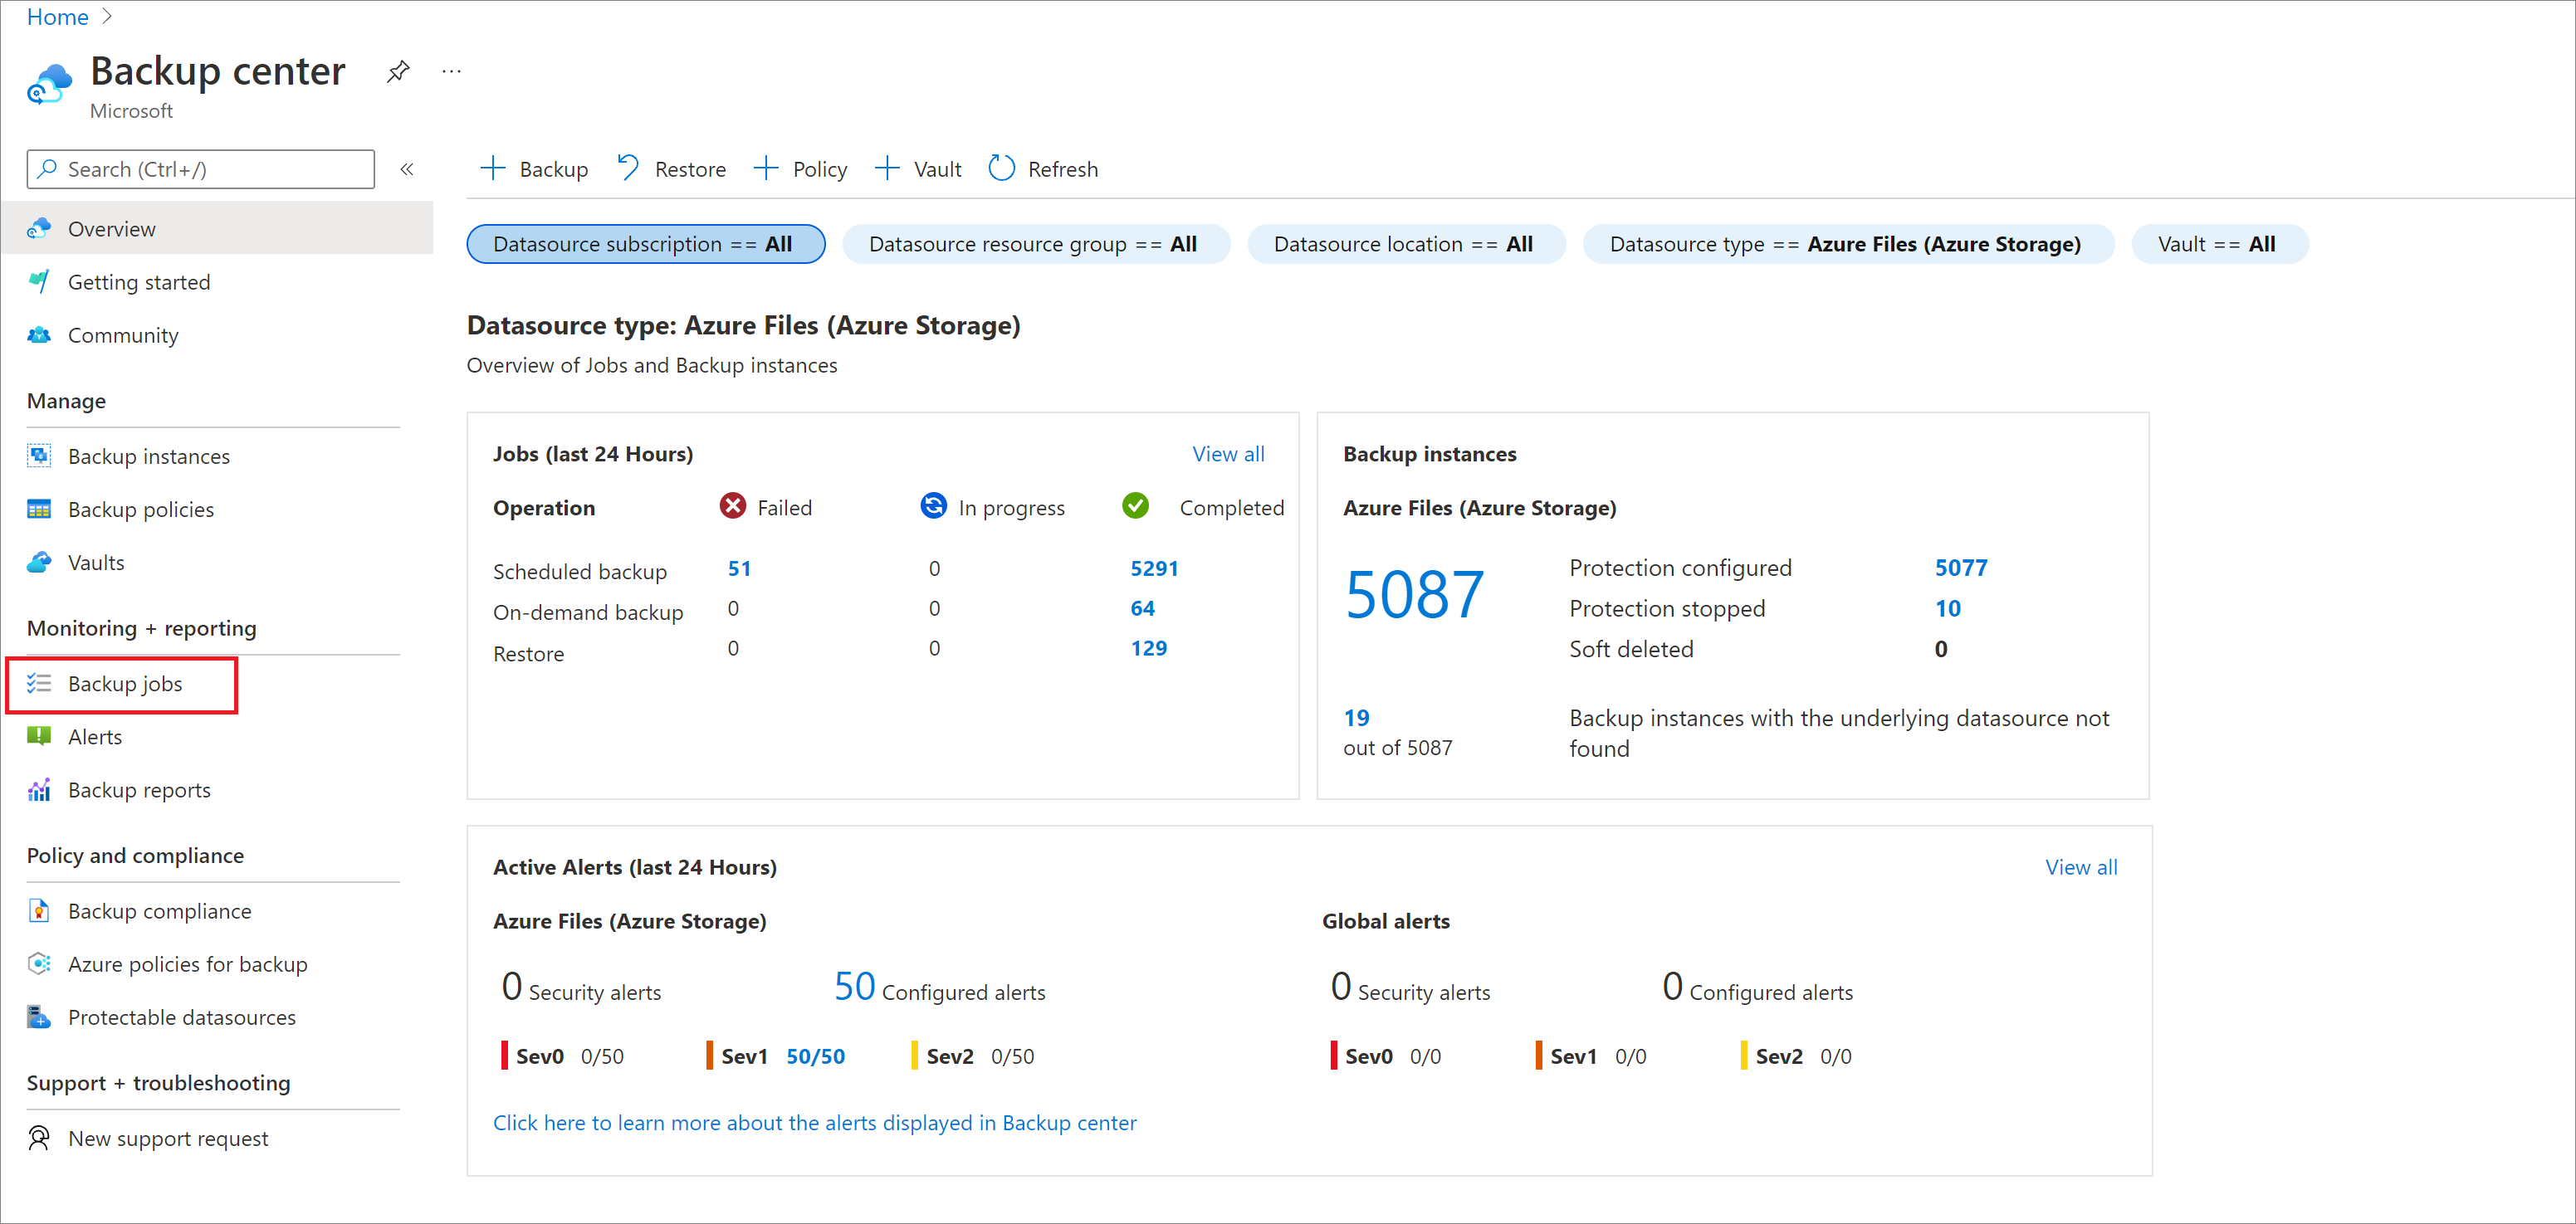
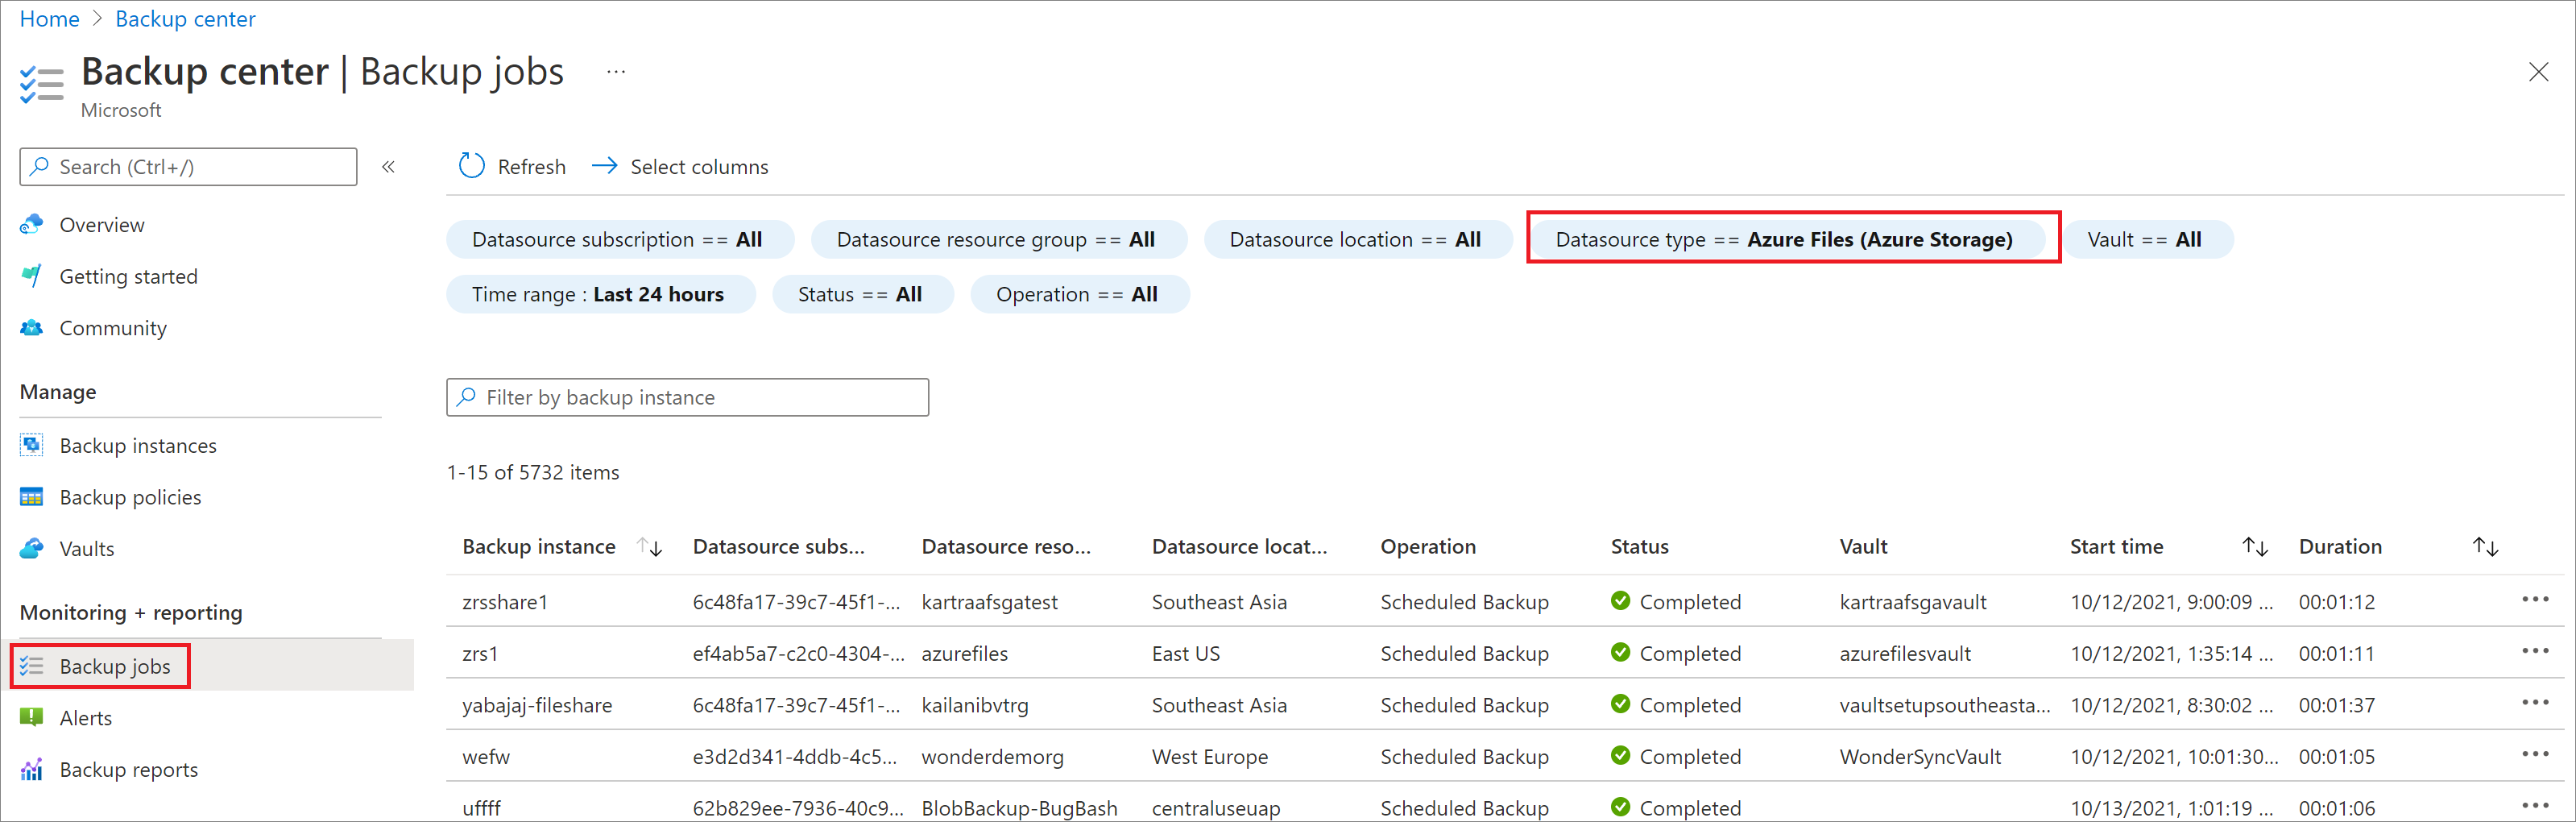
The Backup Jobs blade lists the status of all jobs.
On the Backup Jobs blade, select Azure Files (Azure Storage) as the datasource type and select any row to see details of the particular job.
Note
In case of snapshot tier, the data transferred to the vault is reported as 0.


Monitor Azure File share backup operations by using Azure Backup reports
Azure Backup provides a reporting solution that uses Azure Monitor logs and Azure workbooks. These resources help you get rich insights into your backups. You can leverage these reports to gain visibility into Azure Files backup items, jobs at item level and details of active policies. Using the Email Report feature available in Backup Reports, you can create automated tasks to receive periodic reports via email. Learn how to configure and view Azure Backup reports.
Create a new policy
You can create a new policy to back up Azure File shares from the Backup policies section of Backup center. All policies created when you configured backup for file shares show up with the Policy Type as Azure File Share.
To create a new backup policy, follow these steps:
On the Backup policies blade of the Backup center, select +Add.
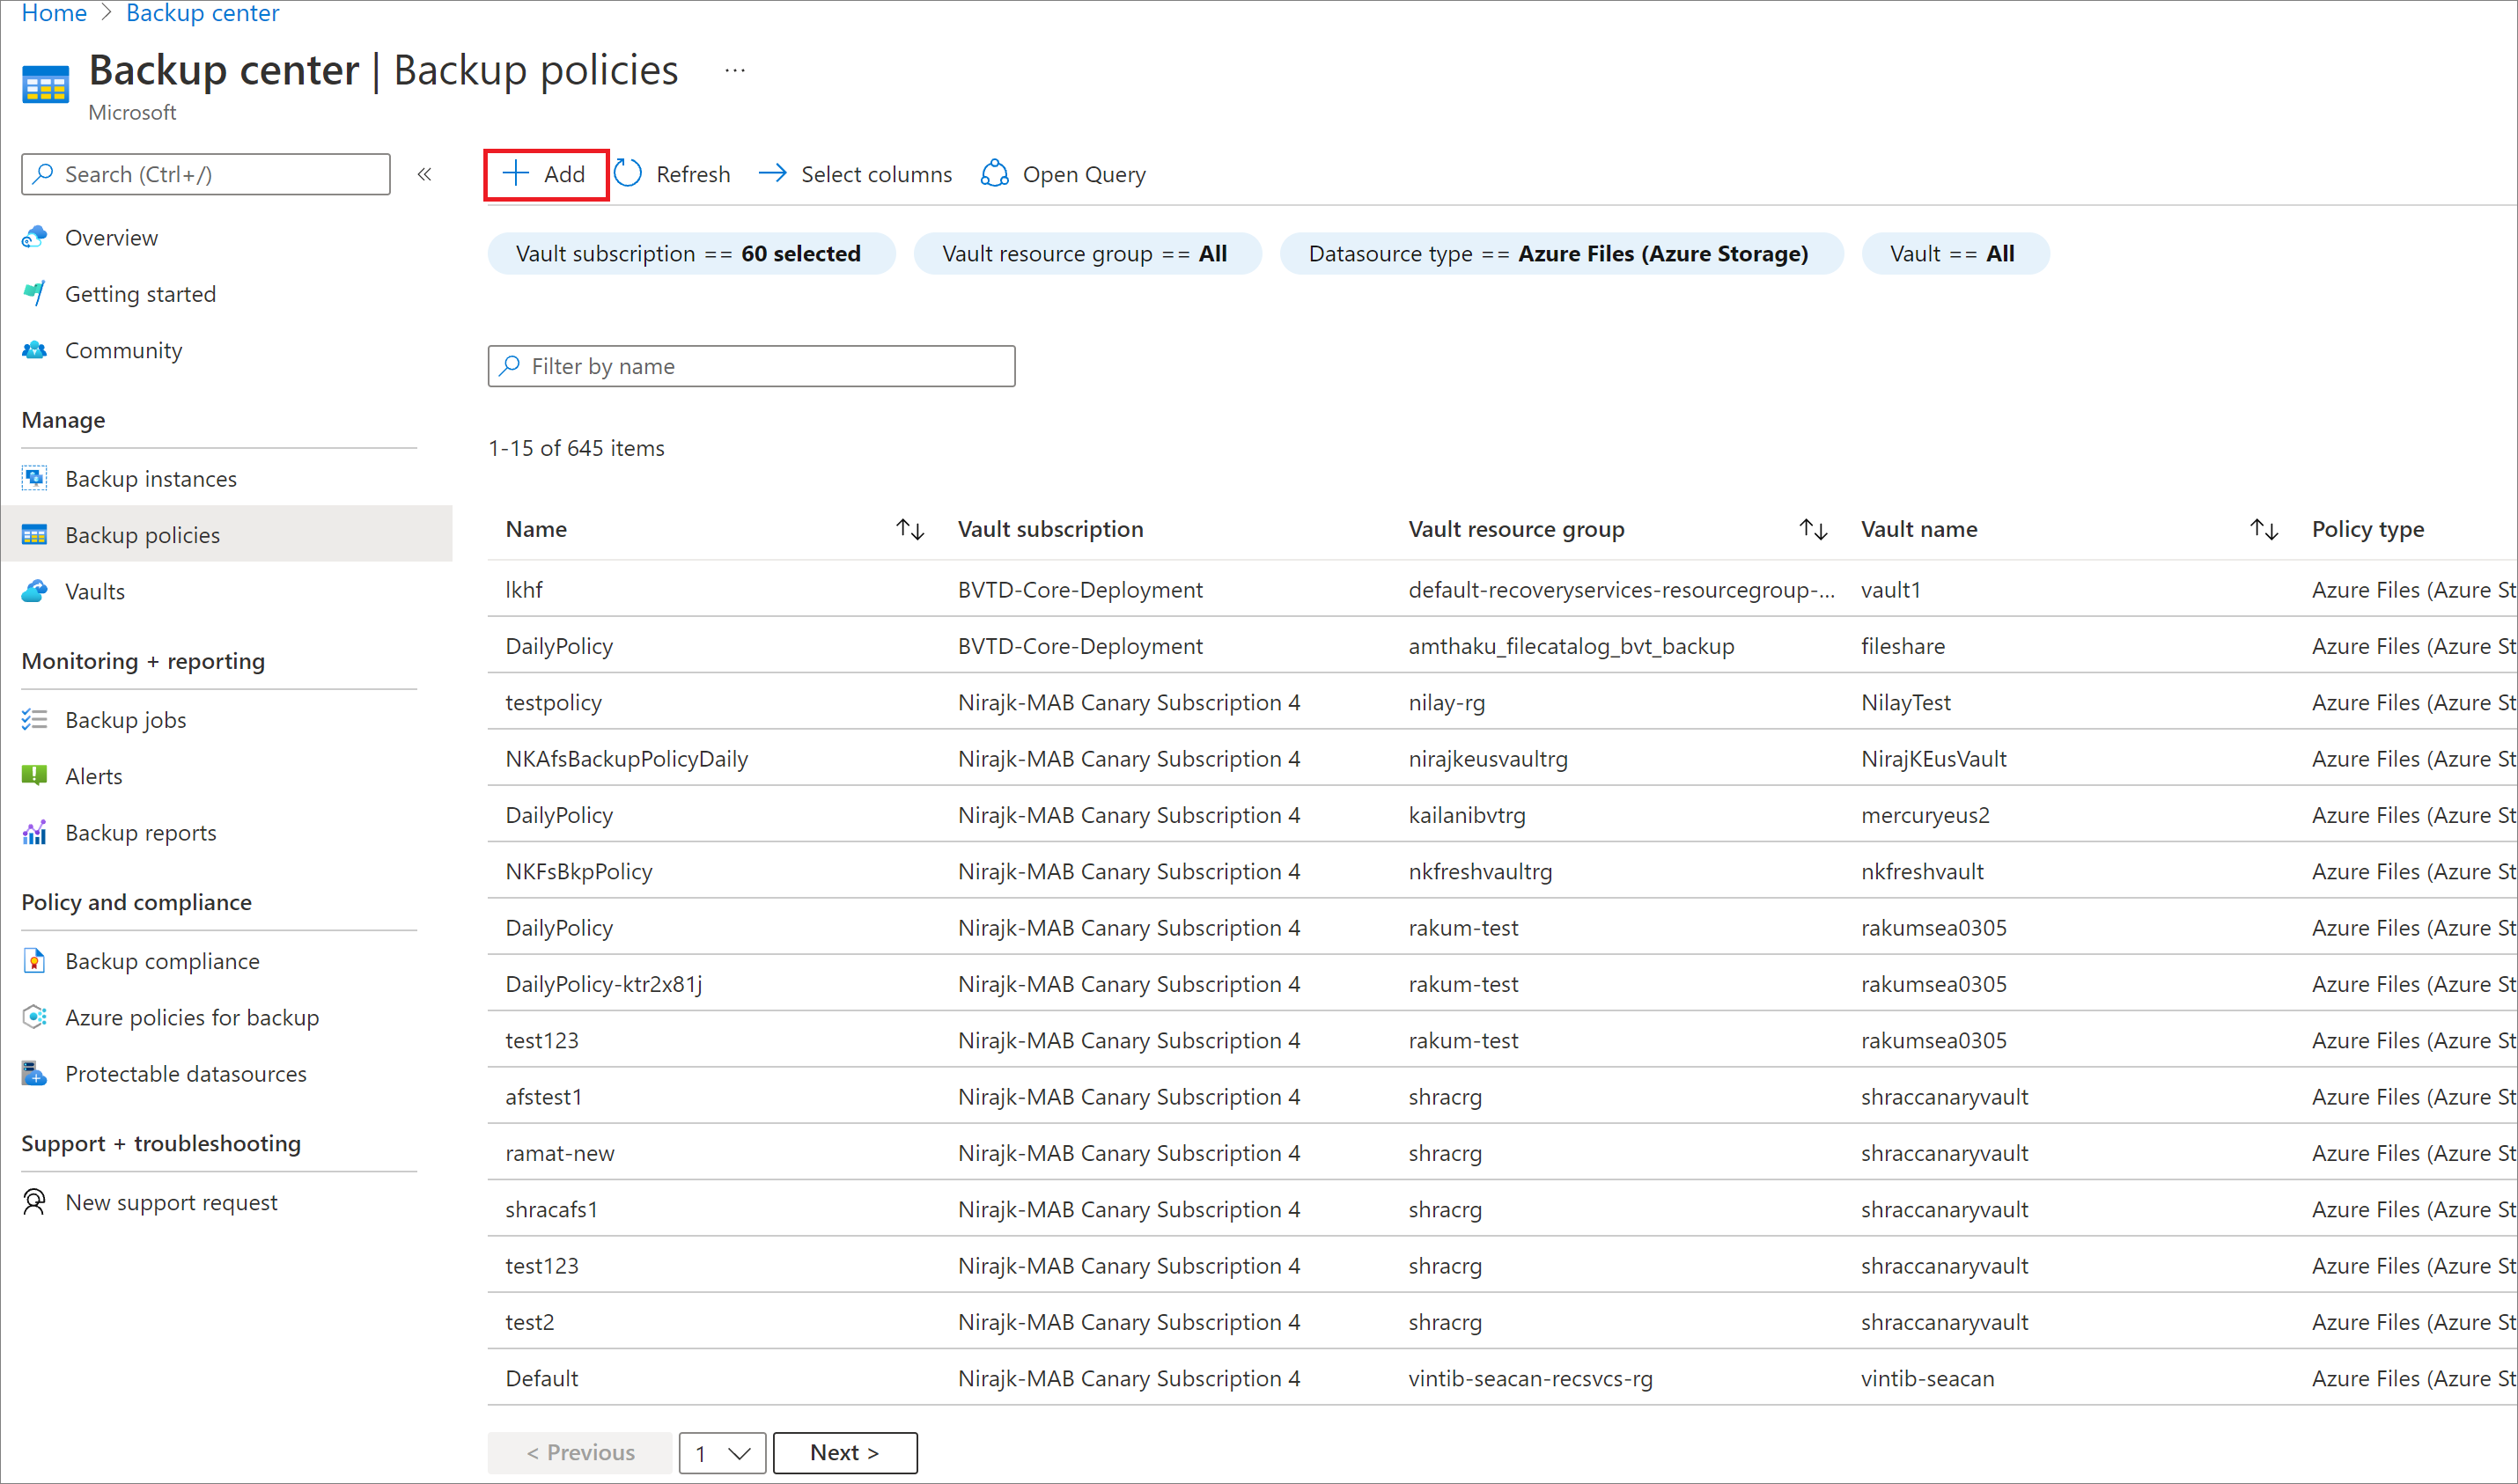
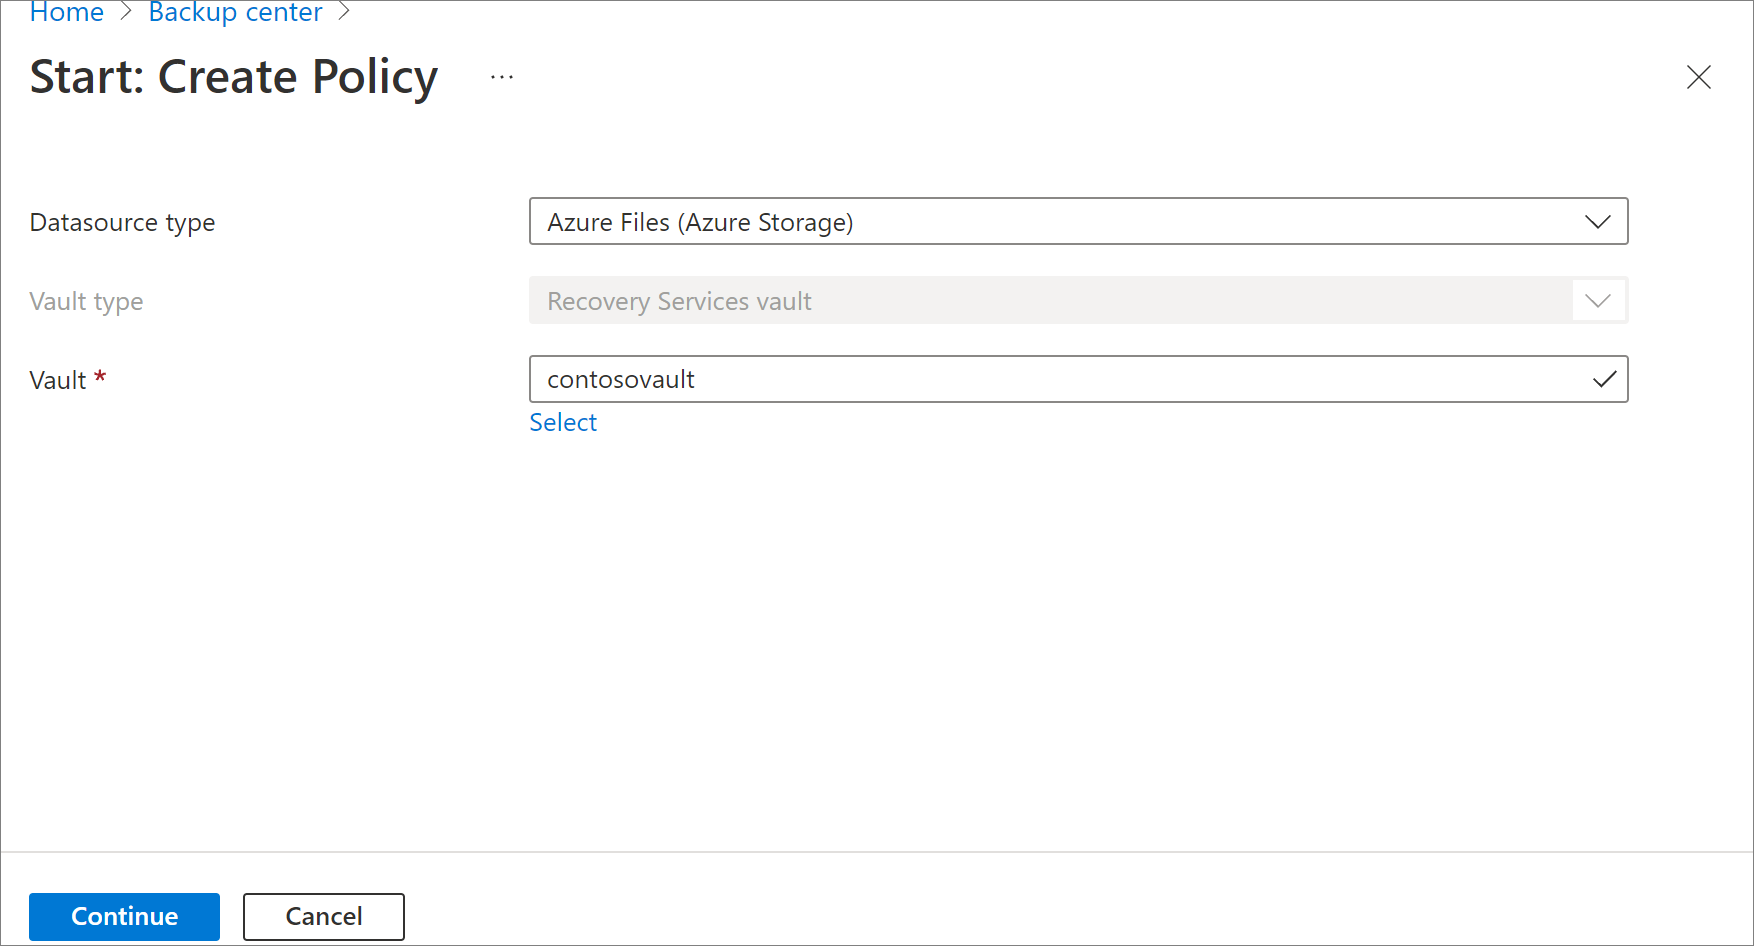
On the Start: Create Policy blade, select Azure Files (Azure Storage) as the datasource type, select the vault under which the policy should be created, and then select Continue.
Once the Backup policy blade for Azure File Share opens, specify the policy name.
Select the appropriate backup tier based on your data protection requirements.
- Snapshot: Enables only snapshot-based backups that are stored locally and can only provide protection in case of accidental deletion.
- Vault-Standard (Preview): Provides comprehensive data protection.
In Backup schedule, select an appropriate frequency for the backups - Daily or Hourly.
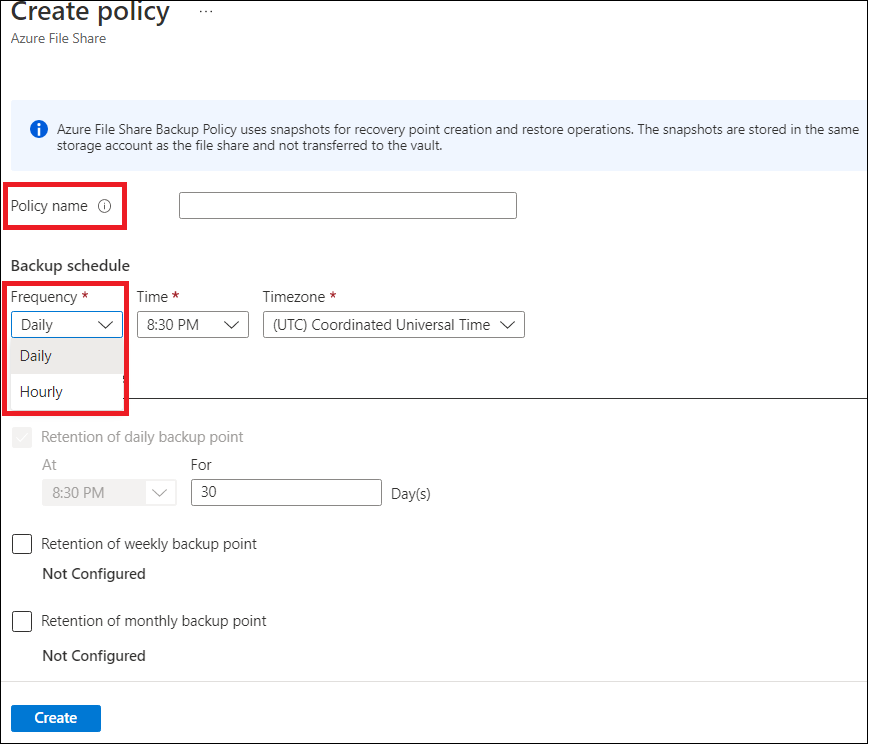
Daily: Triggers one backup per day. For daily frequency, select the appropriate values for:
- Time: The timestamp when the backup job needs to be triggered.
- Time zone: The corresponding time zone for the backup job.
Hourly: Triggers multiple backups per day. For hourly frequency, select the appropriate values for:
- Schedule: The time interval (in hours) between the consecutive backups.
- Start time: The time when the first backup job of the day needs to be triggered.
- Duration: Represents the backup window (in hours), that is, the time span in which the backup jobs need to be triggered as per the selected schedule.
- Time zone: The corresponding time zone for the backup job.
For example, you’ve the RPO (recovery point objective) requirement of 4 hours and your working hours are 9 AM to 9 PM. To meet these requirements, the configuration for backup schedule would be:
- Schedule: Every 4 hours
- Start time: 9 AM
- Duration: 12 hours
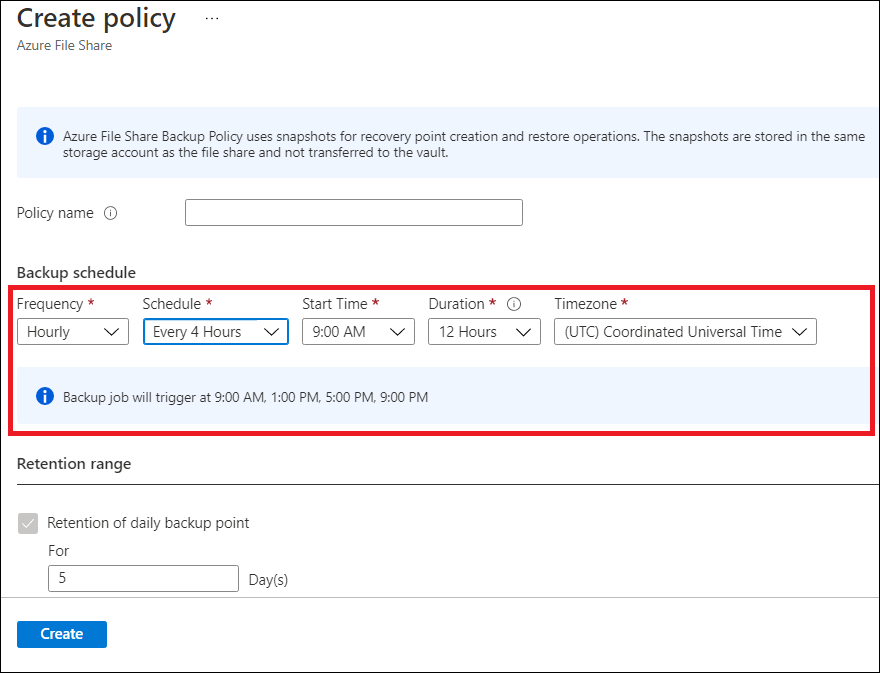
Based on your selection, the backup job details (the time stamps when backup job would be triggered) display on the backup policy blade.
Note
If you select the Vault-Standard (Preview) as the backup tier, snapshots are taken as per the configured backup schedule. However, the data is transferred to the vault from the last snapshot of the day.
In Retention range section, specify appropriate Snapshot retention and Vault retention (preview)) values for backups - tagged as daily, weekly, monthly, or yearly.
After defining all attributes of the policy, select Create.

View policy
To view the existing backup policies:
Go to Backup center and select Backup policies under the Manage section.
All Backup policies configured across your vault appear.
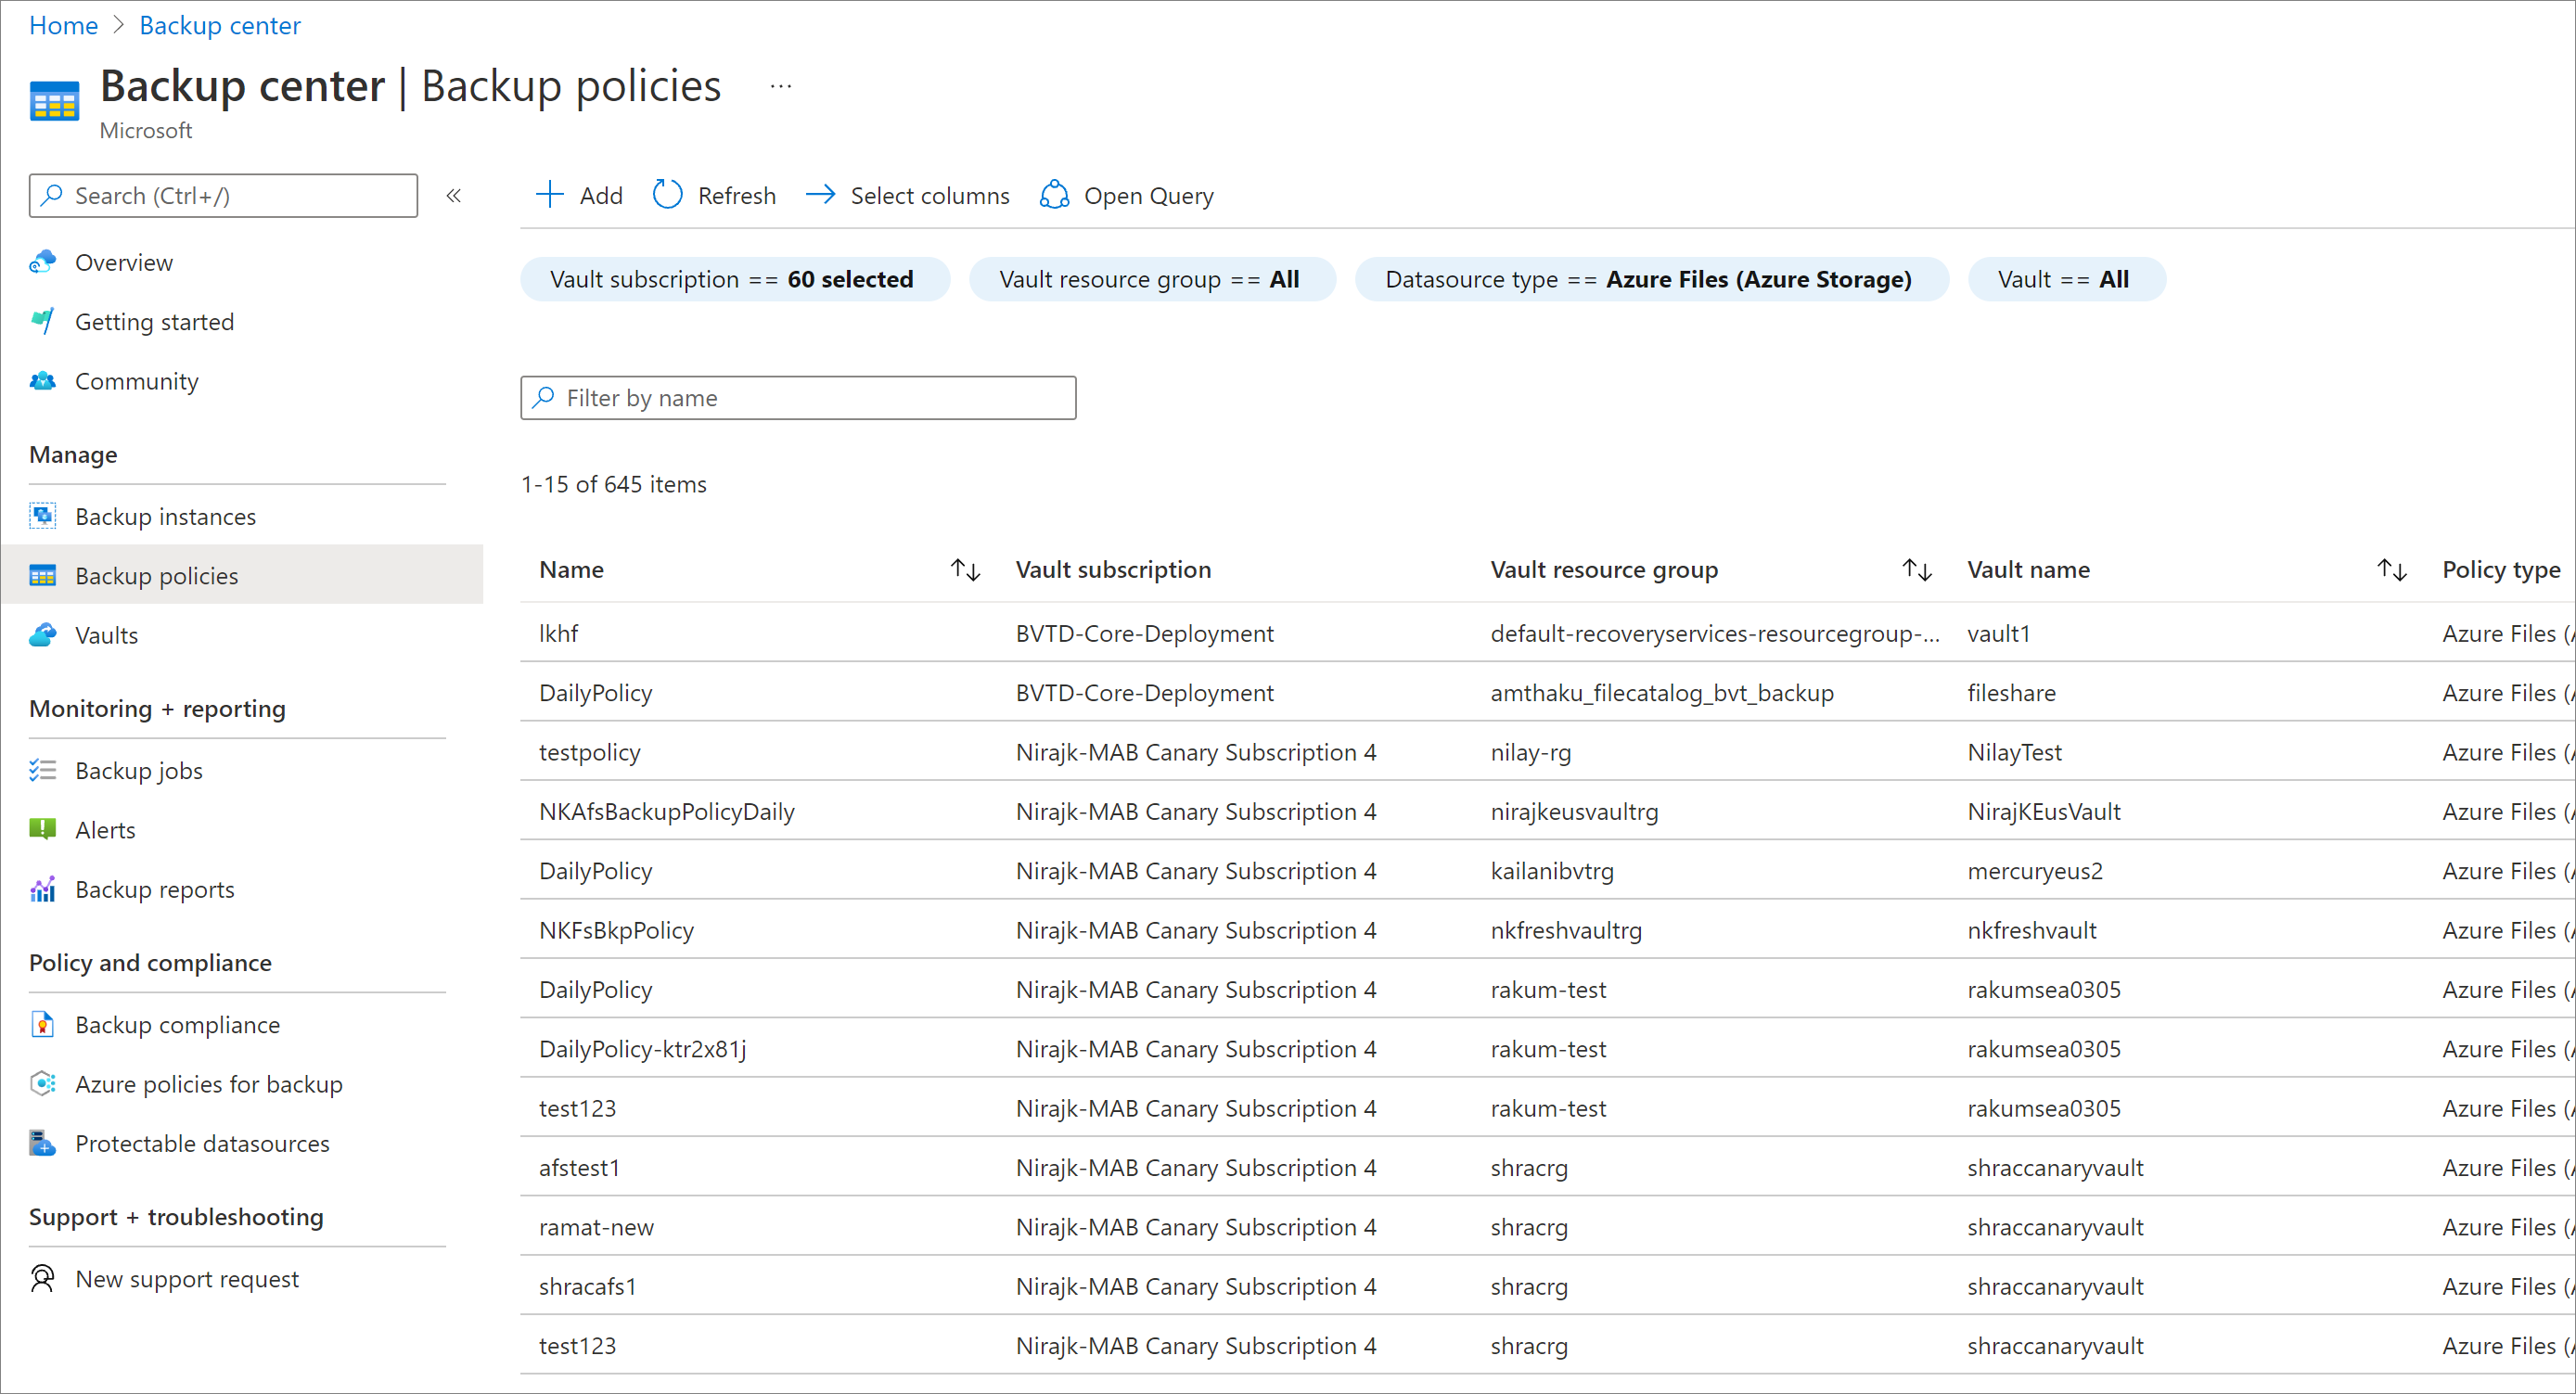
To view policies specific to Azure Files (Azure Storage), select Azure File Share as the datasource type.

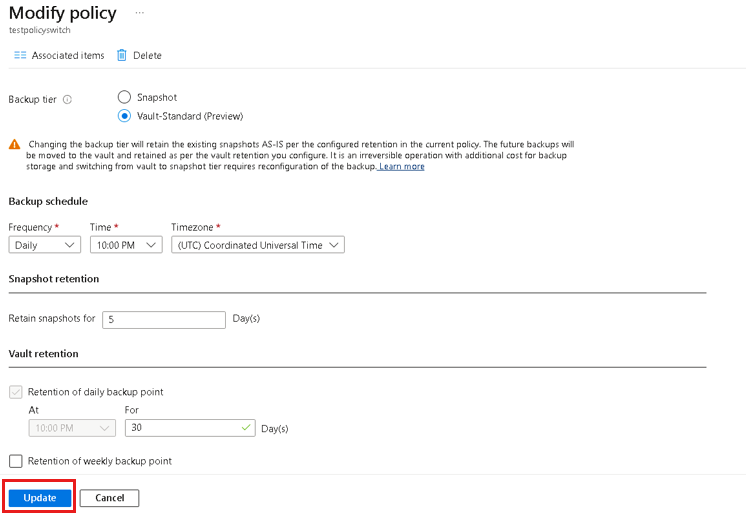
Modify policy
You can modify a backup policy to change the backup frequency or retention range. Also, you can switch backup tier from Snapshot to Vault-Standard (Preview).
To modify a policy:
Go to Backup center and select Backup policies under the Manage section.
All Backup policies configured across your vaults appear.
To view policies specific to an Azure File share, select Azure Files (Azure Storage) as the datasource type.
Select the policy you want to update.
On the Modify policy blade, edit the backup schedule, retention, or backup tier as required, and then select Update.
Note
The change of backup tier will retain the existing snapshots AS-IS as per the configured retention in the current policy. The future backups will be moved to the vault and retained as per the vault retention you configure. The change of backup tier is an irreversible operation and switching from vault to snapshot tier requires reconfiguration of the backup.
:::
An Update in Progress message appears in the Modify policy blade. Once the policy changes successfully, the Successfully updated the backup policy message appears.

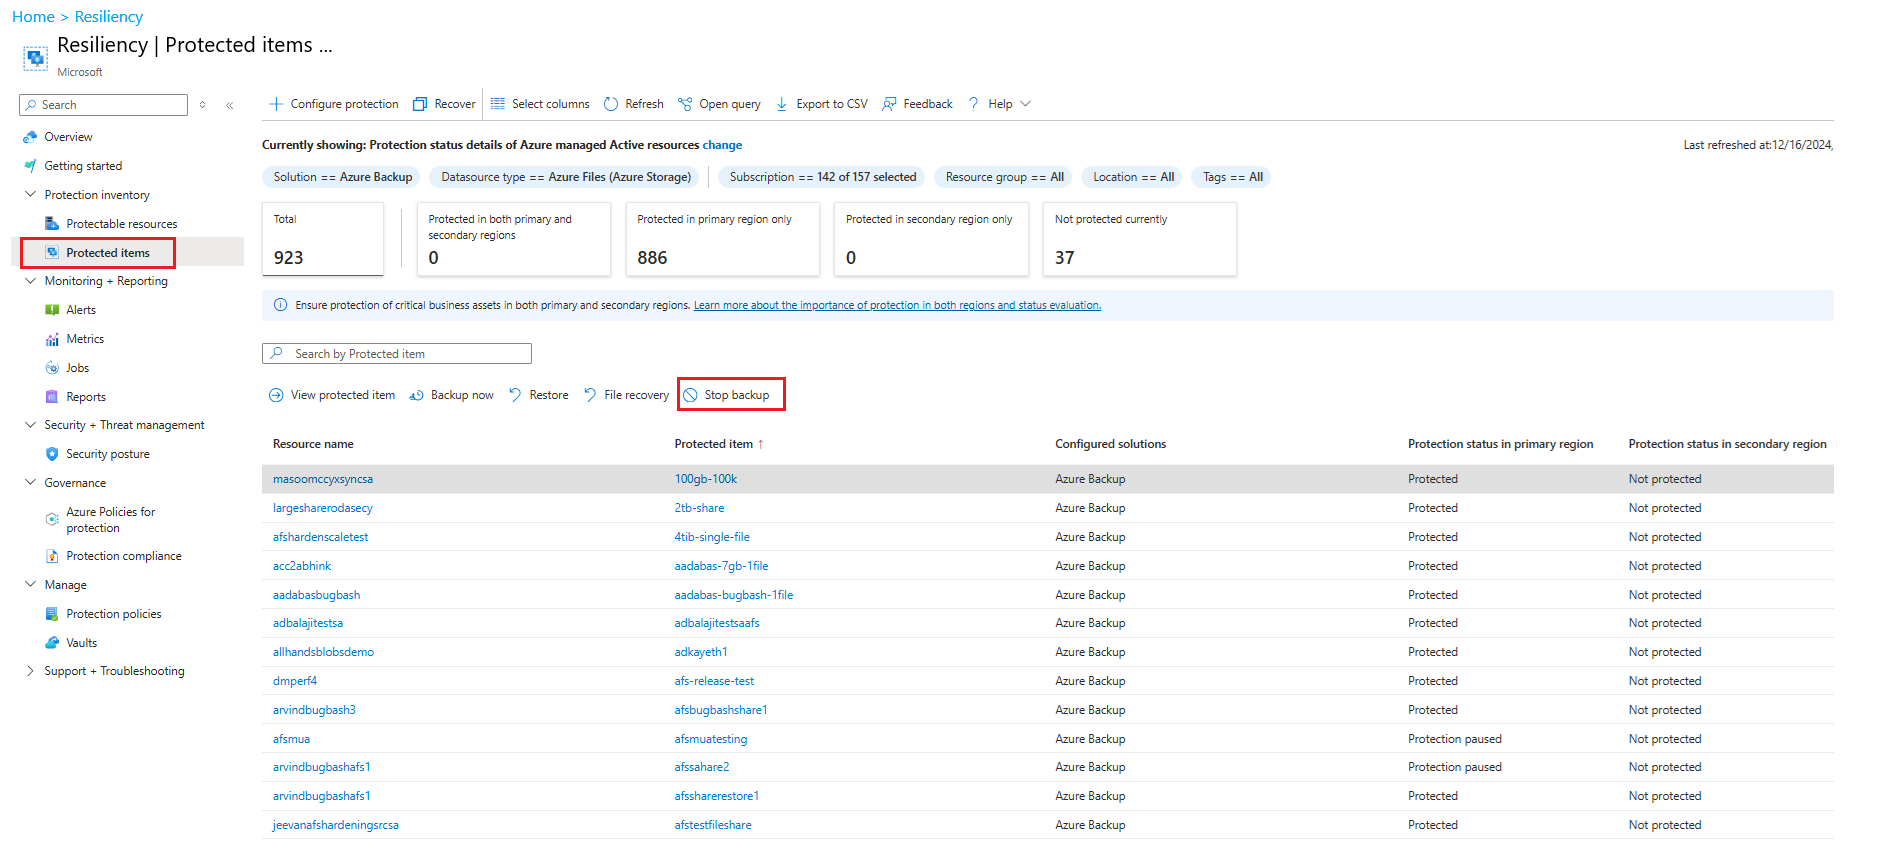
Stop protection on a file share
There are two ways to stop protecting Azure File shares:
- Stop all future backup jobs, and delete all recovery points.
- Stop all future backup jobs, but leave the recovery points.
There might be a cost associated with leaving the recovery points in storage, because the underlying snapshots created by Azure Backup will be retained. The benefit of leaving the recovery points is that you can restore the file share later. For information about the cost of leaving the recovery points, see the pricing details. If you decide to delete all the recovery points, you can't restore the file share.
To stop protection for an Azure File share:
Go to Backup center, select Backup Instances from the menu, and then select Azure Files (Azure Storage) as the datasource type.
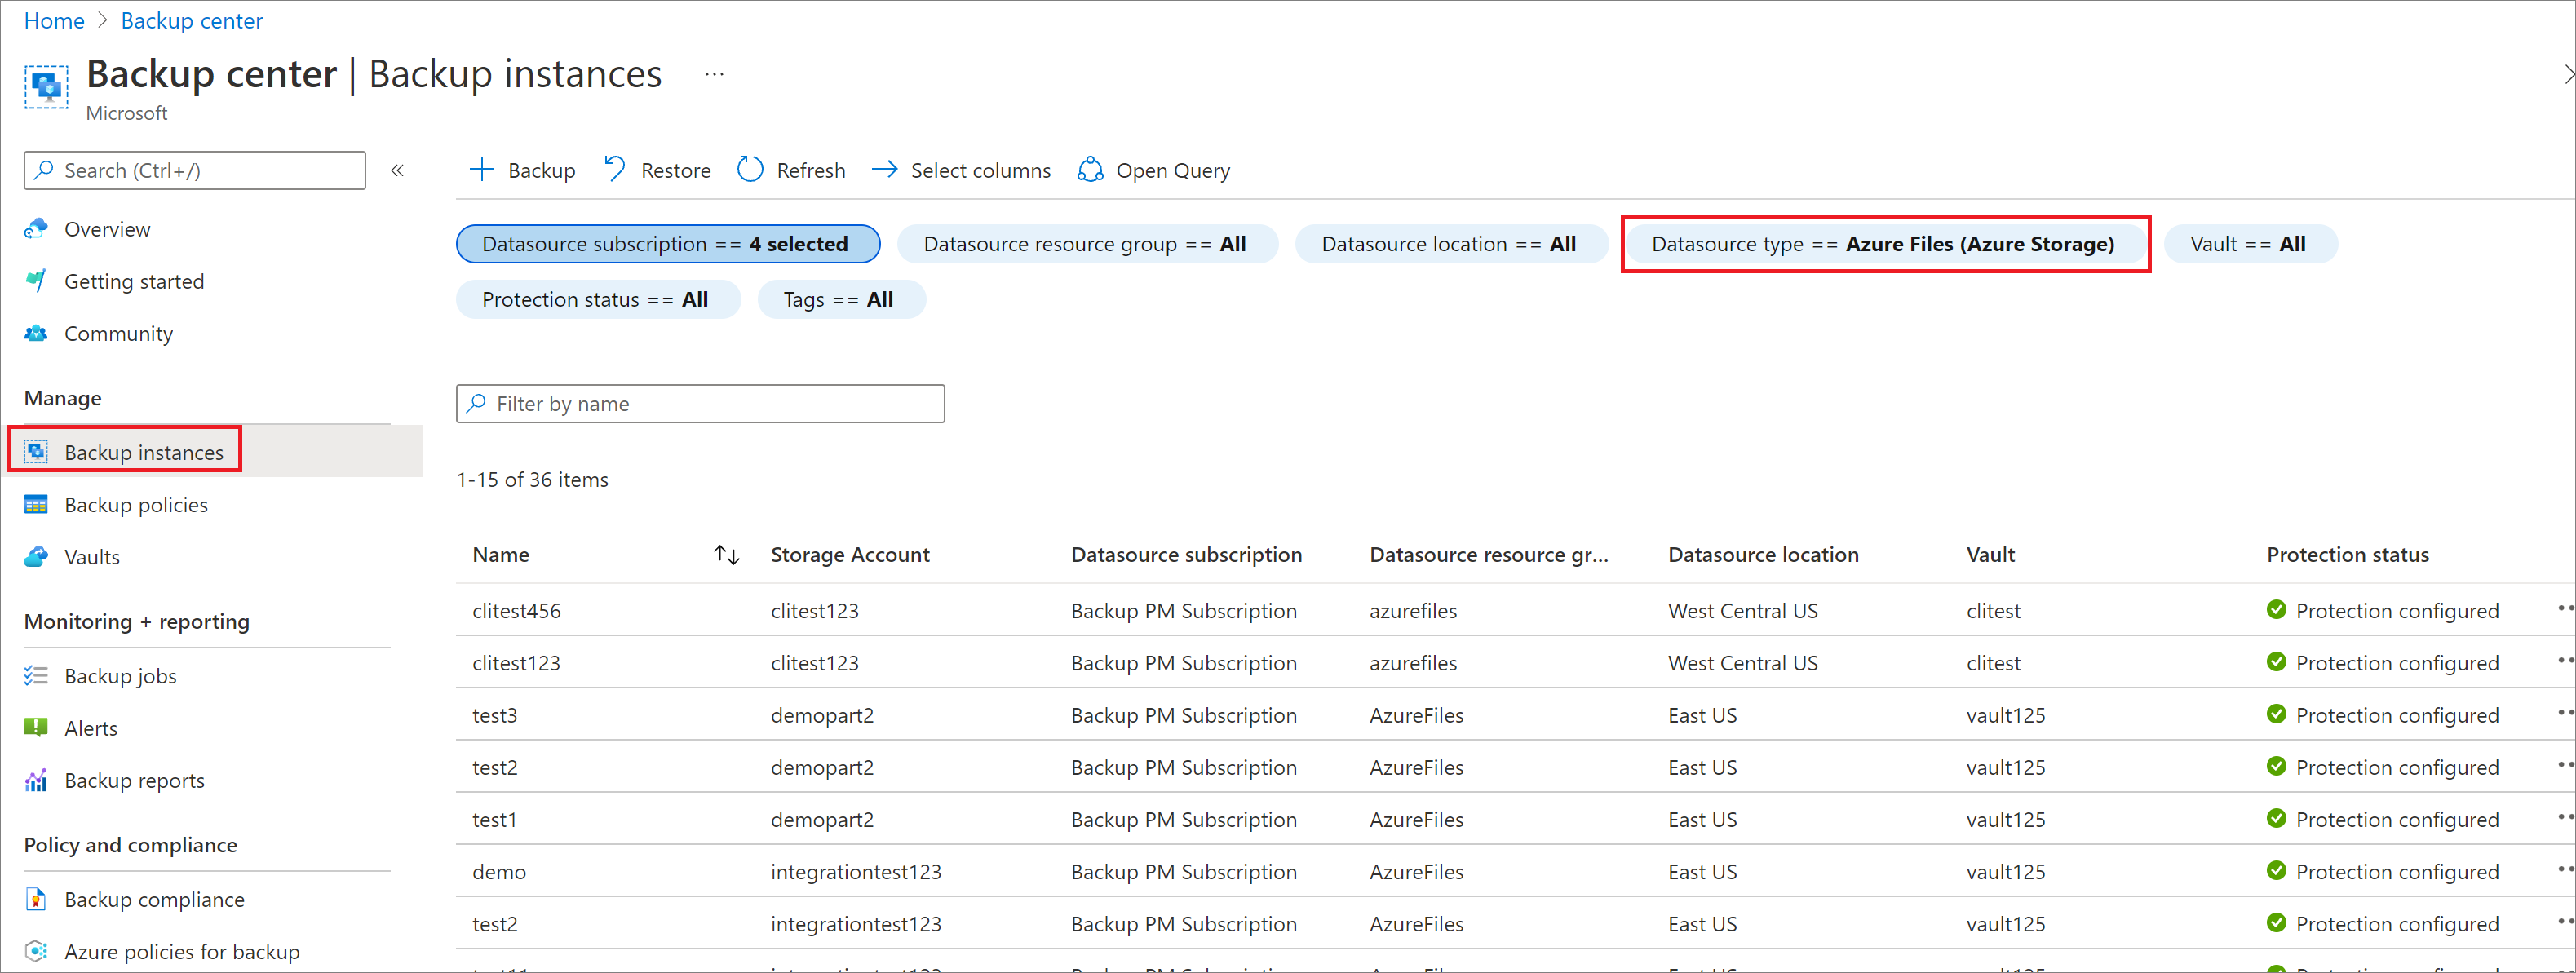
Select the backup item for which you want to stop protection.
Select the Stop backup option.
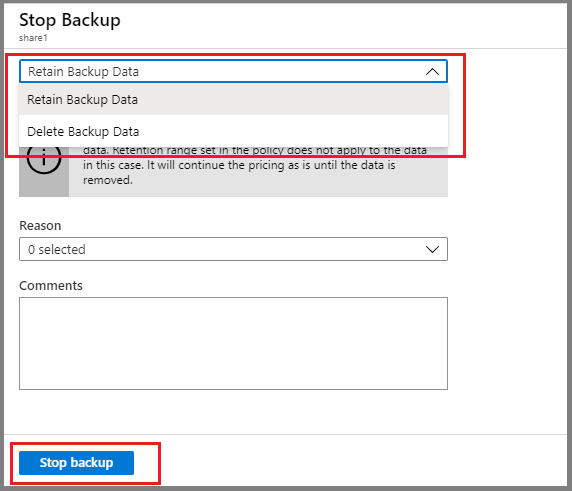
On the Stop Backup blade, select Retain Backup Data or Delete Backup Data. Then select Stop backup.

Resume protection on a file share
If the Retain Backup Data option was selected when protection for the file share was stopped, it's possible to resume protection. If the Delete Backup Data option was selected, protection for the file share can't resume.
To resume protection for the Azure File share:
Go to Backup center, select Backup Instances from the menu, and then select Azure Files (Azure Storage) as the datasource type.
Select the backup item for which you want to resume protection.
Select the Resume backup option.

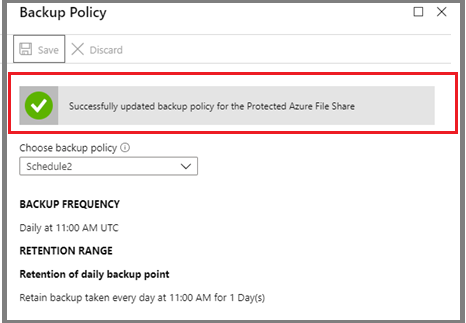
The Backup Policy blade opens. Select a policy of your choice to resume backup.
After you select a backup policy, select Save.
You'll see an Update in Progress message in the portal. After the backup successfully resumes, you'll see the message Successfully updated backup policy for the Protected Azure File Share.
Delete backup data
You can delete the backup of a file share during the Stop backup job, or anytime after you stop the protection. It might be beneficial to wait days or even weeks before you delete the recovery points. When you delete backup data, you can't choose specific recovery points to delete. If you decide to delete your backup data, you delete all recovery points associated with the file share.
The following procedure assumes that the protection was stopped for the file share.
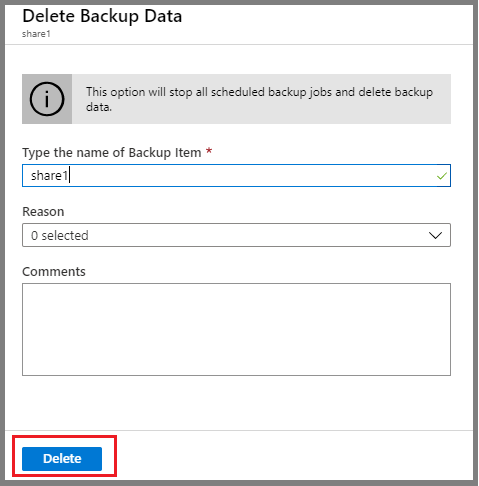
To delete backup data for the Azure File share:
After the backup job is stopped, the Resume backup and Delete backup data options are available in the Backup Item dashboard. Select the Delete backup data option.

The Delete Backup Data blade opens. Enter the name of the file share to confirm deletion. Optionally, provide more information in the Reason or Comments boxes. After you're sure about deleting the backup data, select Delete.
Unregister a storage account
To protect your file shares in a particular storage account by using a different Recovery Services vault, first stop protection for all file shares in that storage account. Then unregister the account from the current Recovery Services vault used for protection.
The following procedure assumes that the protection was stopped for all file shares in the storage account you want to unregister.
To unregister the storage account:
Open the Recovery Services vault where your storage account is registered.
On the Overview blade, select the Backup Infrastructure option under the Manage section.
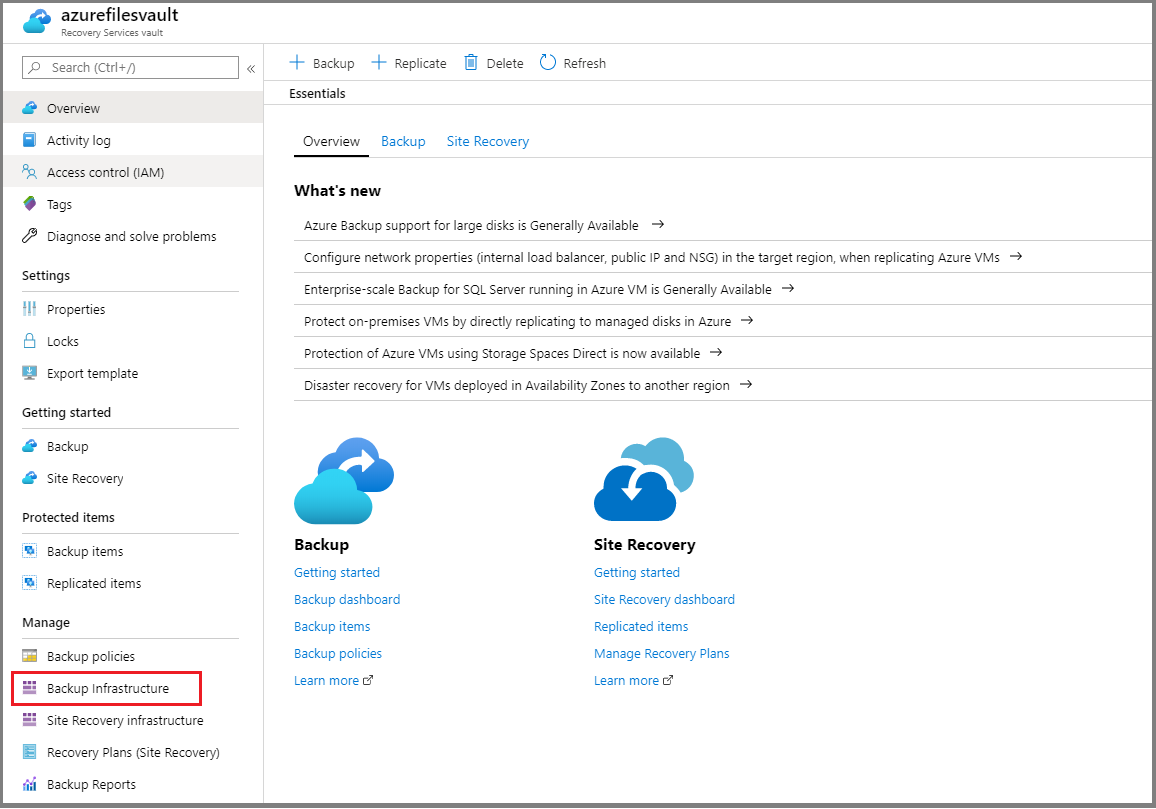
The Backup Infrastructure blade opens. Select Storage Accounts under the Azure Storage Accounts section.
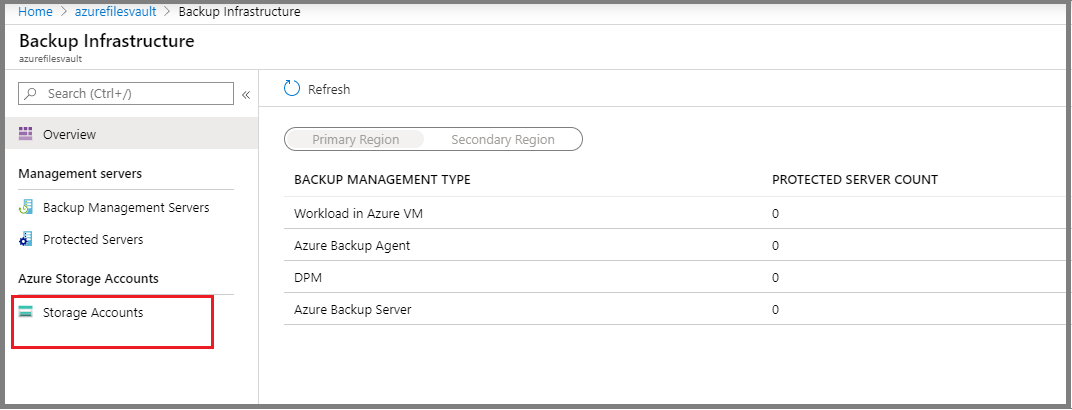
After you select Storage Accounts, a list of storage accounts registered with the vault appears.
Right-click the storage account you want to unregister, and select Unregister.

Next steps
Povratne informacije
Uskoro: tokom 2024. postepeno ćemo ukidati probleme s uslugom GitHub kao mehanizam povratnih informacija za sadržaj i zamijeniti ga novim sistemom povratnih informacija. Za više informacija, pogledajte https://aka.ms/ContentUserFeedback.
Pošalјite i prikažite povratne informacije za