Tutorial: Deploy a web app from a geo-replicated Azure container registry
This is part two in a three-part tutorial series. In part one, a private, geo-replicated container registry was created, and a container image was built from source and pushed to the registry. In this article, you take advantage of the network-close aspect of the geo-replicated registry by deploying the container to Web App instances in two different Azure regions. Each instance then pulls the container image from the closest registry.
In this tutorial, part two in the series:
- Deploy a container image to two Web Apps for Containers instances
- Verify the deployed application
If you haven't yet created a geo-replicated registry and pushed the image of the containerized sample application to the registry, return to the previous tutorial in the series, Prepare a geo-replicated Azure container registry.
In the next article in the series, you update the application, then push the updated container image to the registry. Finally, you browse to each running Web App instance to see the change automatically reflected in both, showing Azure Container Registry geo-replication and webhooks in action.
Automatic deployment to Web Apps for Containers
Azure Container Registry provides support for deploying containerized applications directly to Web Apps for Containers. In this tutorial, you use the Azure portal to deploy the container image created in the previous tutorial to two web app plans located in different Azure regions.
When you deploy a web app from a container image in your registry, and you have a geo-replicated registry in the same region, Azure Container Registry creates an image deployment webhook for you. When you push a new image to your container repository, the webhook picks up the change and automatically deploys the new container image to your web app.
Deploy a Web App for Containers instance
In this step, you create a Web App for Containers instance in the West US region.
Sign in to the Azure portal and navigate to the registry you created in the previous tutorial.
Select Repositories > acr-helloworld, then right-click on the v1 tag under Tags and select Deploy to web app:
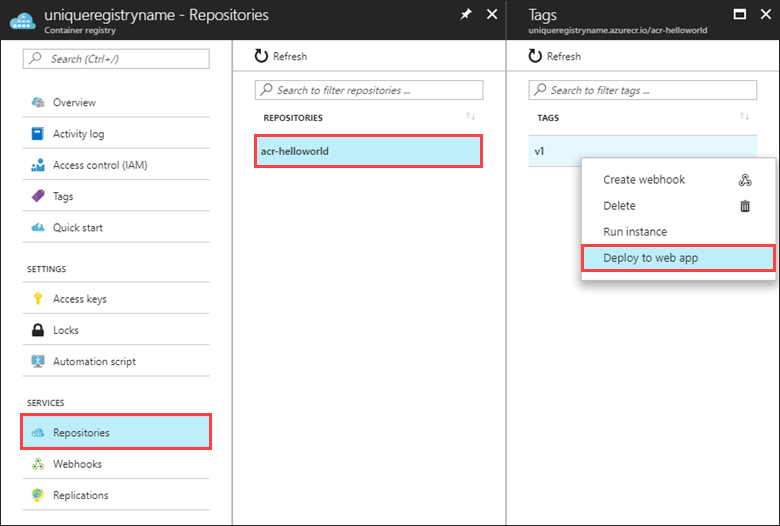
If "Deploy to web app" is disabled, you might not have enabled the registry admin user as directed in Create a container registry in the first tutorial. You can enable the admin user in Settings > Access keys in the Azure portal.
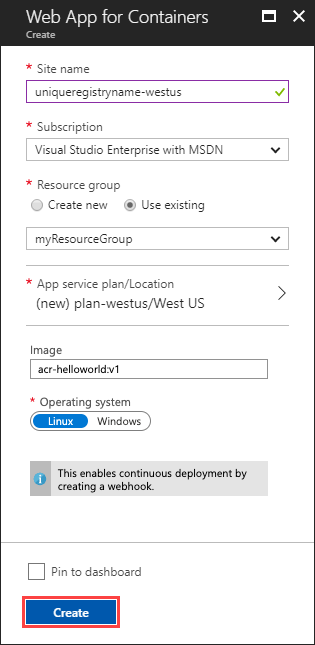
Under Web App for Containers that's displayed after you select "Deploy to web app," specify the following values for each setting:
| Setting | Value |
|---|---|
| Site Name | A globally unique name for the web app. In this example, we use the format <acrName>-westus to easily identify the registry and region the web app is deployed from. |
| Resource Group | Use existing > myResourceGroup |
| App service plan/Location | Create a new plan named plan-westus in the West US region. |
| Image | acr-helloworld:v1 |
| Operating system | Linux |
Note
When you create a new app service plan to deploy your containerized app, a default plan is automatically selected to host your application. The default plan depends on the operating system setting.
Select Create to provision the web app to the West US region.
View the deployed web app
When deployment is complete, you can view the running application by navigating to its URL in your browser.
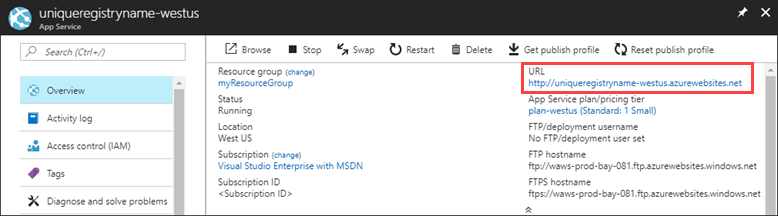
In the portal, select App Services, then the web app you provisioned in the previous step. In this example, the web app is named uniqueregistryname-westus.
Select the hyperlinked URL of the web app in the top-right of the App Service overview to view the running application in your browser.
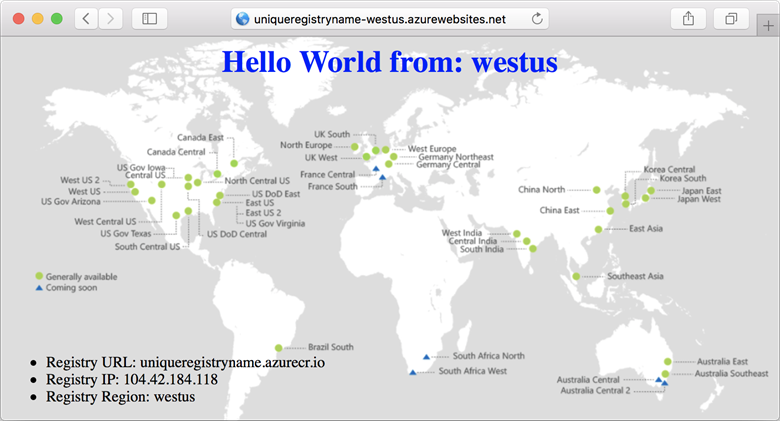
Once the Docker image is deployed from your geo-replicated container registry, the site displays an image representing the Azure region hosting the container registry.
Deploy second Web App for Containers instance
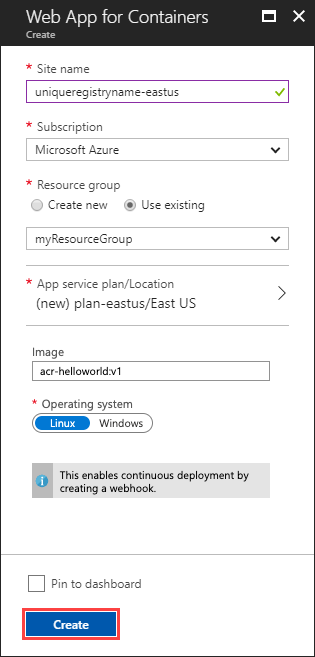
Use the procedure outlined in the previous section to deploy a second web app to the East US region. Under Web App for Containers, specify the following values:
| Setting | Value |
|---|---|
| Site Name | A globally unique name for the web app. In this example, we use the format <acrName>-eastus to easily identify the registry and region the web app is deployed from. |
| Resource Group | Use existing > myResourceGroup |
| App service plan/Location | Create a new plan named plan-eastus in the East US region. |
| Image | acr-helloworld:v1 |
| Operating system | Linux |
Select Create to provision the web app to the East US region.
View the second deployed web app
As before, you can view the running application by navigating to its URL in your browser.
In the portal, select App Services, then the web app you provisioned in the previous step. In this example, the web app is named uniqueregistryname-eastus.
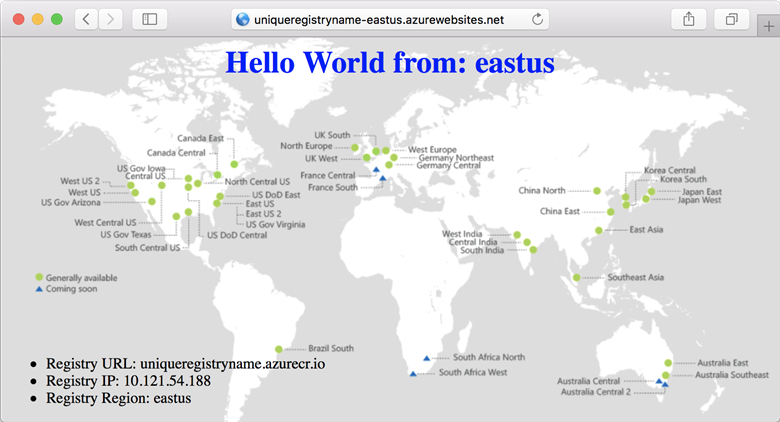
Select the hyperlinked URL of the web app in the top-right of the App Service overview to view the running application in your browser.

Once the Docker image is deployed from your geo-replicated container registry, the site displays an image representing the Azure region hosting the container registry.
Next steps
In this tutorial, you deployed two Web App for Containers instances from a geo-replicated Azure container registry.
Advance to the next tutorial to update and then deploy a new container image to the container registry, then verify that the web apps running in both regions were updated automatically.
Povratne informacije
Uskoro: tokom 2024. postepeno ćemo ukidati probleme s uslugom GitHub kao mehanizam povratnih informacija za sadržaj i zamijeniti ga novim sistemom povratnih informacija. Za više informacija, pogledajte https://aka.ms/ContentUserFeedback.
Pošalјite i prikažite povratne informacije za