Tutorial: Authenticate for APIs
In this tutorial, you learn how to authenticate for the the Microsoft Purview data plane APIs. Anyone who wants to submit data to Microsoft Purview, include Microsoft Purview as part of an automated process, or build their own user experience on Microsoft Purview can use the APIs to do so.
If you don't have an Azure subscription, create a free account before you begin.
Prerequisites
- To get started, you must have an existing Microsoft Purview account. If you don't have a catalog, see the quickstart for creating a Microsoft Purview account.
Create a service principal (application)
For an API client to access the Microsoft Purview data plane APIs, the client must have a service principal (application), and an identity that Microsoft Purview recognizes and is configured to trust. When you make API calls, that service principal's identity will be used for authorization.
Customers who have used existing service principals (application IDs) have had a high rate of failure. Therefore, we recommend creating a new service principal for calling APIs.
To create a new service principal:
Sign in to the Azure portal.
From the portal, search for and select Microsoft Entra ID.
From the Microsoft Entra ID page, select App registrations from the left pane.
Select New registration.
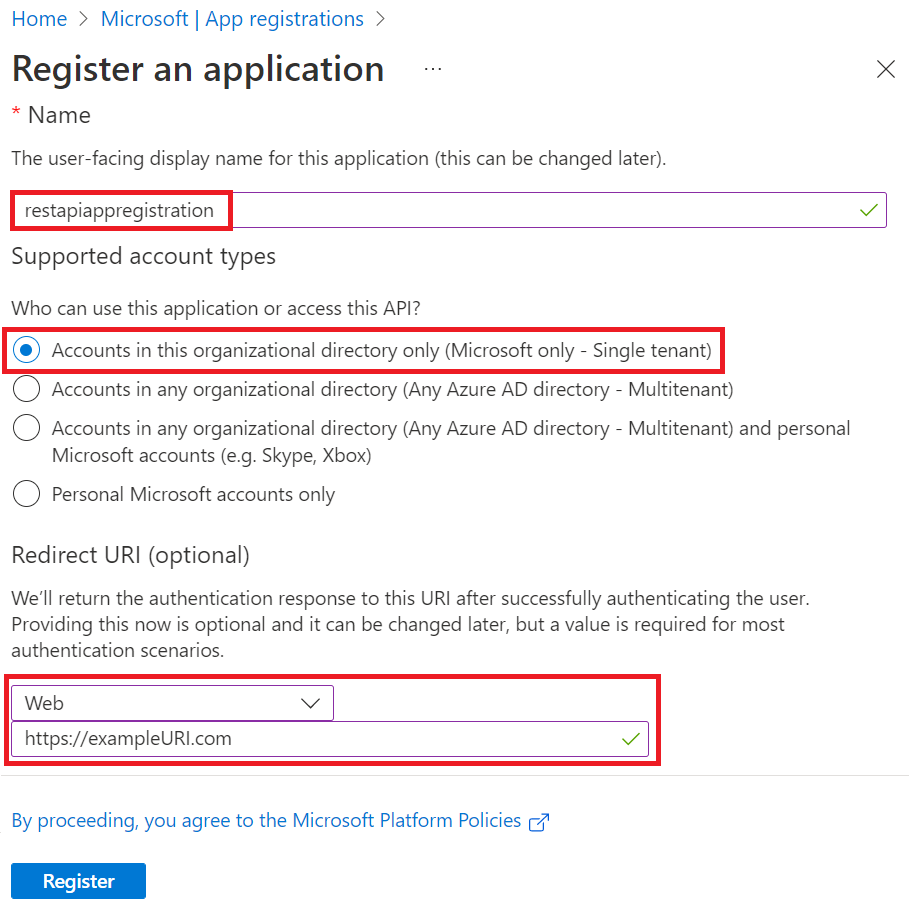
On the Register an application page:
- Enter a Name for the application (the service principal name).
- Select Accounts in this organizational directory only (<your tenant's name> only - Single tenant).
- For Redirect URI (optional), select Web and enter a value. This value doesn't need to be a valid endpoint.
https://exampleURI.comwill do. - Select Register.
On the new service principal page, copy the values of the Display name and the Application (client) ID to save for later.
The application ID is the
client_idvalue in the sample code.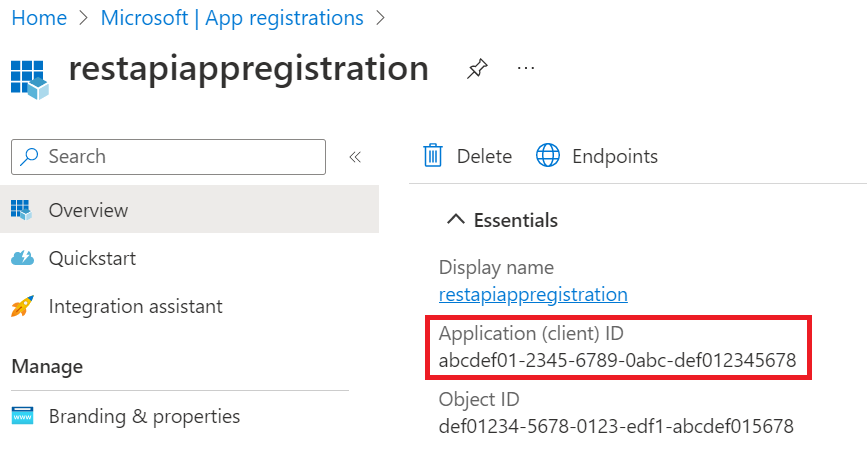
To use the service principal (application), you need to know the service principal's password that can be found by:
From the Azure portal, search for and select Microsoft Entra ID, and then select App registrations from the left pane.
Select your service principal (application) from the list.
Select Certificates & secrets from the left pane.
Select New client secret.
On the Add a client secret page, enter a Description, select an expiration time under Expires, and then select Add.
On the Client secrets page, the string in the Value column of your new secret is your password. Save this value.

Set up authentication using service principal
Once the new service principal is created, you need to assign the data plane roles of your purview account to the service principal created above. Follow the steps below to assign the correct role to establish trust between the service principal and the Purview account:
Navigate to your Microsoft Purview governance portal.
Select the Data Map in the left menu.
Select Collections.
Select the root collection in the collections menu. This will be the top collection in the list, and will have the same name as your Microsoft Purview account.
Note
You can also assign your service principal permission to any sub-collections, instead of the root collection. However, all APIs will be scoped to that collection (and sub-collections that inherit permissions), and users trying to call the API for another collection will get errors.
Select the Role assignments tab.
Assign the following roles to the service principal created previously to access various data planes in Microsoft Purview. For detailed steps, see Assign Azure roles using the Microsoft Purview governance portal.
- Data Curator role to access Catalog Data plane.
- Data Source Administrator role to access Scanning Data plane.
- Collection Admin role to access Account Data Plane and Metadata policy Data Plane.
- Policy Author role to access the DevOps policies API
Note
Only members of the Collection Admin role can assign data plane roles in Microsoft Purview. For more information about Microsoft Purview roles, see Access Control in Microsoft Purview.
Get token
You can send a POST request to the following URL to get access token.
https://login.microsoftonline.com/{your-tenant-id}/oauth2/token
You can find your Tenant ID by searching for Tenant Properties in the Azure portal. The ID will be available on the tenant properties page.
The following parameters need to be passed to the above URL:
- client_id: client ID of the application registered in Microsoft Entra ID and is assigned to a data plane role for the Microsoft Purview account.
- client_secret: client secret created for the above application.
- grant_type: This should be ‘client_credentials’.
- resource: ‘https://purview.azure.net’
Here's a sample POST request in PowerShell:
$tenantID = "12a345bc-67d1-ef89-abcd-efg12345abcde"

$url = "https://login.microsoftonline.com/$tenantID/oauth2/token"
$params = @{ client_id = "a1234bcd-5678-9012-abcd-abcd1234abcd"; client_secret = "abcd~a1234bcd56789012abcdabcd1234abcd"; grant_type = "client_credentials"; resource = ‘https://purview.azure.net’ }

Invoke-WebRequest $url -Method Post -Body $params -UseBasicParsing | ConvertFrom-Json
Sample response token:
    {
        "token_type": "Bearer",
        "expires_in": "86399",
        "ext_expires_in": "86399",
        "expires_on": "1621038348",
        "not_before": "1620951648",
        "resource": "https://purview.azure.net",
        "access_token": "<<access token>>"
    }
Tip
If you get an error message that reads: Cross-origin token redemption is permitted only for the 'Single-Page Application' client-type.
- Check your request headers and confirm that your request doesn't contain the 'origin' header.
- Confirm that your redirect URI is set to web in your service principal.
- If you are using an application like Postman, make sure your software is up to date.
Use the access token above to call the Data plane APIs.
Next steps
Váš názor
Připravujeme: V průběhu roku 2024 budeme postupně vyřazovat problémy z GitHub coby mechanismus zpětné vazby pro obsah a nahrazovat ho novým systémem zpětné vazby. Další informace naleznete v tématu: https://aka.ms/ContentUserFeedback.
Odeslat a zobrazit názory pro