Deploy Azure Cloud Services (extended support) using the Azure portal
This article explains how to use the Azure portal to create a Cloud Service (extended support) deployment.
Before you begin
Review the deployment prerequisites for Cloud Services (extended support) and create the associated resources.
Deploy a Cloud Services (extended support)
Sign in to the Azure portal.
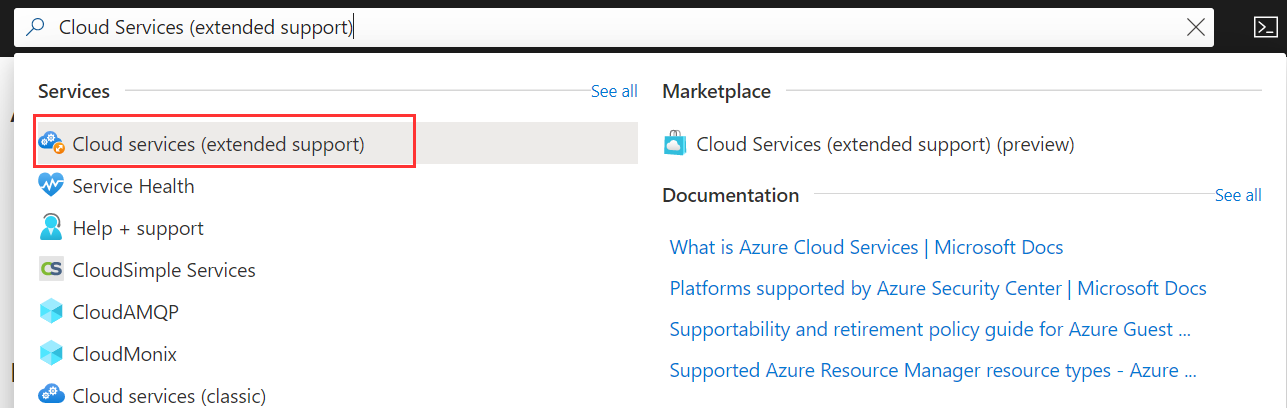
Using the search bar located at the top of the Azure portal, search for and select Cloud Services (extended support).
In the Cloud Services (extended support) pane select Create.
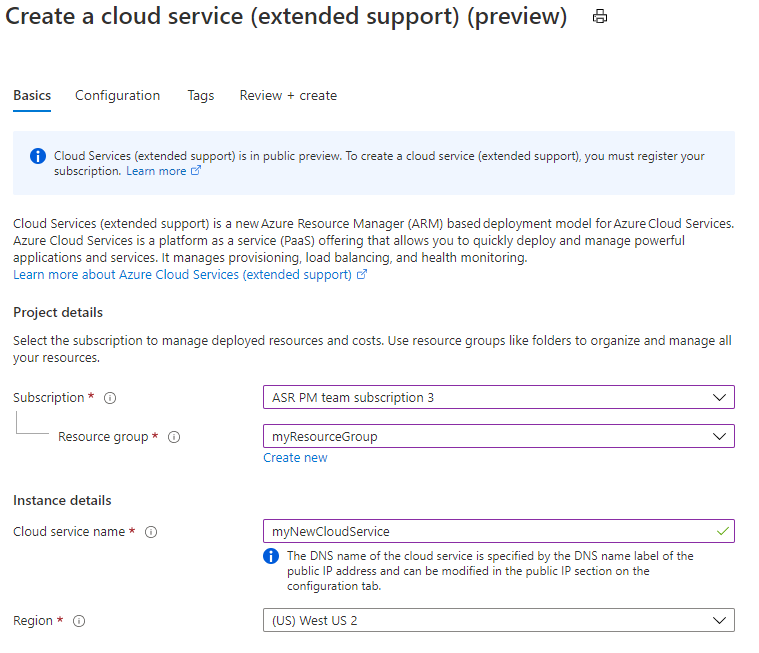
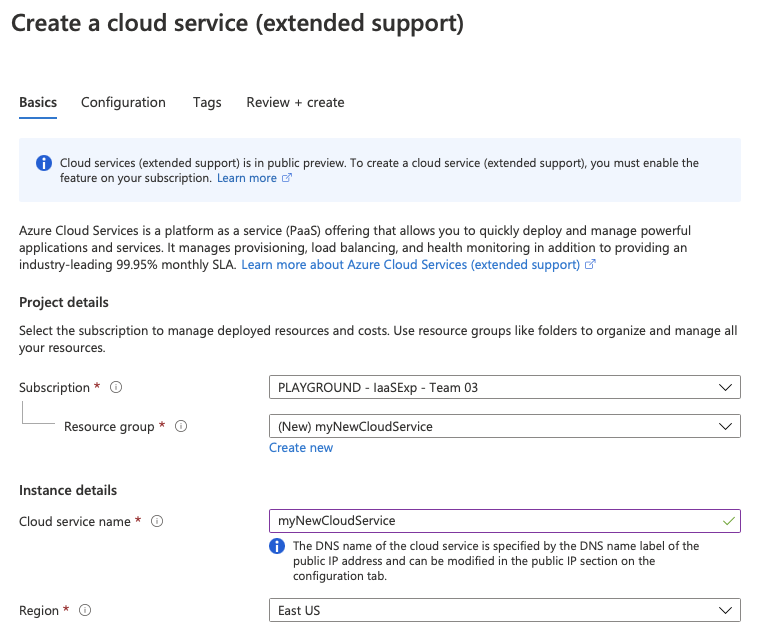
The Cloud Services (extended support) creation window will open to the Basics tab.
- Select a Subscription.
- Choose a resource group or create a new one.
- Enter the desired name for your Cloud Service (extended support) deployment.
- The DNS name of the cloud service is separate and specified by the DNS name label of the public IP address and can be modified in the public IP section in the configuration tab.
- Select the region to deploy to.
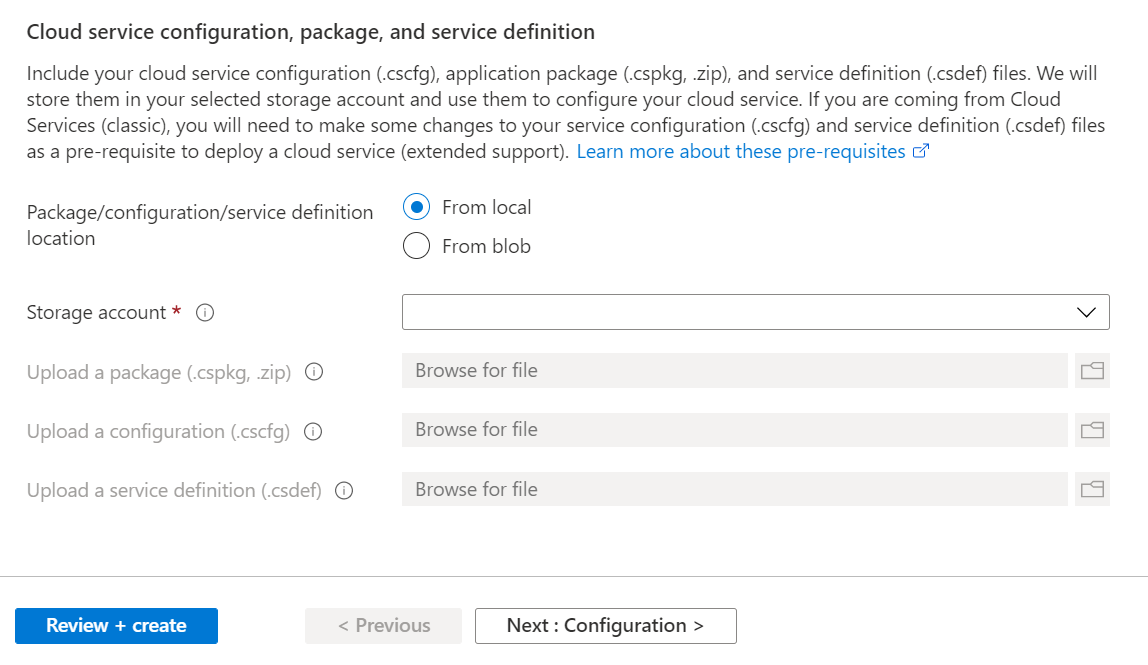
Add your cloud service configuration, package and definition files. You can add existing files from blob storage or upload these from your local machine. If uploading from your local machine, these will be then be stored in a storage account.
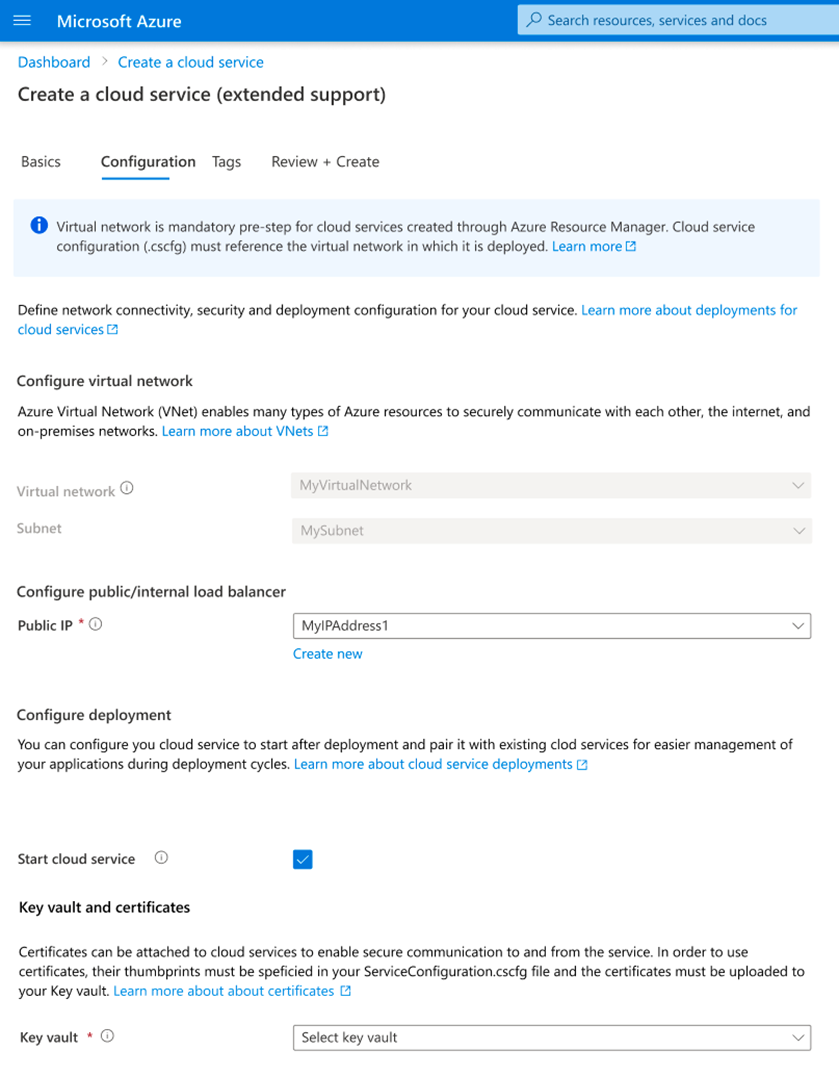
Once all fields have been completed, move to and complete the Configuration tab.
- Select a virtual network to associate with the Cloud Service or create a new one.
- Cloud Service (extended support) deployments must be in a virtual network. The virtual network must also be referenced in the Service Configuration (.cscfg) file under the
NetworkConfigurationsection.
- Cloud Service (extended support) deployments must be in a virtual network. The virtual network must also be referenced in the Service Configuration (.cscfg) file under the
- Select an existing public IP address to associate with the Cloud Service or create a new one.
- If you have IP Input Endpoints defined in your Service Definition (.csdef) file, a public IP address will need to be created for your Cloud Service.
- Cloud Services (extended support) only supports the Basic IP address SKU.
- If your Service Configuration (.cscfg) contains a reserved IP address, the allocation type for the public IP must be set tp Static.
- Optionally, assign a DNS name for your cloud service endpoint by updating the DNS label property of the Public IP address that is associated with the cloud service.
- (Optional) Start Cloud Service. Choose start or not start the service immediately after creation.
- Select a Key Vault
- Key Vault is required when you specify one or more certificates in your Service Configuration (.cscfg) file. When you select a key vault we will try to find the selected certificates from your Service Configuration (.cscfg) file based on their thumbprints. If any certificates are missing from your key vault you can upload them now and click Refresh.
- Select a virtual network to associate with the Cloud Service or create a new one.
- Once all fields have been completed, move to the Review and Create tab to validate your deployment configuration and create your Cloud Service (extended support).
Next steps
- Review frequently asked questions for Cloud Services (extended support).
- Deploy a Cloud Service (extended support) using the Azure portal, PowerShell, Template or Visual Studio.
- Visit the Cloud Services (extended support) samples repository
Feedback
Kommer snart: I hele 2024 udfaser vi GitHub-problemer som feedbackmekanisme for indhold og erstatter det med et nyt feedbacksystem. Se https://aka.ms/ContentUserFeedback for at få flere oplysninger.
Indsend og få vist feedback om