Tutorial: Design an Azure Database for PostgreSQL - Single Server using the Azure portal
APPLIES TO:  Azure Database for PostgreSQL - Single Server
Important
Azure Database for PostgreSQL - Single Server is on the retirement path. We strongly recommend that you upgrade to Azure Database for PostgreSQL - Flexible Server. For more information about migrating to Azure Database for PostgreSQL - Flexible Server, see What's happening to Azure Database for PostgreSQL Single Server?.
Azure Database for PostgreSQL is a managed service that enables you to run, manage, and scale highly available PostgreSQL databases in the cloud. Using the Azure portal, you can easily manage your server and design a database.
In this tutorial, you use the Azure portal to learn how to:
- Create an Azure Database for PostgreSQL server
- Configure the server firewall
- Use psql utility to create a database
- Load sample data
- Query data
- Update data
- Restore data
Prerequisites
If you don't have an Azure subscription, create a free account before you begin.
Create an Azure Database for PostgreSQL
An Azure Database for PostgreSQL server is created with a defined set of compute and storage resources. The server is created within an Azure resource group.
Follow these steps to create an Azure Database for PostgreSQL server:
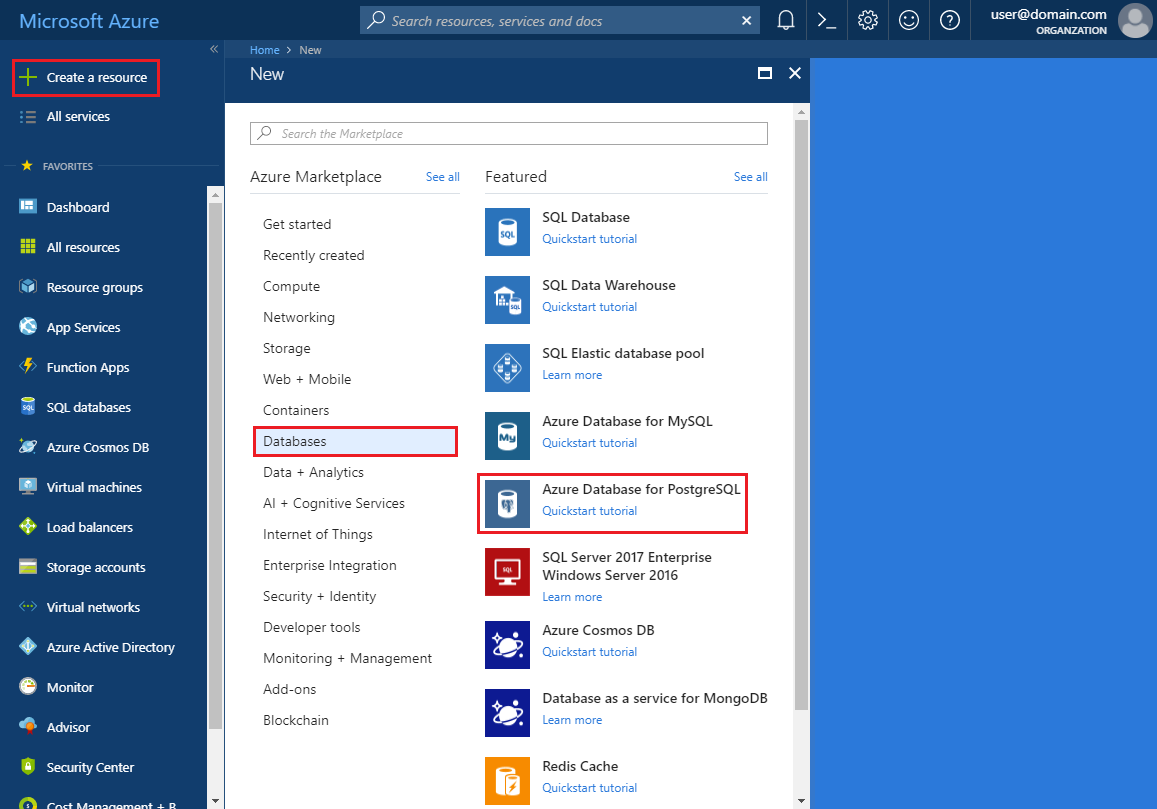
Select Create a resource in the upper left-hand corner of the Azure portal.
Select Databases from the New page, and select Azure Database for PostgreSQL from the Databases page.
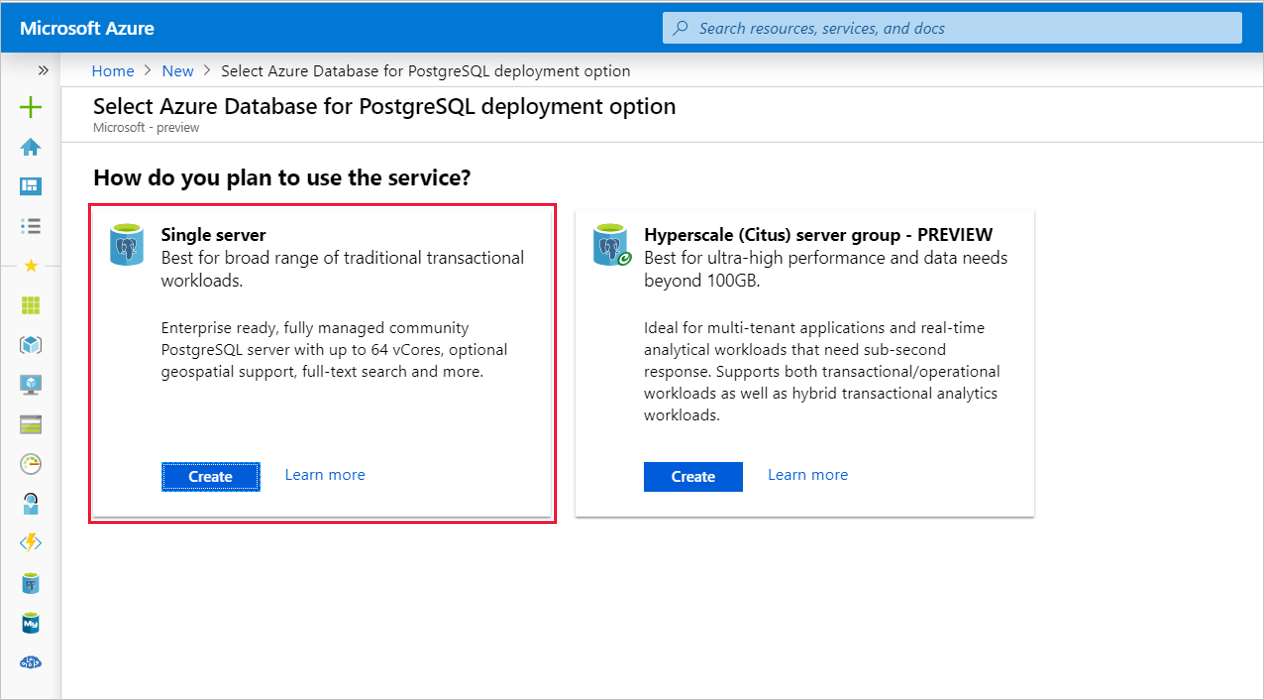
Select the Single server deployment option.
Fill out the Basics form with the following information:
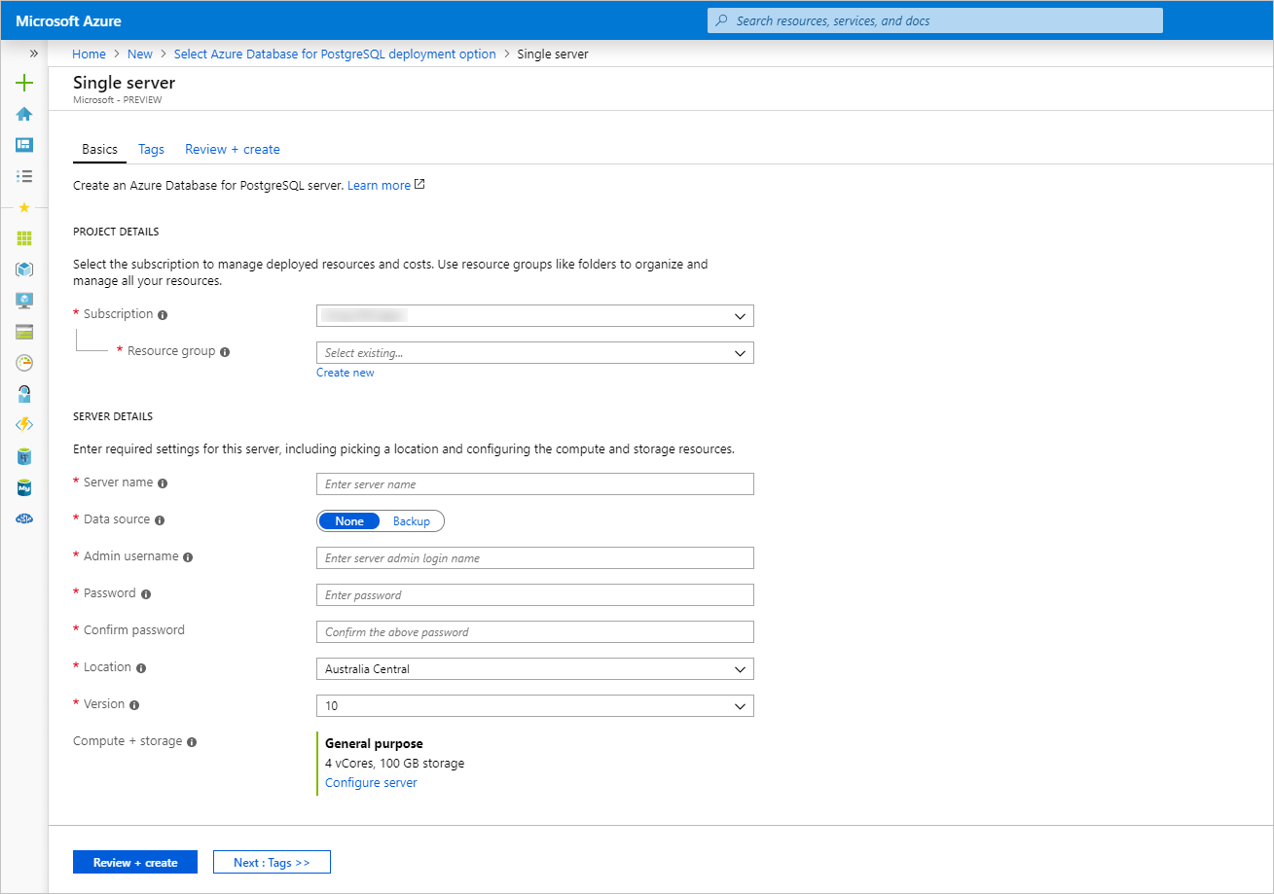
Setting Suggested Value Description Subscription Your subscription name The Azure subscription that you want to use for your server. If you have multiple subscriptions, choose the subscription in which you're billed for the resource. Resource group myresourcegroup A new resource group name or an existing one from your subscription. Server name mydemoserver A unique name that identifies your Azure Database for PostgreSQL server. The domain name postgres.database.azure.com is appended to the server name you provide. The server can contain only lowercase letters, numbers, and the hyphen (-) character. It must contain at least 3 through 63 characters. Data source None Select None to create a new server from scratch. (You would select Backup if you were creating a server from a geo-backup of an existing Azure Database for PostgreSQL server). Admin username myadmin Your own login account to use when you connect to the server. The admin login name can't be azure_superuser, azure_pg_admin, admin, administrator, root, guest, or public. It can't start with pg_. Password Your password A new password for the server admin account. It must contain between 8 and 128 characters. Your password must contain characters from three of the following categories: English uppercase letters, English lowercase letters, numbers (0 through 9), and non-alphanumeric characters (!, $, #, %, etc.). Location The region closest to your users The location that is closest to your users. Version The latest major version The latest PostgreSQL major version, unless you have specific requirements otherwise. Compute + storage General Purpose, Gen 5, 2 vCores, 5 GB, 7 days, Geographically Redundant The compute, storage, and backup configurations for your new server. Select Configure server. Next, select the General Purpose tab. Gen 5, 4 vCores, 100 GB, and 7 days are the default values for Compute Generation, vCore, Storage, and Backup Retention Period. You can leave those sliders as is or adjust them. To enable your server backups in geo-redundant storage select Geographically Redundant from the Backup Redundancy Options. To save this pricing tier selection, select OK. The next screenshot captures these selections. Note
Consider using the Basic pricing tier if light compute and I/O are adequate for your workload. Note that servers created in the Basic pricing tier cannot later be scaled to General Purpose or Memory Optimized. See the pricing page for more information.

Tip
With auto-growth enabled your server increases storage when you are approaching the allocated limit, without impacting your workload.
Select Review + create to review your selections. Select Create to provision the server. This operation may take a few minutes.
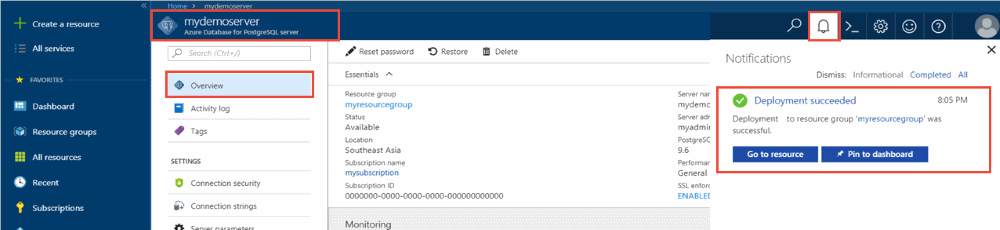
On the toolbar, select the Notifications icon (a bell) to monitor the deployment process. Once the deployment is done, you can select Pin to dashboard, which creates a tile for this server on your Azure portal dashboard as a shortcut to the server's Overview page. Selecting Go to resource opens the server's Overview page.
By default, a postgres database is created under your server. The postgres database is a default database that's meant for use by users, utilities, and third-party applications. (The other default database is azure_maintenance. Its function is to separate the managed service processes from user actions. You cannot access this database.)
Configure a server-level firewall rule
The Azure Database for PostgreSQL service uses a firewall at the server-level. By default, this firewall prevents all external applications and tools from connecting to the server and any databases on the server unless a firewall rule is created to open the firewall for a specific IP address range.
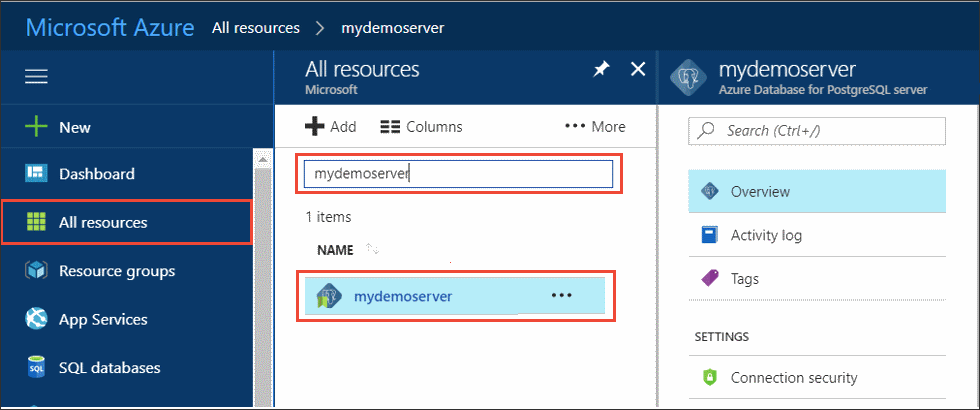
After the deployment completes, select All Resources from the left-hand menu and type in the name mydemoserver to search for your newly created server. Select the server name listed in the search result. The Overview page for your server opens and provides options for further configuration.
In the server page, select Connection security.
Select in the text box under Rule Name, and add a new firewall rule to specify the IP range for connectivity. Enter your IP range. Select Save.
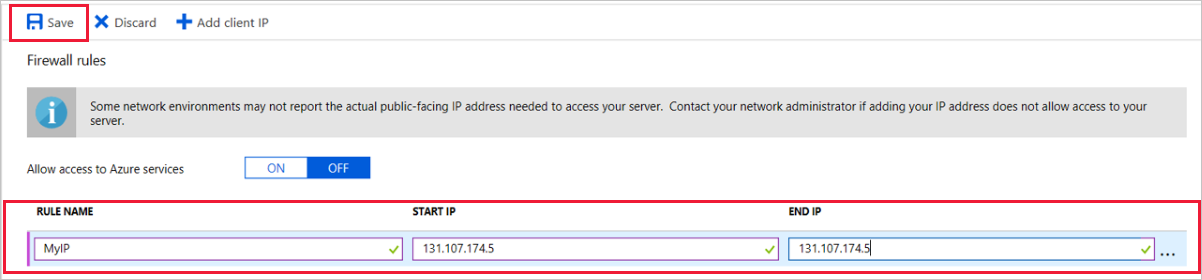
Select Save and then select the X to close the Connections security page.
Note
Azure PostgreSQL server communicates over port 5432. If you are trying to connect from within a corporate network, outbound traffic over port 5432 may not be allowed by your network's firewall. If so, you cannot connect to your Azure SQL Database server unless your IT department opens port 5432.
Get the connection information
When you created the Azure Database for PostgreSQL server, the default postgres database was also created. To connect to your database server, you need to provide host information and access credentials.
From the left-hand menu in the Azure portal, select All resources and search for the server you just created.
Select the server name mydemoserver.
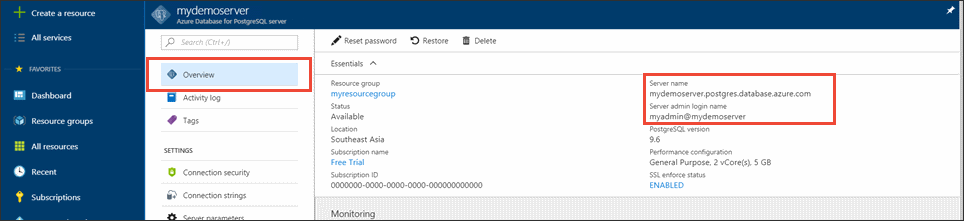
Select the server's Overview page. Make a note of the Server name and Server admin login name.
Connect to PostgreSQL database using psql
If your client computer has PostgreSQL installed, you can use a local instance of psql, or the Azure Cloud Console to connect to an Azure PostgreSQL server. Let's now use the psql command-line utility to connect to the Azure Database for PostgreSQL server.
Run the following psql command to connect to an Azure Database for PostgreSQL database:
psql --host=<servername> --port=<port> --username=<user@servername> --dbname=<dbname>For example, the following command connects to the default database called postgres on your PostgreSQL server mydemoserver.postgres.database.azure.com using access credentials. Enter the
<server_admin_password>you chose when prompted for password.psql --host=mydemoserver.postgres.database.azure.com --port=5432 --username=myadmin@mydemoserver --dbname=postgresTip
If you prefer to use a URL path to connect to Postgres, URL encode the @ sign in the username with
%40. For example the connection string for psql would be,psql postgresql://myadmin%40mydemoserver@mydemoserver.postgres.database.azure.com:5432/postgresOnce you are connected to the server, create a blank database at the prompt:
CREATE DATABASE mypgsqldb;At the prompt, execute the following command to switch connection to the newly created database mypgsqldb:
\c mypgsqldb
Create tables in the database
Now that you know how to connect to the Azure Database for PostgreSQL, you can complete some basic tasks:
First, create a table and load it with some data. Let's create a table that tracks inventory information using this SQL code:
CREATE TABLE inventory (
	id serial PRIMARY KEY,
	name VARCHAR(50),
	quantity INTEGER
);
You can see the newly created table in the list of tables now by typing:
\dt
Load data into the tables
Now that you have a table, insert some data into it. At the open command prompt window, run the following query to insert some rows of data.
INSERT INTO inventory (id, name, quantity) VALUES (1, 'banana', 150);
INSERT INTO inventory (id, name, quantity) VALUES (2, 'orange', 154);
You have now two rows of sample data into the inventory table you created earlier.
Query and update the data in the tables
Execute the following query to retrieve information from the inventory database table.
SELECT * FROM inventory;
You can also update the data in the table.
UPDATE inventory SET quantity = 200 WHERE name = 'banana';
You can see the updated values when you retrieve the data.
SELECT * FROM inventory;
Restore data to a previous point in time
Imagine you have accidentally deleted this table. This situation is something you cannot easily recover from. Azure Database for PostgreSQL allows you to go back to any point-in-time for which your server has backups (determined by the backup retention period you configured) and restore this point-in-time to a new server. You can use this new server to recover your deleted data. The following steps restore the mydemoserver server to a point before the inventory table was added.
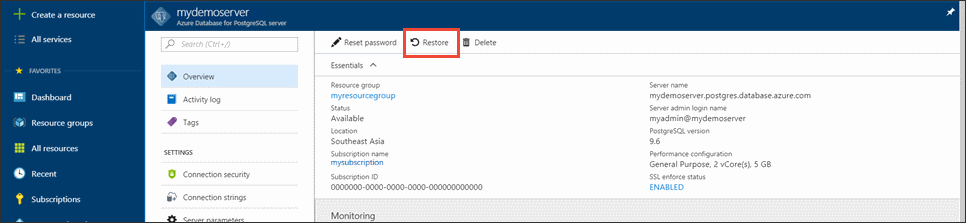
On the Azure Database for PostgreSQL Overview page for your server, select Restore on the toolbar. The Restore page opens.
Fill out the Restore form with the required information:
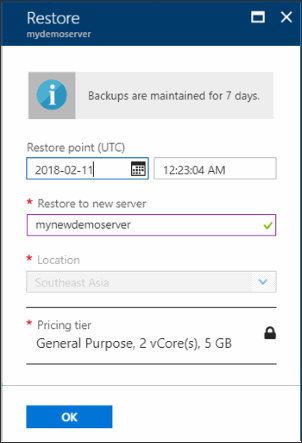
- Restore point: Select a point-in-time that occurs before the server was changed
- Target server: Provide a new server name you want to restore to
- Location: You cannot select the region, by default it is same as the source server
- Pricing tier: You cannot change this value when restoring a server. It is same as the source server.
Select OK to restore the server to a point-in-time before the table was deleted. Restoring a server to a different point in time creates a duplicate new server as the original server as of the point in time you specify, provided that it is within the retention period for your pricing tier.
Clean up resources
In the preceding steps, you created Azure resources in a server group. If you don't expect to need these resources in the future, delete the server group. Press the Delete button in the Overview page for your server group. When prompted on a pop-up page, confirm the name of the server group and select the final Delete button.
Next steps
In this tutorial, you learned how to use the Azure portal and other utilities to:
- Create an Azure Database for PostgreSQL server
- Configure the server firewall
- Use the psql utility to create a database
- Load sample data
- Query data
- Update data
- Restore data
Feedback
Kommer snart: I hele 2024 udfaser vi GitHub-problemer som feedbackmekanisme for indhold og erstatter det med et nyt feedbacksystem. Se https://aka.ms/ContentUserFeedback for at få flere oplysninger.
Indsend og få vist feedback om