Quickstart: Convert a model for rendering
In Quickstart: Render a model with Unity, you learned how to use the Unity sample project to render a built-in model.
This guide shows how to convert your own models, entailing these steps:
- Set up an Azure blob storage account for input and output
- Upload and convert a 3D model for use with Azure Remote Rendering
- Include the converted 3D model in an application for rendering
Prerequisites
- Complete Quickstart: Render a model with Unity
- For the conversion using the PowerShell script: Install Azure PowerShell (documentation)
- Open a PowerShell with admin rights
- Run:
Install-Module -Name Az -AllowClobber
Overview
The renderer on the server can't work directly with source model formats such as FBX or GLTF. Instead, it requires the model to be in a proprietary binary format. The conversion service consumes models from Azure blob storage and writes converted models back to a provided Azure blob storage container.
You need:
- An Azure subscription
- A 'StorageV2' account in your subscription
- A blob storage container for your input model
- A blob storage container for your output data
- A model to convert, see sample models
- See the list of supported source formats
- To use the sample conversion script, make sure you prepare an input folder that contains the model and all external dependencies (like external textures or geometry)
Azure setup
If you don't have an account yet, go to Get started with Azure, select the free account option, and follow the instructions.
Once you have an Azure account, sign in to the Azure portal.
Storage account creation
To create blob storage, you first need a storage account.
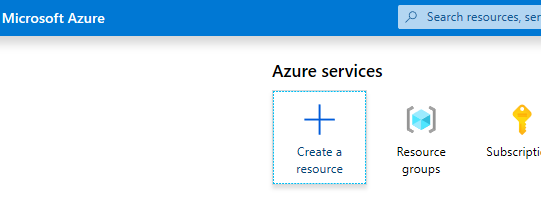
- To create one, select "Create a resource":
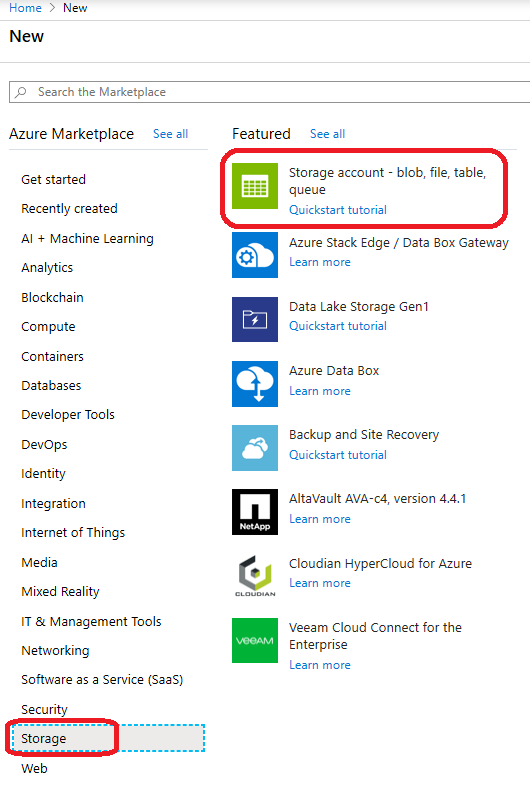
- From the new screen, choose Storage on the left side and then Storage account - blob, file, table, queue from the next column:
- Clicking this button brings up the following screen with storage properties to fill out:
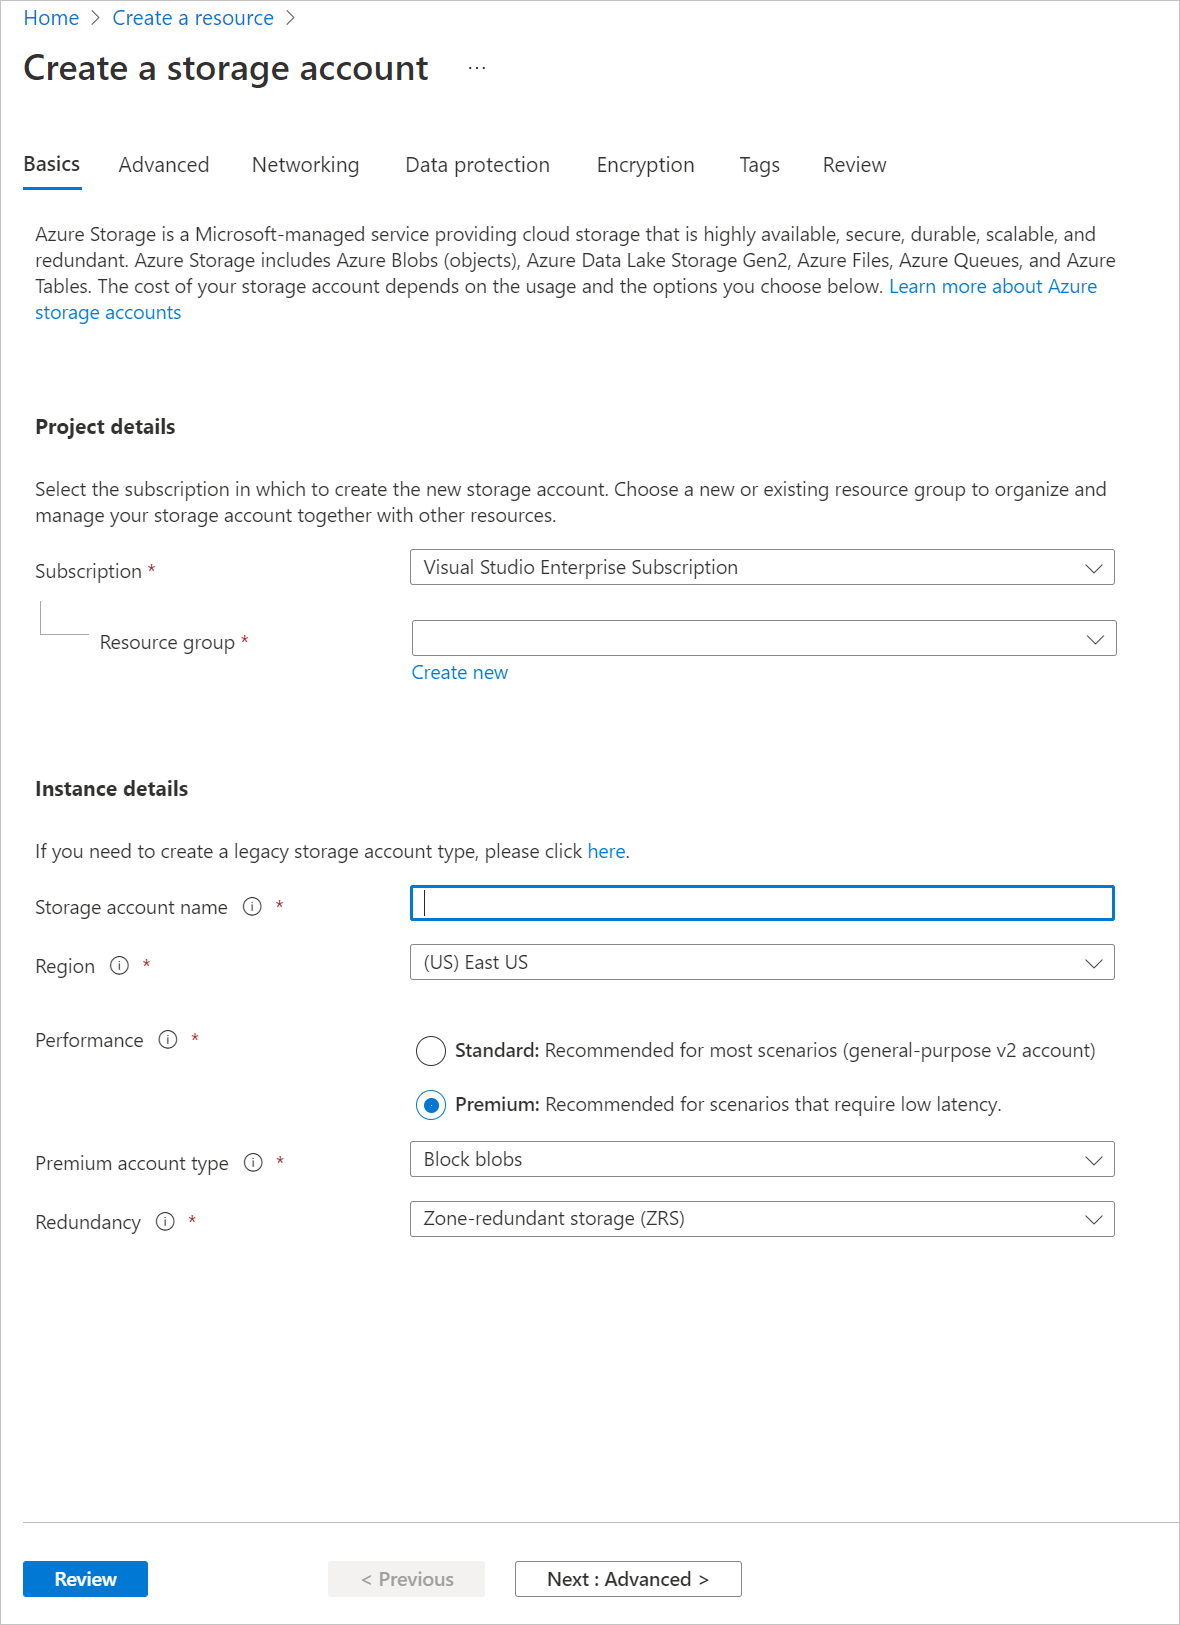
- Fill out the form in the following manner:
- Create a new Resource Group from the link below the drop-down box and name this ARR_Tutorial
- For the Storage account name, enter a unique name here. This name must be globally unique. An error message is shown if the name is already taken. In the scope of this quickstart, we name it arrtutorialstorage. Accordingly, you need to replace it with your name for any occurrence in this quickstart.
- Select a Region close to you. Ideally use the same region as used for setting up the rendering in the other quickstart.
- Performance set to 'Premium'. 'Standard' works as well, but has lower loading time characteristics when loading a model.
- Premium account type set to 'Block blobs'
- Redundancy set to 'Zone-redundant storage (ZRS)'
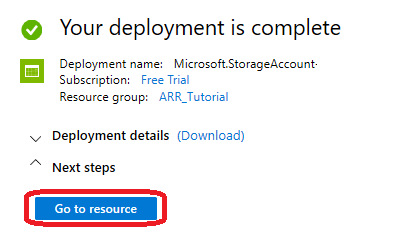
None of the properties in other tabs have to be changed, so you can proceed with "Review + create" and then follow the steps to complete the setup.
The website now informs you about the progress of your deployment and reports "Your deployment is complete" eventually. Select "Go to resource" for the next steps:
Blob storage creation
Next we need two blob containers, one for input and one for output.
- From the "Go to resource" button, you get to a page with a panel on the left that contains a list menu. In that list under the "Blob service" category, select "Containers":
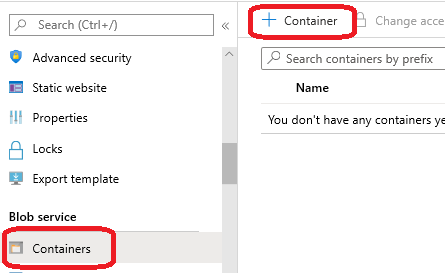
- Press the "+ Container" button to create the input blob storage container. Use the following settings when creating it:
- Name = arrinput
- Public access level = Private
- After the container has been created, select + Container again and repeat with these settings for the output container:
- Name = arroutput
- Public access level = Private
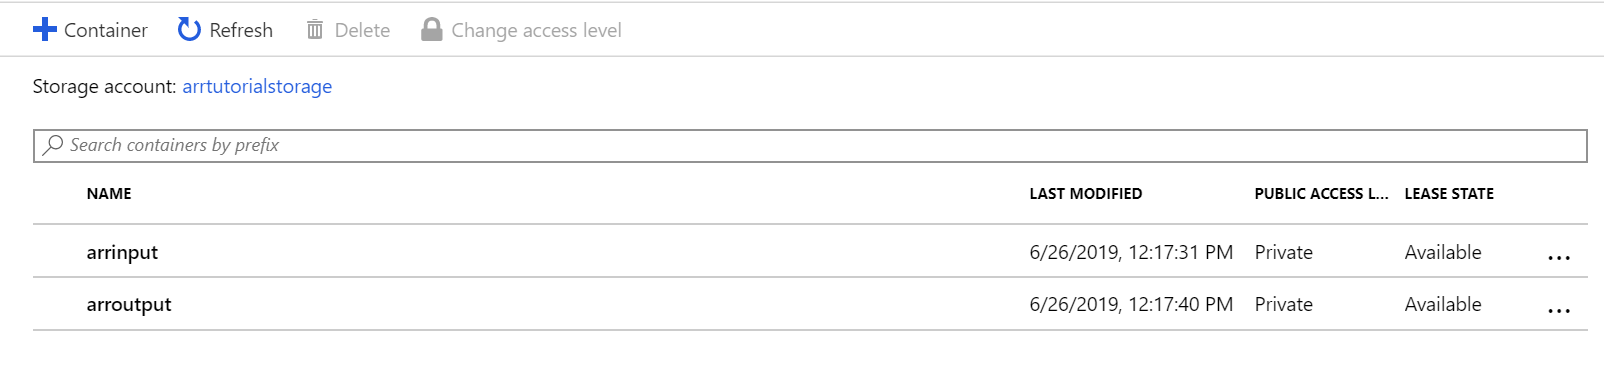
You should now have two blob storage containers:
Run the conversion
There are three distinct ways to trigger a model conversion:
1. Conversion via the ARRT tool
There's a UI-based tool called ARRT to start conversions and interact with the rendered result.

2. Conversion via a PowerShell script
To make it easier to call the asset conversion service, we provide a utility script. It's located in the Scripts folder and is called Conversion.ps1.
In particular, this script
- uploads all files in a given directory from local disk to the input storage container,
- calls the asset conversion REST API
- this api retrieves the data from the input storage container, starts a conversion and returns a conversion ID,
- polls the conversion status API with the retrieved conversion ID until the conversion process terminates with success or failure,
- retrieves a link to the converted asset in the output storage.
The script reads its configuration from the file Scripts\arrconfig.json. Open that JSON file in a text editor.
{
    "accountSettings": {
        "arrAccountId": "8*******-****-****-****-*********d7e",
        "arrAccountKey": "R***************************************l04=",
        "arrAccountDomain": "<select from available regions: australiaeast, eastus, eastus2, japaneast, northeurope, southcentralus, southeastasia, uksouth, westeurope, westus2 or specify the full url>"
    },
    "renderingSessionSettings": {
        "remoteRenderingDomain": "<select from available regions: australiaeast, eastus, eastus2, japaneast, northeurope, southcentralus, southeastasia, uksouth, westeurope, westus2 or specify the full url>"
    },
    "assetConversionSettings": {
        "localAssetDirectoryPath": "D:\\tmp\\robot",
        "resourceGroup": "ARR_Tutorial",
        "storageAccountName": "arrexamplestorage",
        "blobInputContainerName": "arrinput",
        "inputFolderPath": "robotConversion",
        "inputAssetPath": "robot.fbx",
        "blobOutputContainerName": "arroutput",
        "outputFolderPath":"converted/robot",
        "outputAssetFileName": "robot.arrAsset"
    }
}
The configuration within the accountSettings group (account ID, key and domain) should be filled out analogous to the credentials in the Render a model with Unity quickstart.
A full configuration of the renderingSessionSettings group (domain, vmSize and maxLeaseTime) can be seen in PowerShell Example scripts. The vmSize and maxLeaseTime aren't important for conversion and can be omitted, as they don't affect the conversion.
Inside the assetConversionSettings group, make sure to change resourceGroup, blobInputContainerName, and blobOutputContainerName. The value for arrtutorialstorage needs to be replaced with the unique name you picked during storage account creation.
Change localAssetDirectoryPath to point to the directory on your disk, which contains the model you intend to convert. Be careful to properly escape backslashes ("\") in the path using double backslashes ("\\").
The service uploads all data from the path given in localAssetDirectoryPath to the blobInputContainerName blob container under a subpath given by inputFolderPath. With the example configuration, the service uploads the content of the "D:\tmp\robot" directory to the blob container "arrinput" of the storage account "arrtutorialstorage" under the path "robotConversion". Already existing files are overwritten.
Change inputAssetPath to the path of the model to be converted - the path is relative to localAssetDirectoryPath. Use "/" instead of "\" as the path separator. So for a "robot.fbx" file, which is located directly in "D:\tmp\robot", use "robot.fbx".
Once the model was converted, it's written back to the storage container given by blobOutputContainerName. A subpath can be specified by providing the optional outputFolderPath. In the example, the service copies the resulting "robot.arrAsset" to the output blob container under "converted/robot".
The config setting outputAssetFileName determines the name of the converted asset - the parameter is optional and if not specified the service uses the input file name to generate an output name.
Open a PowerShell, make sure you installed the Azure PowerShell as mentioned in the prerequisites. Then log into your subscription with the following command and follow the on-screen directions:
Connect-AzAccount
Note
In case your organization has more than one subscription you might need to specify the SubscriptionId and Tenant arguments. Find details in the Connect-AzAccount documentation.
Change to the azure-remote-rendering\Scripts directory and run the conversion script:
.\Conversion.ps1 -UseContainerSas
You should see something like this:

3. Conversion via API calls
Both the C# and the C++ API provide an entry point to interact with the service:
- C# RemoteRenderingClient.StartAssetConversionAsync()
- C++ RemoteRenderingClient::StartAssetConversionAsync()
Insert new model into Quickstart Sample App
The conversion script generates a Shared Access Signature (SAS) URI for the converted model. You can now copy this URI as the Model Name into the quickstart sample app (see Quickstart: Render a model with Unity).

The sample should now load and render your custom model!
Optional: Re-creating a SAS URI
The SAS URI created by the conversion script expires after 24 hours. However, after it expired you don't need to convert your model again. Instead, you can create a new SAS in the portal as described in the next steps:
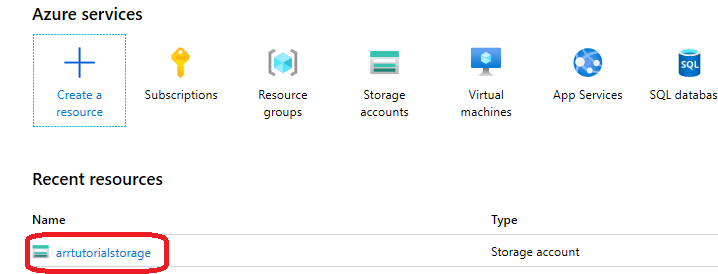
- Sign in to the Azure portal.
- Select your Storage account resource:
In the following screen, Select Storage explorer in the left panel and find your output model (.arrAsset file) in the arroutput blob storage container. Right-click on the file and select Get Shared Access Signature from the context menu:
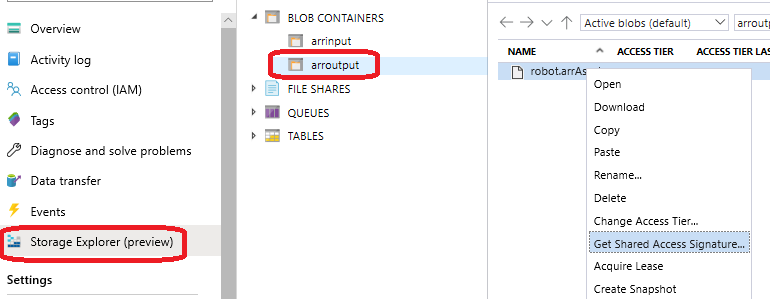
A new screen opens where you can select an expiry date. Press Create, and copy the URI that is shown in the next dialog. This new URI replaces the temporary URI that the script created.
Next steps
Now that you know the basics, have a look at our tutorials to gain more in-depth knowledge.
If you want to learn the details of model conversion, check out the model conversion REST API.
Feedback
Kommer snart: I hele 2024 udfaser vi GitHub-problemer som feedbackmekanisme for indhold og erstatter det med et nyt feedbacksystem. Du kan få flere oplysninger under: https://aka.ms/ContentUserFeedback.
Indsend og få vist feedback om