Configure a packet capture for Virtual WAN site-to-site VPN: Azure portal
This article helps you create a packet capture for an Azure Virtual WAN site-to-site VPN gateway using the Azure portal. Packet capture helps you narrow down the scope of a problem to certain parts of the network. It can help you determine whether the problem is on the on-premises side or the Azure side. By narrowing down the problem, you can more efficiently debug and take remedial action.
While some commonly available packet capture tools do exist, getting relevant packet captures with these tools can be cumbersome, especially in high-volume traffic scenarios. The filtering capabilities provided by the Virtual WAN packet capture are a major differentiator. The Virtual WAN packet capture can be used along with commonly available packet capture tools.
Note
Features and settings are in the process of rolling out across regions to the Azure portal.
Prerequisites
Verify that you have the following configuration already set up in your environment:
- A Virtual WAN and a virtual hub.
- A site-to-site VPN gateway deployed in the virtual hub.
- You can also have connections connecting VPN sites to your site-to-site VPN gateway.
Create a storage account and container
A storage account is used to store the results of packet captures.
- Create a storage account. For steps, see Create a storage account.
- Create a container object within your storage account. For steps, see Create a container.
Generate the SAS URL
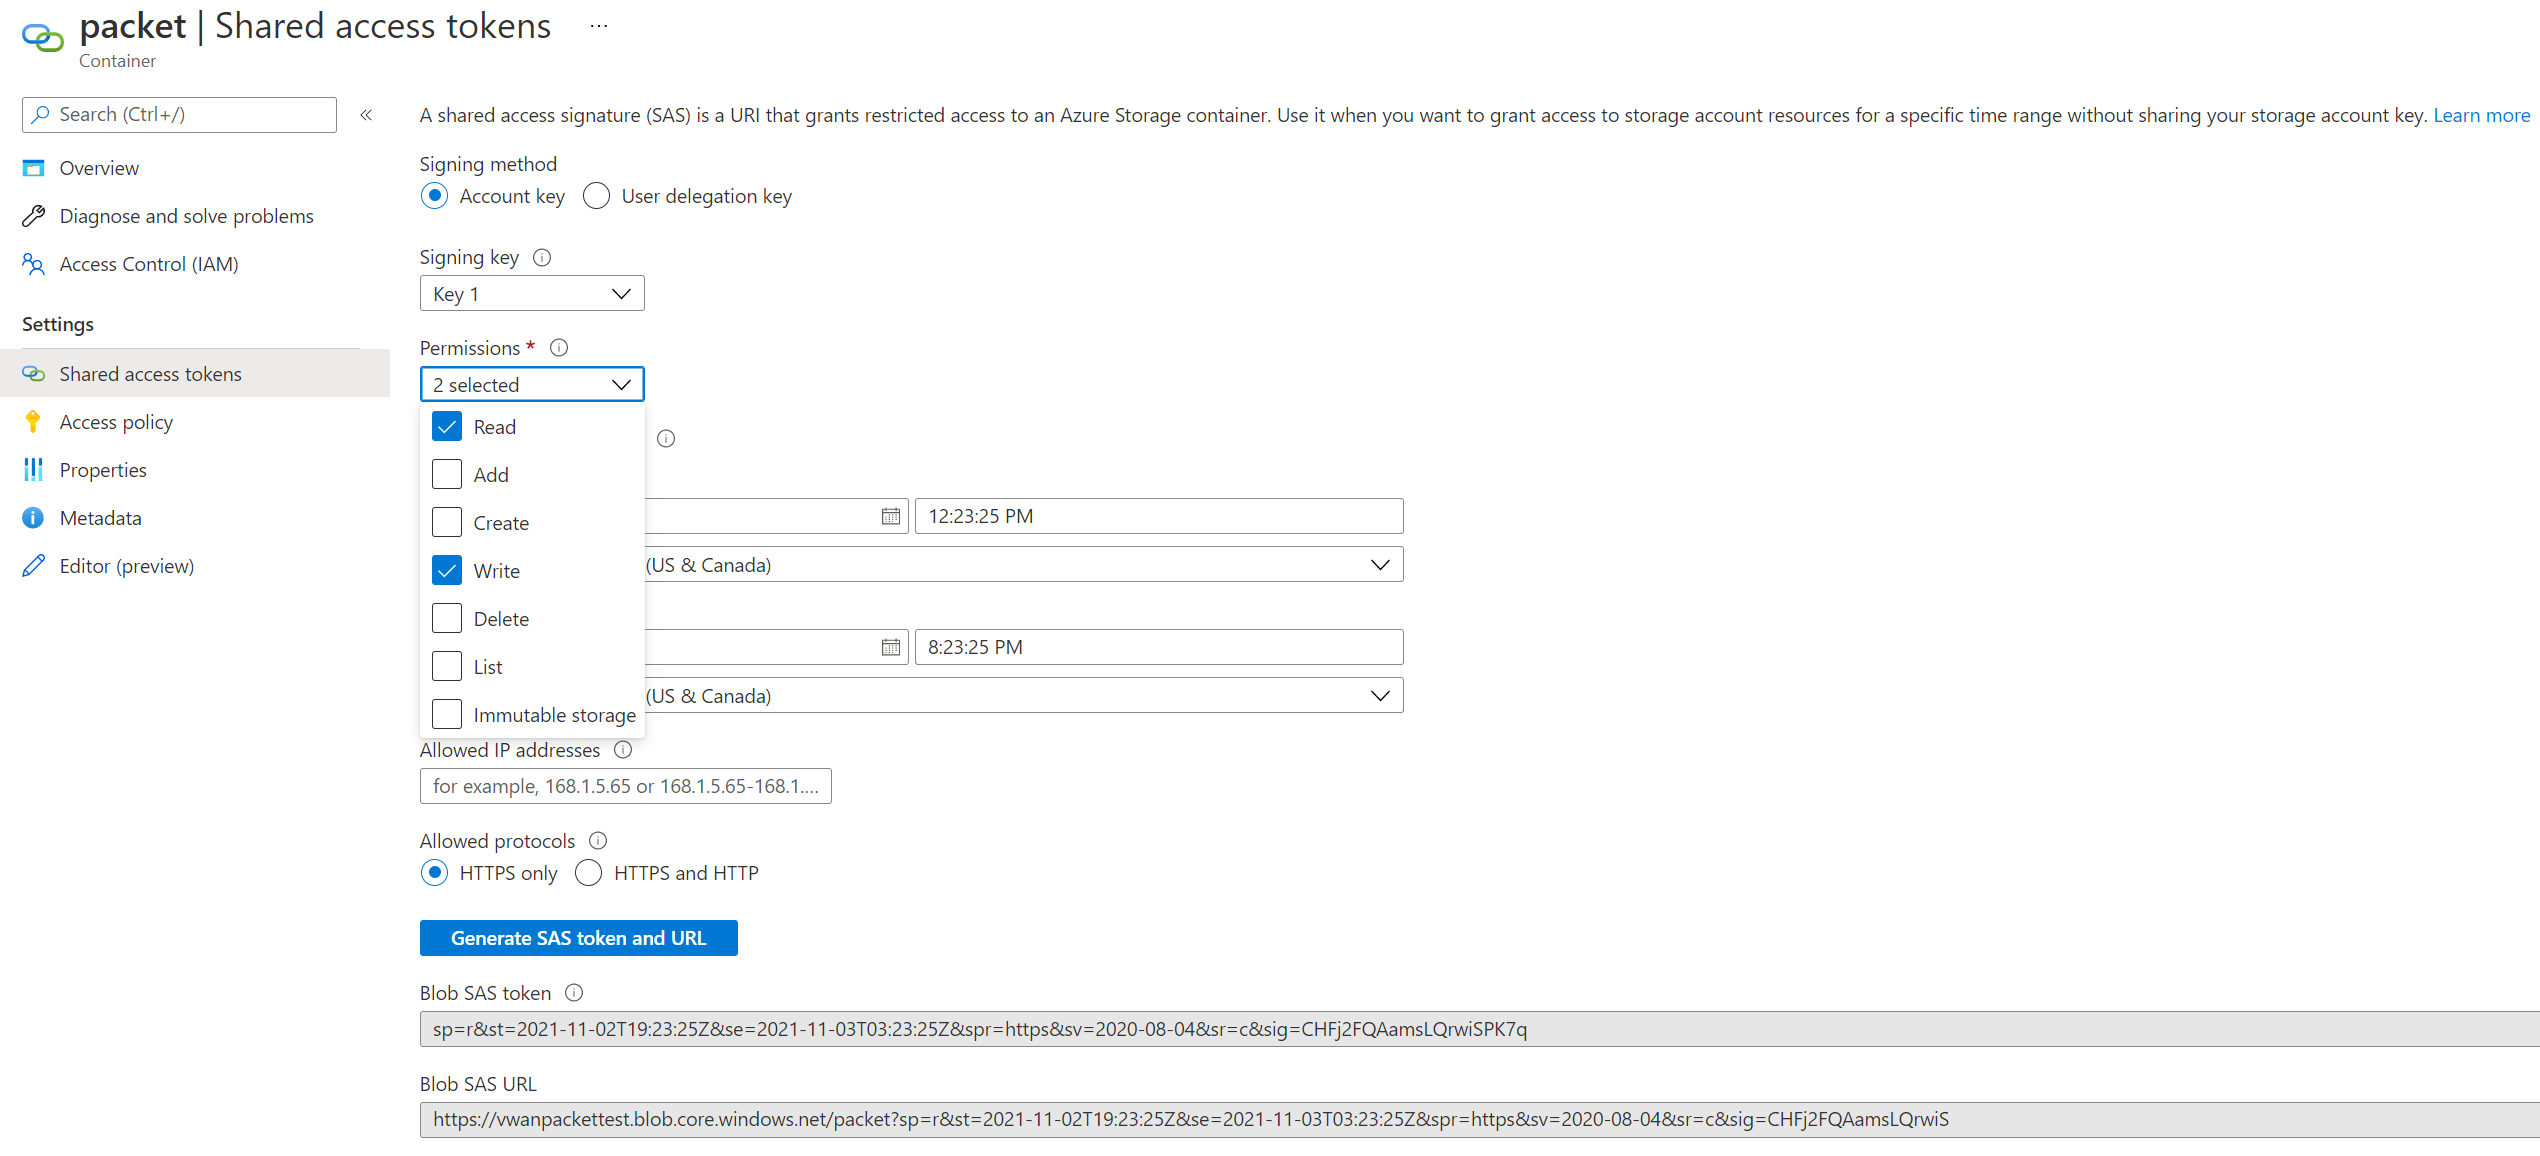
When you stop a packet capture, you must provide the SAS URL of the storage container that you created. The results of your packet capture will be stored via this URL. To generate the SAS URL for your storage container:
Navigate to your newly created container.
Under Settings, select Shared access tokens.
On the Permissions tab, verify that both Read and Write are enabled.
At the bottom of the page, click the Generate SAS token and URL button.
Click to copy the Blob SAS URL link that is generated to your clipboard.

Start a packet capture
In this section, you start the packet capture on the virtual hub.
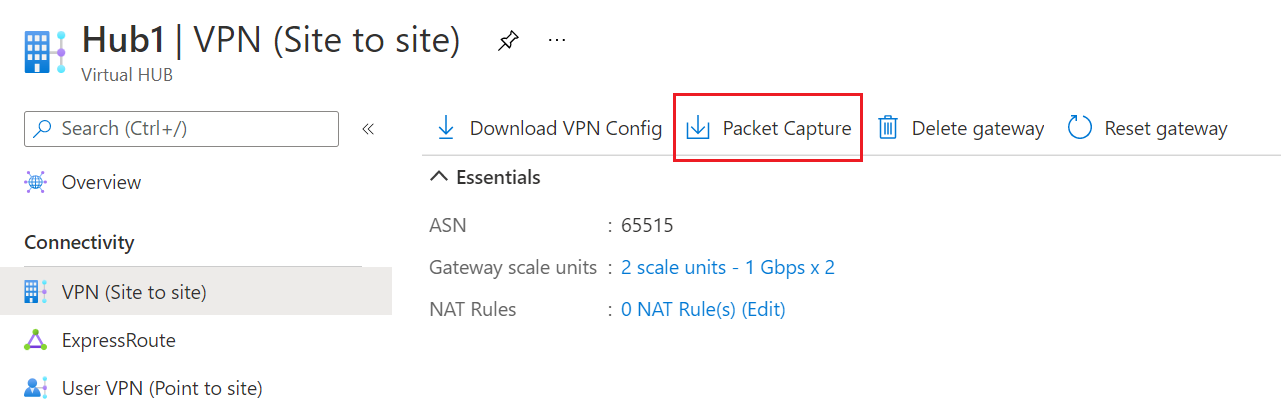
Navigate to the virtual hub.
Click VPN (Site to site).
On the VPN (Site to site) page, click the Packet Capture button at the top of the page.
On the Packet Capture page, click Start.
On the Start Packet Capture page, modify settings, if needed. See the Filters section for options.
Click the Start button to start the packet capture. We recommend letting the packet capture run for at least 600 seconds. Due to sync issues among multiple components on the path, shorter packet captures might not provide complete data.

Optional: Specify filters
To simplify your packet captures, you can specify filters on your packet capture to focus on specific behaviors.
| Parameter | Description | Default values | Available values |
|---|---|---|---|
| TracingFlags | Integer that determines what types of packets are captured | 11 (ESP, IKE, OVPN) | ESP = 1 IKE = 2 OPVN = 8 |
| TCPFlags | Integer that determines which types of TCP Packets are captured | 0 (none) | FIN = 1, SYN = 2, RST = 4, PSH = 8, ACK = 16,URG = 32, ECE = 64, CWR = 128 |
| MaxPacketBufferSize | Maximum size of a captured packet in bytes. Packets are truncated if larger than the provided value. | 120 | Any |
| MaxFileSize | Maximum capture file size in Mb. Captures are stored in a circular buffer so overflow is handled in a FIFO manner (older packets removed first) | 100 | Any |
| SourceSubnets | Packets from the specified CIDR ranges are captured. Specified as an array. | [ ] (all IPv4 addresses) | An IPV4 Subnet |
| DestinationSubnets | Packets destined for the specified CIDR ranges are captured. Specified as an array. | [ ] (all IPv4 addresses) | An IPV4 Subnet |
| SourcePort | Packets with source in the specified ranges are captured. Specified as an array. | [ ] (all ports) | A port |
| DestinationPort | Packets with destination in the specified ranges are captured. Specified as an array. | [ ] (all ports) | A port |
| CaptureSingleDirectionTrafficOnly | If true, only one direction of a bidirectional flow will show up in the packet capture. This will capture all possible combo of IP and ports. | True | True, False |
| Protocol | An array of integers that correspond to IANA protocols. | [ ] (all protocols) | Any protocols listed on this iana.org page. |
Note
For TracingFlags and TCPFlags, you can specify multiple protocols by adding up the numerical values for the protocols you want to capture (same as a logical OR). For example, if you want to capture only ESP and OPVN packets, specify a TracingFlag value of 8+1 = 9.
Stop a packet capture
This section helps you stop or abort a packet capture.
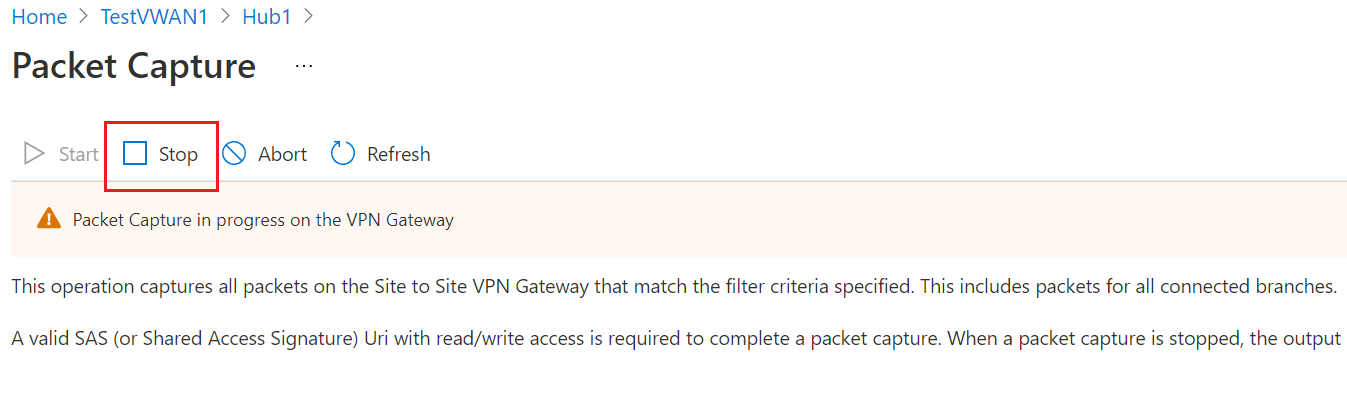
On the virtual hub page, click the Packet Capture button to open the Packet Capture page, then click Stop. This opens the Stop Packet Capture page. At this point, the packet capture isn't yet stopped.
On the Stop Packet Capture page, paste the SaS URL for the storage container that you created earlier into the Output Sas Url field. This is the location where the packet capture files will be stored.
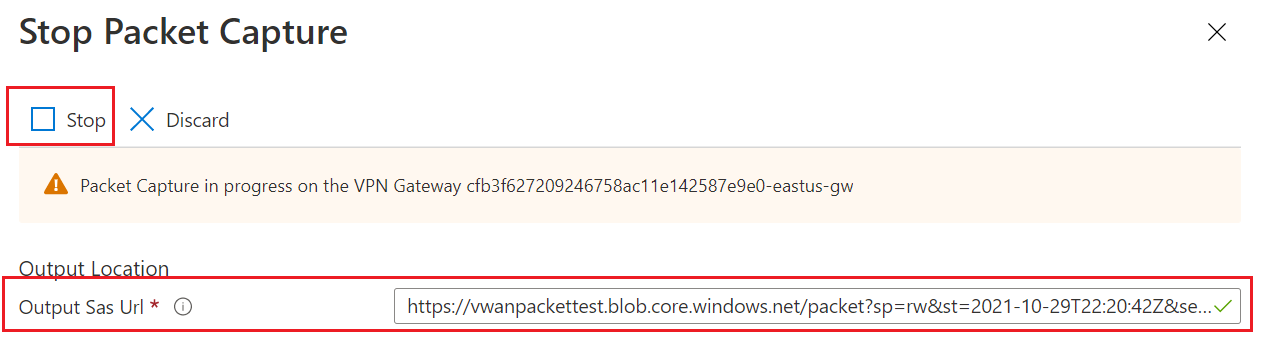
Next, click Stop. The packet capture will stop and the PCAP file is created and saved to the storage account. This can take a few minutes to complete.


To abort a packet capture
If for any reason you need to abort the packet capture, navigate to the virtual hub, click the Packet Capture button to open the Packet Capture page, then click Abort. The PCAP files will not be generated or stored when a packet capture is aborted.
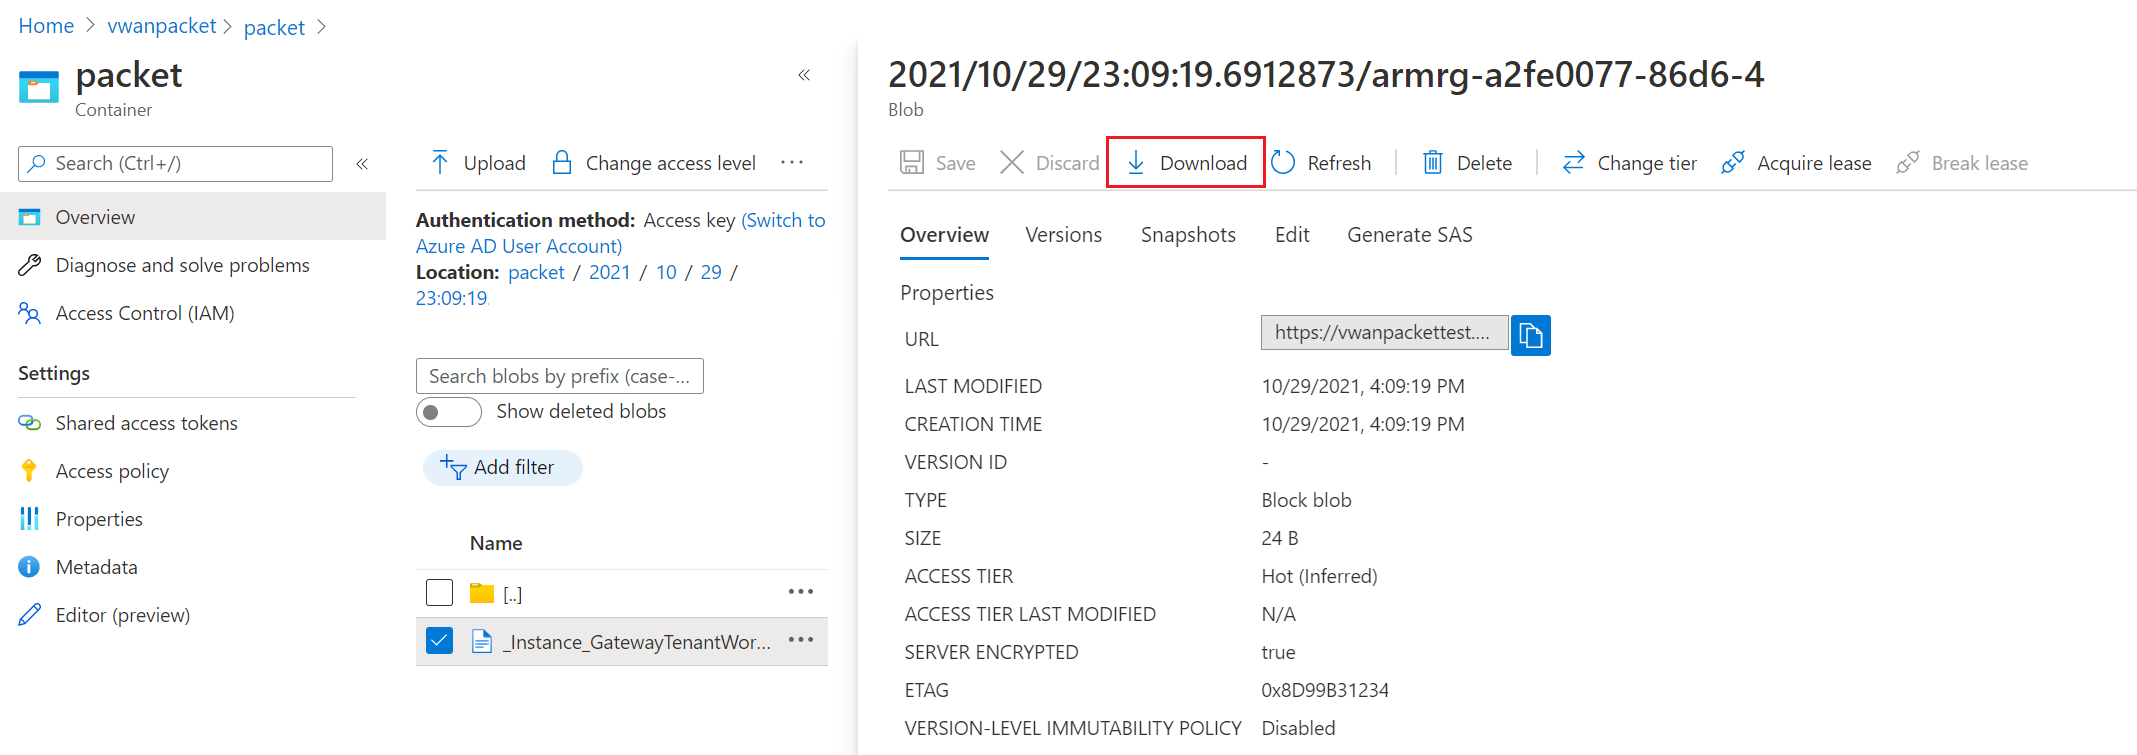
View a packet capture
This section helps you download the packet capture PCAP file to view.
In the Azure portal, navigate to the storage account that you created.
Click Containers to view the containers for the storage account.
Click the container that you created.
Navigate through the folder structure to locate your PCAP file. The folder name and structure is based on the date and UTC time. When you locate the PCAP file, click Download.
Packet capture data files are generated in PCAP format. You can use Wireshark or another commonly available application to open PCAP files.

Key considerations
- Running packet capture can affect performance. Remember to stop the packet capture when you don't need it.
- Suggested minimum packet capture duration is 600 seconds. Because of sync issues among multiple components on the path, shorter packet captures might not provide complete data.
- Packet capture data files are generated in PCAP format. Use Wireshark or other commonly available applications to open PCAP files.
- If the SASurl parameter isn't configured correctly, the trace might fail with storage errors.
Next steps
To learn more about Azure Virtual WAN, see the FAQ.
Feedback
Kommer snart: I hele 2024 udfaser vi GitHub-problemer som feedbackmekanisme for indhold og erstatter det med et nyt feedbacksystem. Du kan få flere oplysninger under: https://aka.ms/ContentUserFeedback.
Indsend og få vist feedback om