How to create and test a local skill in Composer
APPLIES TO: Composer v1.x and v2.x
This article explains how to create a root bot and local skill in the same Composer session, and test their interaction locally.
Composer creates the root and skill bot files in separate projects. When you create the local skill, Composer adds to the root bot project a reference to the skill bot project.
Note
Each dialog can have its own recognizer. A recognizer is a component of your bot that examines incoming messages to determine the users intention by evaluating all predefined intents. Each recognizer type uses a different technique to determine which intent, if any, best matches the user's input.
The bots in this article use the Orchestrator and Regular expression recognizers.
Prerequisites
- Knowledge of bot development in Composer. For information, see the Introduction to Bot Framework Composer and The tutorials.
- Knowledge of skill and skill consumer bots. For information, see About skills.
Create your root bot
Create your initial, root bot. It will consume the skill you create later.
In the Home view, create a new empty bot:
- Select + Create new, select the C# tab, select the Empty Bot template, and select Next.
- Give your bot a name—the bot used in this article is named
RootBot. - Set the Runtime type to Azure Web App.
- Select a location for the bot project.
- Then select Create to have Composer create the bot.
- This process can take a few moments.
The Get started panel contains links to more information about creating bots. You can close it for now.
Orchestrator, an intent recognizer, can recognize intents without LUIS or the need for extra Azure resources. In later steps, you'll change the recognizer type and add an Intent recognized trigger to allow the user to start the skill.
Create the skill
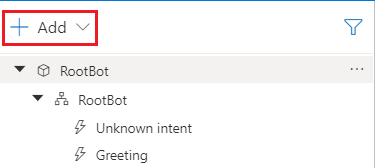
- At the top of the bot explorer, select + Add, then Add a bot.
- On the Add a bot page, select Create a new bot and select Next.
- On the Create a skill in your bot page, select the C# tab, select the Empty Bot template, and select Next.
- On the Create a bot project page:
- Give your bot a name—the skill bot used in this article is named
EchoSkill. - Select Azure Web App for the bot Runtime type.
- Select the location for the bot project, and select Create to have Composer create the bot. This process can take a few moments.
- Give your bot a name—the skill bot used in this article is named
- On the Enable Orchestrator page, agree to use Orchestrator for multi-bot projects and select Continue. Composer will update the RootBot dialog to use the Orchestrator recognizer.
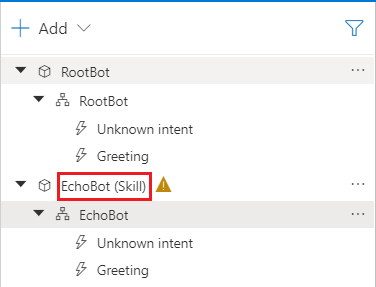
At this point, Composer has created the skill and added it to your project.
Tip
Composer includes a warning, that your skill doesn't yet have a manifest. The manifest isn't needed to complete this article. Composer will create a manifest for you when you publish your skill to Azure.
Add logic to the skill
Update the skill's greeting trigger
The greeting is triggered when the skill bot is accessed directly by the user—when used as a root bot. This greeting won't be triggered when the skill bot is invoked as a skill from another bot.
Select the EchoSkill dialog's Greeting trigger.
Select the Send a response action and change the greeting to:
Welcome to the **EchoBot**. I will repeat what you enter.
Add an event received trigger
You can define an event the root bot should initially send when it starts the skill.
Every event activity should have a name property assigned.
Add a "startSkill" event trigger to the skill to work as a greeting when the skill is invoked from a skill consumer.
Add a new trigger to the EchoSkill dialog. On the Create a trigger page:
- Select Activities for the type of trigger.
- Select Event received (Event activity) for the activity type.
- Select Submit.
Select the new Event received trigger.
In the properties pane, set the trigger's Condition property to:
=turn.activity.name == "startSkill"
On the authoring canvas, add a Send a response action to the trigger.
Set the response to:
I will repeat what you enter, until you enter **stop**.This response is the first message the user will receive when another bot uses a "startSkill" event to start the skill.
Update the skill's Unknown intent trigger
Update the unknown intent trigger to echo the user's utterance.
Select the EchoSkill dialog's Unknown intent trigger.
On the authoring canvas, select the Send a response action.
In the properties pane, change the Responses under Bot Responses to:
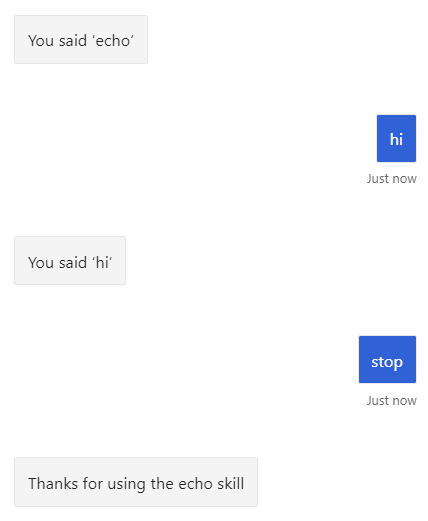
You said, ${turn.activity.text}
Allow the skill to loop
- Select the EchoSkill dialog.
- In the properties pane, change Auto end dialog to
falseto let the skill loop. By default, Auto end dialog istrue.
Add a trigger to let the user exit the skill
Since the echo skill will now loop, you need to give the user a way to exit from the skill and return to the root bot.
Select the EchoSkill dialog.
Change the Recognizer/Dispatch type to Regular expression, which can recognize intents without LUIS or the need for extra Azure resources.
To the EchoSkill dialog, add an Intent recognized trigger.
Name it
stopand set its regEx pattern tostop|cancel|quit. This trigger will fire for any message that contains the strings "stop", "cancel", or "quit" anywhere in the utterance.To the new stop trigger, add a Send a response action to respond to the user's input. Set the bot response to:
Thanks for using the echo skillThen add a second action. Select the Dialog management > End this dialog action.
- If the echo skill is running as a skill, this trigger ends the dialog and returns control to the root bot.
- If the echo skill is running as a root bot, this trigger ends the dialog. However, the bot will start a new instance of the dialog and continue to accept input from the user.
Now, your local skill is ready! The next step is to call the skill from the root bot.
Consume the skill in the root bot
Update the root bot to start the skill when the user enters "echo".
Add a trigger to let the user start the skill
Select the RootBot dialog and add an Intent recognized trigger.
Name it
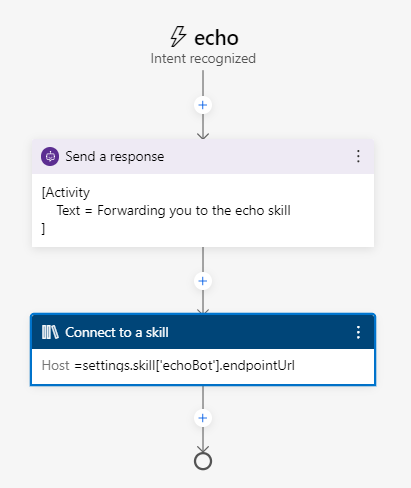
echoand use the following trigger phrases:- echoTo the new echo trigger, add a Send a response action to respond to the user's input. Set the bot response to:
Forwarding you to the echo skillAdd an Access external resources > Connect to a skill action.
In the properties pane for the Connect to a skill action, set the following properties:
In the Skill Dialog Name field, select the skill you want to connect to, the EchoSkill.
By default, the Skill Endpoint field is set to Local Composer. Composer will connect to the skill running locally on your machine. Composer doesn't need a manifest to call a local skill.
Verify that Allow interruptions is
false. This prevents the root bot from starting new conversations with the skill if the use enters "echo" while the skill is active.Verify that Activity processed is
true. When the root bot calls the skill, it will consume the original activity and send a different one to the skill bot.Switch the Activity to Show code and use this template:
[Activity
  type = event
  name = startSkill
]
See the Structured response template section in the Language generation article for more information.
Update the root's Unknown intent trigger
This will help the user tell the root bot responses apart from the echo skill's.
Update the Unknown intent trigger in the RootBot dialog.
Select the Send a response action and change the response to:
Enter **echo** to access the echo skill
You now can test the skill bot and its connection with the consumer bot.
Test the bots locally
Start the bots locally. This allows you to test access to the echo skill from the root bot and that the echo skill can end and return control to the root bot.
You don't need Azure resources for the local bot-to-bot connection.
Select Start all in the upper-right corner of the screen. This tells Composer to start all local bots in the project.
Once the bots have started, the Local bot runtime manager opens. Use Start and stop local bot runtimes (
 ) to show or hide the manager.
In the Local bot runtime manager, open the RootBot in Web Chat.
Interact with the root bot, then enter
echoto have the root bot start the skill.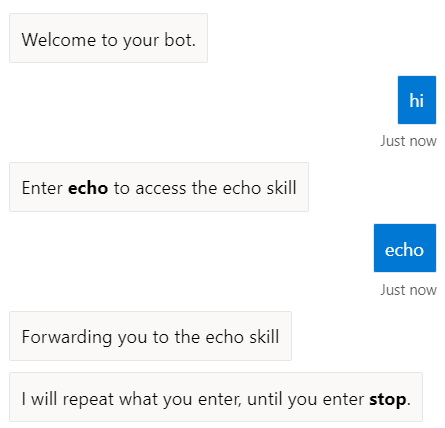
Interact with the skill, then enter
stopto have the echo skill end and return control to the root bot.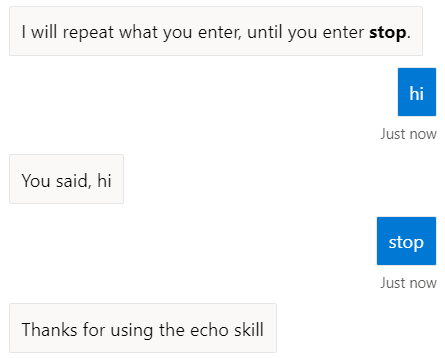

Next steps
To make your skill available to other bots, you need to publish it. For more information, see how to Publish a skill. Once you do so, you'll have a remote skill that other bots can consume.
To connect your bot to a remote skill, see how to Connect to a remote skill. The remote skill can be one you published, or one another developer has made available.
Feedback
Bald verfügbar: Im Laufe des Jahres 2024 werden wir GitHub-Issues stufenweise als Feedbackmechanismus für Inhalte abbauen und durch ein neues Feedbacksystem ersetzen. Weitere Informationen finden Sie unter https://aka.ms/ContentUserFeedback.
Feedback senden und anzeigen für