Tutorial: Deploy a .NET for Apache Spark application to Databricks
This tutorial teaches you how to deploy your app to the cloud through Azure Databricks, an Apache Spark-based analytics platform with one-click setup, streamlined workflows, and interactive workspace that enables collaboration.
In this tutorial, you learn how to:
- Create an Azure Databricks workspace.
- Publish your .NET for Apache Spark app.
- Create a Spark job and Spark cluster.
- Run your app on the Spark cluster.
Important
.NET for Apache Spark is an open source project under the .NET Foundation and does not come with Microsoft Support unless otherwise noted. For issues with or questions about .NET for Apache Spark, please create an issue in its GitHub repository. The community is active and is monitoring submissions.
Warning
.NET for Apache Spark targets an out-of-support version of .NET (.NET Core 3.1). For more information, see the .NET Support Policy.
Prerequisites
Before you start, do the following tasks:
- If you don't have an Azure account, create a free account.
- Sign in to the Azure portal.
- Complete the .NET for Apache Spark - Get Started in 10-Minutes tutorial.
Create an Azure Databricks workspace
Note
This tutorial cannot be carried out using Azure Free Trial Subscription. If you have a free account, go to your profile and change your subscription to pay-as-you-go. For more information, see Azure free account. Then, remove the spending limit, and request a quota increase for vCPUs in your region. When you create your Azure Databricks workspace, you can select the Trial (Premium - 14-Days Free DBUs) pricing tier to give the workspace access to free Premium Azure Databricks DBUs for 14 days.
In this section, you create an Azure Databricks workspace using the Azure portal.
In the Azure portal, select Create a resource > Analytics > Azure Databricks.
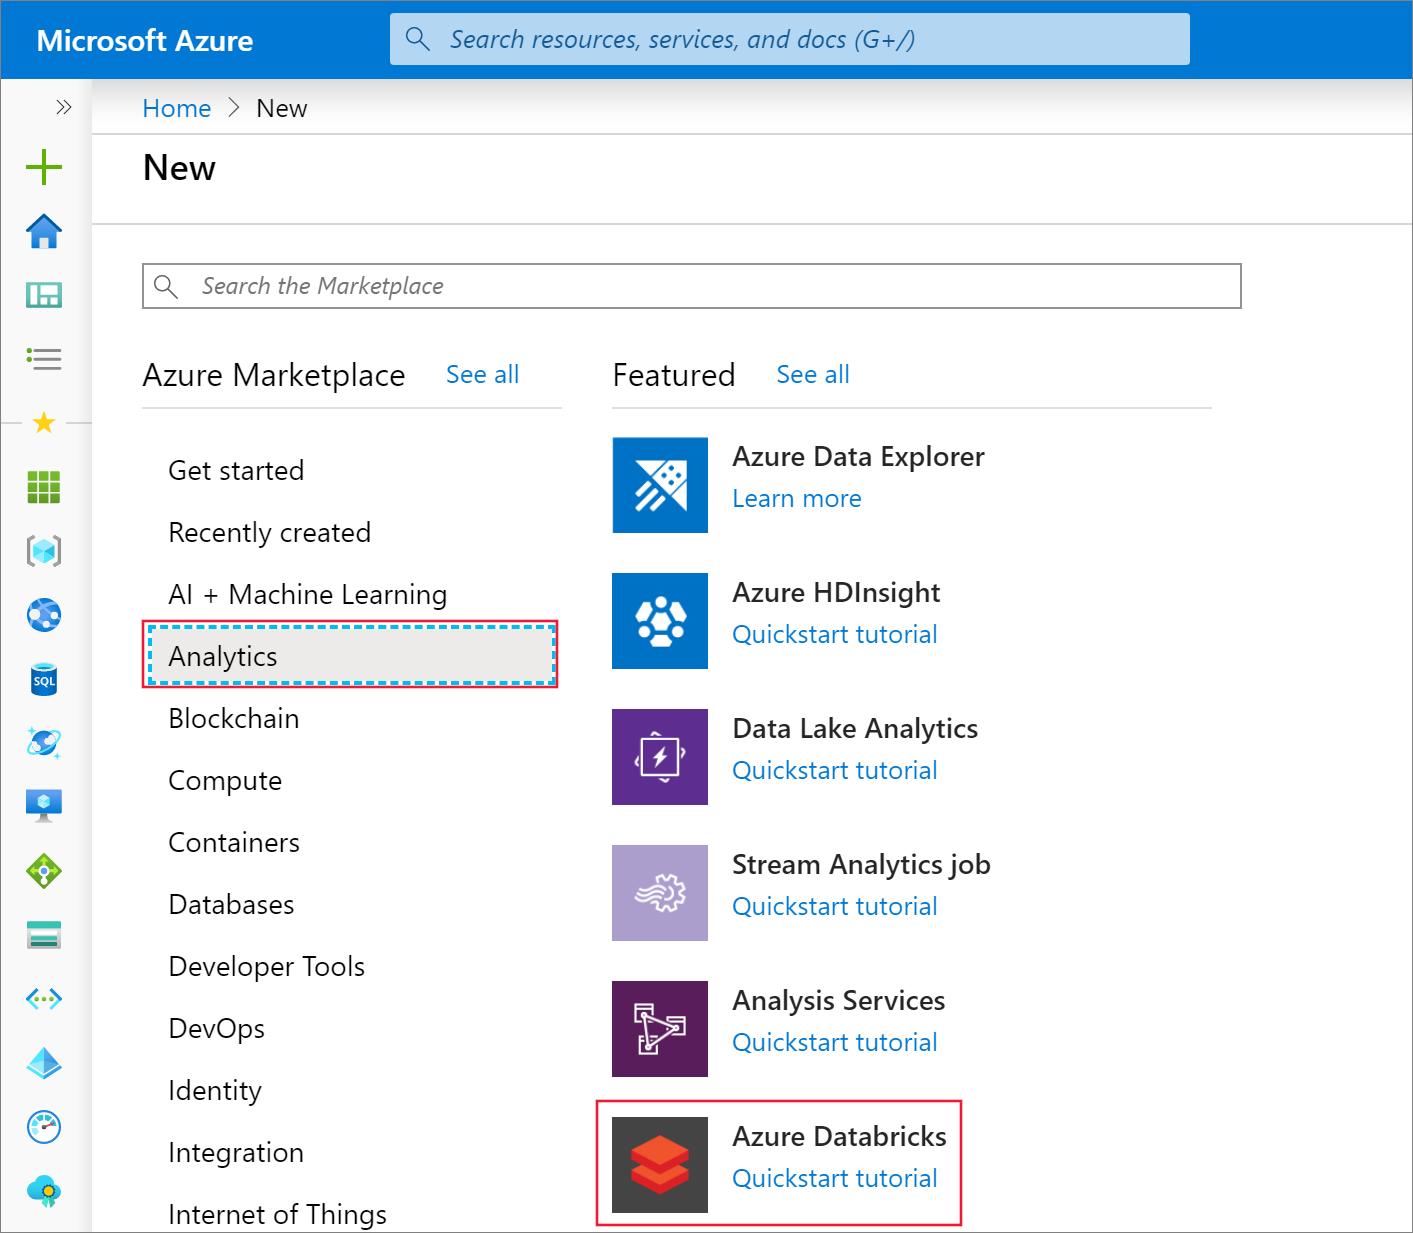
Under Azure Databricks Service, provide the values to create a Databricks workspace.
Property Description Workspace name Provide a name for your Databricks workspace. Subscription From the drop-down, select your Azure subscription. Resource group Specify whether you want to create a new resource group or use an existing one. A resource group is a container that holds related resources for an Azure solution. For more information, see Azure Resource Group overview. Location Select your preferred region. For information about available regions, see Azure services available by region. Pricing Tier Choose between Standard, Premium, or Trial. For more information on these tiers, see Databricks pricing page. Virtual Network No Select Create. The workspace creation takes a few minutes. During workspace creation, you can view the deployment status in Notifications.
Install Azure Databricks tools
You can use the Databricks CLI to connect to Azure Databricks clusters and upload files to them from your local machine. Databricks clusters access files through DBFS (Databricks File System).
The Databricks CLI requires Python 3.6 or above. If you already have Python installed, you can skip this step.
For Windows:
For Linux: Python comes preinstalled on most Linux distributions. Run the following command to see which version you have installed:
python3 --versionUse pip to install the Databricks CLI. Python 3.4 and later include pip by default. Use pip3 for Python 3. Run the following command:
pip3 install databricks-cliOnce you've installed the Databricks CLI, open a new command prompt and run the command
databricks. If you receive a 'databricks' is not recognized as an internal or external command error, make sure you opened a new command prompt.
Set up Azure Databricks
Now that you have the Databricks CLI installed, you need to set up authentication details.
Run the Databricks CLI command
databricks configure --token.After running the configure command, you are prompted to enter a host. Your host URL uses the format:
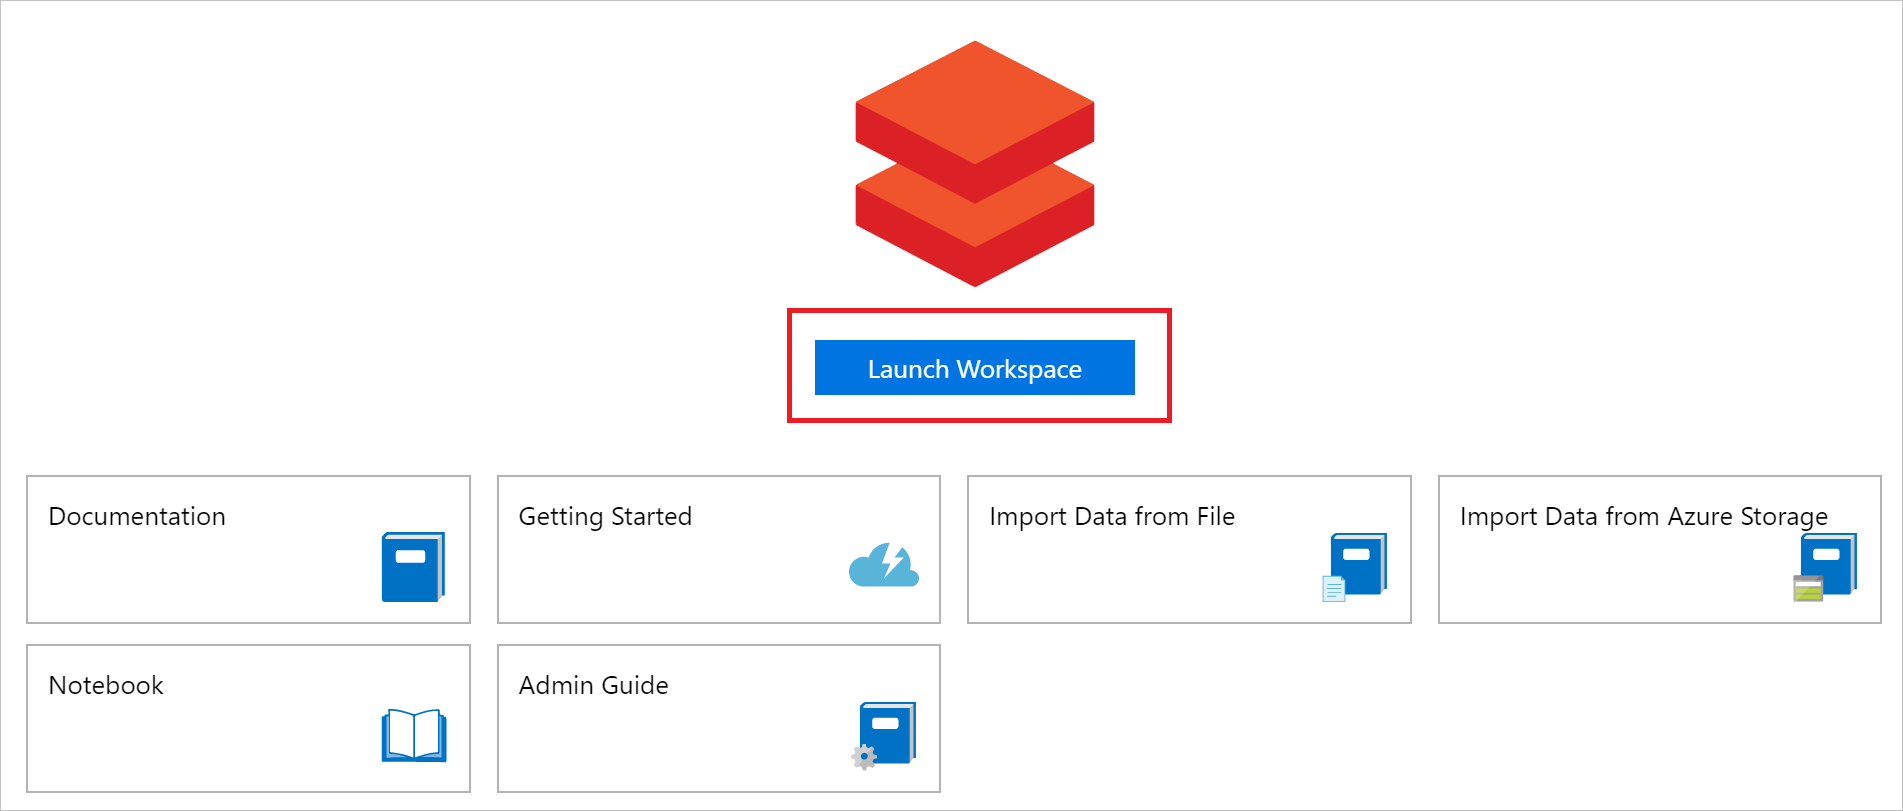
https://<Location>.azuredatabricks.net. For instance, if you selected eastus2 during Azure Databricks Service creation, the host would behttps://eastus2.azuredatabricks.net.After entering your host, you are prompted to enter a token. In the Azure portal, select Launch Workspace to launch your Azure Databricks workspace.
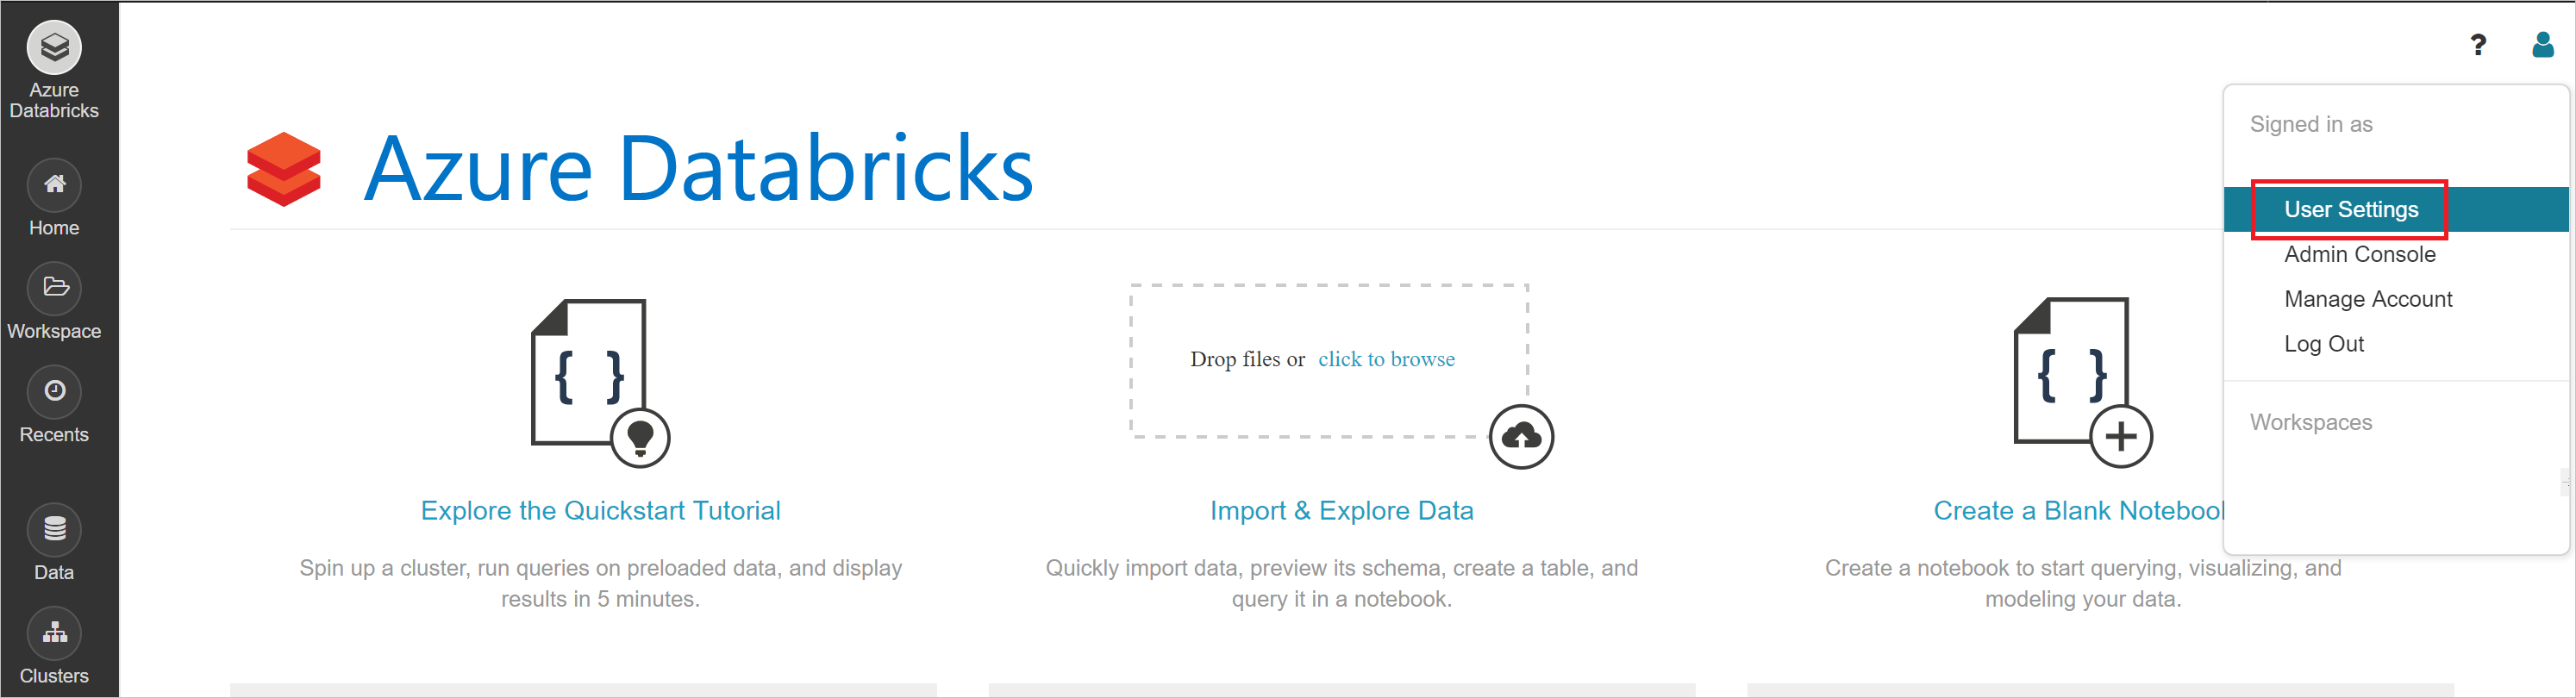
On the home page of your workspace, select User Settings.
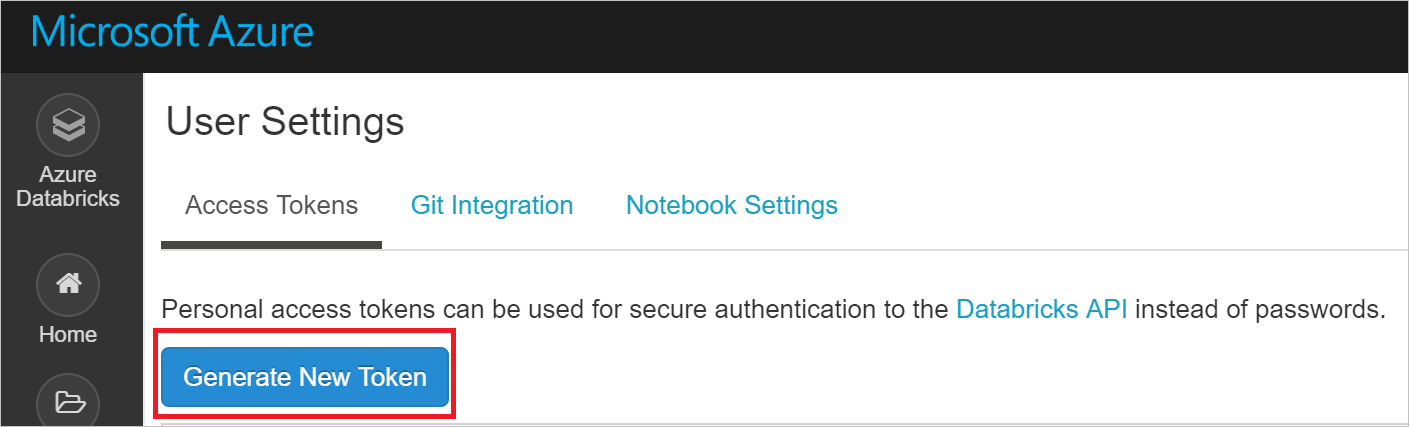
On the User Settings page, you can generate a new token. Copy the generated token and paste it back into your command prompt.
You should now be able to access any Azure Databricks clusters you create and upload files to the DBFS.
Download worker dependencies
Note
Azure and AWS Databricks are Linux-based. Therefore, if you are interested in deploying your app to Databricks, make sure your app is .NET Standard compatible and that you use .NET Core compiler to compile your app.
Microsoft.Spark.Worker helps Apache Spark execute your app, such as any user-defined functions (UDFs) you may have written. Download Microsoft.Spark.Worker.
The install-worker.sh is a script that lets you copy .NET for Apache Spark dependent files into the nodes of your cluster.
Create a new file named install-worker.sh on your local computer, and paste the install-worker.sh contents located on GitHub.
The db-init.sh is a script that installs dependencies onto your Databricks Spark cluster.
Create a new file named db-init.sh on your local computer, and paste the db-init.sh contents located on GitHub.
In the file you just created, set the
DOTNET_SPARK_RELEASEvariable tohttps://github.com/dotnet/spark/releases/download/v1.0.0/Microsoft.Spark.Worker.netcoreapp3.1.linux-x64-1.0.0.tar.gz. Leave the rest of the db-init.sh file as-is.
Note
If you are using Windows, verify that the line-endings in your install-worker.sh and db-init.sh scripts are Unix-style (LF). You can change line endings through text editors like Notepad++ and Atom.
Publish your app
Next, you publish the mySparkApp created in the .NET for Apache Spark - Get Started in 10-Minutes tutorial to ensure your Spark cluster has access to all the files it needs to run your app.
Run the following commands to publish the mySparkApp:
cd mySparkApp
dotnet publish -c Release -f netcoreapp3.1 -r ubuntu.16.04-x64
Do the following tasks to zip your published app files so that you can easily upload them to your Databricks Spark cluster.
On Windows:
Navigate to mySparkApp/bin/Release/netcoreapp3.1/ubuntu.16.04-x64. Then, right-click on Publish folder and select Send to > Compressed (zipped) folder. Name the new folder publish.zip.
On Linux, run the following command:
zip -r publish.zip .If you have any user-defined functions in your app, the app assemblies, such as DLLs that contain user-defined functions along with their dependencies, need to be placed in the working directory of each Microsoft.Spark.Worker.
Upload your application assemblies to your Databricks cluster:
cd <path-to-your-app-publish-directory>
databricks fs cp <assembly>.dll dbfs:/apps/dependencies
Uncomment and modify the app dependencies section in db-init.sh to point to your app dependencies path. Then, upload the updated db-init.sh to your cluster:
cd <path-to-db-init-and-install-worker>
databricks fs cp db-init.sh dbfs:/spark-dotnet/db-init.sh
Note
For more information, see the Submit a .NET for Apache Spark job to Databricks guide.
Upload files
In this section, you upload several files to DBFS so that your cluster has everything it needs to run your app in the cloud. Each time you upload a file to the DBFS, make sure you are in the directory where that file is located on your computer.
Run the following commands to upload the db-init.sh, install-worker.sh, and Microsoft.Spark.Worker to DBFS:
databricks fs cp db-init.sh dbfs:/spark-dotnet/db-init.sh
databricks fs cp install-worker.sh dbfs:/spark-dotnet/install-worker.sh
databricks fs cp Microsoft.Spark.Worker.netcoreapp3.1.linux-x64-1.0.0.tar.gz dbfs:/spark-dotnet/Microsoft.Spark.Worker.netcoreapp3.1.linux-x64-1.0.0.tar.gz
Run the following commands to upload the remaining files your cluster will need to run your app: the zipped publish folder, input.txt, and microsoft-spark-2-4_2.11-1.0.0.jar.
cd mySparkApp
databricks fs cp input.txt dbfs:/input.txt

cd mySparkApp\bin\Release\netcoreapp3.1\ubuntu.16.04-x64 directory
databricks fs cp publish.zip dbfs:/spark-dotnet/publish.zip
databricks fs cp microsoft-spark-2-4_2.11-1.0.0.jar dbfs:/spark-dotnet/microsoft-spark-2-4_2.11-1.0.0.jar
Create a job
Your app runs on Azure Databricks through a job that runs spark-submit, which is the command you use to run .NET for Apache Spark jobs.
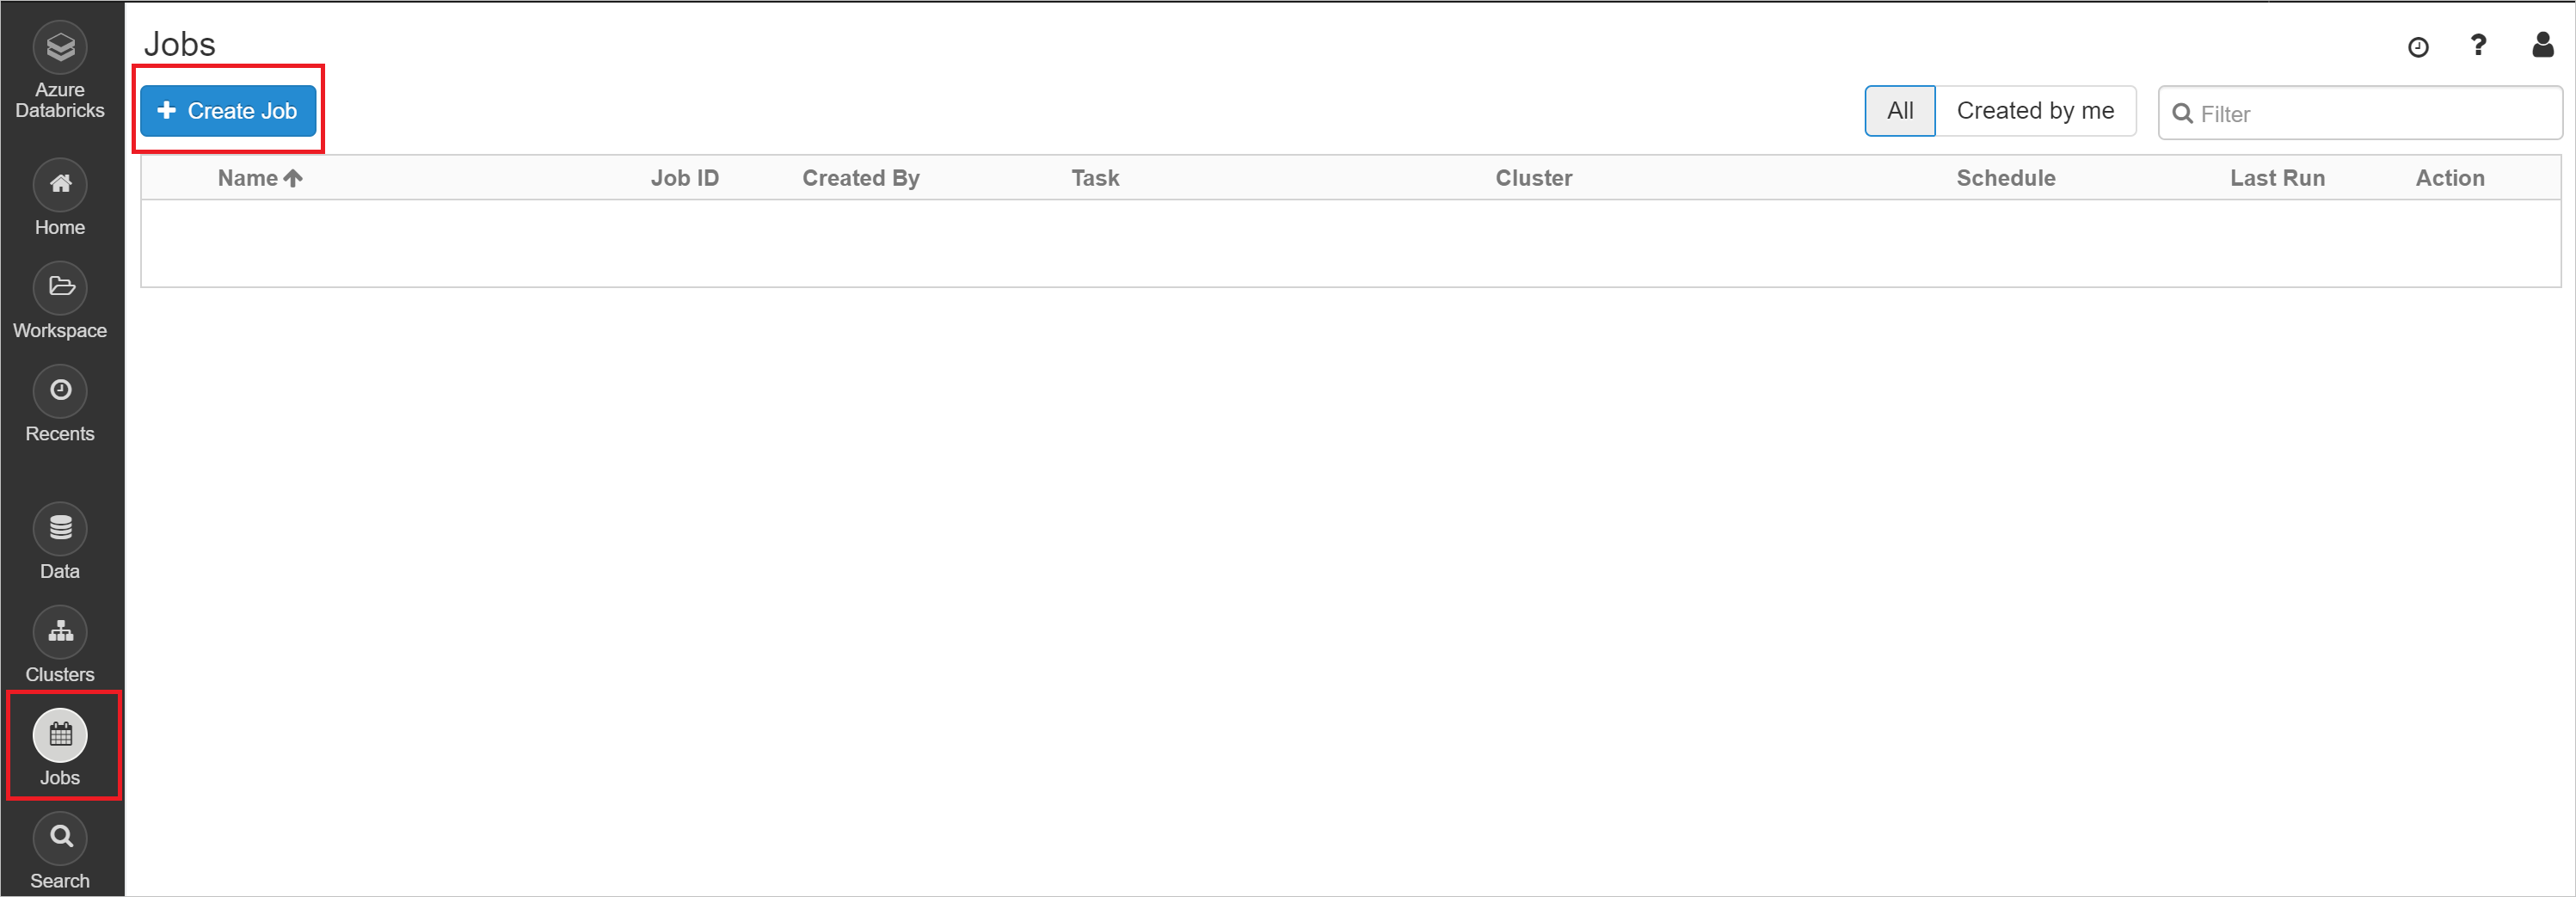
In your Azure Databricks Workspace, select the Jobs icon and then + Create Job.
Choose a title for your job, and then select Configure spark-submit.
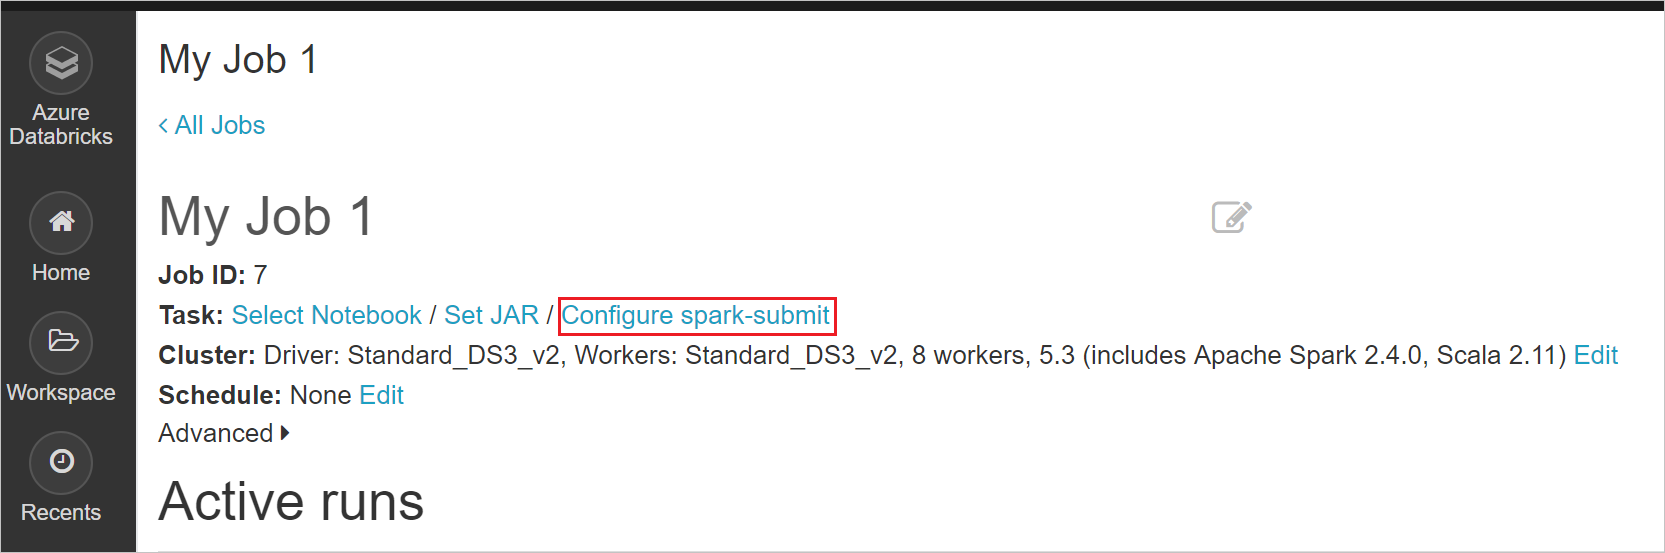
Paste the following parameters in the job configuration. Then, select Confirm.
["--class","org.apache.spark.deploy.dotnet.DotnetRunner","/dbfs/spark-dotnet/microsoft-spark-2-4_2.11-1.0.0.jar","/dbfs/spark-dotnet/publish.zip","mySparkApp"]
Create a cluster
Navigate to your job and select Edit to configure your job's cluster.
Set your cluster to Spark 2.4.1. Then, select Advanced Options > Init Scripts. Set Init Script Path as
dbfs:/spark-dotnet/db-init.sh.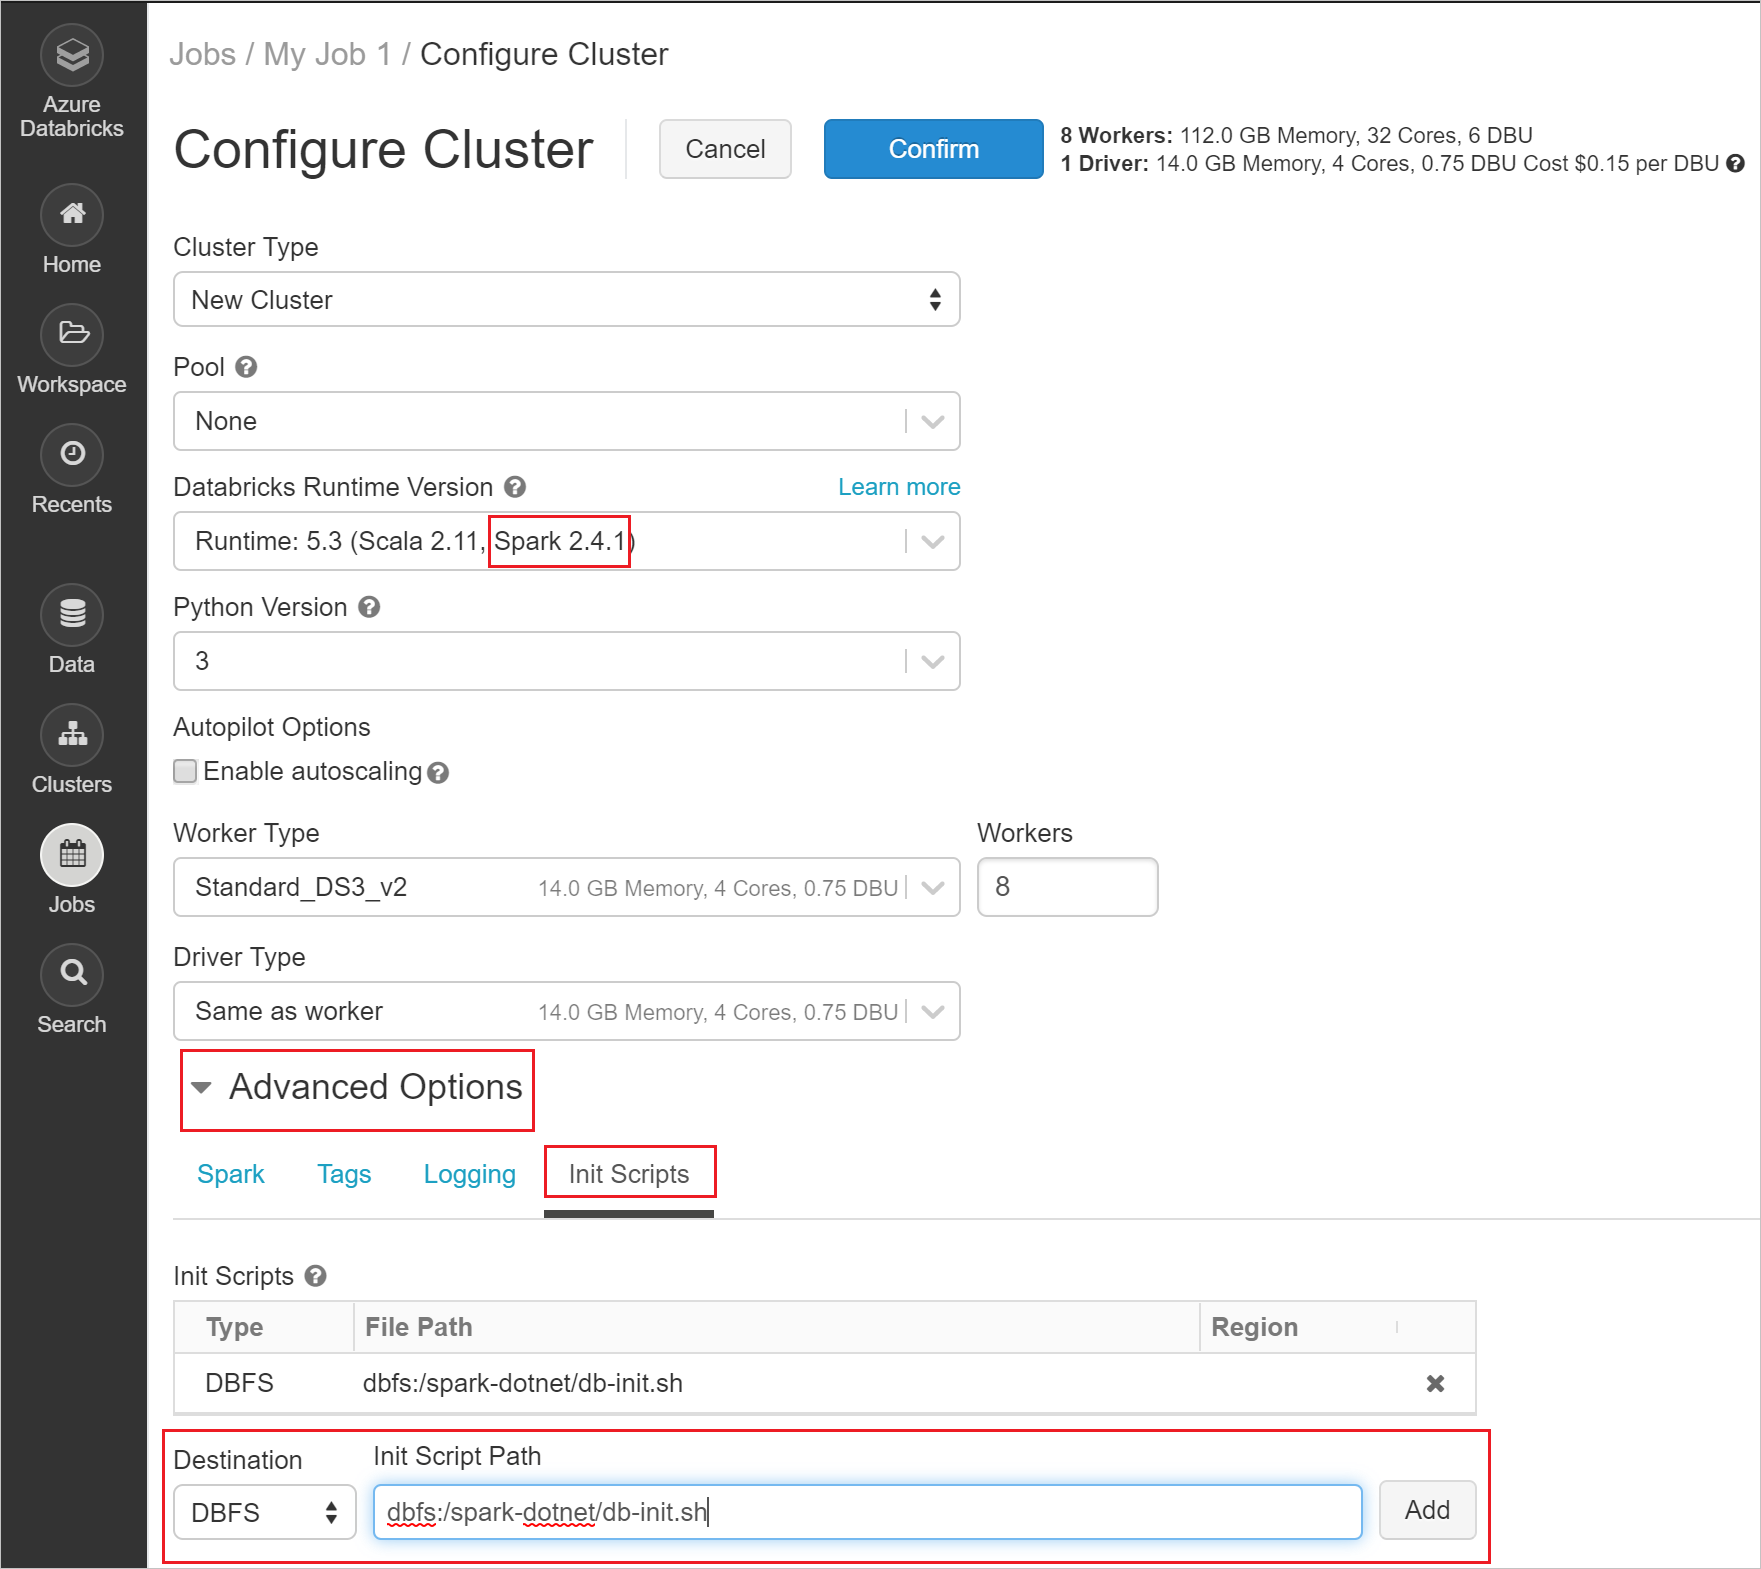
Select Confirm to confirm your cluster settings.
Run your app
Navigate to your job and select Run Now to run your job on your newly configured Spark cluster.
It takes a few minutes for the job's cluster to create. Once it is created, your job will be submitted, and you can view the output.
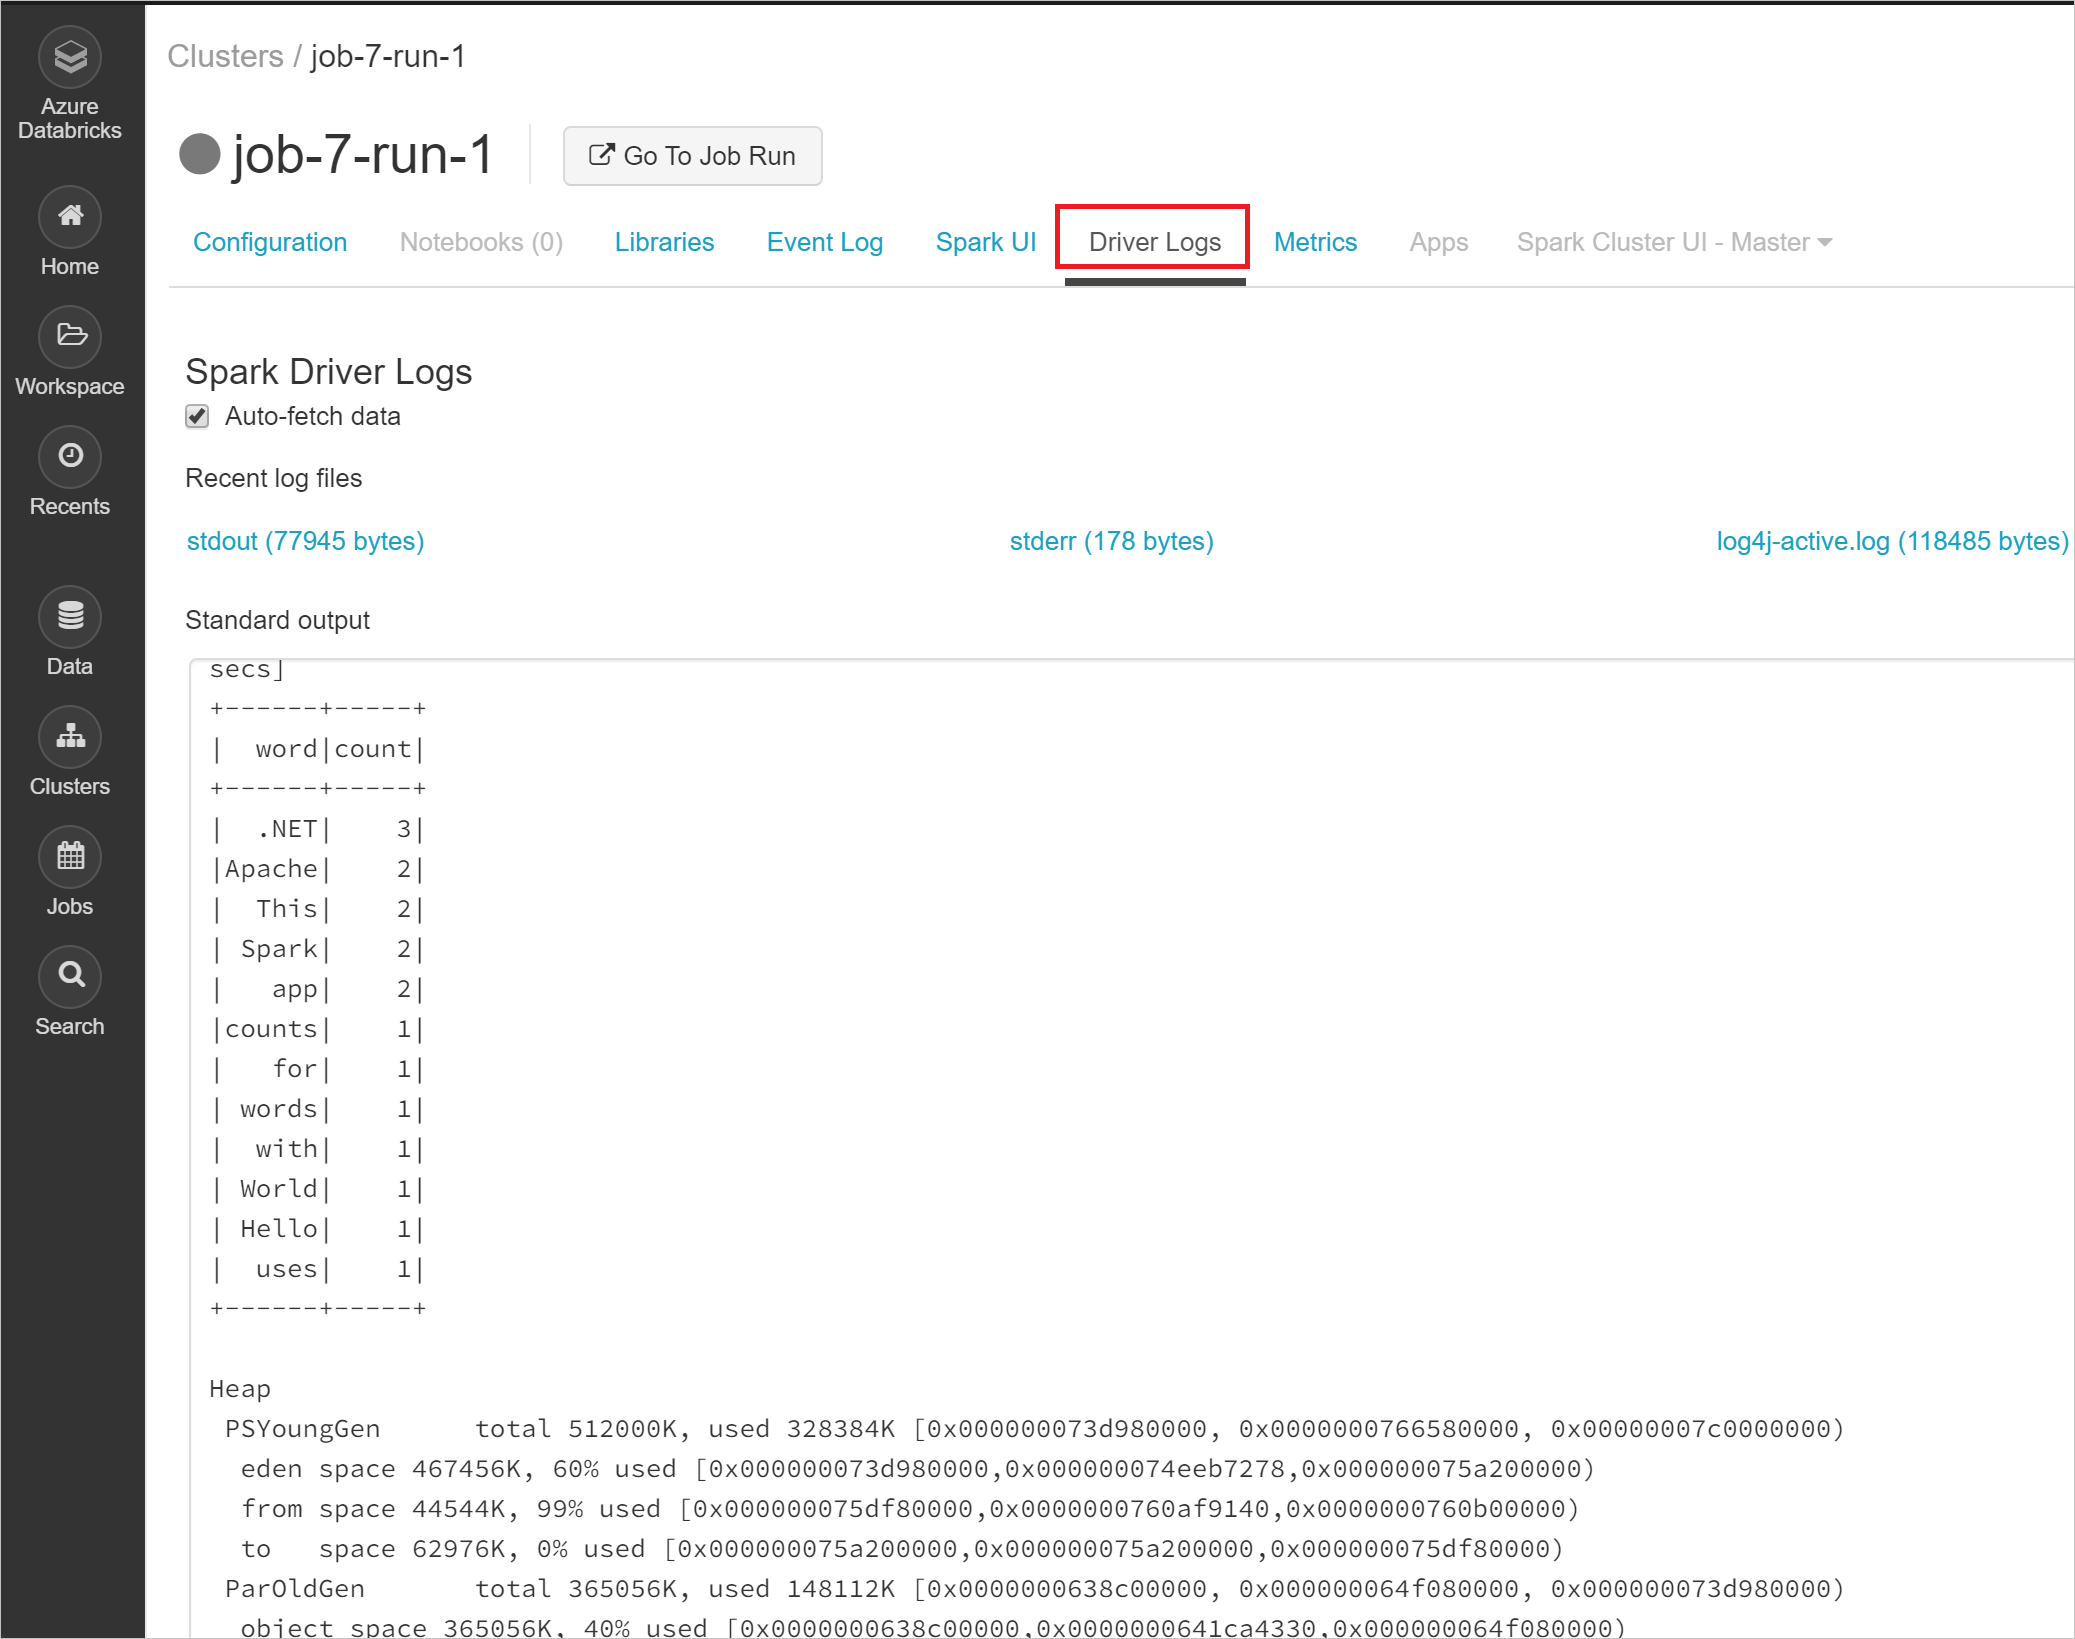
Select Clusters from the left menu, and then the name and run of your job.
Select Driver Logs to view the output of your job. When your app finishes executing, you see the same word count table from the getting started local run written to the standard output console.
Congratulations, you've run your first .NET for Apache Spark application in Azure Databricks!
Clean up resources
If you no longer need the Databricks workspace, you can delete your Azure Databricks resource in the Azure portal. You can also select the resource group name to open the resource group page, and then select Delete resource group.
Next steps
In this tutorial, you deployed your .NET for Apache Spark application to Databricks. To learn more about Databricks, continue to the Azure Databricks Documentation.