TFS Application Tier will use different hardware than it’s using right now
TFS 2013
Illustration of migration upgrade
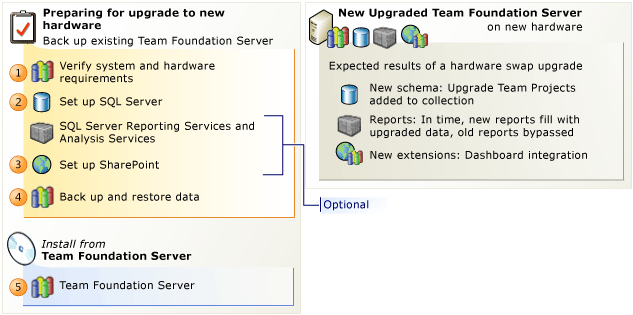
To do a hardware swap (migration) upgrade of Team Foundation Server
 Double Check. Verify that the operating system and hardware meet the requirements for Team Foundation Server. You must use a 64-bit server if you use a server operating system.
Determine the service account you will use for Team Foundation Server. By default, TFS uses Network Service, but you can also use a domain account. In most cases, you should use the same account you used for the previous installation or consider using Network Service.
For more information, see requirements for Team Foundation Server, or Accounts required for installation of Team Foundation Server.
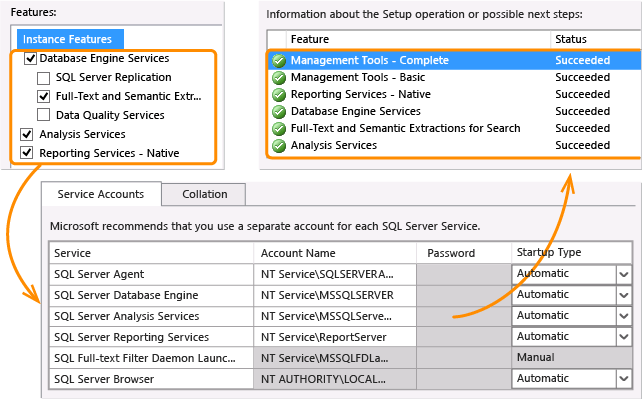
 Set up SQL Server. You’re going to install all the SQL Server features that TFS requires on the same server where you’ll eventually run TFS.
For more information, see Set up SQL Server for TFS
 Set up SharePoint Products. If you don’t skip the portal setup, you have two options for how to deal with SharePoint:
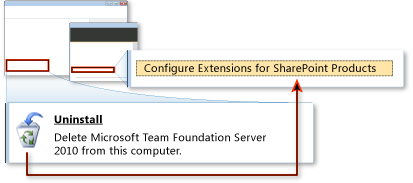
Option one: Use the same SharePoint site for TFS that you have right now
If your old SharePoint server is still running, you can continue to use it. Go to the SharePoint server and uninstall the old extensions, and then install the new extensions before you upgrade TFS. If SharePoint and the previous version of TFS were on the same computer, you have to uninstall the entire TFS 2010 application tier. In the new upgraded configuration, the only TFS component on the SharePoint server will be the TFS extensions for SharePoint.
For more information, see Use the same SharePoint site for TFS that you have right now
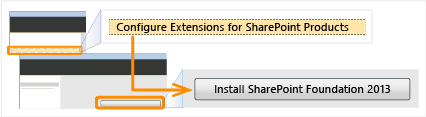
Option two: Move SharePoint to New Hardware for TFS
You can install SharePoint Foundation using the TFS extensions for SharePoint wizard. The TFS wizard will install a fresh copy of SharePoint using the installation of SQL Server you just set up, and then configure the TFS extensions for the new installation of TFS. After you install SharePoint, you’ll detach its content database to prepare for the migration of the data from your previous SharePoint installation in step 4, Restore Data.
For more information, see Move SharePoint to new hardware for TFS
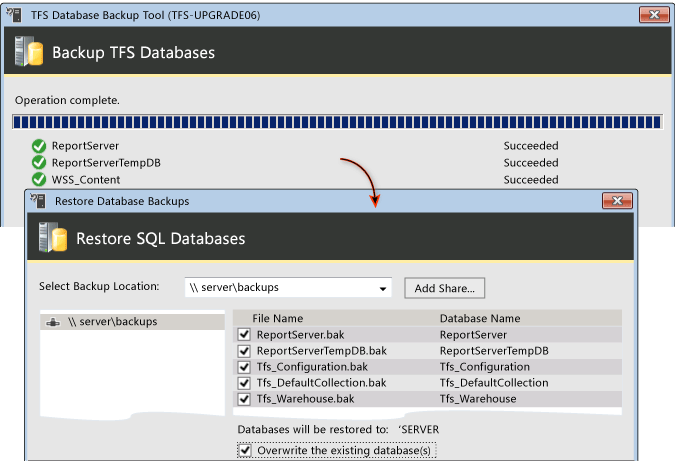
 Restore data. You can use the TFS custom backup and restore tools to manage your data. First you’re going to back up your data, including the encryption key on the report server. Next, you’re going to restore your data to the SQL Server instance you set up in step 2. With the restore complete, you’ll use the SQL Server Reporting tool to restart the report server database, restore its encryption key, and then verify access. If you installed SharePoint, you’ll use a SharePoint command line tool to attach and upgrade your content database.
For more information, see Back up and restore data for TFS
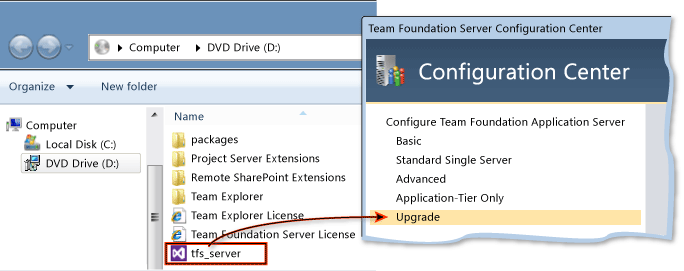
 Upgrade TFS. Run the Team Foundation Server install from the product DVD and then use the Upgrade Configuration wizard to upgrade your installation.
For more information, see Run the TFS Upgrade Wizard
Tip
If you have Project Server added to TFS, this is the point where you should upgrade the TFS Extensions for Project Server. See the heading "Less-common upgrade tasks" for more information in TFS upgrade requirements
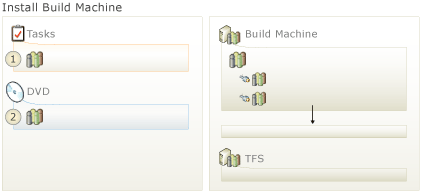
Next Step: Set up a new build machine
After you upgrade the application tier, you might want to install the new build service. For more information, see Set up Team Foundation Build Service.