Quickstart: Grant permission to create unlimited app registrations
In this quick start guide, you create a custom role with permission to create an unlimited number of app registrations, and then assign that role to a user. The assigned user can then use the Microsoft Entra admin center, Microsoft Graph PowerShell, or Microsoft Graph API to create application registrations. Unlike the built-in Application Developer role, this custom role grants the ability to create an unlimited number of application registrations. The Application Developer role grants the ability, but the total number of created objects is limited to 250 to prevent hitting the directory-wide object quota. The least privileged role required to create and assign Microsoft Entra custom roles is the Privileged Role Administrator.
If you don't have an Azure subscription, create a free account before you begin.
Prerequisites
- Microsoft Entra ID P1 or P2 license
- Privileged Role Administrator or Global Administrator
- Microsoft Graph PowerShell module when using PowerShell
- Admin consent when using Graph explorer for Microsoft Graph API
For more information, see Prerequisites to use PowerShell or Graph Explorer.
Microsoft Entra admin center
Create a custom role
Tip
Steps in this article might vary slightly based on the portal you start from.
Sign in to the Microsoft Entra admin center as at least a Privileged Role Administrator.
Browse to Identity > Roles & admins > Roles & admins.
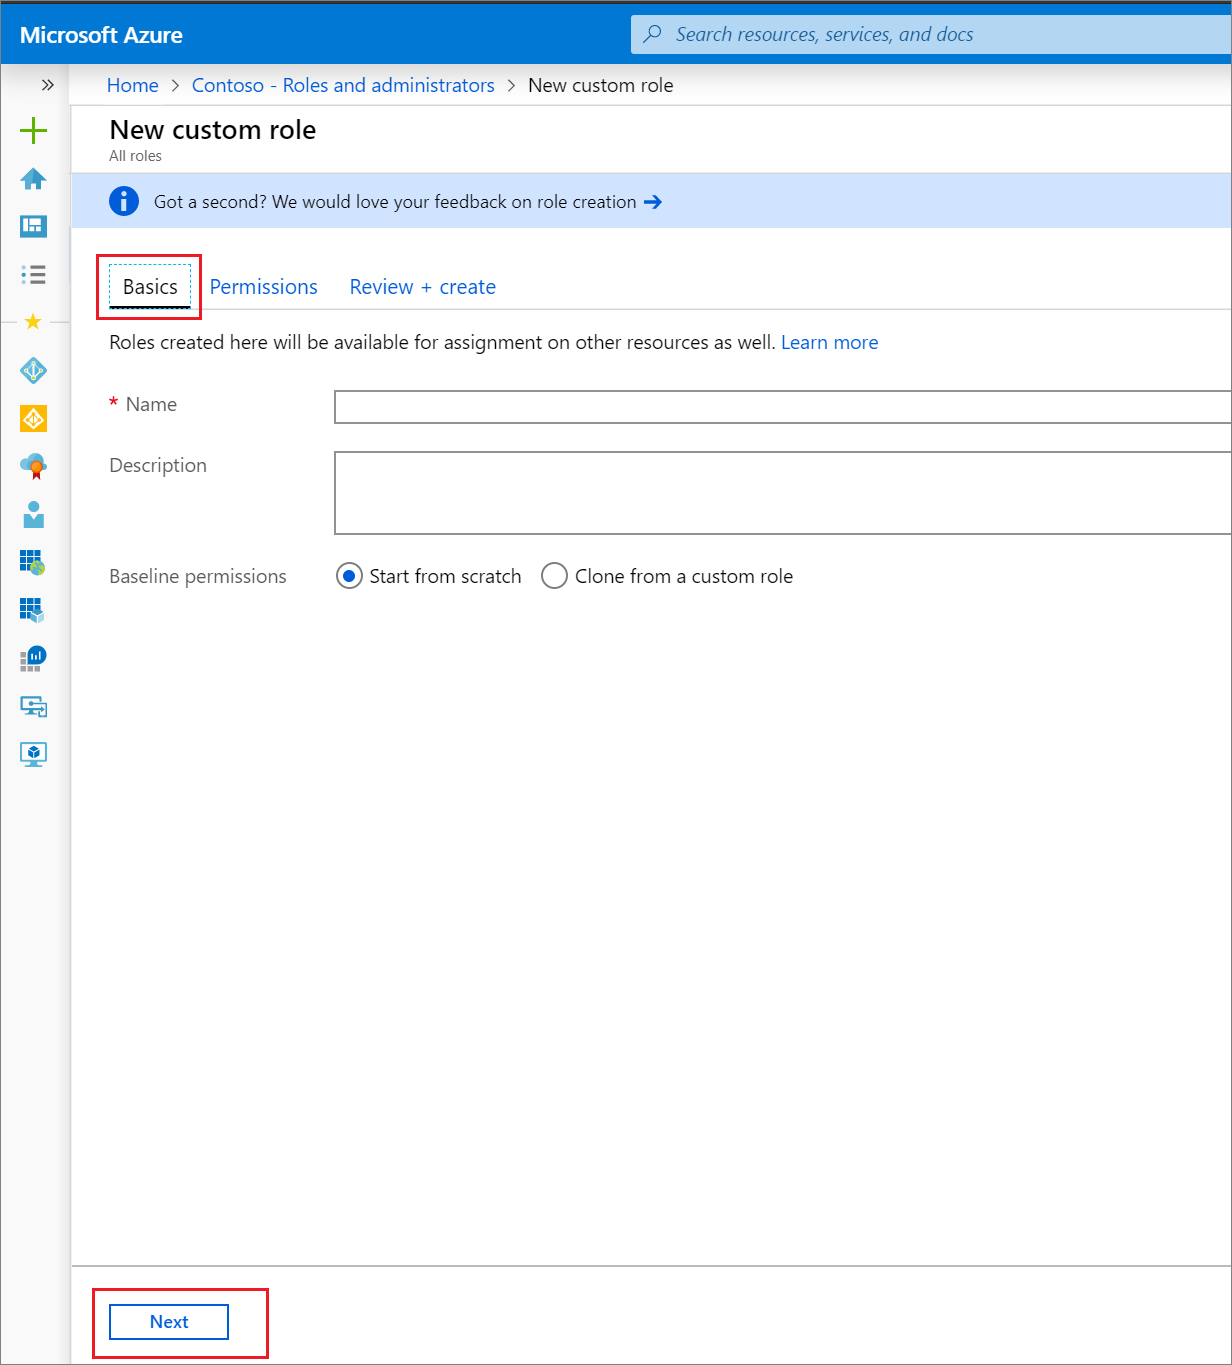
Select New custom role.

On the Basics tab, provide "Application Registration Creator" for the name of the role and "Can create an unlimited number of application registrations" for the role description, and then select Next.
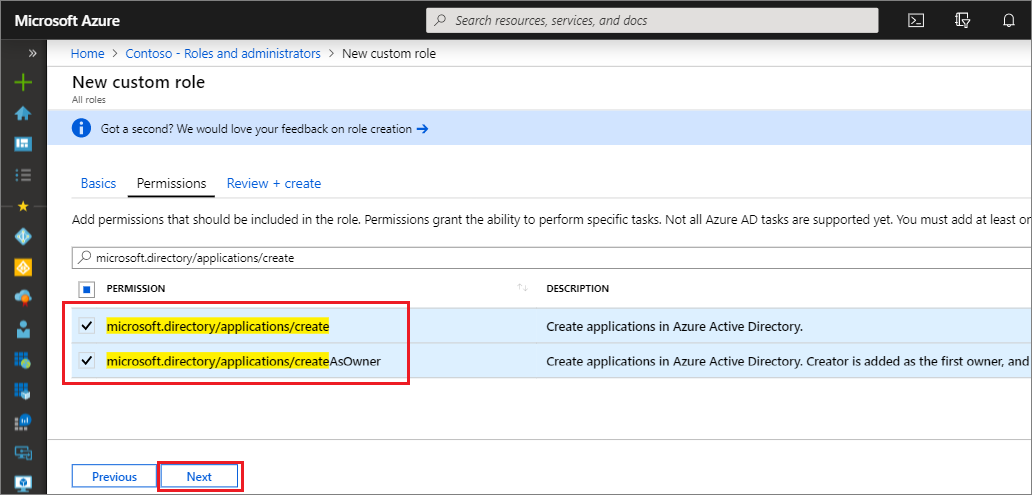
On the Permissions tab, enter "microsoft.directory/applications/create" in the search box, and then select the checkboxes next to the desired permissions, and then select Next.
On the Review + create tab, review the permissions and select Create.
Assign the role
Sign in to the Microsoft Entra admin center as at least a Privileged Role Administrator.
Browse to Identity > Roles & admins > Roles & admins.
Select the Application Registration Creator role and select Add assignment.
Select the desired user and click Select to add the user to the role.
Done! In this quickstart, you successfully created a custom role with permission to create an unlimited number of app registrations, and then assign that role to a user.
Tip
To assign the role to an application using the Microsoft Entra admin center, enter the name of the application into the search box of the assignment page. Applications are not shown in the list by default, but are returned in search results.
App registration permissions
There are two permissions available for granting the ability to create application registrations, each with different behavior.
- microsoft.directory/applications/createAsOwner: Assigning this permission results in the creator being added as the first owner of the created app registration, and the created app registration counts against the creator's 250 created objects quota.
- microsoft.directory/applications/create: Assigning this permission results in the creator not being added as the first owner of the created app registration, and the created app registration won't count against the creator's 250 created objects quota. Use this permission carefully, because there's nothing preventing the assignee from creating app registrations until the directory-level quota is hit. If both permissions are assigned, this permission takes precedence.
PowerShell
Create a custom role
Create a new role using the following PowerShell script:
# Basic role information
$displayName = "Application Registration Creator"
$description = "Can create an unlimited number of application registrations."
$templateId = (New-Guid).Guid

# Set of permissions to grant
$allowedResourceAction =
@(
    "microsoft.directory/applications/create"
    "microsoft.directory/applications/createAsOwner"
)
$rolePermissions = @{'allowedResourceActions'= $allowedResourceAction}

# Create new custom admin role
$customRole = New-MgRoleManagementDirectoryRoleDefinition -DisplayName $displayName -Description $description -RolePermissions $rolePermissions -TemplateId $templateId -IsEnabled:$true
Assign the role
Assign the role using the following PowerShell script:
# Get the user and role definition you want to link
$user = Get-MgUser -Filter "UserPrincipalName eq 'Adam@contoso.com'"
$roleDefinition = Get-MgRoleManagementDirectoryRoleDefinition -Filter "DisplayName eq 'Application Registration Creator'"

# Get resource scope for assignment
$resourceScope = '/'

# Create a scoped role assignment
$roleAssignment = New-MgRoleManagementDirectoryRoleAssignment -DirectoryScopeId $resourceScope -RoleDefinitionId $roleDefinition.Id -PrincipalId $user.Id
Microsoft Graph API
Create a custom role
Use the Create unifiedRoleDefinition API to create a custom role.
POST https://graph.microsoft.com/v1.0/roleManagement/directory/roleDefinitions
Body
{
    "description": "Can create an unlimited number of application registrations.",
    "displayName": "Application Registration Creator",
    "isEnabled": true,
    "rolePermissions":
    [
        {
            "allowedResourceActions":
            [
                "microsoft.directory/applications/create"
                "microsoft.directory/applications/createAsOwner"
            ]
        }
    ],
    "templateId": "<PROVIDE NEW GUID HERE>",
    "version": "1"
}
Assign the role
Use the Create unifiedRoleAssignment API to assign the custom role. The role assignment combines a security principal ID (which can be a user or service principal), a role definition (role) ID, and a Microsoft Entra resource scope.
POST https://graph.microsoft.com/v1.0/roleManagement/directory/roleAssignments
Body
{
    "@odata.type": "#microsoft.graph.unifiedRoleAssignment",
    "principalId": "<PROVIDE OBJECTID OF USER TO ASSIGN HERE>",
    "roleDefinitionId": "<PROVIDE OBJECTID OF ROLE DEFINITION HERE>",
    "directoryScopeId": "/"
}
Next steps
- Feel free to share with us on the Microsoft Entra administrative roles forum.
- For more about Microsoft Entra roles, see Microsoft Entra built-in roles.
- For more about default user permissions, see comparison of default guest and member user permissions.
Feedback
Coming soon: Throughout 2024 we will be phasing out GitHub Issues as the feedback mechanism for content and replacing it with a new feedback system. For more information see: https://aka.ms/ContentUserFeedback.
Submit and view feedback for