Get started with trainable classifiers
A Microsoft Purview trainable classifier is a tool you can train to recognize various types of content by giving it samples to look at. Once trained, you can use it to identify item for application of Office sensitivity labels, Communications compliance policies, and retention label policies.
Creating a custom trainable classifier first involves giving it samples that are human picked and positively match the category. Then, after it has processed those, you test the classifiers ability to predict by giving it a mix of positive and negative samples. This article shows you how to create and train a custom classifier and how to improve the performance of custom trainable classifiers and pre-trained classifiers over their lifetime through retraining.
To learn more about the different types of classifiers, see Learn about trainable classifiers.
Tip
If you're not an E5 customer, use the 90-day Microsoft Purview solutions trial to explore how additional Purview capabilities can help your organization manage data security and compliance needs. Start now at the Microsoft Purview compliance portal trials hub. Learn details about signing up and trial terms.
Prerequisites
Licensing requirements
Classifiers are a Microsoft 365 E5, or E5 Compliance feature. You must have one of these subscriptions to make use of them.
Permissions
To access classifiers in the UI:
- the Global admin needs to opt in for the tenant to create custom classifiers.
- the Compliance Administrator role is required to train a classifier.
To use classifiers in the following scenarios, you will need the permissions listed:
| Scenario | Required Role Permissions |
|---|---|
| Retention label policy | Record Management Retention Management |
| Sensitivity label policy | Security Administrator Compliance Administrator Compliance Data Administrator |
| Communication compliance policy | Insider Risk Management Administrator Supervisory Review Administrator |
Important
By default, only the user who creates a custom classifier can train and review predictions made by that classifier.
Prepare for a custom trainable classifier
It's helpful to understand what's involved in creating a custom trainable classifier before you dive in.
Timeline
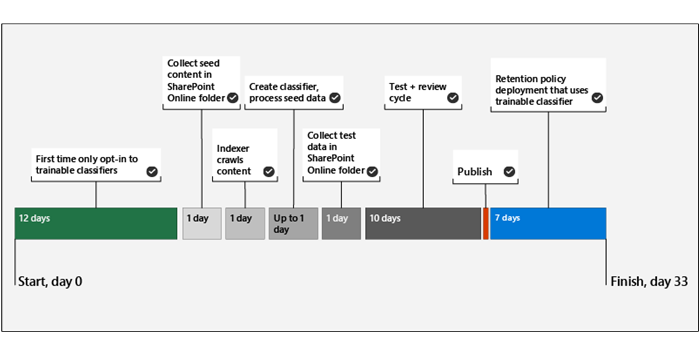
This timeline reflects a sample deployment of trainable classifiers.
Tip
You must opt-in to create and work with trainable classifiers. It takes twelve days for Microsoft 365 to complete a baseline evaluation of your organization's content after you opt-in. Contact your global administrator to kick off the opt-in process.
Overall workflow
To understand more about the overall workflow of creating custom trainable classifiers, see Process flow for creating custom trainable classifiers.
Seed content
When you want a trainable classifier to independently and accurately identify an item as being in particular category of content, you first have to present it with many samples of the type of content that are in the category. This feeding of samples to the trainable classifier is known as seeding. Seed content is selected by a human and is judged to represent the category of content.
Tip
You need to have at least 50 positive samples and can have as many as 500. The trainable classifier will process up to the 500 most recently created samples (by file created date/time stamp). The more samples you provide, the more accurate the predictions the classifier makes will be.
Testing content
Once the trainable classifier has processed enough positive samples to build a prediction model, you need to test the predictions it makes to see if the classifier can correctly distinguish between items that match the category and items that don't. You do this by selecting another, hopefully larger, set of human picked content that consists of samples that should fall into the category and samples that won't. You should test with different data than the initial seed data you first provided. Once it processes those, you manually go through the results and verify whether each prediction is correct, incorrect, or you aren't sure. The trainable classifier uses this feedback to improve its prediction model.
Tip
For best results, have at least 200 items in your test sample set with an even distribution of positive and negative matches.
How to create a trainable classifier
Collect between 50-500 seed content items. These must be limited to samples that strongly represent the type of content you want the trainable classifier to positively identify as being in the category. See, Default crawled file name extensions and parsed file types in SharePoint Server for the supported file types.
Important
Make sure the items in your seed set are strong examples of the category. The trainable classifier initially builds its model based on what you seed it with. The classifier assumes all seed samples are strong positives and has no way of knowing whether a sample is a weak or negative match to the category.
Place the seed content in a SharePoint Online folder that is dedicated to holding the seed content only. Make note of the site, library, and folder URL.
Tip
If you create a new site and folder for your seed data, allow at least an hour for that location to be indexed before creating the trainable classifier that will use that seed data.
Sign in to the Microsoft Purview compliance portal with either Compliance admin or Security admin role access and navigate to Data classification > Classifiers.
Choose the Trainable classifiers tab.
Choose Create trainable classifier.
Fill in appropriate values for the Name and Description fields of the category of items you want this trainable classifier to identify.
Pick the SharePoint Online site, library, and folder URL for the seed content site from step 2. Choose Add.
Review the settings and choose Create trainable classifier.
Within 24 hours the trainable classifier will process the seed data and build a prediction model. The classifier status is In progress while it processes the seed data. When the classifier is finished processing the seed data, the status changes to Need test items.
You can now view the details page by choosing the classifier.
Collect at least 200 test content items (10,000 max) for best results. These should be a mix of items that are strong positives, strong negatives and some that are a little less obvious in their nature. See, Default crawled file name extensions and parsed file types in SharePoint Server for the supported file types.
Place the test content in a SharePoint Online folder that is dedicated to holding only the test content. Make note of the SharePoint Online site, library, and folder URL.
Tip
If you create a new site and folder for your test data, allow at least an hour for that location to be indexed before creating the trainable classifier that will use that seed data.
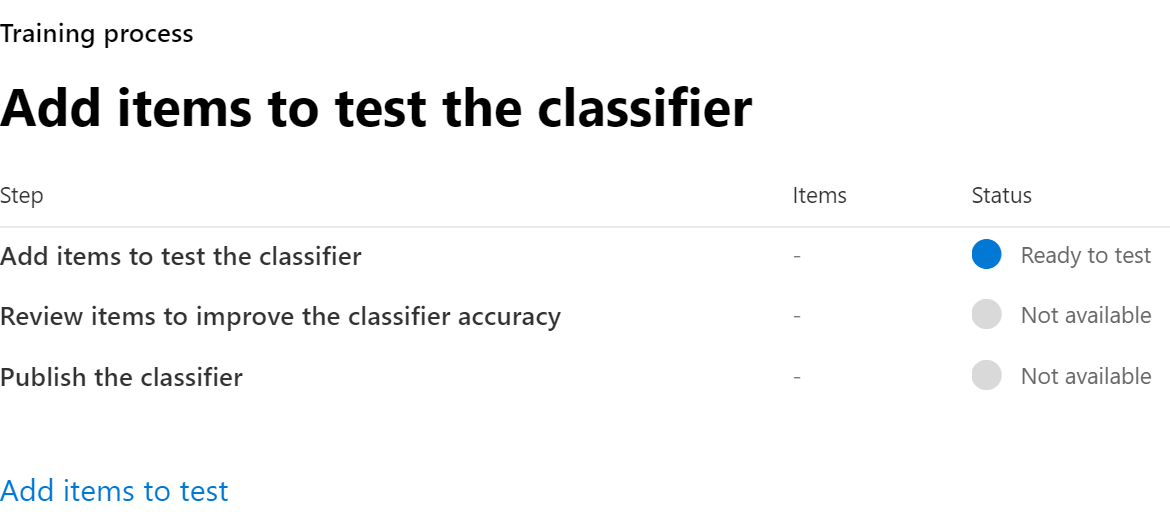
Choose Add items to test.
Pick the SharePoint Online site, library, and folder URL for the test content site from step 12. Choose Add sites.
Finish the wizard by choosing Done. Your trainable classifier will take up to an hour to process the test files.
When the trainable classifier is done processing your test files, the status on the details page will change to
Ready to review. If you need to increase the test sample size, choose Add items to test and allow the trainable classifier to process the additional items.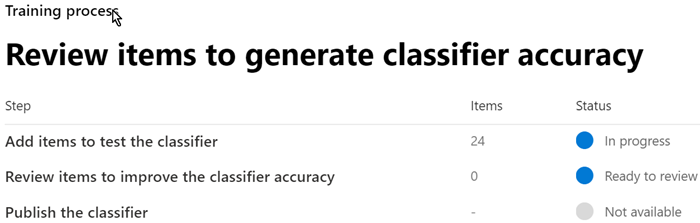
Choose the Tested items to review tab to review items.
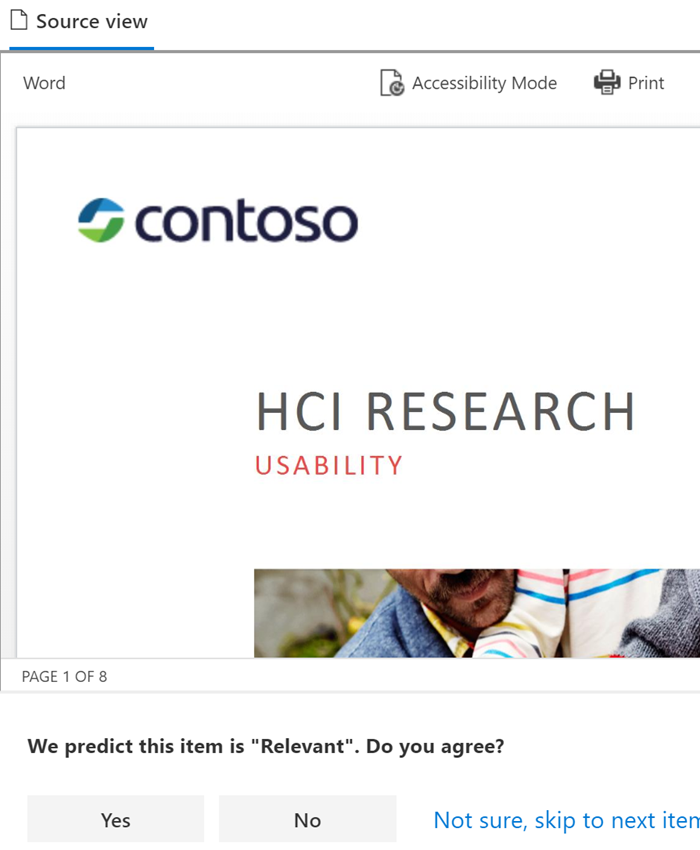
Microsoft 365 will present 30 items at a time. Review them; in the We predict this item is "Relevant". Do you agree? box, choose Yes, or No, or Not sure, skip to next item. Model accuracy is automatically updated every 30 items.
Review at least 200 items. Once the accuracy score has stabilized, the publish option will become available and the classifier status will say Ready to use.
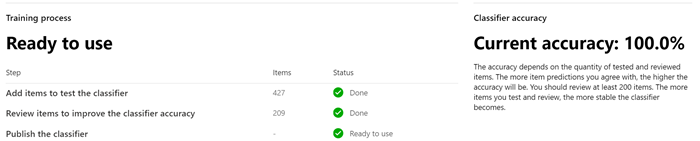
Publish the classifier.
Once published, your classifier will be available as a condition in Office auto-labeling with sensitivity labels, auto-apply retention label policy based on a condition and in Communication compliance.
Feedback
Coming soon: Throughout 2024 we will be phasing out GitHub Issues as the feedback mechanism for content and replacing it with a new feedback system. For more information see: https://aka.ms/ContentUserFeedback.
Submit and view feedback for