"MAPI unavailable" error in Skype for Business 2016 client
Symptoms
In certain situations, the MAPI connection to Exchange Server may not be available to Skype for Business 2016 clients. This issue occurs in the following scenarios:
- You have a new installation of Office 2016, or you create a new Outlook 2016 profile.
- You upgrade an existing Office 2013 installation to Office 2016, and then you create a new Outlook 2016 Exchange Server profile.
This issue may occur for Microsoft 365 Exchange Online or Exchange On-Premises users. When this issue occurs, the MAPI connection is unavailable to Skype for Business 2016 clients. Additionally, you may experience the following symptoms:
The Skype for Business Configuration Information feature (hold down the Ctrl key and right-click the Skype for Business 2016 system tray icon) shows a "MAPI unavailable" status, as shown.

If you click the Conversations tab
 , and then you click View more in Outlook, you receive the following error message:
Your Outlook profile is not configured correctly. Contact your support team with this information.
Delegate functionality may be broken. For example, you cannot schedule a meeting on behalf of someone else. When you try to create the online meeting, you receive the following error message:
You do not have permissions to schedule online meetings on behalf of the owner of this account. Please contact the owner of the account to get delegate permissions in Lync.
Cause
This issue occurs because Skype for Business 2016 uses the PR_PROFILE_USER property to get the free/busy information. However, Microsoft Outlook 2016 doesn't write the property as part of the Reliable Profiles feature.
Resolution
To fix this issue, use one of the following methods, depending on your Office installation type. See the "More Information" section to determine whether your Office installation is MSI-based or Click-to-Run.
For MSI-based versions of Skype for Business 2016
To fix this issue, install the July 5, 2016, update (KB3115268) for Skype for Business 2016.
For Click-to-Run versions of Skype for Business 2016
Current Channel (CC): Fixed in builds 16.0.7167.2040 and later
First Release Deferred Channel (FRDC): Fixed in builds 16.0.6965.2078 and later
Deferred Channel (DC): Fixed in builds 16.0.6965.2092 and later
For more information about C2R Channel builds, see Microsoft 365 client update channel releases.
Workaround
Important
Follow the steps in this section carefully. Serious problems might occur if you modify the registry incorrectly. Before you modify it, back up the registry for restoration in case problems occur.
To work around this issue in a Click-to-Run version of Skype for Business 2016, use the Workaround in this section.
Note
Only the workaround itself is supported by the Outlook team. The preliminary steps in the first procedure are unsupported. However, this procedure provides information that is required to complete the workaround. These steps also provide a method to verify that the workaround is deployed correctly and to back out the changes if it's necessary.
Preliminary steps (unsupported)
Important
The following procedure is unsupported by the Outlook team and may cause other issues in Outlook. Use this procedure at your own risk. We do not recommend that you use this procedure. However, we are including it here because it was previously published, and you may have to have to use these steps to remove the MAPI PR_PROFILE_USER property (or registry key) after fixes are released for all Click-to-Run product channels.
Start Registry Editor.
Windows 10
Type regedit.exe at the Start screen, and then tap or click regedit in the search results.
Windows 8.1 and Windows 8
Swipe in from the right to open the charms, select Search, and then type regedit.exe in the search box.
Windows 7 and Windows Vista
Click Start, type regedit in the Start Search box, and then press Enter. If you are prompted for an administrator password or for confirmation, type the password, or click Allow.
Locate the following registry subkey:
HKEY_CURRENT_USER\Software\Microsoft\Office\16.0\Outlook\Profiles
Under this subkey, locate and expand the name of your Outlook profile.
Note
By default, the profile name is "Outlook." However, your profile may have a different name if you created it manually.
Under the profile, locate and then expand the 9375CFF0413111d3B88A00104B2A6676 key.
Under the 9375CFF0413111d3B88A00104B2A6676 key, you should see a subfolder for each account that's in your profile. Select the first subfolder (00000001), and then examine the data of the Account Name binary value by double-clicking the value. Repeat this process until you find the Account Name value that includes your SMTP address.
Under the \0000000x subkey that includes your SMTP address, locate the Service UID binary value.
Note
This value represents a GUID (for example, c3 d1 9a 7b 80 1b c4 4a 96 0a e5 b6 3b f9 7c 7e).
Locate the subfolder in your profile that matches the GUID value that you found in step 6 (for example, \c3d19a7b801bc44a960ae5b63bf97c7e).
Under the subkey from step 7, examine the 01023d0d binary value.
Note
This value represents a GUID (for example, 5f cf d5 f1 ba 5c 6f 45 b3 57 cc 5e 0d 16 94 58).
Locate the subfolder in your profile that matches the GUID value from step 8 (for example, \5fcfd5f1ba5c6f45b357cc5e0d169458).
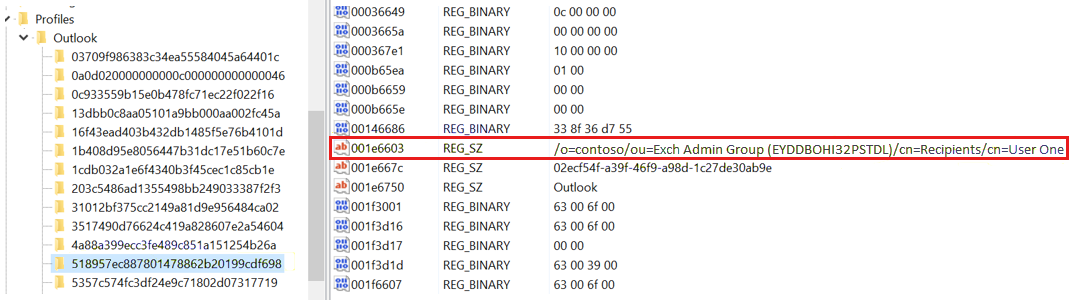
In this location, create a string value that's named 001e6603, as shown.

Find the user's Legacy Exchange domain name (DN).
Press and hold Ctrl while you right-click the Outlook system tray icon. Then, select Test E-mail AutoConfiguration.
In the dialog box that opens, clear both the Use GuessSmart and Secure Guessmart Authentication check boxes, and then click Test.
After the test is complete, select the XML tab, and then locate the Legacy DN value, as shown.
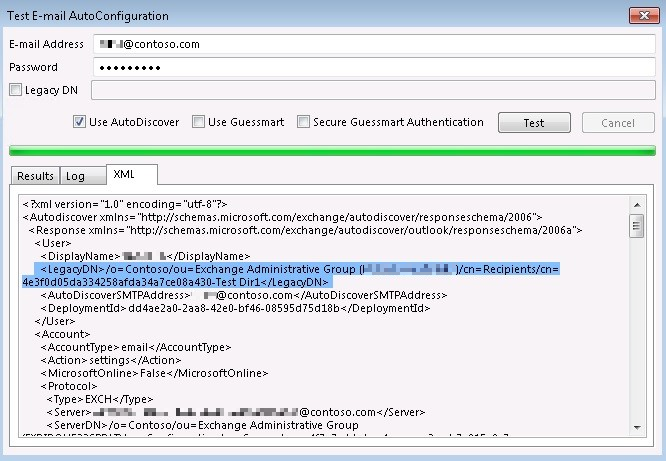
Copy the legacy DN information. Although the entire tagged entry is highlighted in this screen shot, the value that you want to copy is everything between the <LegacyDN> tags. In this example, it is /o=Contoso /ou=Exchange Administrative Group (FYDIBOHF23SPDLT)/cn=Recipients/cn=4ef0d05da334258afda34a7ce08a430-TestDir1.
In the registry, populate the Value data field by using the legacy DN information that you just copied, as shown. Then click OK.

Workaround (supported)
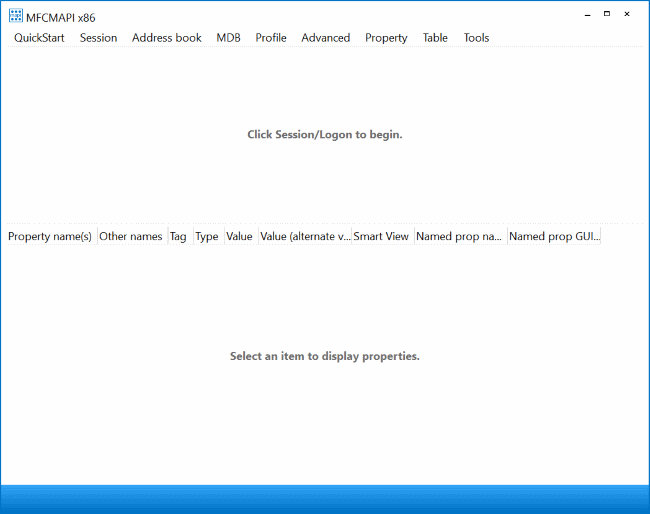
Obtain the MFCMapi tool from the following website:
Start the tool on the affected user's computer.
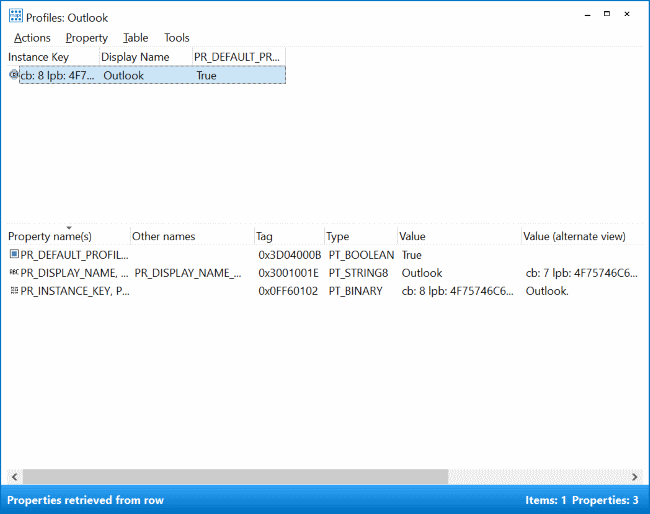
Click Profile, and then click Show Profiles.
Double-click the affected user's profile. In this situation, there is only the default profile that's named "Outlook." If the user has multiple profiles, select the one that represents their primary user account that is experiencing this issue.
In the Services table that opens, locate the service that has the Display Name of "Microsoft Exchange," and then double-click that service to open it.

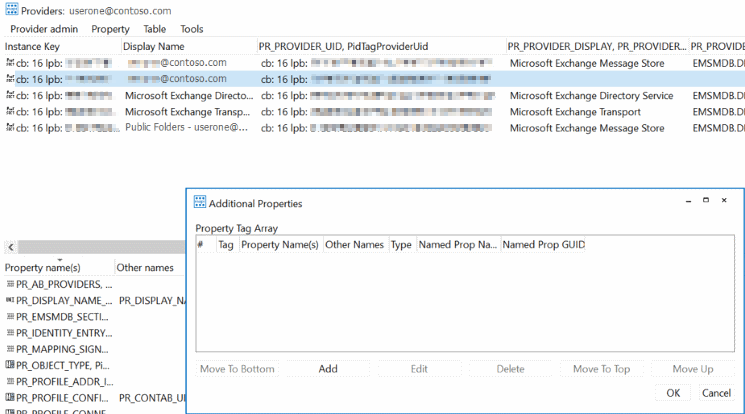
In the Providers table that opens. locate and select the provider that has the SMTP address of the affected user that has no entries for "PR_PROVIDER_DISPLAY."
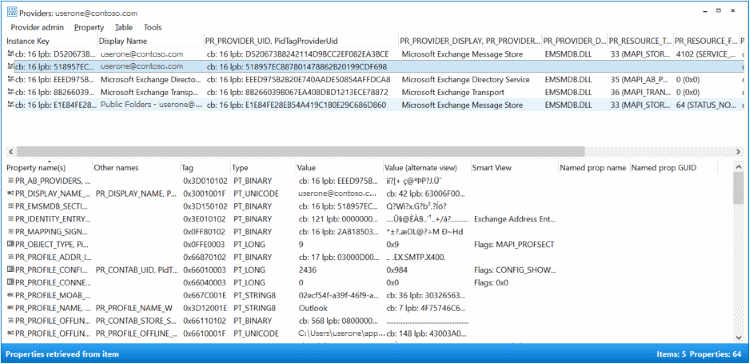
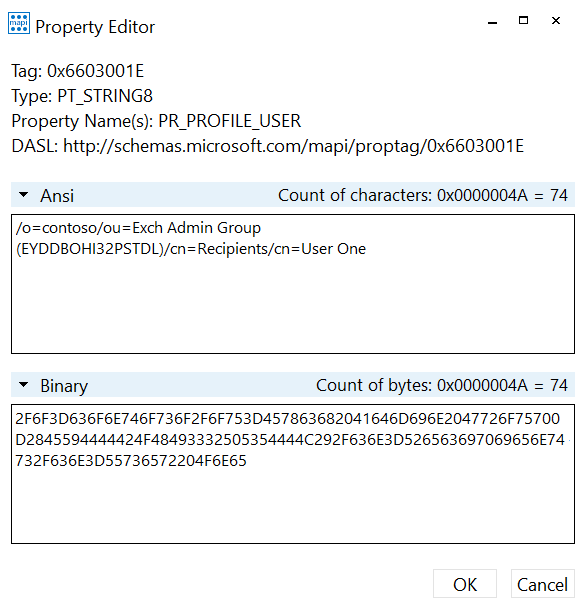
In the MFCMapi tool, examine the Providers window to make sure that the user's SMTP address provider is selected. Then, look for the property that's named PR_PROFILE_USER. If this property exists, go to step 10. If this property does not exist, click Additional Properties on the Property menu, and then click the Add button.
In the Property Tag dialog box, type PR_PROFILE_USER.
Note
MFCMapi translates the named Property Tag into the correct values, as shown.
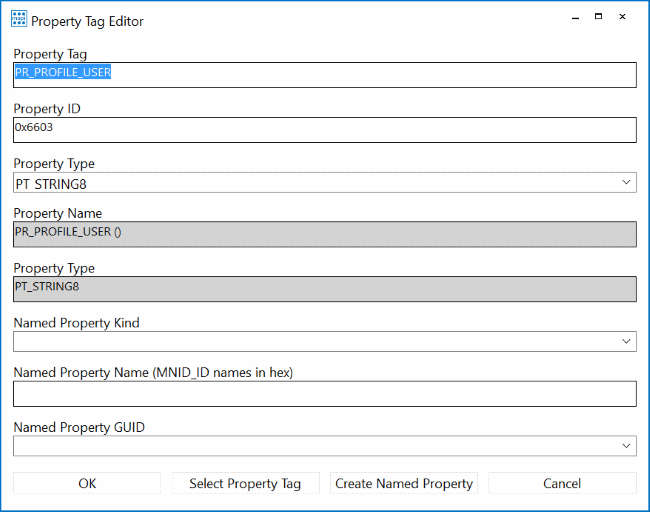
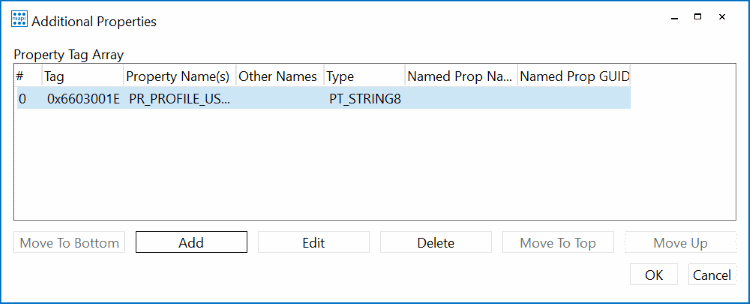
Click OK. Then, click OK in the Additional Properties window.
Run Test Autodiscovery from the Preliminary steps procedure to get the affected user's Legacy Exchange DN (LegDN). Copy this information to the clipboard.
In the Providers window, right-click the PR_PROFILE_USER property, and then click Edit.
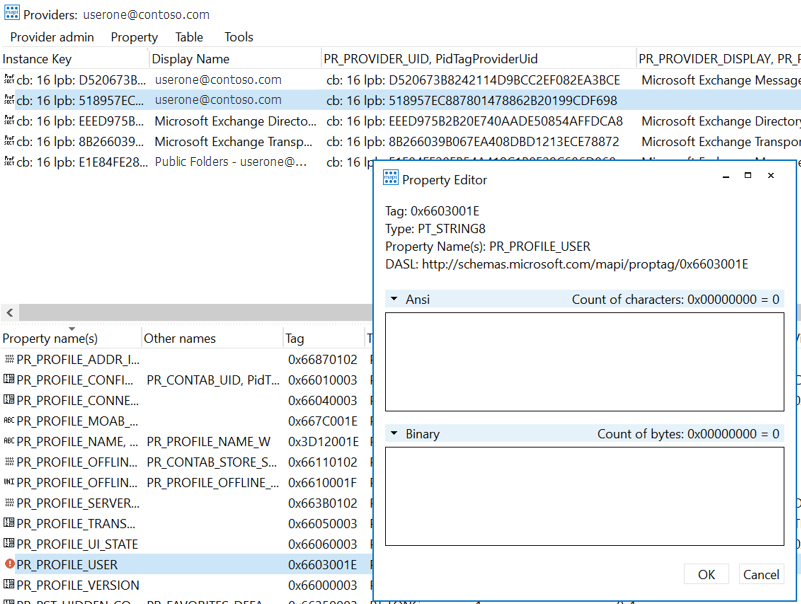
Paste the user's LegDN information in the Ansi text box, and then click OK.
Note
MFCMapi may now show two entries for PR_PROFILE_USER. This is a known display issue that can be safely ignored.
Optional: Use the method that is described in Workaround 1 to examine the new registry value that was created by MFCMapi and verify that it's in the correct Outlook Profile for the affected user.
Close all MFCMapi windows and Registry Editor, and then test MAPI connectivity. Also, completely log off from Skype, and verify that the program is not running.
Log back on to Skype, wait a minute or two, and then check the Skype configuration. You should now see MAPI Status displayed as OK.

Note
It can take some time for the change to take effect. You may have to log out of Outlook and Skype for Business and then sign back in to see the change.
More Information
To determine whether your Office installation is Click-to-Run or MSI-based, follow these steps:
- Start an Office 2016 application.
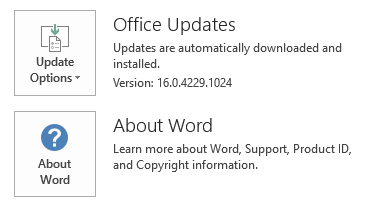
- On the File menu, select Account.
- For Office 2016 Click-to-Run installations, an Update Options item is displayed. For MSI-based installations, the Update Options item isn't displayed.
| Office 2016 Click-to-Run installation | MSI-based Office 2016 |
|---|---|
|

|
Third-party information disclaimer
The third-party products that this article discusses are manufactured by companies that are independent of Microsoft. Microsoft makes no warranty, implied or otherwise, about the performance or reliability of these products.
Still need help? Go to Microsoft Community.
Feedback
Coming soon: Throughout 2024 we will be phasing out GitHub Issues as the feedback mechanism for content and replacing it with a new feedback system. For more information see: https://aka.ms/ContentUserFeedback.
Submit and view feedback for