Create a no-code vision solution in Azure Percept Studio
Important
Retirement of Azure Percept DK:
Update 22 February 2023: A firmware update for the Percept DK Vision and Audio accessory components (also known as Vision and Audio SOM) is now available here, and will enable the accessory components to continue functioning beyond the retirement date.
The Azure Percept public preview will be evolving to support new edge device platforms and developer experiences. As part of this evolution the Azure Percept DK and Audio Accessory and associated supporting Azure services for the Percept DK will be retired March 30th, 2023.
Effective March 30th, 2023, the Azure Percept DK and Audio Accessory will no longer be supported by any Azure services including Azure Percept Studio, OS updates, containers updates, view web stream, and Custom Vision integration. Microsoft will no longer provide customer success support and any associated supporting services. For more information, please visit the Retirement Notice Blog Post.
Azure Percept Studio enables you to build and deploy custom computer vision solutions, no coding required. In this article, you will:
- Create a vision project in Azure Percept Studio
- Collect training images with your devkit
- Label your training images in Custom Vision
- Train your custom object detection or classification model
- Deploy your model to your devkit
- Improve your model by setting up retraining
This tutorial is suitable for developers with little to no AI experience and those just getting started with Azure Percept.
Prerequisites
- Azure Percept DK (devkit)
- Azure subscription
- Azure Percept DK setup experience: you connected your devkit to a Wi-Fi network, created an IoT Hub, and connected your devkit to the IoT Hub
Create a vision prototype
Start your browser and go to Azure Percept Studio.
On the overview page, click the Demos & tutorials tab.
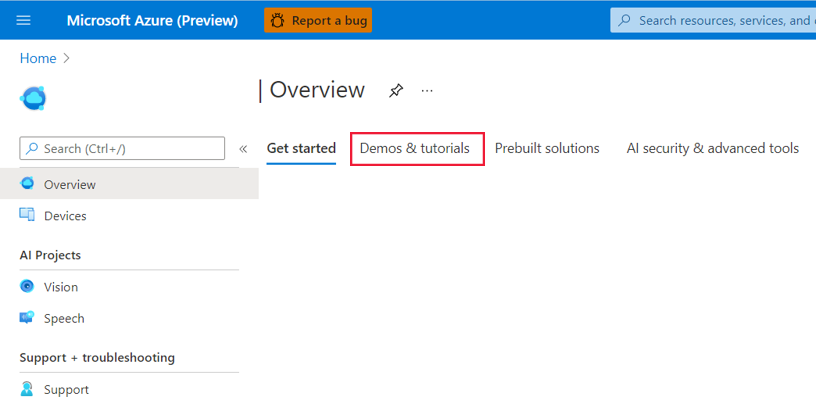
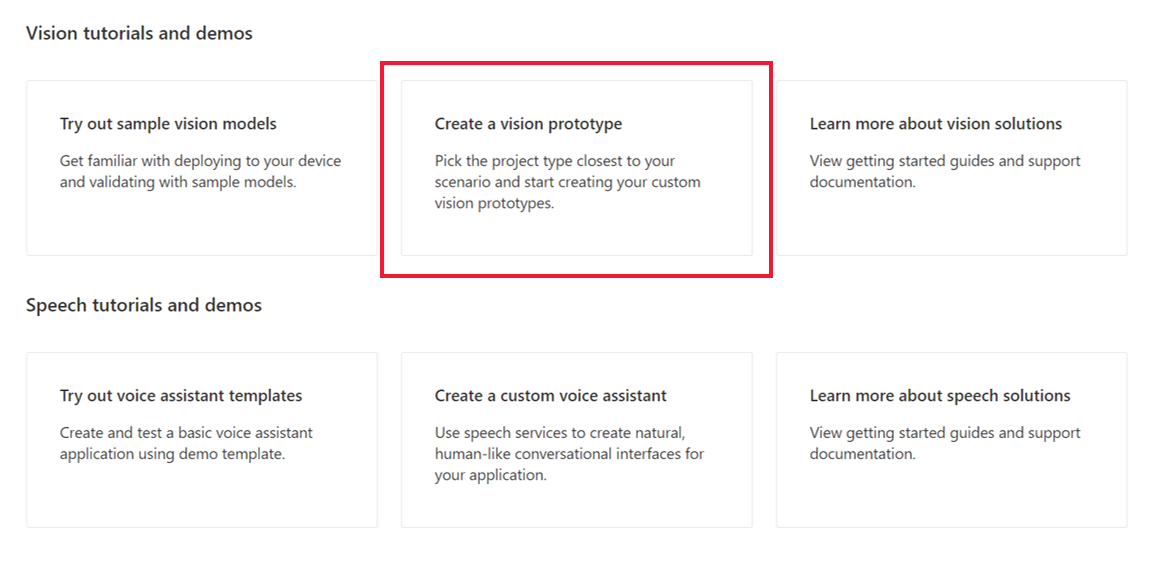
Under Vision tutorials and demos, click Create a vision prototype.
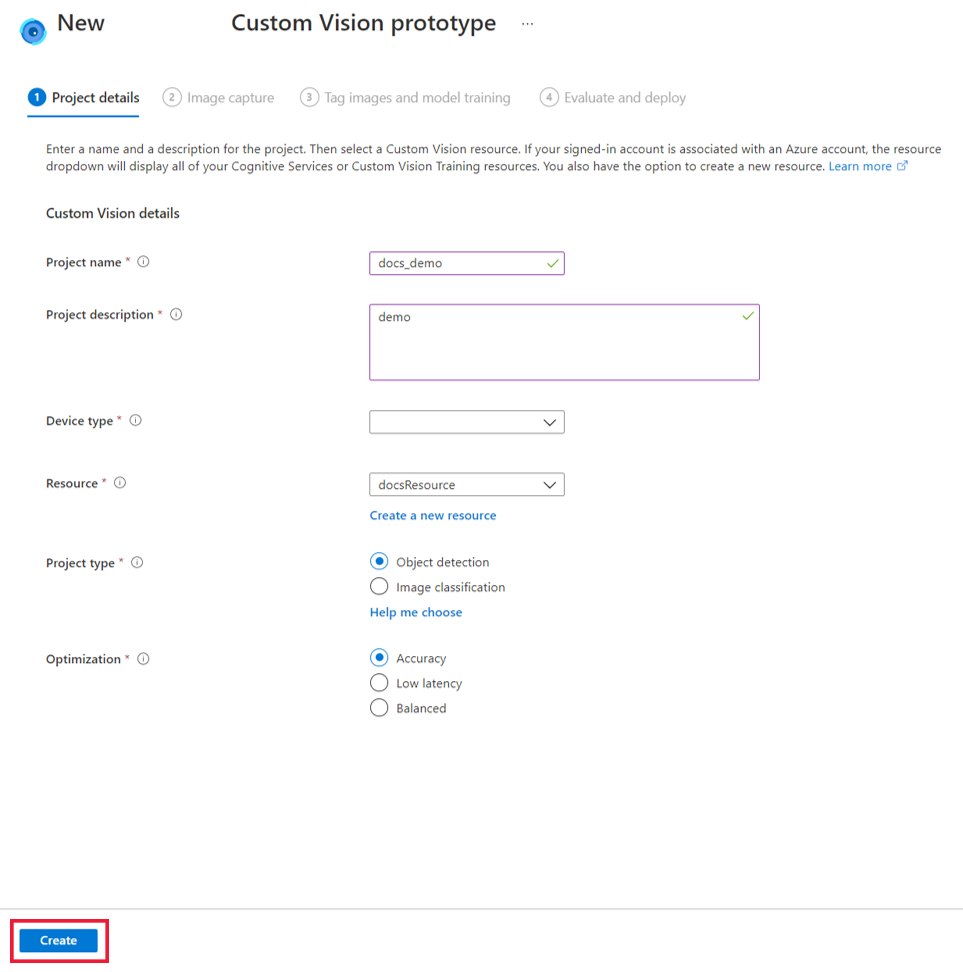
On the New Azure Percept Custom Vision prototype page, do the following:
In the Project name box, enter a name for your vision prototype.
Enter a description of the vision prototype in the Project description box.
Select Azure Percept DK under the Device type drop-down menu.
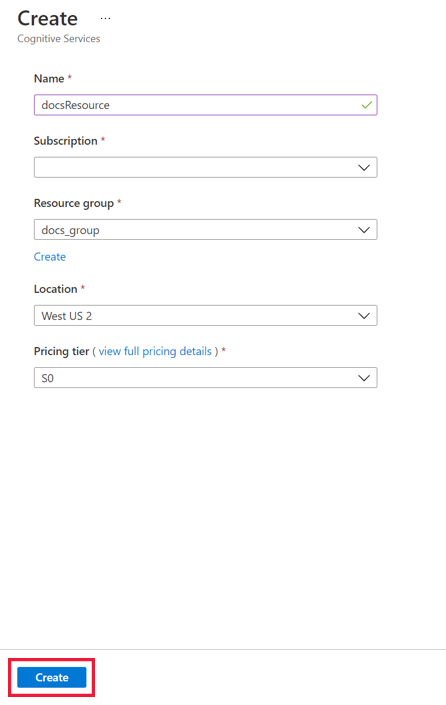
Select a resource under the Resource drop-down menu or click Create a new resource. If you elect to create a new resource, do the following in the Create window:
- Enter a name for your new resource.
- Select your Azure subscription.
- Select a resource group or create a new one.
- Select your preferred region.
- Select your pricing tier (we recommend S0).
- Click Create at the bottom of the window.
For Project type, choose whether your vision project will perform object detection or image classification. For more information on the project types, click Help me choose.
For Optimization, select whether you want to optimize your project for accuracy, low network latency, or a balance of both.
Click the Create button.


Connect a device to your project and capture images
After creating a vision solution, you must add your devkit and its corresponding IoT Hub to it.
Power on your devkit.
In the IoT Hub dropdown menu, select the IoT hub that your devkit was connected to during the OOBE.
In the Devices dropdown menu, select your devkit.
Next, you must either load images or capture images for training your AI model. We recommended uploading at least 30 images per tag type. For example, if you want to build a dog and cat detector, you must upload at least 30 images of dogs and 30 images of cats. To capture images with the vision SoM of your devkit, do the following:
In the Image capture window, select View device stream to view the vision SoM video stream.
Check the video stream to ensure that your vision SoM camera is correctly aligned to take the training pictures. Make adjustments as necessary.
In the Image capture window, click Take photo.
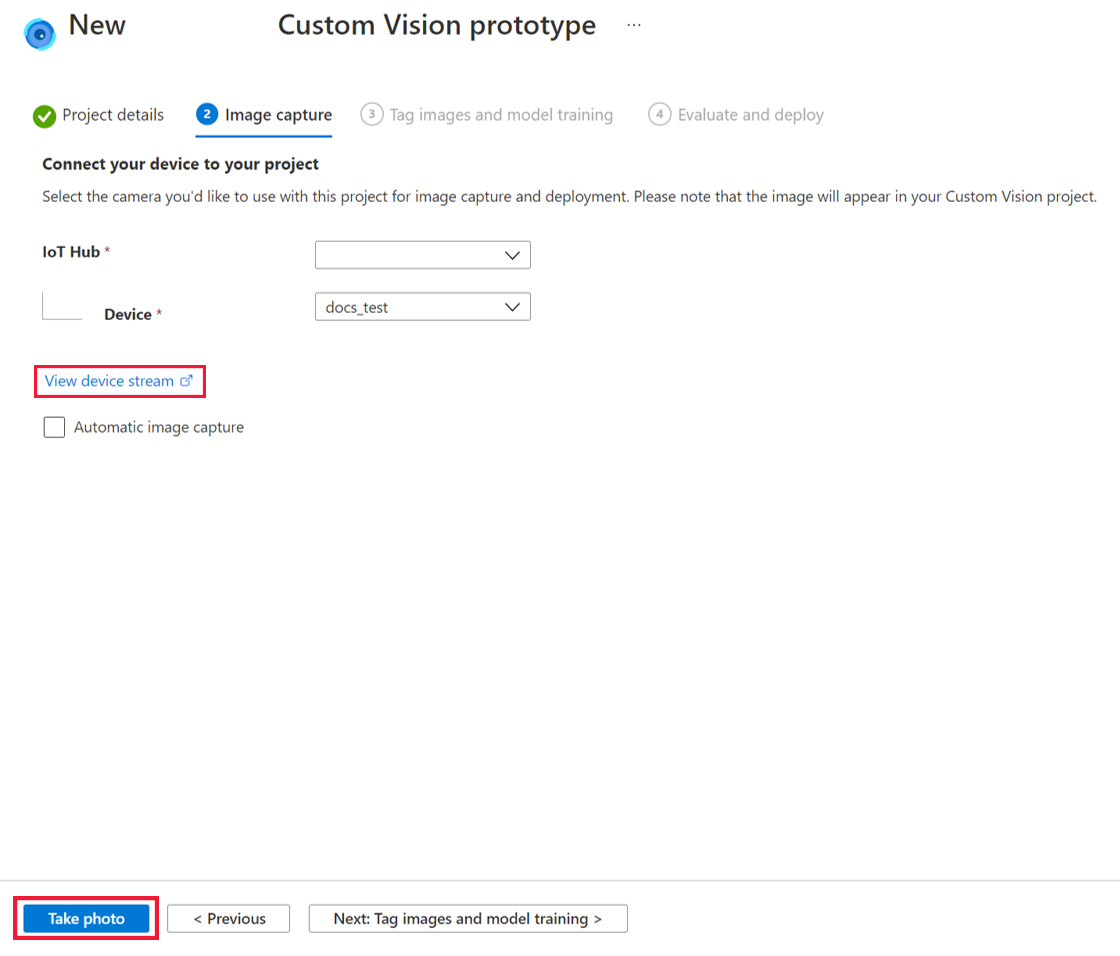
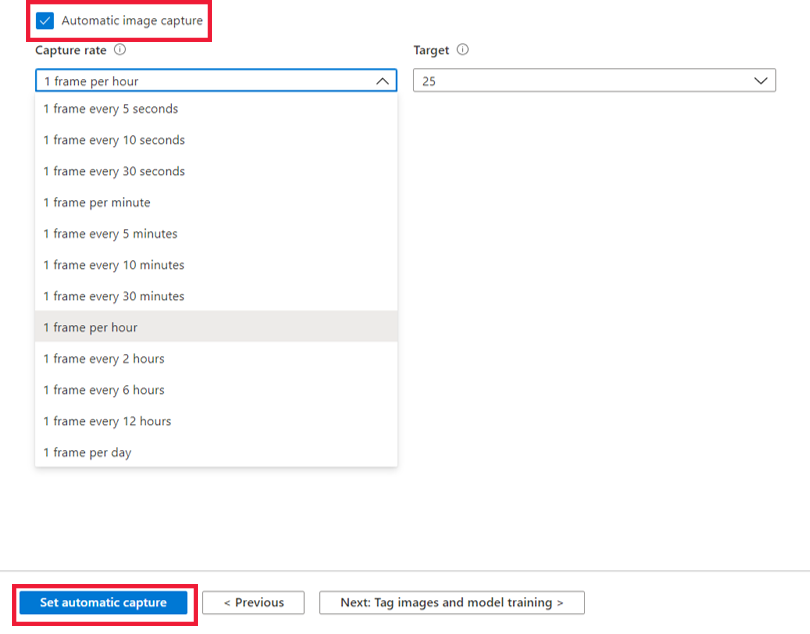
Alternatively, set up an automated image capture to collect a large quantity of images at a time by checking the Automatic image capture box. Select your preferred imaging rate under Capture rate and the total number of images you would like to collect under Target. Click Set automatic capture to begin the automatic image capture process.
When you have enough photos, click Next: Tag images and model training at the bottom of the screen. All images will be saved in Custom Vision.
Note
If you elect to upload training images directly to Custom Vision, please note that image file size cannot exceed 6MB.
Tag images and train your model
Before training your model, add labels to your images.
On the Tag images and model training page, click Open project in Custom Vision.
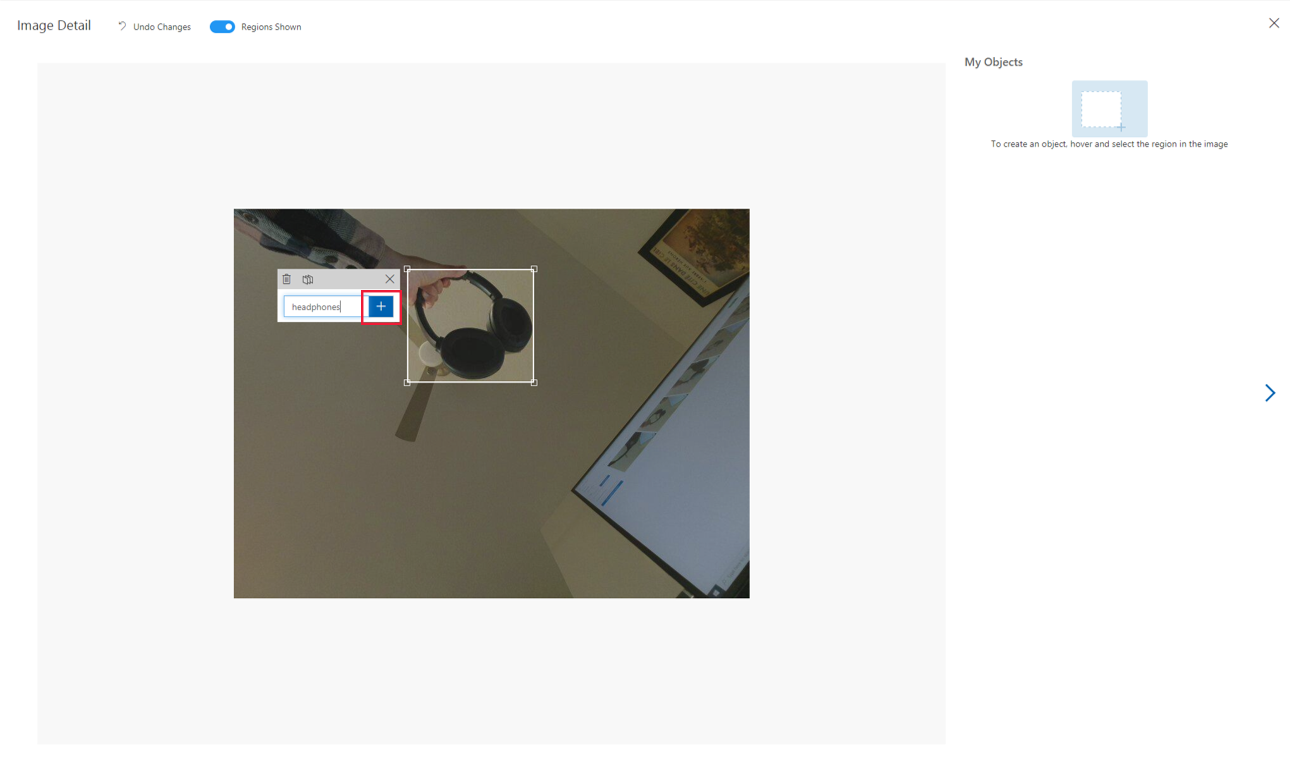
On the left-hand side of the Custom Vision page, click Untagged under Tags to view the images you just collected in the previous step. Select one or more of your untagged images.
In the Image Detail window, click on the image to begin tagging. If you selected object detection as your project type, you must also draw a bounding box around specific objects you would like to tag. Adjust the bounding box as needed. Type your object tag and click + to apply the tag. For example, if you were creating a vision solution that would notify you when a store shelf needs restocking, add the tag "Empty Shelf" to images of empty shelves, and add the tag "Full Shelf" to images of fully-stocked shelves. Repeat for all untagged images.
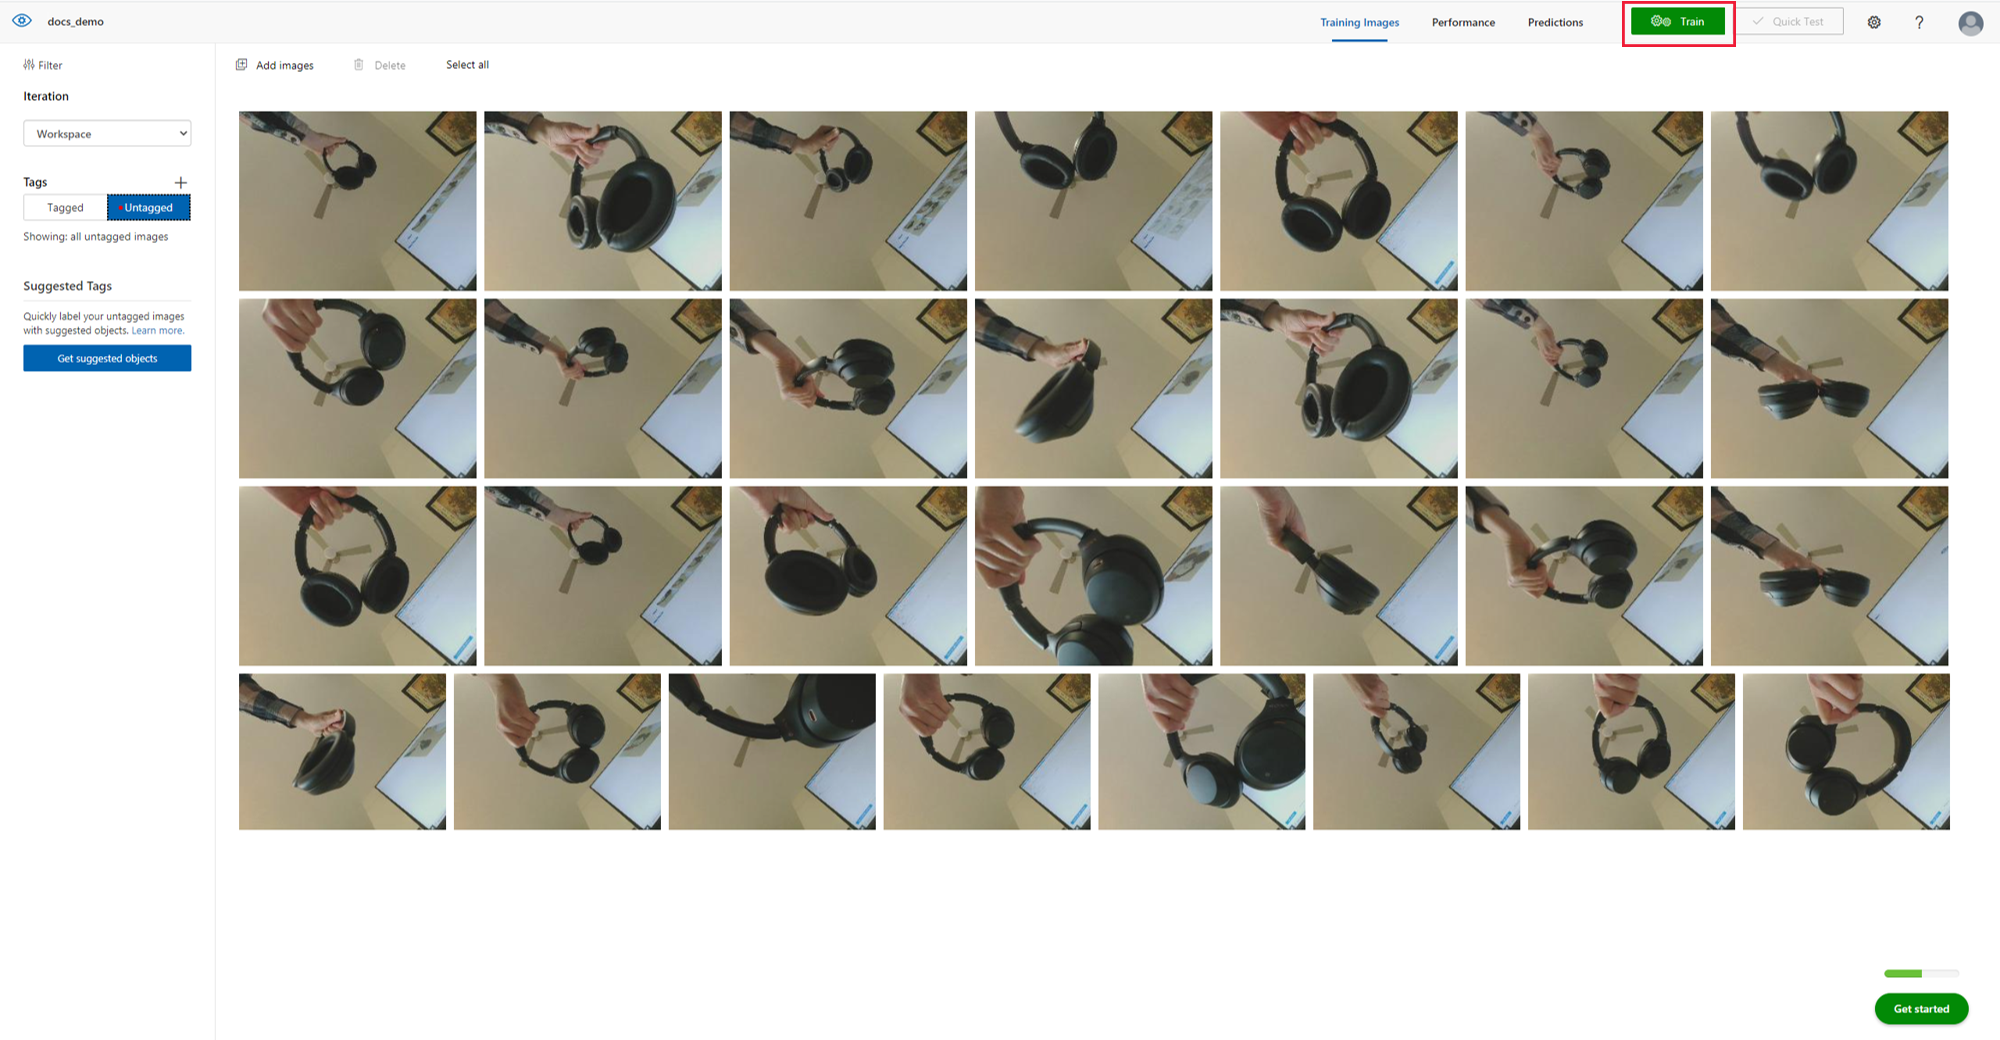
After tagging your images, click the X icon in the upper right corner of the window. Click Tagged under Tags to view all of your newly tagged images.
After your images are labeled, you are ready to train your AI model. To do so, click Train near the top of the page. You must have at least 15 images per tag type to train your model (we recommend using at least 30). Training typically takes about 30 minutes, but it may take longer if your image set is extremely large.
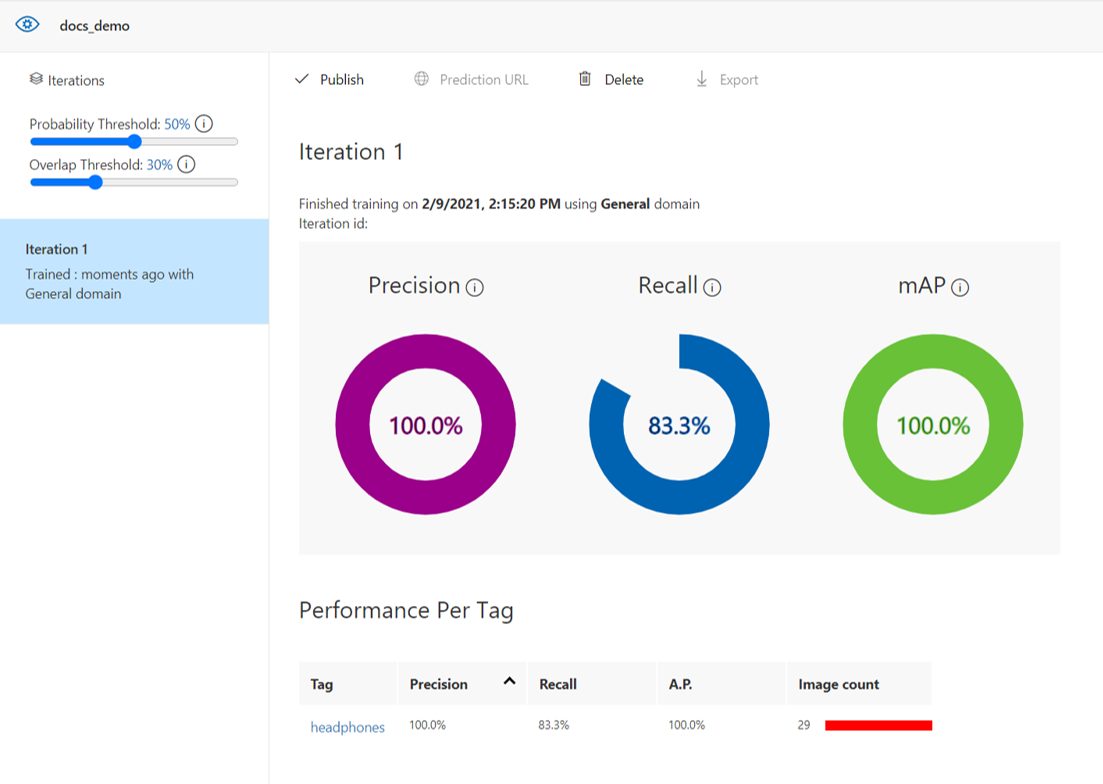
When the training has completed, your screen will show your model performance. For more information about evaluating these results, please see the model evaluation documentation. After training, you may also wish to test your model on additional images and retrain as necessary. Each time you train your model, it will be saved as a new iteration. Reference the Custom Vision documentation for additional information on how to improve model performance.
Note
If you elect to test your model on additional images in Custom Vision, please note that test image file size cannot exceed 4MB.
Once you are satisfied with the performance of your model, close Custom Vision by closing the browser tab.
Deploy your AI model
Go back to your Azure Percept Studio tab and click Next: Evaluate and deploy at the bottom of your screen.
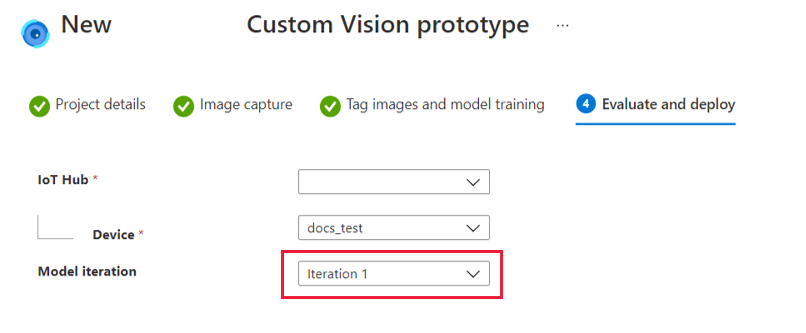
The Evaluate and deploy window will show the performance of your selected model iteration. Select the iteration you would like to deploy to your devkit under the Model iteration drop-down menu and click Deploy model at the bottom of the screen.
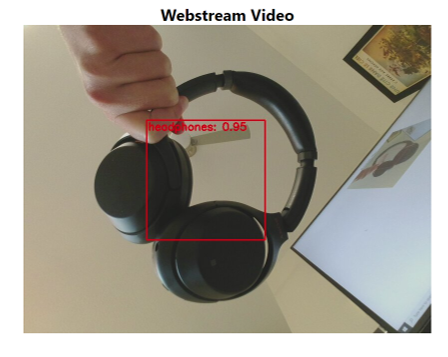
After deploying your model, view your device's video stream to see your model inferencing in action.

After closing this window, you may go back and edit your vision project anytime by clicking Vision under AI Projects on the Azure Percept Studio homepage and selecting the name of your vision project.

Improve your model by setting up retraining
After you have trained your model and deployed it to the device, you can improve model performance by setting up retraining parameters to capture more training data. This feature is used to improve a trained model's performance by giving you the ability to capture images based on a probability range. For example, you can set your device to only capture training images when the probability is low. Here is some additional guidance on adding more images and balancing training data.
To set up retraining, go back to your Project, then to Project Summary
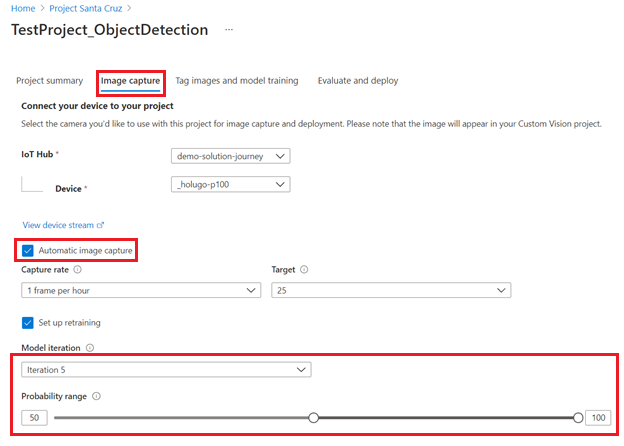
In the Image capture tab, select Automatic image capture and Set up retraining.
Set up the automated image capture to collect a large quantity of images at a time by checking the Automatic image capture box.
Select your preferred imaging rate under Capture rate and the total number of images you would like to collect under Target.
In the set up retraining section, select the iteration that you would like to capture more training data for, then select the probability range. Only images that meet the probability rate will be uploaded to your project.
Clean up resources
If you created a new Azure resource for this tutorial and you no longer wish to develop or use your vision solution, perform the following steps to delete your resource:
- Go to the Azure portal.
- Click on All resources.
- Click the checkbox next to the resource created during this tutorial. The resource type will be listed as Cognitive Services.
- Click the Delete icon near the top of the screen.
Video walkthrough
For a visual walkthrough of the steps described above, please see the following video:
Next Steps
Next, check out the vision how-to articles for information on additional vision solution features in Azure Percept Studio.