Configure port mirroring in the Azure portal
After deploying Azure VMware Solution, you can configure port mirroring from the Azure portal. Port mirroring places a protocol analyzer on the port that receives the mirrored data. It analyzes traffic from a source, a virtual machine (VM), or a group of VMs, and then sent to a defined destination. Use the following steps to configure port mirroring to monitor network traffic, which involves forwarding a copy of each packet from one network switch port to another.
Important
Port Mirroring is intended to be used as a temporary investigative tool and not a permanent network data collection feature. This is because NSX-T Data Center does not have the resources to port mirror all traffic continuously. The IPFIX feature should be used if a continuous meta-data network flow logging solution is required.
Prerequisites
An Azure VMware Solution private cloud with access to the vCenter Server and NSX-T Manager interfaces. For more information, see the Configure networking tutorial.
Create the VMs or VM groups
Create the source and destination VMs or VM groups. The source group has a single VM or multiple VMs where the traffic is mirrored.
In your Azure VMware Solution private cloud, under Workload Networking, select Port mirroring > VM groups > Add.
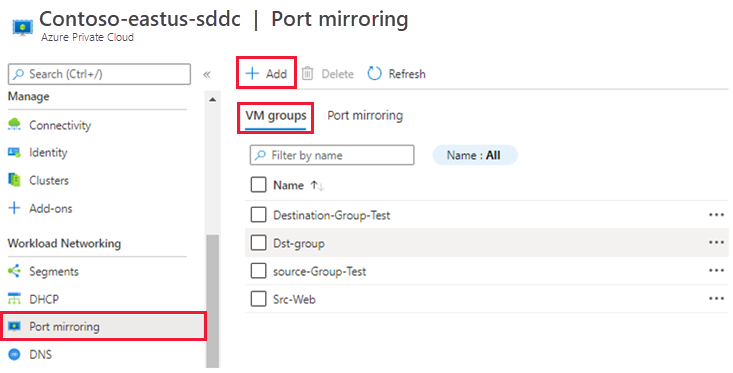
Provide a name for the new VM group, select VMs from the list, and then OK.
Repeat these steps to create the destination VM group.
Note
Before creating a port mirroring profile, make sure that you've created both the source and destination VM groups.
Create a port mirroring profile
Create a port mirroring profile that defines the traffic direction for the source and destination VM groups.
Select Port mirroring > Port mirroring > Add and then provide:
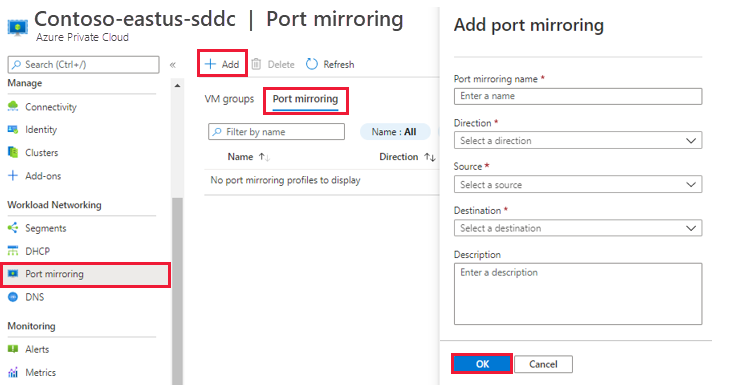
Port mirroring name - Descriptive name for the profile.
Direction - Select from Ingress, Egress, or Bi-directional.
Source - Select the source VM group.
Destination - Select the destination VM group.
Description - Enter a description for the port mirroring.
Select OK to complete the profile.
The profile and VM groups are visible in the Azure VMware Solution console.
Feedback
Coming soon: Throughout 2024 we will be phasing out GitHub Issues as the feedback mechanism for content and replacing it with a new feedback system. For more information see: https://aka.ms/ContentUserFeedback.
Submit and view feedback for