Deploy disaster recovery using VMware HCX
In this article, learn how to deploy disaster recovery of your virtual machines (VMs) with VMware HCX solution and use an Azure VMware Solution private cloud as the recovery or target site.
The diagram shows the deployment of VMware HCX from on-premises VMware vSphere to Azure VMware Solution private cloud disaster recovery scenario.

Important
Although part of VMware HCX, VMware HCX Disaster Recovery (DR) is not recommended for large deployments. The disaster recovery orchestration is 100% manual, and Azure VMware Solution currently doesn't have runbooks or features to support manual VMware HCX DR failover. For enterprise-class disaster recovery, refer to VMware Site Recovery Manager (SRM) or VMware Business Continuity and Disaster Recovery (BCDR) solutions.
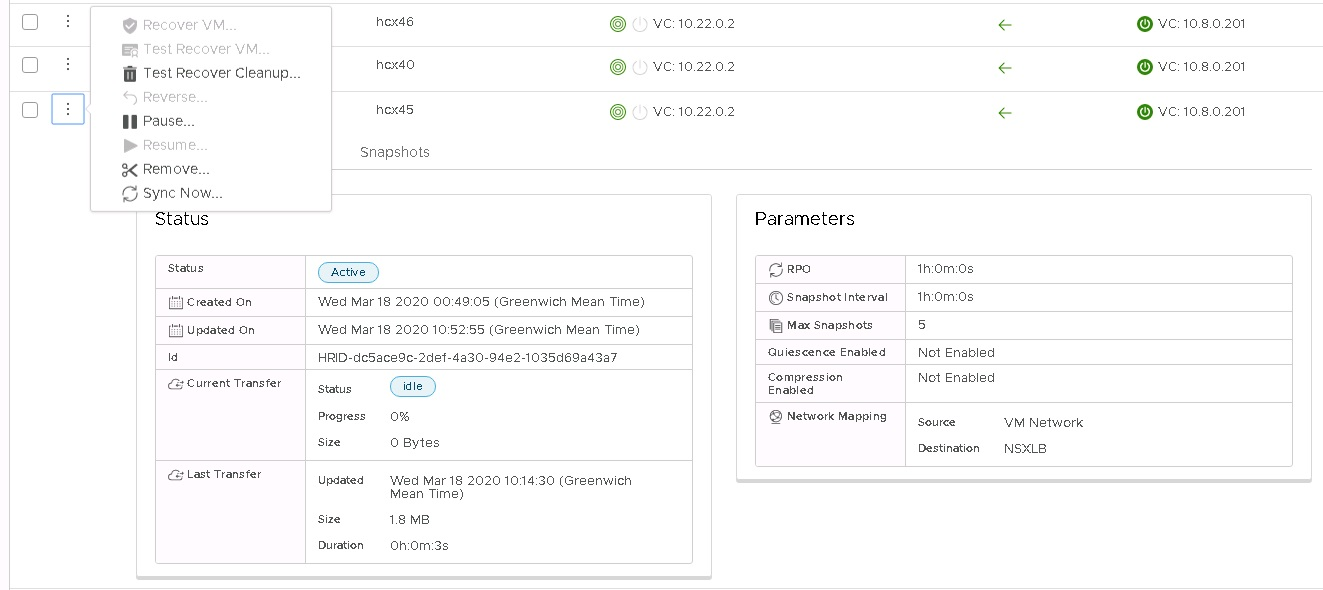
VMware HCX provides various operations for fine control and granularity in replication policies. Available Operations include:
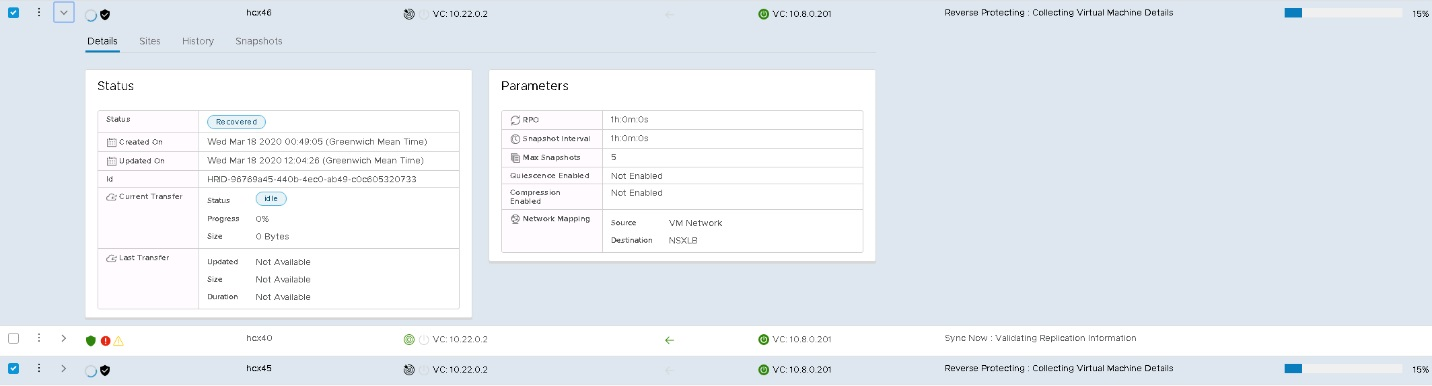
Reverse – After a disaster occurs, reverse helps make Site B the source site and Site A, where the protected VM now lives.
Pause – Pause the current replication policy associated with the VM selected.
Resume - Resume the current replication policy associated with the VM selected.
Remove - Remove the current replication policy associated with the VM selected.
Sync Now – Out of bound sync source VM to the protected VM.
This guide covers the following replication scenarios:
Protect a VM or a group of VMs.
Complete a Test Recover of a VM or a group of VMs.
Recover a VM or a group of VMs.
Reverse Protection of a VM or a group of VMs.
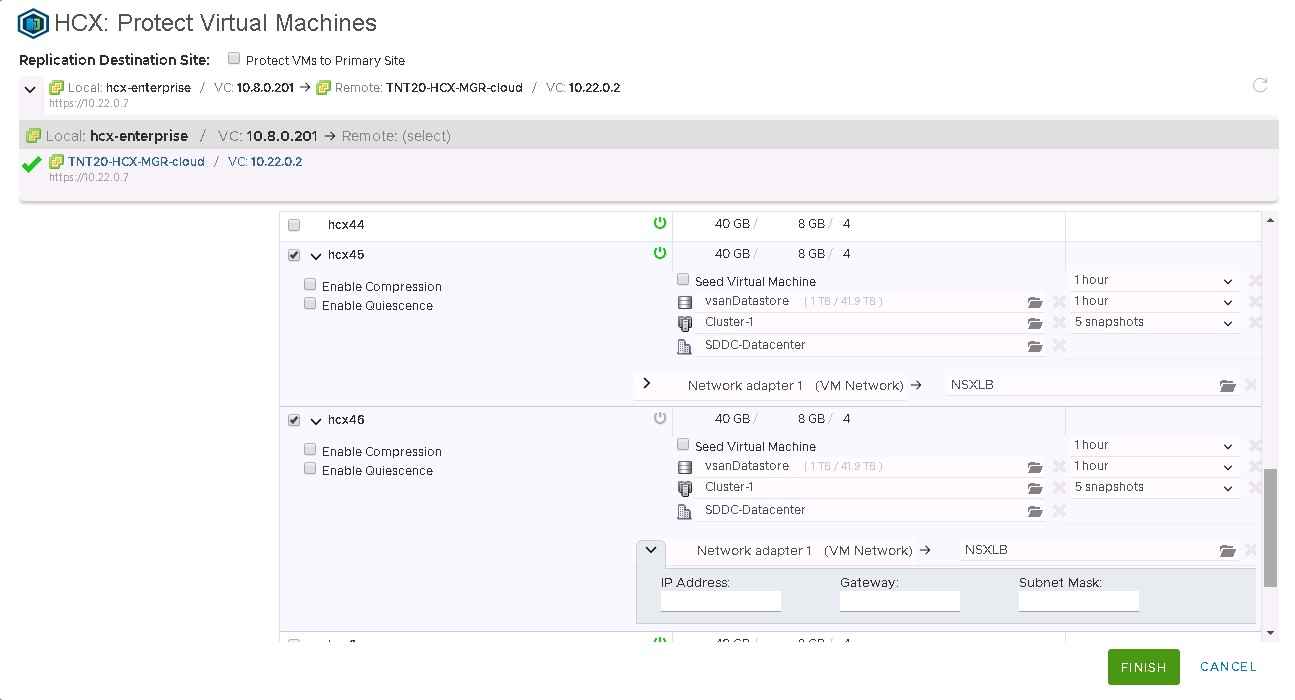
Protect VMs
Sign in to vSphere Client on the source site and access HCX plugin.
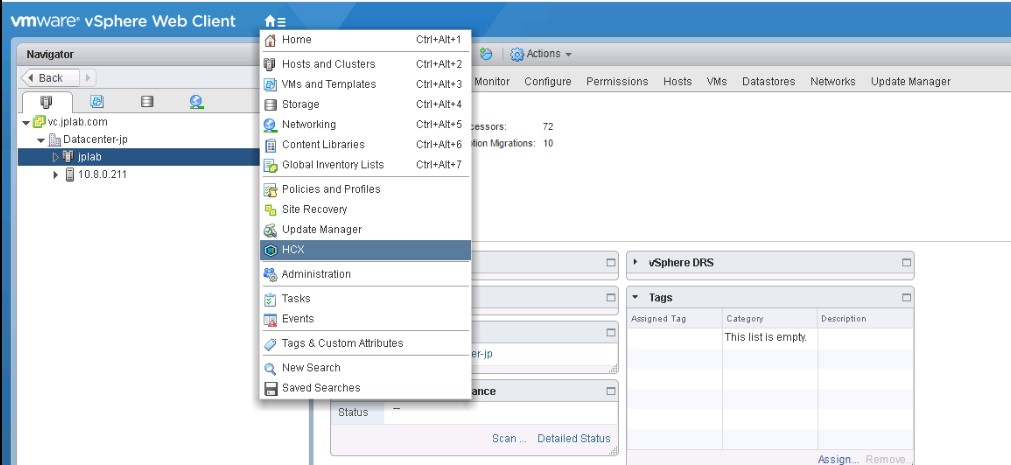
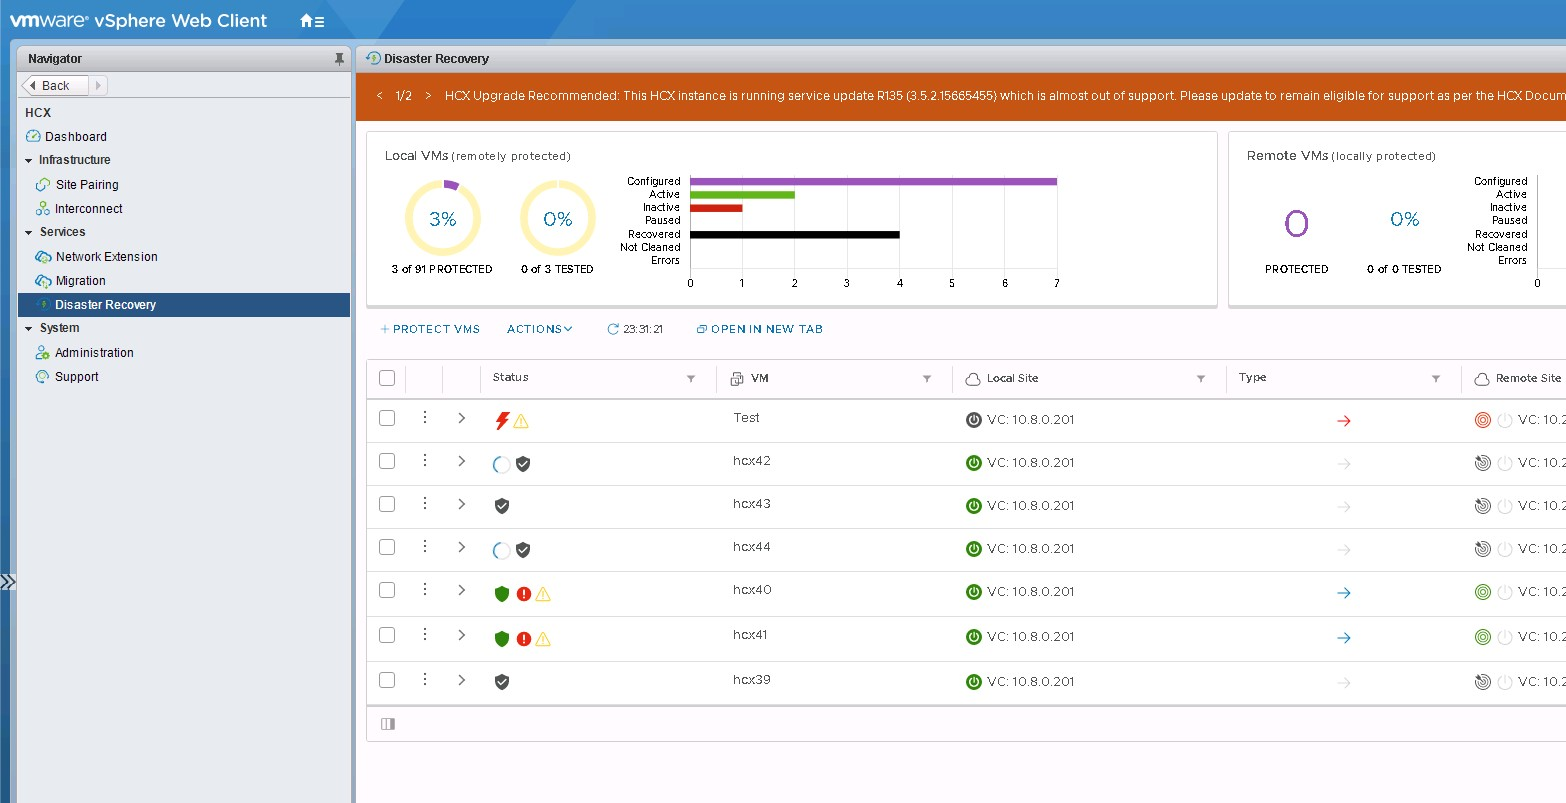
Enter the Disaster Recovery area and select PROTECT VMS.
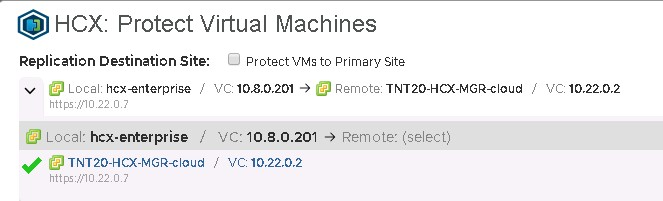
Select the Source and the Remote sites. The Remote site in this case should be the Azure VMware Solution private cloud.
If needed, select the Default replication options:
Enable Compression: Recommended for low throughput scenarios.
Enable Quiescence: Pauses the VM to ensure a consistent copy is synced to the remote site.
Destination Storage: Remote datastore for the protected VMs, and in an Azure VMware Solution private cloud, which can be a vSAN datastore or an Azure NetApp Files datastore.
Compute Container: Remote vSphere Cluster or Resource Pool.
Destination Folder: Remote destination folder, which is optional, and if no folder is selected, the VMs are placed directly under the selected cluster.
RPO: Synchronization interval between the source VM and the protected VM. It can be anywhere from 5 minutes to 24 hours.
Snapshot interval: Interval between snapshots.
Number of Snapshots: Total number of snapshots within the configured snapshot interval.
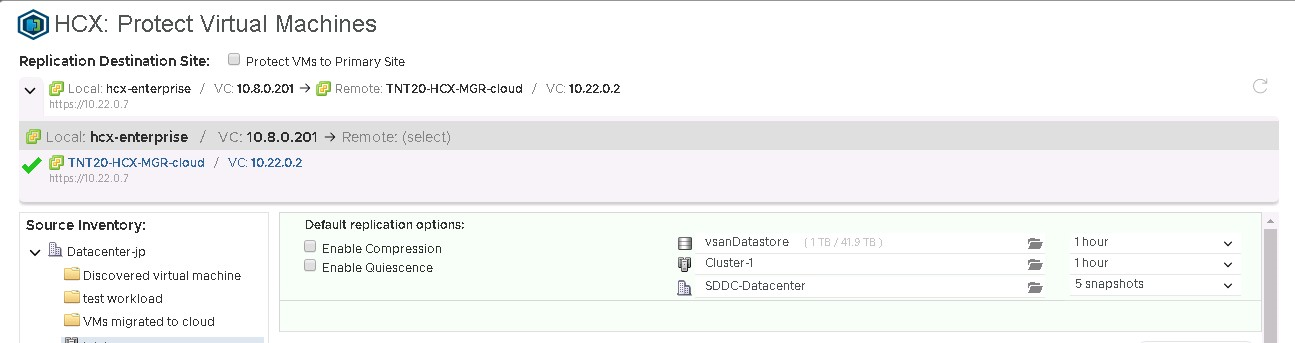
Select one or more VMs from the list and configure the replication options as needed.
By default, the VMs inherit the Global Settings Policy configured in the Default replication options. For each network interface in the selected VM, configure the remote Network Port Group and select Finish to start the protection process.
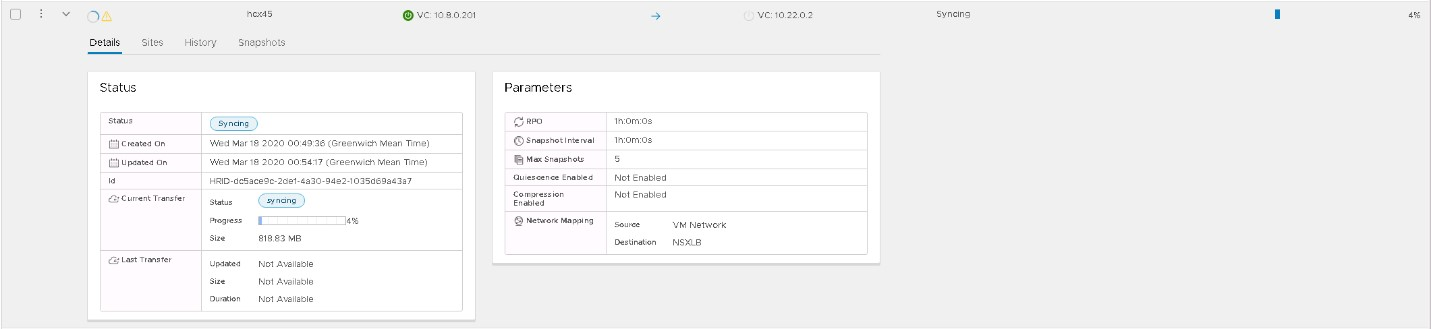
Monitor the process for each of the selected VMs in the same disaster recovery area.
After the VM is protected, you can view the different snapshots in the Snapshots tab.
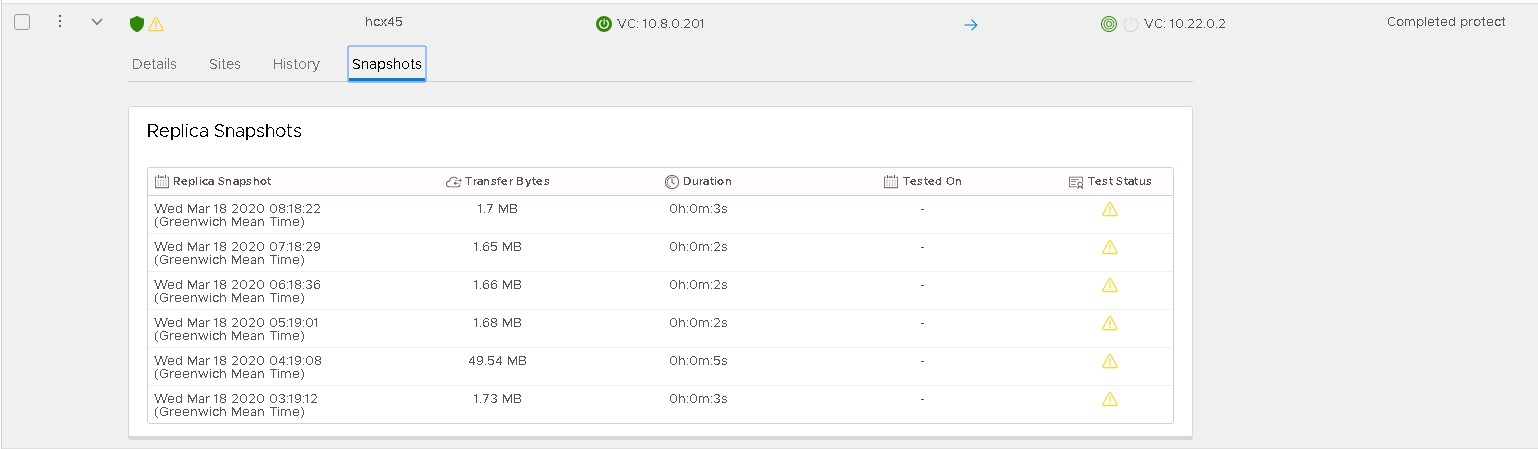
The yellow triangle means the snapshots and the virtual machines weren't tested in a Test Recovery operation.
There are key differences between a VM that is powered off and one powered on. The image shows the syncing process for a powered-on VM. It starts the syncing process until it finishes the first snapshot, which is a full copy of the VM, and then completes the next ones in the configured interval. It syncs a copy for a powered off VM, and then the VM appears as inactive, and protection operation shows as completed. When the VM is powered on, it starts the syncing process to the remote site.


Complete a test recover of VMs
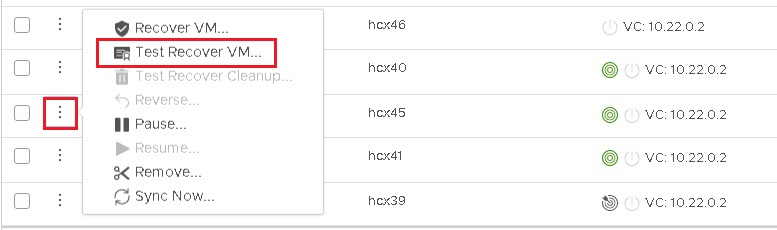
Sign in to vSphere Client on the remote site, which is the Azure VMware Solution private cloud.
Within the HCX plugin, in the Disaster Recovery area, select the vertical ellipses on any VM to display the operations menu and then select Test Recover VM.
Select the options for the test and the snapshot you want to use to test different states of the VM.
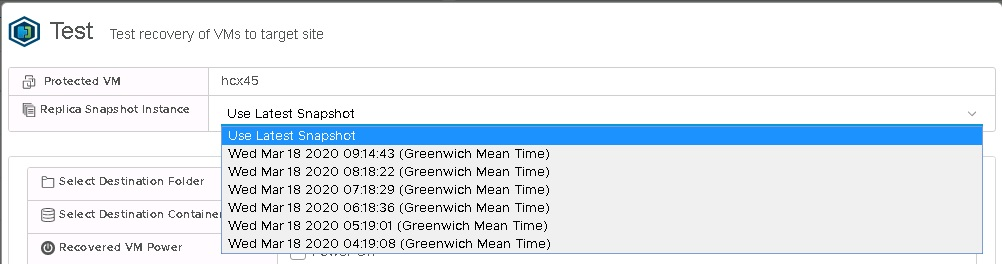
After you select Test, the recovery operation begins.
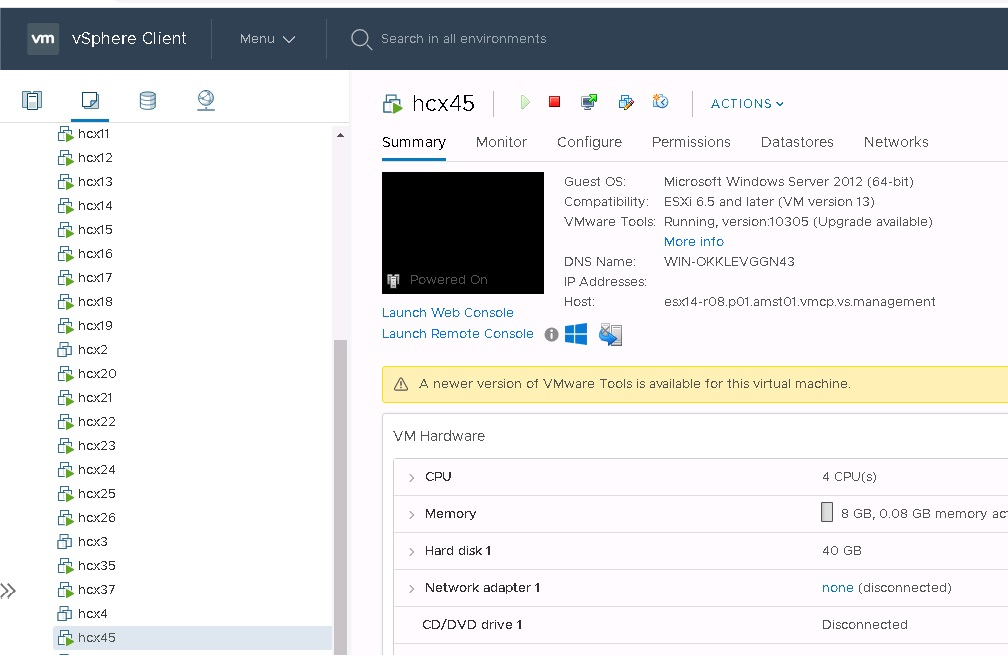
When finished, you can check the new VM in the Azure VMware Solution private cloud vCenter Server.
After testing on the VM or any application running on it are finished, do a cleanup to delete the test instance.


Recover VMs
Sign in to vSphere Client on the remote site, which is the Azure VMware Solution private cloud, and access the HCX plugin.
For the recovery scenario, a group of VMs used for this example.
Select the VM to be recovered from the list, open the ACTIONS menu, and select Recover VMs.
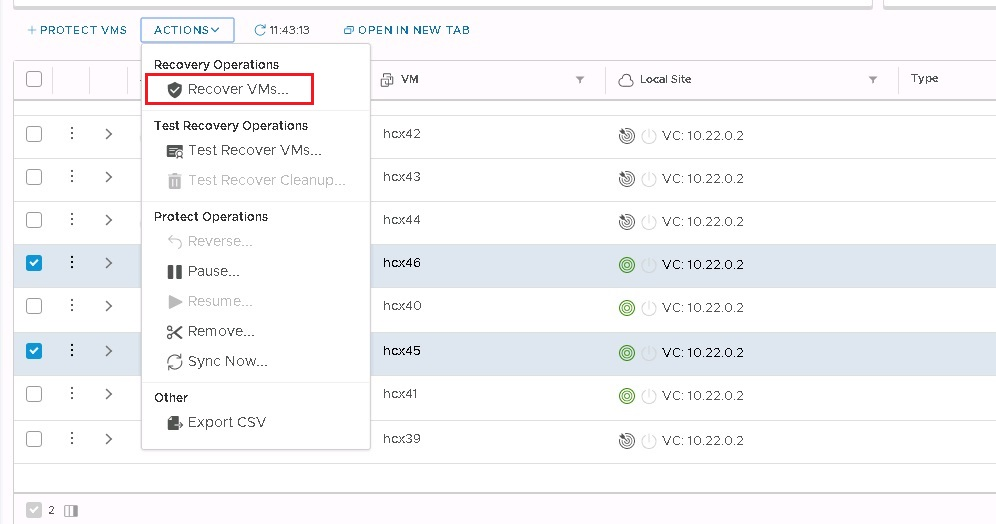
Configure the recovery options for each instance and select Recover to start the recovery operation.
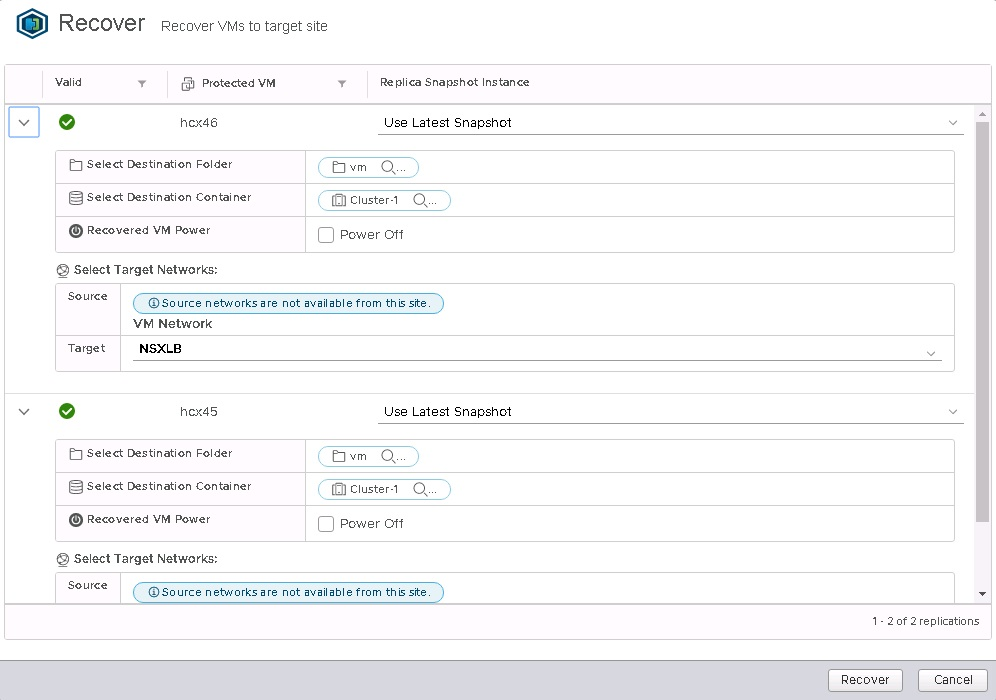
After the recovery operation is completed, the new VMs appear in the remote vCenter Server inventory.
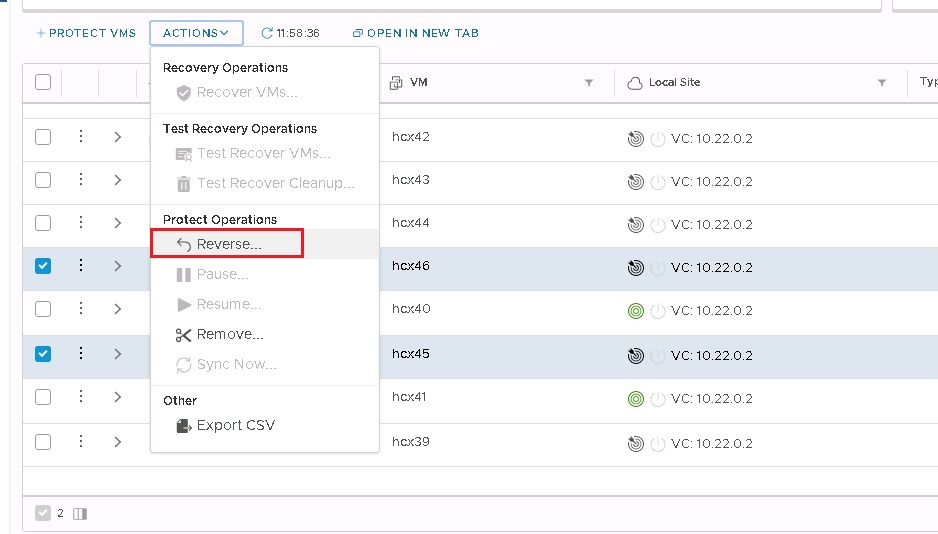
Complete a reverse replication on VMs
Sign in to vSphere Client on your Azure VMware Solution private cloud, and access HCX plugin.
Note
Ensure the original VMs on the source site are powered off before you start the reverse replication. The operation fails if the VMs aren't powered off.
From the list, select the VMs to be replicated back to the source site, open the ACTIONS menu, and select Reverse.
Select Reverse to start the replication.
Monitor on the details section of each VM.

Disaster recovery plan automation
VMware HCX currently doesn't have a built-in mechanism to create and automate a disaster recovery plan. However, VMware HCX provides a set of REST APIs, including APIs for the Disaster Recovery operation. The API specification can be accessed within VMware HCX Manager in the URL.
These APIs cover the following operations in Disaster Recovery.
Protect
Recover
Test Recover
Planned Recover
Reverse
Query
Test Cleanup
Pause
Resume
Remove Protection
Reconfigure
The following example shows a recover operation payload in JSON.
[

    {

        "replicationId": "string",

        "needPowerOn": true,

        "instanceId": "string",

        "source": {

            "endpointType": "string",

            "endpointId": "string",

            "endpointName": "string",

            "resourceType": "string",

            "resourceId": "string",

            "resourceName": "string"

        },

        "destination": {

            "endpointType": "string",

            "endpointId": "string",

            "endpointName": "string",

            "resourceType": "string",

            "resourceId": "string",

            "resourceName": "string"

        },

        "placement": [

            {

                "containerType": "string",

                "containerId": "string"

            }

        ],

        "resourceId": "string",

        "forcePowerOff": true,

        "isTest": true,

        "forcePowerOffAfterTimeout": true,

        "isPlanned": true

    }

]
With these APIs, you can build a custom mechanism to automate a disaster recovery plan's creation and execution.
Feedback
Coming soon: Throughout 2024 we will be phasing out GitHub Issues as the feedback mechanism for content and replacing it with a new feedback system. For more information see: https://aka.ms/ContentUserFeedback.
Submit and view feedback for