Create, test, and deploy a custom question answering project
You can create a custom question answering project from your own content, such as FAQs or product manuals. This article includes an example of creating a custom question answering project from a product manual, to answer questions.
Prerequisites
- If you don't have an Azure subscription, create a free account before you begin.
- A language resource with the custom question answering feature enabled.
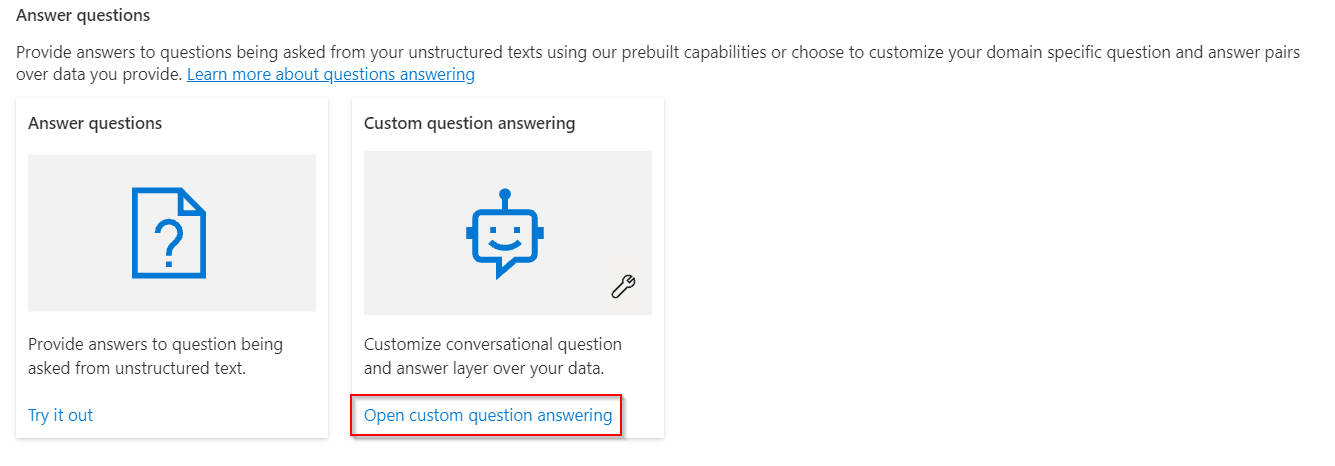
Create your first custom question answering project
Sign in to the Language Studio with your Azure credentials.
Scroll down to the Understand questions and conversational language section and select Open custom question answering.
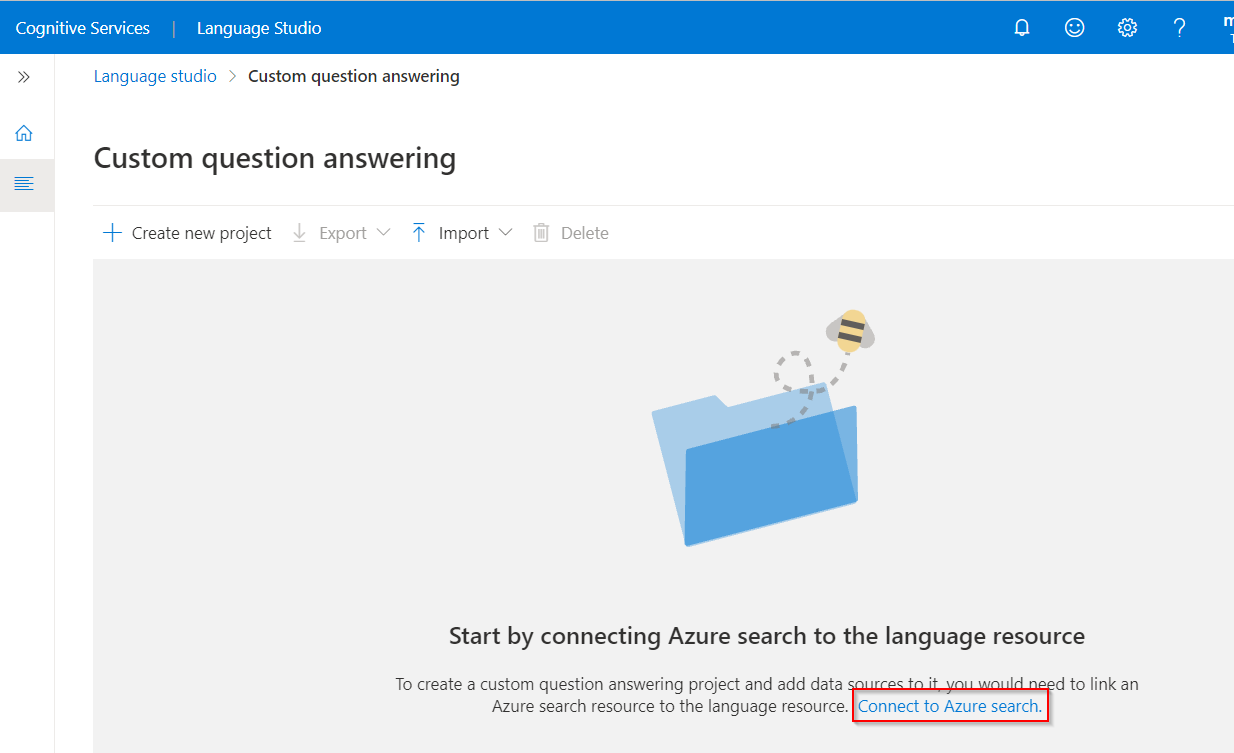
If your resource is not yet connected to Azure Search select Connect to Azure Search. This will open a new browser tab to Features pane of your resource in the Azure portal.
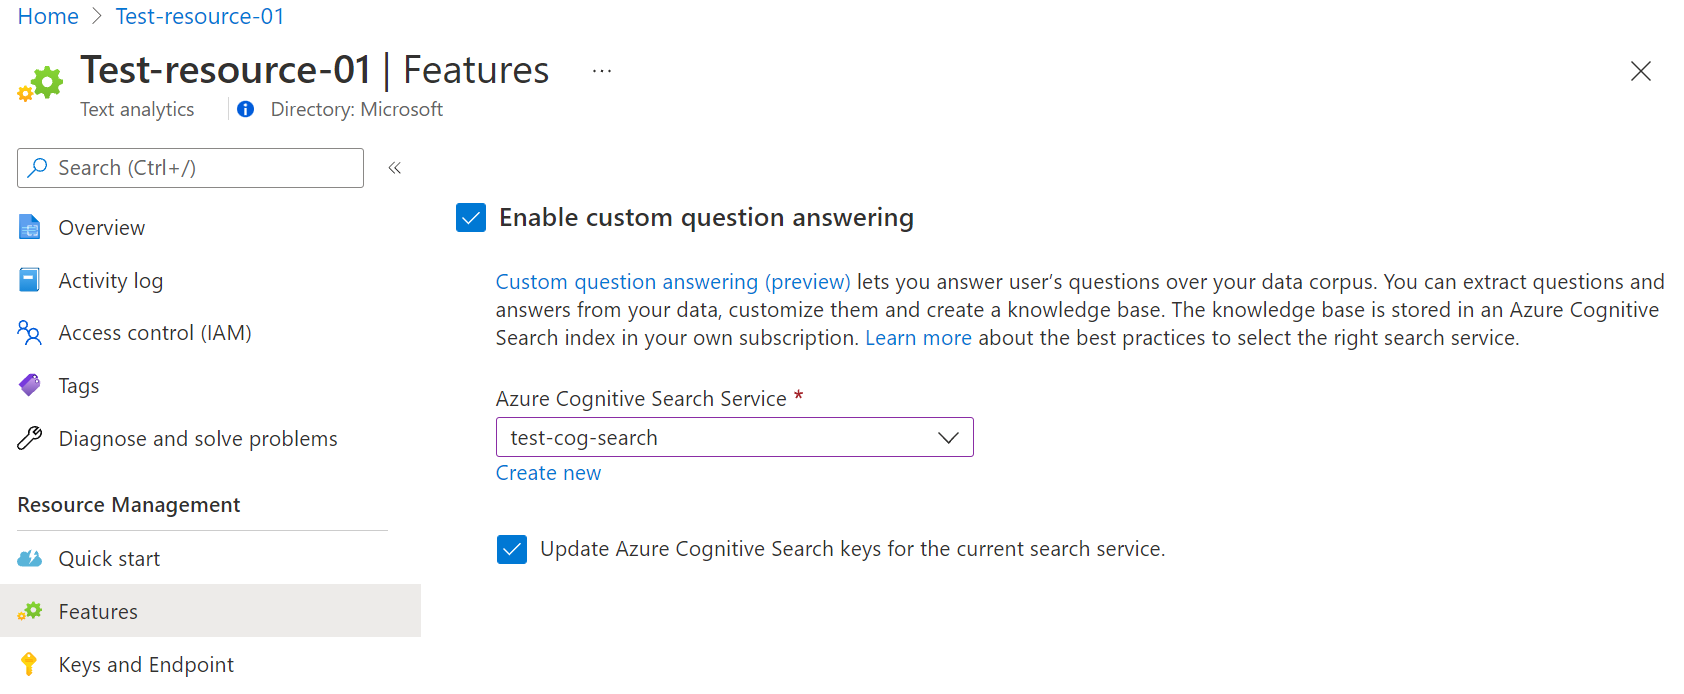
Select Enable custom question answering, choose the Azure Search resource to link to, and then select Apply.
Return to the Language Studio tab. You may need to refresh this page for it to register the change to your resource. Select Create new project.
Choose the option I want to set the language for all projects created in this resource > select English > Select Next.
Enter a project name of Sample-project, a description of My first question answering project, and leave the default answer with a setting of No answer found.
Review your choices and select Create project
From the Manage sources page select Add source > URLS.
Select Add url enter the following values and then select Add all:
URL Name URL Value Surface Book User Guide https://download.microsoft.com/download/7/B/1/7B10C82E-F520-4080-8516-5CF0D803EEE0/surface-book-user-guide-EN.pdf The extraction process takes a few moments to read the document and identify questions and answers. Question and answering will determine if the underlying content is structured or unstructured.
After successfully adding the source, you can then edit the source contents to add more custom question answer sets.
Test your project
Select the link to your source, this will open the edit project page.
Select Test from the menu bar > Enter the question How do I setup my surface book?. An answer will be generated based on the question answer pairs that were automatically identified and extracted from your source URL:
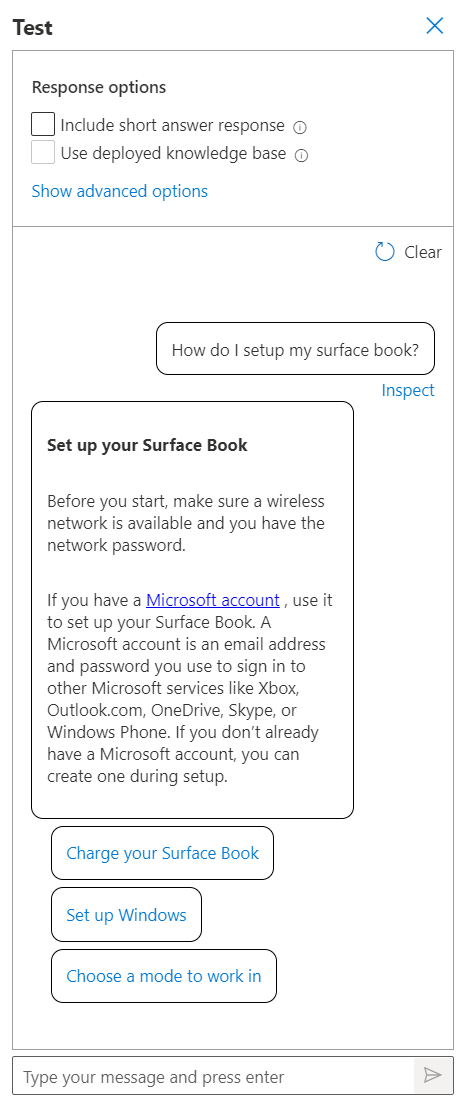
If you check the box for include short answer response you will also see a precise answer, if available, along with the answer passage in the test pane when you ask a question.
Select Inspect to examine the response in more detail. The test window is used to test your changes to your project before deploying your project.
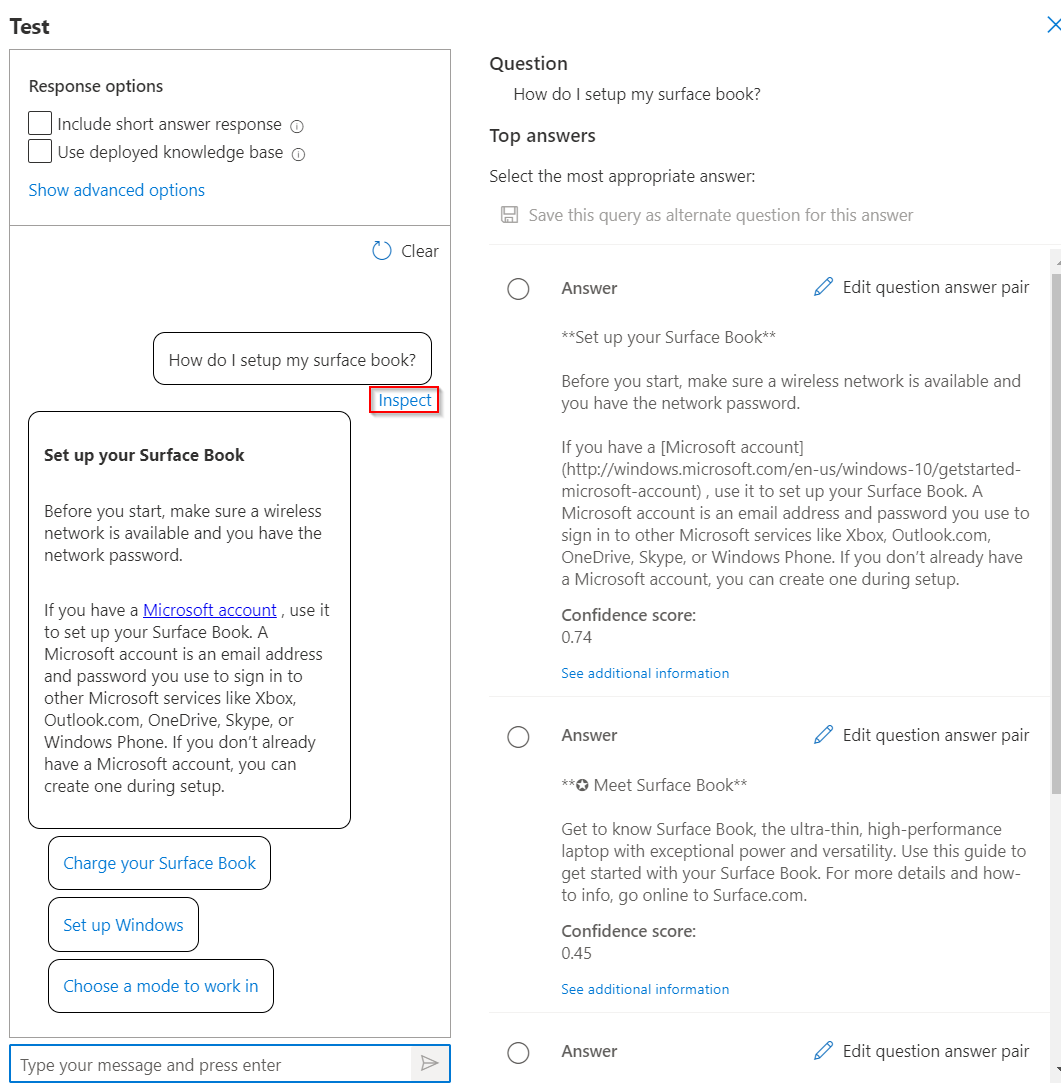
From the Inspect interface, you can see the level of confidence that this response will answer the question and directly edit a given question and answer response pair.
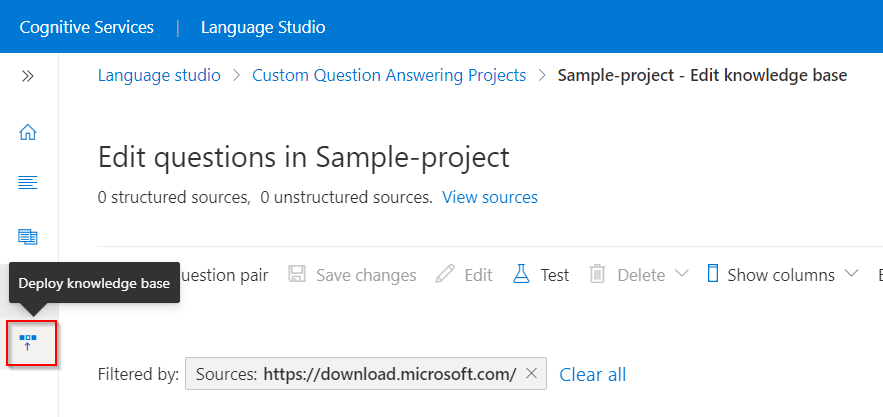
Deploy your project
Select the Deploy project icon to enter the deploy project menu.
When you deploy a project, the contents of your project move from the
testindex to aprodindex in Azure Search.Select Deploy > and then when prompted select Deploy again.
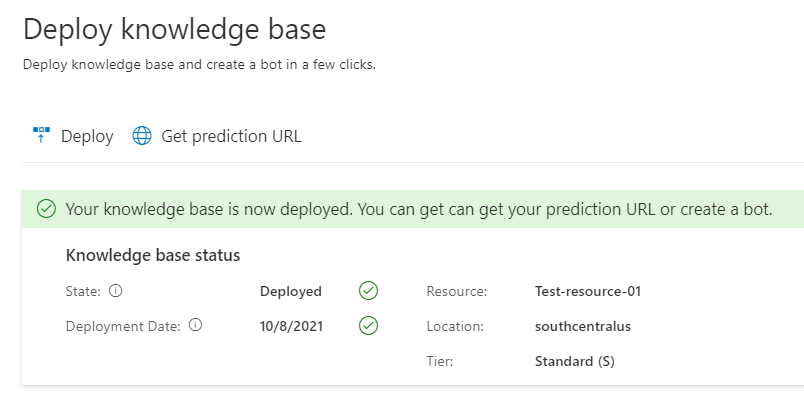
Your project is now successfully deployed. You can use the endpoint to answer questions in your own custom application to answer or in a bot.
Clean up resources
If you will not continue to test custom question answering, you can delete the associated resource.
Next steps
Feedback
Coming soon: Throughout 2024 we will be phasing out GitHub Issues as the feedback mechanism for content and replacing it with a new feedback system. For more information see: https://aka.ms/ContentUserFeedback.
Submit and view feedback for