Improve performance by compressing files in Azure Front Door
File compression is an effective method to improve file transfer speed and increase page-load performance. The server compresses the file to reduce its size before sending it. File compression can reduce bandwidth costs and provide a better experience for your users.
There are two ways to enable file compression:
- Enabling compression on your origin server. Azure Front Door passes along the compressed files and delivers them to clients that request them.
- Enabling compression directly on the Azure Front Door POP servers (compression on the fly). In this case, Azure Front Door compresses the files and sends them to the end users.
Note
Range requests may be compressed into different sizes. Azure Front Door requires the Content-Length response header values to be the same for any GET HTTP request. If clients send byte range requests with the Accept-Encoding header that leads to the origin responding with different content lengths, then Azure Front Door returns a 503 error. You can either disable compression on the origin/Azure Front Door, or create a Rules Engine rule to remove the Accept-Encoding header from byte range requests.
Important
Azure Front Door configuration changes takes up to 10 mins to propagate throughout the network. If you're setting up compression for the first time for your CDN endpoint, consider waiting 1-2 hours before you troubleshoot to ensure the compression settings have propagated to all the POPs.
Enabling compression
Note
In Azure Front Door, compression is part of Enable Caching in Route. Only when you Enable Caching, can you take advantage of compression in Azure Front Door.
You can enable compression in the following ways:
- During quick create - When you enable caching, you can enable compression.
- During custom, create - Enable caching and compression when you're adding a route.
- In Front Door manager.
- On the Optimization page.
Enable compression in Front Door manager
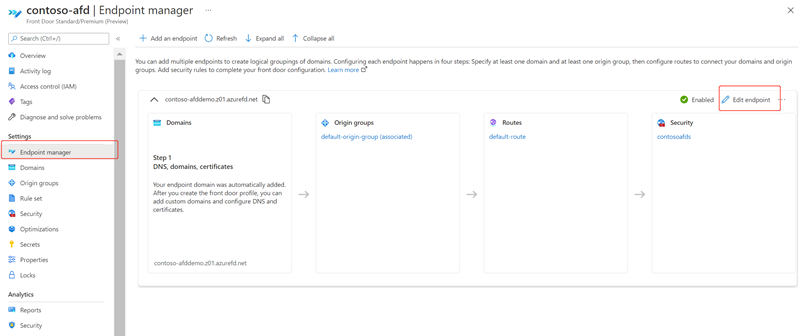
From the Azure Front Door Standard/Premium profile page, go to Front Door manager and select the endpoint you want to enable compression.
Within the endpoint, select the route you want to enable compression on.
Ensure Enable caching is checked, then select the checkbox for Enable compression.
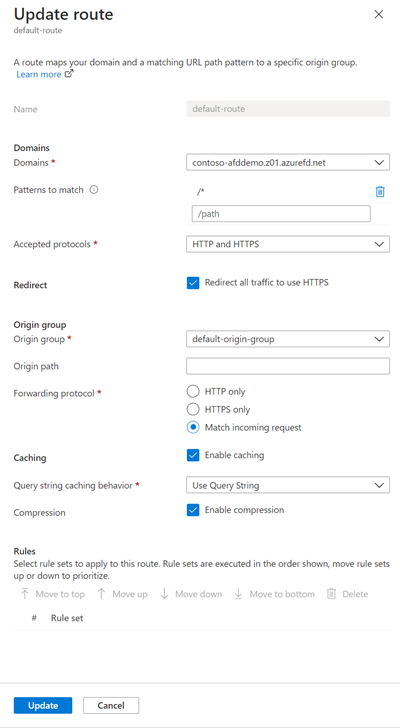
Select Update to save the configuration.

Enable compression in Optimizations
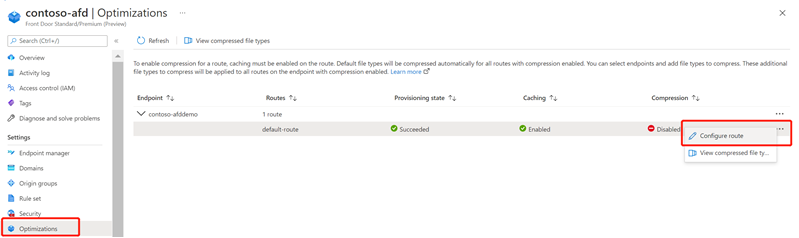
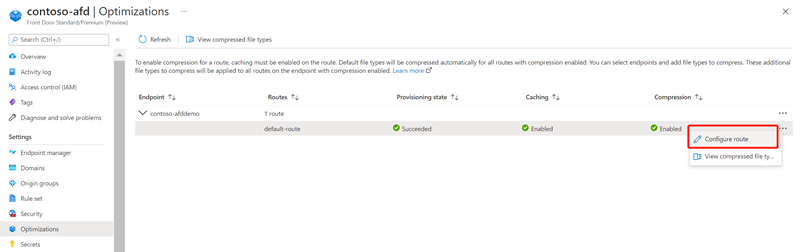
From the Azure Front Door Standard/Premium profile page, go to Optimizations under Settings. Expand the endpoint to see the list of routes.
Select the three dots next to the route that has compression Disabled. Then select Configure route.
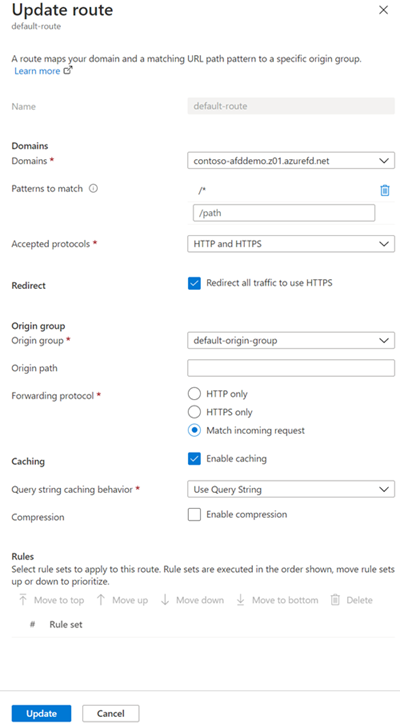
Ensure Enable caching is checked, then select the checkbox for Enable compression.
Select Update.

Modify compression content type
You can modify the default list of MIME types on Optimizations page.
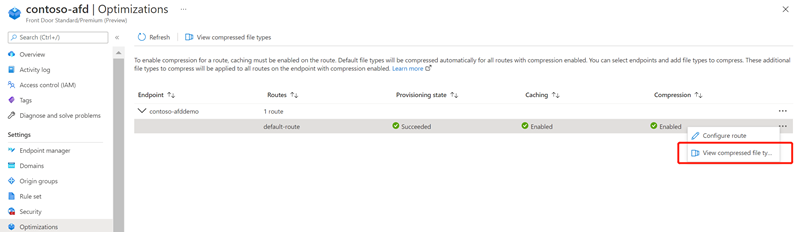
From the Azure Front Door Standard/Premium profile page, go to Optimizations under Settings. Then select the route that has compression Enabled.
Select the three dots next to the route that has compression Enabled. Then select View Compressed file types.
Delete default formats or select Add to add new content types.

Select Save to update the compression configuration.

Disabling compression
You can disable compression in the following ways:
- Disable compression in Azure Front Door manager route.
- Disable compression in Optimizations page.
Disable compression in Azure Front Door manager
From the Azure Front Door Standard/Premium profile page, go to Front Door manager under Settings.
Select the route you want to disable compression on. Uncheck the Enable compression box.
Select Update to save the configuration.
Disable compression in Optimizations
From the Azure Front Door Standard/Premium profile page, go to Optimizations under Settings. Then select the route that has compression Enabled.
Select the three dots next to the route that has compression Enabled, then select Configure route.
Uncheck the Enable compression box.
Select Update to save the configuration.
Compression rules
In Azure Front Door, only eligible files are compressed. To be eligible for compression, a file must:
- Be of a MIME type
- Be larger than 1 KB
- Be smaller than 8 MB
These profiles support the following compression encodings:
- gzip (GNU zip)
- brotli
If the request supports more than one compression type, brotli compression takes precedence.
When a request for an asset specifies gzip compression and the request results in a cache miss, Azure Front Door does gzip compression of the asset directly on the POP server. Afterward, the compressed file is served from the cache.
If the origin uses Chunked Transfer Encoding (CTE) to send compressed data to the Azure Front Door POP, then response sizes greater than 8 MB aren't supported.
Next steps
- Learn how to configure your first Rules Set
- Learn more about Rule Set Match Conditions
- Learn more about Azure Front Door Rule Set
Feedback
Coming soon: Throughout 2024 we will be phasing out GitHub Issues as the feedback mechanism for content and replacing it with a new feedback system. For more information see: https://aka.ms/ContentUserFeedback.
Submit and view feedback for