How to configure the policy settings for Azure Information Protection
In addition to the Information Protection bar title and tooltip, there are some settings in the Azure Information Protection policy that you can configure independently from the labels:

Note that your policy settings might have different default values, depending on when you purchased your subscription for Azure Information Protection. Some settings might also be set by a custom client setting.
To configure the policy settings
If you haven't already done so, open a new browser window and sign in to the Azure portal. Then navigate to the Azure Information Protection pane.
For example, in the search box for resources, services, and docs: Start typing Information and select Azure Information Protection.
From the Classifications > Policies menu option: On the Azure Information Protection - Policies pane, select Global if the settings that you want to configure will apply to all users.
If the settings that you want to configure are in a scoped policy so that they apply to selected users only, select your scoped policy instead.
On the Policy pane, configure the settings:
Select the default label: When you set this option, select the label to assign to documents and emails that do not have a label. You cannot set a label as the default if it has sublabels.
This setting applies to Office apps and the scanner. It does not apply to File Explorer, or PowerShell.
Send audit data to Azure Information Protection analytics: Before you create an Azure Log Analytics workspace for Azure Information analytics, the values for this setting display Off and Not configured. When you create the workspace, the values change to Off and On.
When the setting is On, clients that support central reporting send data to the Azure Information Protection service. This information includes what labels are applied and when a user selects a label with a lower classification, or removes a label. Set this policy setting to Off to prevent this data from being sent.
Note
The AIP audit log and analytics sunset is announced as of March 18, 2022, with a full retirement date of September 31, 2022. For more information, see Removed and retired services.
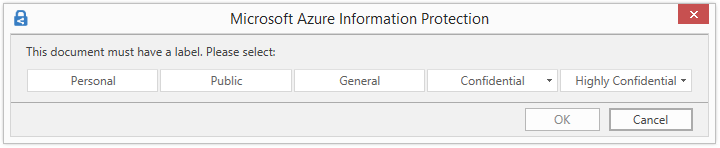
All documents and emails must have a label: When you set this option to On, all saved documents and sent emails must have a label applied. The labeling might be manually assigned by a user, automatically as a result of a condition, or be assigned by default (by setting the Select the default label option).
If a label is not assigned when users save a document or send an email, they are prompted to select a label. For example:
This option does not apply when you remove a label by using the Set-AIPFileLabel PowerShell cmdlet with the RemoveLabel parameter.
Users must provide justification to set a lower classification label, remove a label, or remove protection: When you set this option to On and a user does any of these actions (for example, change the Public label to Personal), the user is prompted to provide an explanation for this action. For example, the user might explain that the document no longer contains sensitive information. The action and its justification reason are logged in their local Windows event log: Applications and Services Logs > Azure Information Protection.

This option is not applicable for lowering the classification of sublabels under the same parent label.
For email messages with attachments, apply a label that matches the highest classification of those attachments: When you set this option to Recommended, users are prompted to apply a label to their email message. The label is dynamically chosen, based on the classification labels that are applied to the attachments, and the highest classification label is selected. The attachment must be a physical file, and cannot be a link to a file (for example, a link to a file on Microsoft SharePoint or OneDrive). Users can accept the recommendation or dismiss it. When you set this option to Automatic, the label is automatically applied but users can remove the label or select a different label before sending the email.
To take the ordering of sublabels into consideration when you use this policy setting, you must configure an advanced client setting.
When the attachment with the highest classification label is configured for protection with the preview setting of user-defined permissions: - When the label's user-defined permissions include Outlook (Do Not Forward), that label is applied and Do Not Forward protection is applied to the email. When the label's user-defined permissions are just for Word, Excel, PowerPoint, and File Explorer, that label is not applied to the email, and neither is protection.
Display the Information Protection bar in Office apps: When this setting is off, users cannot select labels from a bar in Word, Excel, PowerPoint, and Outlook. Instead, users must select labels from the Protect button on the ribbon. When this setting is on, users can select labels from either the bar or the button.
When this setting is on, it can be used in conjunction with an advanced client setting so that users can permanently hide the Azure Information Protection bar if they choose not to show the bar. They can do this by clearing the Show Bar option from the Protect button.
Add the Do Not Forward button to the Outlook ribbon: When this setting is on, users can select this button from the Protection group on the Outlook ribbon in addition to selecting the Do Not Forward option from Outlook menus. To help ensure that users classify their emails as well as protect them, you might prefer to not add this button but instead, configure a label for protection and a user=defined permission for Outlook. This protection setting is functionally the same as selecting the Do Not Forward button, but when this functionality is included with a label, emails are classified as well as protected.
This policy setting can also be configured with an advanced client setting as a client customization.
Make the custom permissions option available to users: When this setting is on, users see options to set their own protection settings that can override any protection settings that you might have included with a label configuration. Users can also see an option to remove protection. When this setting is off, users do not see these options.
Note that this policy setting has no effect on custom permissions that users can configure from Office menu options. However, it can also be configured with an advanced client setting as a client customization.
The custom permissions options are located in the following places:
In Office applications: From the ribbon, Home tab > Protection group > Protect > Custom Permissions
From File Explorer: Right-click > Classify and protect > Custom permissions
Provide a custom URL for the Azure Information Protection client "Tell me more" web page: Users see this link in the Microsoft Azure Information Protection dialog box, Help and Feedback section, when they select Protect > Help and feedback from the Home tab in their Office applications. By default, this link goes to the Azure Information Protection website. You can enter an HTTP or HTTPS (recommended) URL if you want this link to go to an alternative web page. No check is made to verify that the custom URL entered is accessible or displays correctly on all devices.
As an example, for your help desk, you might enter the Microsoft documentation page that includes information about installing and using the client:
https://docs.microsoft.com/information-protection/rms-client/info-protect-client. Or release version information:https://docs.microsoft.com/information-protection/rms-client/client-version-release-history. Alternatively, you might publish your own webpage that includes information for users to contact your help desk, or a video that steps users through how to use the labels that you have configured.
To save your changes and make them available to users, click Save.
When you click Save, your changes are automatically available to users and services. There's no longer a separate publish option.
Next steps
To see how some of these policy settings can work together, try the Configure Azure Information Protection policy settings that work together tutorial.
For more information about configuring your Azure Information Protection policy, use the links in the Configuring your organization's policy section.