Azure Data Studio - Azure connectivity
Azure Data Studio uses the Microsoft Authentication Library (MSAL) by default to acquire an access token from Microsoft Entra ID. The settings that apply to Microsoft Entra authentication are discussed, along with commonly observed issues and their solutions.
Note
While Microsoft Entra ID is the new name for Azure Active Directory (Azure AD), to prevent disrupting existing environments, Azure AD still remains in some hardcoded elements such as UI fields, connection providers, error codes, and cmdlets. In this article, the two names are interchangeable.
Azure: Authentication library
This setting is only available in Azure Data Studio 1.41 through 1.45. It is no longer available in Azure Data Studio 1.46 and later versions.
This setting controls the authentication library used by Azure Data Studio when adding a Microsoft Entra account. Microsoft Authentication Library (MSAL) offers authentication and authorization services using standard-compliant implementations of OAuth 2.0 and OpenID Connect (OIDC) 1.0. Read more about Microsoft Authentication Library (MSAL). In Azure Data Studio 1.46 and later versions, MSAL is the only library in use, as ADAL (Active Directory Authentication Library) is deprecated.
Azure authentication method
Azure Data Studio supports Microsoft Entra multifactor authentication (MFA) using the following modes:
- Using Code Grant authentication (enabled by default)
- Using Device Code authentication
Accounts > Azure > Auth: Code Grant
Settings.json
"accounts.azure.auth.codeGrant": true
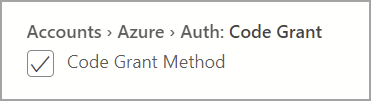
When Code Grant method is checked, users are prompted to authenticate with browser based authentication. This option is enabled by default.
Accounts > Azure > Auth: Device Code
Settings.json
"accounts.azure.auth.deviceCode": true
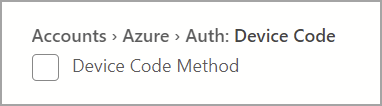
When Device Code method is enabled, users are provided with a code and a URL to enter which can then be used to sign in.
When both options are checked, users are prompted to select one of the two authentication modes when adding a Microsoft Entra account.
Azure cloud configuration
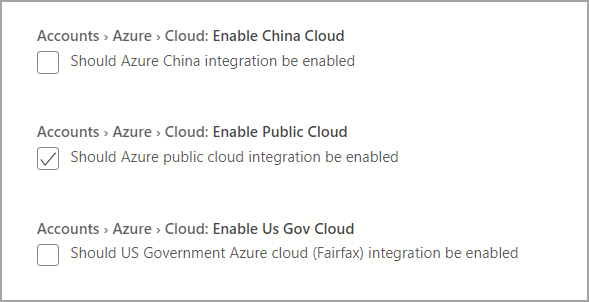
Azure Data Studio supports Microsoft Entra authentication with national clouds. Azure Public Cloud is enabled by default, but users can enable other national clouds as needed:
Settings.json
"accounts.azure.cloud.enableChinaCloud": false,
"accounts.azure.cloud.enablePublicCloud": true,
"accounts.azure.cloud.enableUsGovCloud": false
Custom cloud endpoints can also be defined. See Configuring custom cloud endpoints.
Azure resource configuration
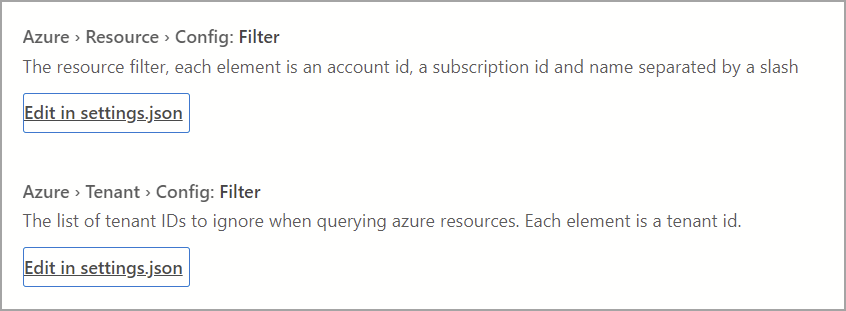
These settings apply filters on Azure resources and tenants.
- Resource Config filter: Applies inclusion filter to resources that should be displayed.
- Tenant Config filter: Applies exclusion filter to tenants that should be ignored.
Settings.json
"azure.resource.config.filter": [],
"azure.tenant.config.filter": [
    "313b5f9e-9b92-414c-8d87-a317e42d0222"
]
Proxy setup for Microsoft Entra authentication
If using Azure Data Studio behind a proxy, users must specify proxy settings for Azure Data Studio to communicate with external endpoints. There are two ways to provide proxy settings for Azure Data Studio to use:
- Setting proxy configuration in the Azure Data Studio (Settings > Http: Proxy Settings)
- Setting environment variables for proxy configuration
Azure Data Studio settings take precedence over environment variables.
Azure Data Studio proxy settings
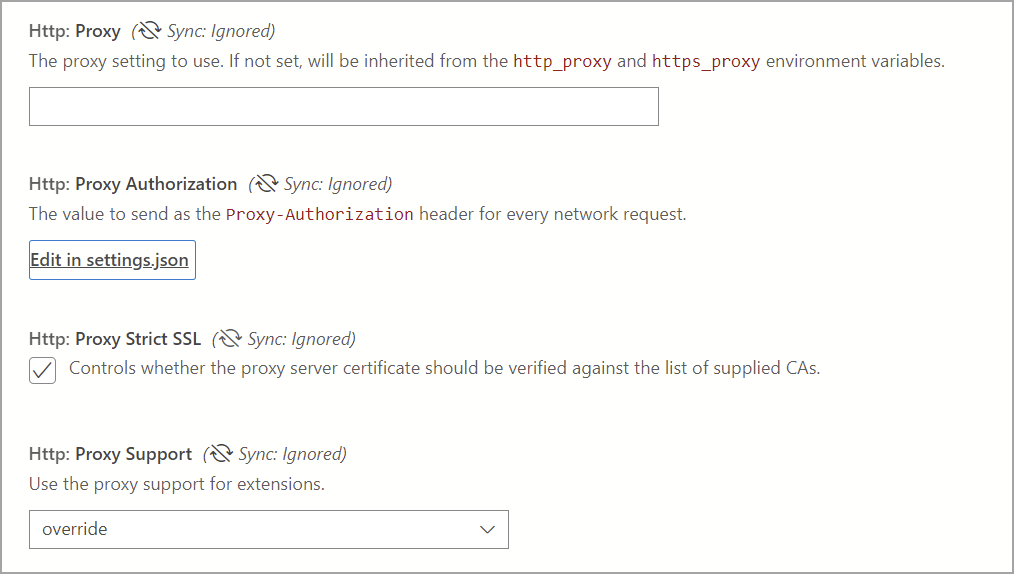
The following settings are available in Azure Data Studio:
Settings.json
"http.proxy": "https://userName@fqdn:yourPassword@yourProxyURL.com:8080",
"http.proxyStrictSSL": true,
"http.proxyAuthorization": "",
"http.proxySupport" : "override"
Supported environment variables for proxy
'HTTP_PROXY': 'http://userName@fqdn:yourPassword@yourProxyURL.com:8080''HTTPS_PROXY': 'https://userName@fqdn:yourPassword@yourProxyURL.com:8080'
Allowlist URLs
In a proxy environment, user applications may need to allow specific domains used by Azure Data Studio. Hostnames through which you may need or want to allow communication are:
Azure Public
https://management.azure.comhttps://login.microsoftonline.com/
Azure (US Government)
https://management.core.usgovcloudapi.net/https://login.microsoftonline.us/
Azure operated by 21Vianet
https://management.core.chinacloudapi.cn/https://login.partner.microsoftonline.cn/
The URLs to allow can sometimes vary on a case-by-case basis. In order to verify you aren't blocking any URLs from going through, go to Help > Toggle Developer Tools and select the Network tab. Any URLs that are blocked are listed, and you may need to allow those URLs to successfully add your account.
Configuring custom cloud endpoints
Azure Data Studio 1.46 introduces support for adding custom endpoints for nonpublic clouds.
Adding custom cloud endpoints
Open Settings in Azure Data Studio (Ctrl/Cmd + Shift + P) and enter Azure: Custom Provider Settings, then select Edit in settings.json, which opens the settings.json file automatically and add azure.customProviderSettings:

The following entries are required for the endpoint to work:
hostclientIdscopessqlResourcemicrosoftResourcearmResourcegraphResourceazureStorageResource
An example JSON entry for one provider is presented as a guide:
"azure.customProviderSettings": [
    {
        "name": "Azure Custom",
        "settings": {
            "metadata": {
                "displayName": "Azure Custom Cloud",
                "id": "azure_customCloud",
                "endpoints": {
                    "host": "https://hostendpoint.com/",
                    "clientId": "test",
                    "microsoftResource": "https://microsoftresource.com/",
                    "graphResource": "https://graphresource.com/",
                    "msGraphResource": "https://msgraphresource.com/",
                    "armResource": "https://armresource.com/",
                    "sqlResource": "https://sqlresource.net/",
                    "azureKeyVaultResource": "https://azurekeyvault.net/",
                    "azureLogAnalyticsResource": "https://azure.loganalytic.io/",
                    "azureStorageResource": {
                        "endpoint": "",
                        "endpointSuffix": ".azurestorage.net/"
                    },
                    "azureKustoResource": "https://kusto.net/",
                    "powerBiResource": "https://powerbi.net/",
                    "scopes": "https://management.net/scopes",
                    "portalEndpoint": "https://portal.azure.com"
                }
            }
        }
    }
]
After adding the endpoint, save the settings.json file. Azure Data Studio notifies you to reload the application. After it has reloaded, you are notified that the custom endpoints have been loaded:

If this message doesn't appear, check that all the entries for the endpoint exist, and are filled in.
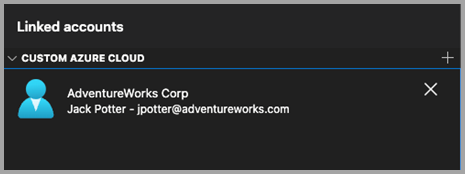
After adding a custom cloud, open the Azure Linked accounts pane, and the custom cloud viewlet appears. Select Add an account and choose the authentication mode if prompted. You are taken to the host endpoint to authenticate.
Multiple custom cloud providers
Additional cloud providers can be added to the settings.json file using the same format.
"azure.customProviderSettings": [
    {
        "name": "Azure Custom",
        "settings": {
            "metadata": {
                "displayName": "Azure Custom Cloud",
                "id": "azure_customCloud",
                "endpoints": {
                    "host": "https://hostendpoint.com/",
                    "clientId": "test",
                    "microsoftResource": "https://microsoftresource.com/",
                    "graphResource": "https://graphresource.com/",
                    "msGraphResource": "https://msgraphresource.com/",
                    "armResource": "https://armresource.com/",
                    "sqlResource": "https://sqlresource.net/",
                    "azureKeyVaultResource": "https://azurekeyvault.net/",
                    "azureLogAnalyticsResource": "https://azure.loganalytic.io/",
                    "azureStorageResource": {
                        "endpoint": "",
                        "endpointSuffix": ".azurestorage.net/"
                    },
                    "azureKustoResource": "https://kusto.net/",
                    "powerBiResource": "https://powerbi.net/",
                    "scopes": "https://management.net/scopes",
                    "portalEndpoint": "https://portal.azure.com"
                }
            }
        }
    },
    {
        "name": "Azure Custom 2",
        "settings": {
            "metadata": {
                "displayName": "Azure Custom Cloud 2",
                "id": "azure_customCloud2",
                "endpoints": {
                    "host": "https://hostendpoint.com/",
                    "clientId": "test",
                    "microsoftResource": "https://microsoftresource.com/",
                    "graphResource": "https://graphresource.com/",
                    "msGraphResource": "https://msgraphresource.com/",
                    "armResource": "https://armresource.com/",
                    "sqlResource": "https://sqlresource.net/",
                    "azureKeyVaultResource": "https://azurekeyvault.net/",
                    "azureLogAnalyticsResource": "https://azure.loganalytic.io/",
                    "azureStorageResource": {
                        "endpoint": "",
                        "endpointSuffix": ".azurestorage.net/"
                    },
                    "azureKustoResource": "https://kusto.net/",
                    "powerBiResource": "https://powerbi.net/",
                    "scopes": "https://management.net/scopes",
                    "portalEndpoint": "https://portal.azure.com"
                }
            }
        }
    }
]
Common authentication issues
Possible issues and solutions when adding an Azure account are discussed.
Issue: SSL Error on localhost page (ERR_SSL_PROTOCOL_ERROR)
Users may see an SSL error when signing in to their account. This flow opens an external web page to localhost, typically prompting users to sign in via the standard Microsoft authentication prompts. The URL for this page looks similar to http://localhost:50055/signin?nonce=...
Some browsers may be set up to automatically redirect all http links to https, which breaks this process as the local server serving the web page doesn't support https. If the link in the address bar starts with https, then you get an SSL error and the page can't load. In that case, the workarounds listed here may address the issue.
Change URL to http
First, manually change the URL from https:// to http://. The browser may change it back to https, in which case it's necessary to try another option.
Disable HSTS (HTTP Strict Transport Security)
For Edge/Chrome browsers, you can disable HSTS for localhost.
- Open Edge/Chrome, and in the address bar, type
edge://net-internals/#hsts(orchrome://net-internals/#hstsfor Chrome). - Scroll to the bottom of the page and in the
Delete domain security policiessection, enterlocalhostand pressDelete.
Once that is complete, you should be able to sign in, and not have the browser redirect your localhost links automatically to https.
Issue: Unable to add account behind a proxy
If the user application is running in an environment behind a proxy, user authentication may not complete, and these steps can be used to resolve the issue.
Recheck environment variables and http.proxy settings in Azure Data Studio. If the proxy requires user authentication, providing a username/password in http.proxy URL can resolve authentication issues; otherwise, Azure Data Studio can't read logged-in user credentials. Alternatively, you can try running Azure Data Studio as a different user, as it may help resolve authentication issues with proxy. However, the latter only works for some scenarios.
The URLs to allow can vary on a case-by-case basis. To verify you aren't blocking any URLs from going through, go to Help > Toggle Developer Tools and select the Network tab. Here you see any URLs that are getting blocked that you may need to allow to add your account successfully.
Uncheck Http: Proxy Strict SSL. It's possible that proxy certificate isn't verifiable against the list of trusted CAs. Disabling Strict SSL can rule out the proxy certificate as an issue.
To conclude:
As a cross-platform application, Azure Data Studio proxy resolution fetches the proxy from either setting within the application, or through environment variables. The aim is to avoid interaction with system settings, which can vary significantly on different operating systems.
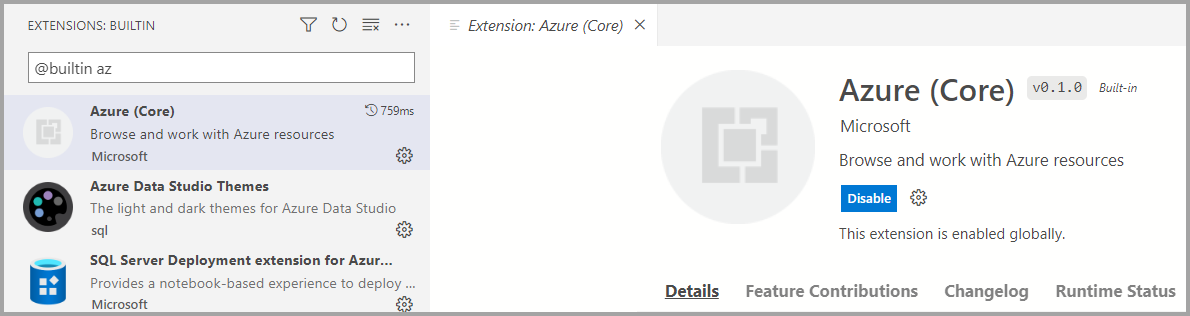
Issue: Azure Core extension is disabled
Azure Core extension is a built-in extension in Azure Data Studio. Ensure it's not disabled or uninstalled accidentally. This extension is required to authenticate Microsoft Entra accounts and connect to resources using MFA.
Issue: System CA certificates are expired
Azure Data Studio's default behavior includes validating system's root CA certificates when making REST API calls using HTTPS Protocol. Validation is controlled with the http:systemCertificates setting, which is enabled by default:

"http.systemCertificates": true
If a system's root CA certificate is expired, authentication requests to Microsoft Entra ID fail, and an error is captured in the Azure account logs:
error: certificate is expired
To mitigate this error, you should remove any expired Root CA Certificates or disable the setting to not validate system certificates.
Capture logs for Azure authentication
Azure Data Studio captures Error events for Microsoft Entra account activity by default. To enable more detailed traces, users can modify these settings:
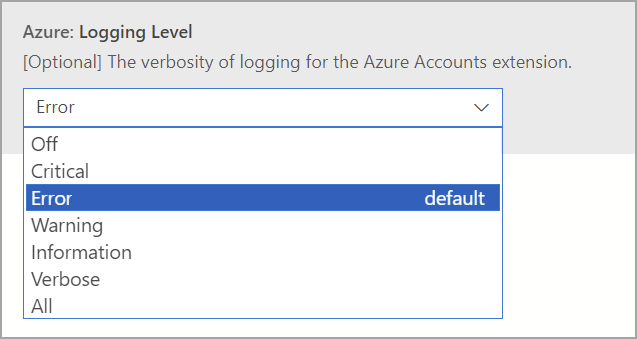
Azure: Logging level
This setting configures the logging level for information from Azure core that can be captured in Azure Data Studio. Change it to Verbose or All to capture detailed logs that can be useful to diagnose authentication failures. For more information, see Azure Data Studio logs and location to learn how to capture logging information.
Settings.json
"azure.loggingLevel": "Verbose"
Azure: PII logging
Users can enable PII (Personally Identifiable Information) logging for local testing and debugging purposes. This setting enables more thorough logging of the authentication process, but may contain sensitive information such as access tokens or user IDs when authenticating with Microsoft Entra ID. Because this logging captures sensitive information, it's recommended to:
- Not share these logs with anyone else, especially when adding logs to GitHub issues
- Disable the setting once the necessary information has been collected
- Delete the log files once the setting has been disabled
Settings.json
"azure.piiLogging": true

Azure: No system keychain
This setting disables system keychain integration to prevent repeated keychain access prompts on macOS. User Credentials are alternatively stored in a flat file in the user's home directory.
Settings.json
"azure.noSystemKeychain": true

Clear Microsoft Entra account token cache
Azure Data Studio maintains a cache of access tokens to prevent the throttling of token requests to Microsoft Entra ID. It's possible that Azure Data Studio's token cache may be outdated, which requires cleaning up expired access tokens from the application cache.
Execute this command from Command Palette (Ctrl/CMD + Shift + P) to clear access tokens for linked Microsoft Entra accounts:
Azure Accounts: Clear Azure Account Token Cache (accounts.clearTokenCache)
Clear all saved Microsoft Entra accounts
Execute this command from Command Palette (Ctrl/CMD + Shift + P) to remove all linked Microsoft Entra accounts from Azure Data Studio:
Clear all saved accounts (clearSavedAccounts)
Feedback
Coming soon: Throughout 2024 we will be phasing out GitHub Issues as the feedback mechanism for content and replacing it with a new feedback system. For more information see: https://aka.ms/ContentUserFeedback.
Submit and view feedback for