Introduction - Create an assemble-to-order sales order
You typically use Assemble to Order for items that you don't want to stock in inventory because you expect to customize them to customer requests or because you want to minimize the inventory carrying cost by supplying them just in time.
The assemble-to-order process typically involves the following steps.
Create a sales order header. This does not differ from the typical process that is used to create a Sales Order.
Select an assembly item on a sales order line and enter a value in the Quantity field.
When you enter a value in the Quantity field on a sales line, Business Central calculates the quantity of each component that is required to satisfy the order.
Tip
If there are enough quantities of components available on the order due date, the process continues to the next step.
If the quantities are insufficient, an assembly availability warning appears and asks the order processor if they want to continue with the order quantity.
If there is no assembly availability warning, or if the order processor decides to continue even though there is a warning, Business Central automatically creates an Assembly Order and links it to the sales line. The assembly order header is created based on the field values of the sales line, and the assembly order lines are copied from the assembly item's BOM. Any quantity fields are set to reflect the quantity entered on the sales line.
You can change the linked Assembly Order. This change includes the addition and deletion of assembly order lines or the substitution of one component for another. You also can change the quantity of each component that is required for the assembly. If you do make a change to the components that are used in the assembly order, you can easily reassess availability information and recalculate the order's cost and price.
When you complete the sales order and its associated assembly lines to the customer's satisfaction, release the Sales Order for picking, assembly, and shipment.
Sell a standard assembly item
If the Assembly Policy field on the item card of an assembly item is Assemble-to-Order, then the item is not expected to be kept in inventory, and it must be assembled specifically to a sales order. When you enter the item on a sales order line, then an assembly order is automatically created and linked to the sales order.
In this procedure, you process the sale of an item that will be assembled according to specifications you already have in your assembly bill of material. The step includes initiating the sales order line.
To sell an item that is assembled to order, select the lookup icon, enter Sales Orders, and then select the related link.
Customize linked assembly order lines
In this procedure, you process the sale of an item that will be assembled according to customer specifications and will require some changes in your assembly bill of materials. This is similar to the process steps you used previously. These steps, however, include initiating the sales order line and customizing the assembly item by modifying its components and resources.
To sell an item that is assembled to order, select the Search for Page icon in the top-right corner of the page, enter Sales Orders, and then select the related link.
Check the availability for assembly components
To check availability for assembly components, you can continue the process you used in one of two previous examples.
When you open Sales Order, change the number of units in the Quantity field, and find one or more components of the requested assembly item quantity are not available, then an availability warning page opens.

Select Details to see details about the components. Because there is an assembly item on the sales line, you need to look at Lines FastTab to see how many components are available and how many are required. The page shows how many units of a parent you can make based on the availability of child items on underlying lines.
You can use the page to find out if you can fulfill a sales order for an item on a specified date by looking at its current availability and the quantities that can be supplied by its components. On the Lines FastTab, you can find the following important fields:
Gross Requirements: Specifies the total demand for the assembly component.
Scheduled Receipt: Specifies how many units of the assembly component are inbound on orders.
Expected Available Inventory: Specifies how many units of the assembly component are available for the current assembly order on the due date.
Current Quantity: Specifies how many units of the component are required on the assembly order line.
Earliest Available Date: Specifies the late arrival date of an inbound supply order that can cover the needed quantity of the assembly component.
Able to Assemble: Specifies how many units of the assembly item on the assembly order header can be assembled, based on the availability of the component.
Substitution Available: Specifies if a substitute is available for the item on the assembly order line.

Roll up assemble-to-order costs and prices
The first unit cost and unit price for an assembly item on a sales order line are copied from the item card. After you customize the assembly order lines of a linked assembly order, however, the end product might differ from the assembly item that is referenced by the item number.
To update the Unit Cost (LCY) and Unit Price fields on a sales order line after you change a linked assembly order, follow these steps.
Return to the sales order that you've already created.
Select the settings icon, and then select Personalize to see Cross-Reference No. field on the Lines FastTab.
Select More and +Fields, position your mouse pointer on lines, find Unit Cost (LCY) field on the right side of screen, and then move the field to the line.
Select Done, and then select the line for your assembly item.
Point to Line, select Related Information, Assemble to Order, and then the Roll Up Cost function.
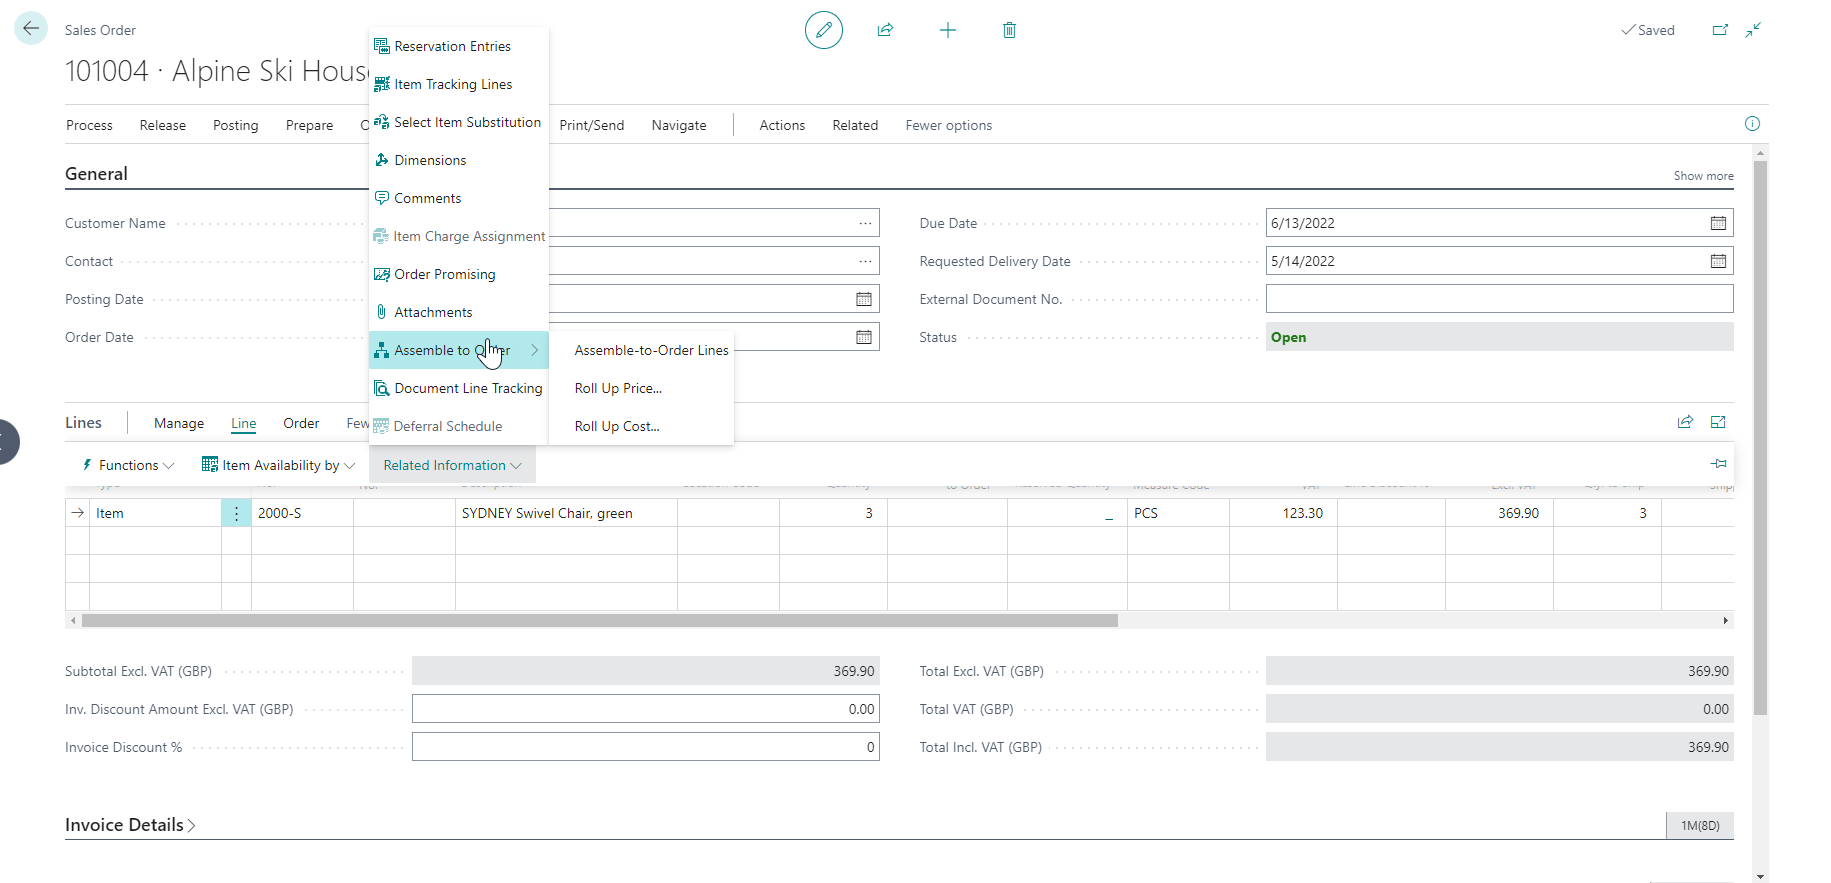
Select Yes to confirm the message and the Unit Cost (LCY) field updates.
Point to Line to update the Unit Price field, select Related Information, Assemble to Order, and then select the Roll Up Price function.
Select Yes to confirm the message and the unit price changes. This change shows the total for all the unit prices for all the components that are specified on the linked assembly order lines.
Close the sales order.

Create an assemble-to-order sales order
Watch the following demonstration on how to create and process an assemble-to-order sales order.