Exercise - Configure a caching policy
When you manage APIs with Azure API Management, you can modify API behavior without having to rewrite code, by use of policies. To cache API responses, you use API Management's caching policies.
As the developer for a board game company, you decide to implement caching for a Board Gaming API. First, you need to add the API to API Management. Then, you'll write your caching policies. We'll do both in this exercise.
Important
You need your own Azure subscription to run this exercise, and you might incur charges. If you don't already have an Azure subscription, create a free account before you begin.
Note
In this exercise, the Board Gaming web API is hosted in the azurewebsites.net domain. The API Management instance is in the azure-api.net domain.
Create a Redis cache
We'll use the Consumption tier for API Management for this module. That's because Azure configures API Management instances for this tier in just a minute or so. Other tiers can take up to 30 minutes or longer.
The Consumption tier in API Management is intended for organizations that prefer to build APIs on serverless principles. It's a tier that has no internal cache. We must therefore create an external Redis cache and then configure an API Management caching policy to use it.
Let's create a cache right away. This will allow the setup to run behind the scenes while we work on other steps:
Sign in to the Azure portal.
On the Azure portal Resource menu, or on the Home page, select Create a resource. The Create a resource pane appears.
In the Create a resource menu, select Databases, and then search for and select Azure Cache for Redis. Select Create. The New Redis Cache pane appears.
On the Basics tab, enter the following values for each setting.
Setting Value Project details Subscription Select your subscription. Resource group Select a new or existing resource group. A resource group is a logical container that holds related resources for an Azure solution. Instance Details DNS name Enter a unique name. Make a note of it. You'll need it later on. Location Select an available region. Cache type Standard C1 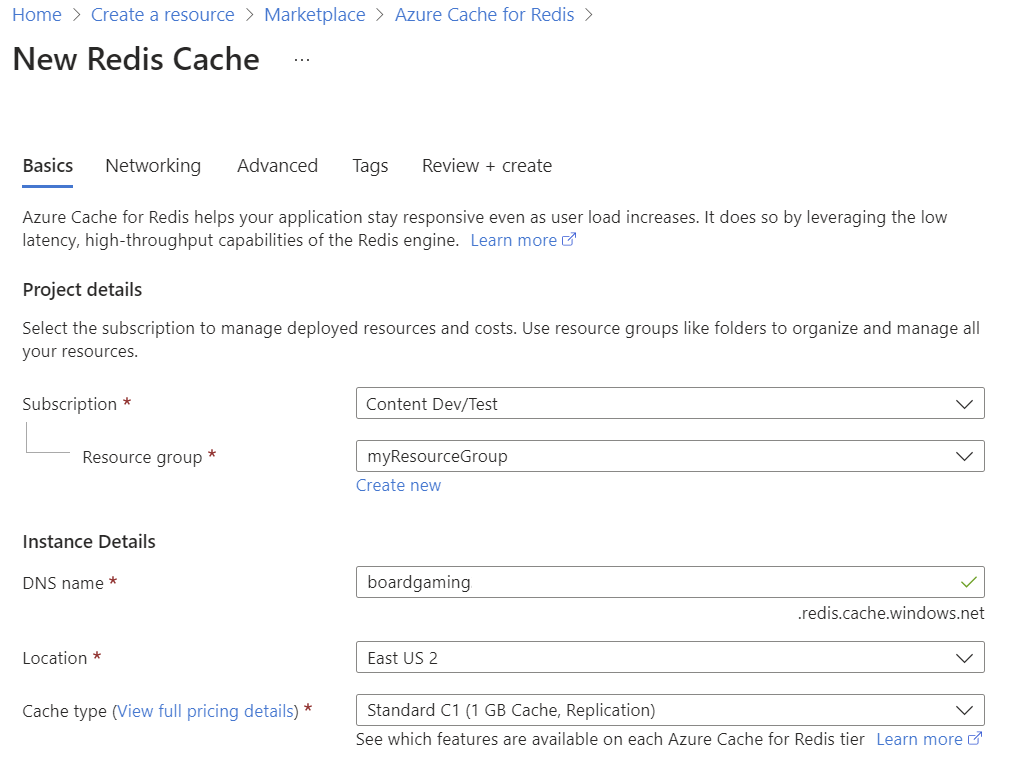
Select Review + create to validate your input, and then select Create.
Create a web API in Azure App Service
To create an Azure App Service web API, we use the following steps:
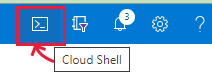
In the Azure taskbar, select the Cloud Shell icon to open Azure Cloud Shell.
Clone the sample web API by running the following command:
git clone https://github.com/MicrosoftDocs/mslearn-improve-api-performance-with-apim-caching-policy.gitSet up the web API by running these commands:
cd mslearn-improve-api-performance-with-apim-caching-policy
bash setup.sh
Setup.sh has seven parts that take several minutes to run. When it finishes, three URLs are displayed:
- A web API test URL to test the web API
- A Swagger URL for the Swagger UI
- A Swagger JSON URL for the OpenAPI definition
Make note of these URLs. We'll use them in the next task.
Test the newly deployed web API
When the web API is successfully created in Cloud Shell, you can test it. Run a test by submitting a GET request in the browser or by checking the OpenAPI definition. This test runs against the web API in the azurewebsites.net domain before it's added to API Management.
On the Azure portal Resource menu, or on the Home page, select All resources. Then select the App Service resource. The BoardGamingAPI123aa456789 App Service pane appears. The numbers at the end will differ for your implementation.
In the command bar of the Overview tab, as a test, select Browse. Notice the error message. The browser displays the message "No webpage found for this address". This occurs because the web API doesn't implement a web user interface.
In a new browser tab, paste the web API test URL that you previously copied, and select Enter. The browser displays a response in JSON format. Notice that the result includes the server time, with the label quotePreparedTime.
In a second browser tab, paste the Swagger URL that you copied previously and then select Enter. The browser displays the Swagger page for your Board Gaming API. Keep this browser tab open for later use.
In a third browser tab, paste the Swagger JSON URL that you copied previously. The browser displays the OpenAPI specification in JSON format.
Leave these tabs open. They'll be handy later.
Create a new API Management instance
Now that we have a functional API, let's set up API Management:
On the Azure portal Resource menu, or on the Home page, select Create a resource. The Create a resource pane appears.
In the Create a Resource menu, select Integration, and then select API Management from the result list. The Create API Management service pane appears.
Enter the following values for each setting in the Basics tab.
Setting Value Project details Subscription Select your subscription. Resource group Select a new or existing resource group. A resource group is a logical container that holds related resources for an Azure solution. Instance details Region Choose the same location you used for the Redis cache. Resource name Choose a unique name. Make a note of it. You'll need it later on. Organization name BoardGames Administrator email The email address to receive all system notifications. Pricing tier Pricing tier Consumption Select Review + create to validate your input, and then select Create.
Configure API Management to use an external cache
You can configure the API Management instance to use your Redis cache as an external cache only when the Redis cache is completely deployed.
On the Azure portal Resource menu, or on the Home page, select All resources. Then select the Azure Cache for Redis resource type. An Azure Cache for Redis pane appears.
In the Overview section of the pane, you should see the resource status display as Running. If it isn't, continue to check the status every few minutes by clicking the Refresh link. Proceed only when your Redis cache deployment is running.
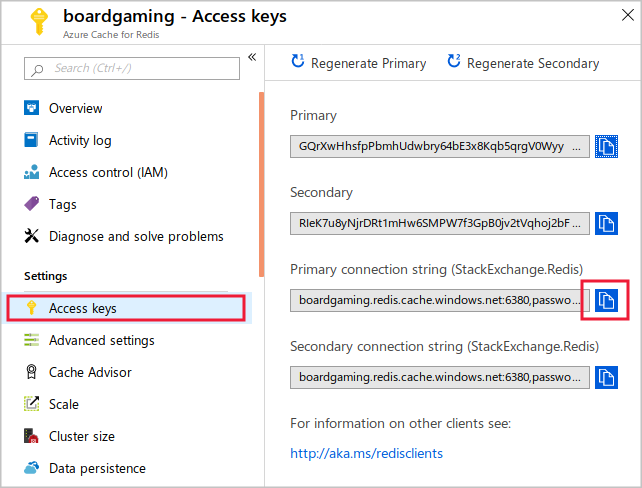
In the Azure Cache for Redis menu, in the Settings section of the left pane, select Access keys. The Access keys pane appears for the Azure Cache for Redis instance that you just created.
In the right corner of the Primary connection string (StackExchange.Redis) box, select the Copy to clipboard icon.
In the All resources pane, select the same API Management service resource that you created earlier. The API Management service pane appears.
On the API Management service menu, in Deployment + Infrastructure in the left navigation, select External cache. The External cache pane for your API Management service appears.
Select + Add from the command bar. The External cache pane for your API Management service appears.
In the Cache instance dropdown list, select Custom. Then in the Use from box, select the same location that you used for the API Management instance.
In the Connection string box, paste the primary connection string that you copied. Then in the command bar, select Save.
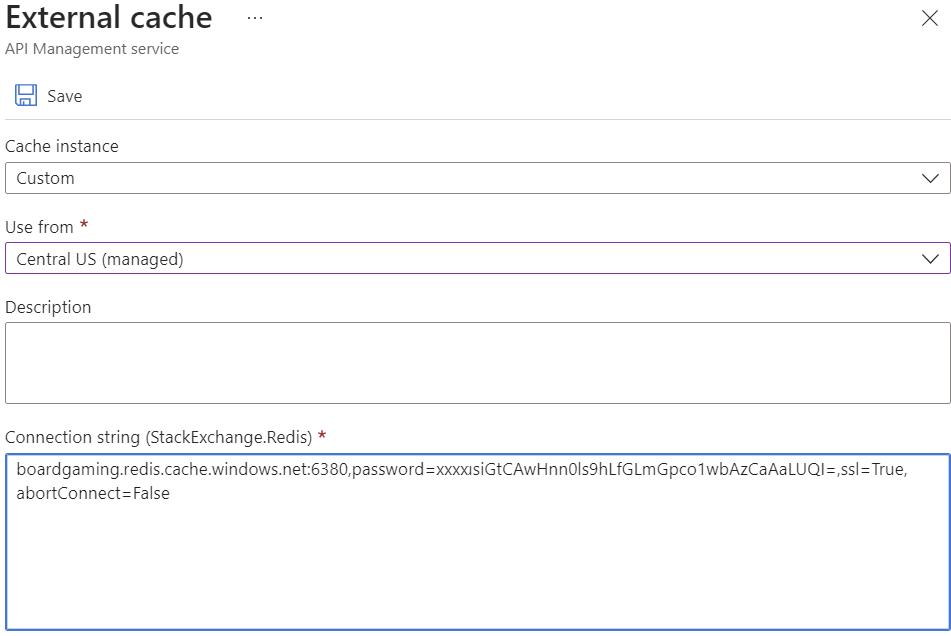
The external cache that you created is now listed on the External cache page for your API Management service.
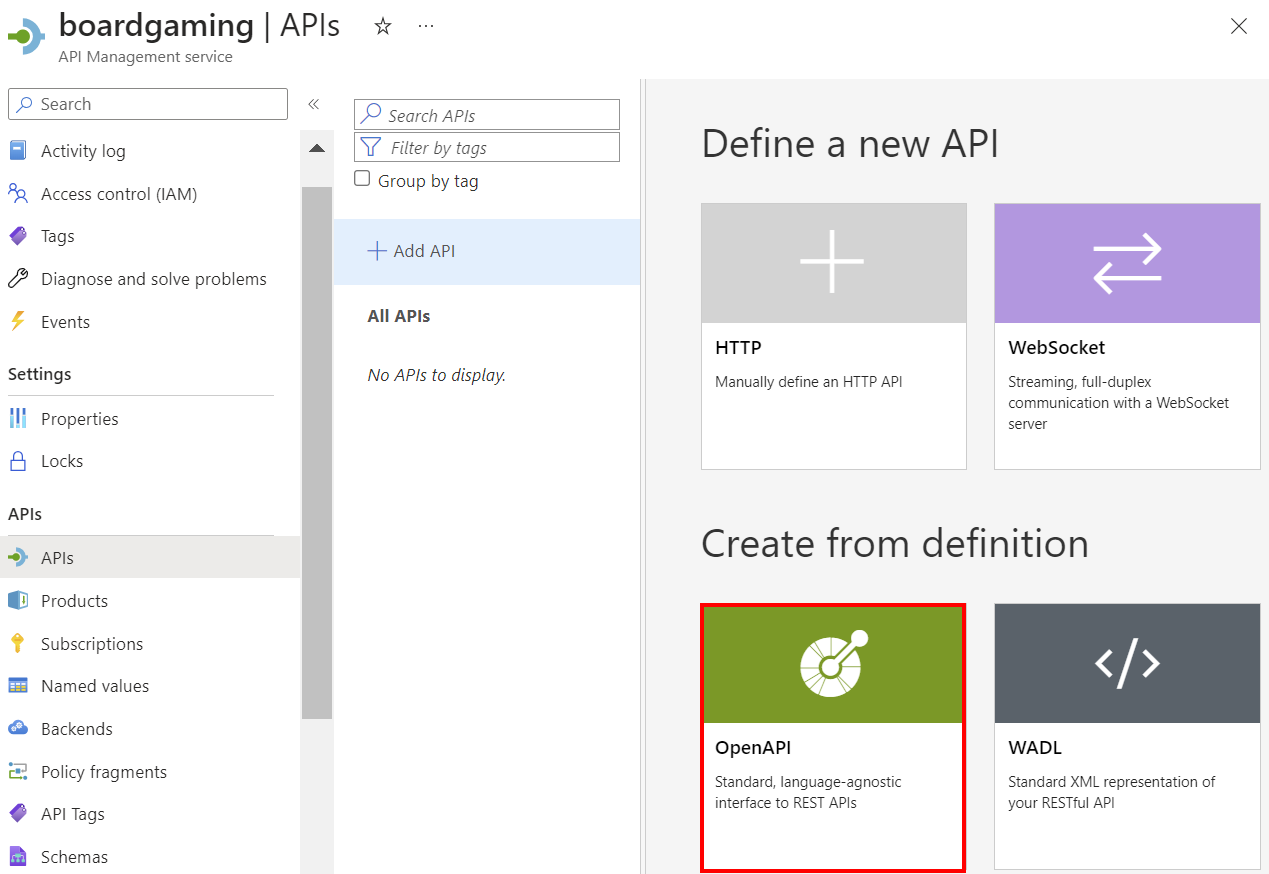
Add your API to API Management
We must apply a policy to enable users to access the API. However, before you can apply a policy, you must add the API to the API Management instance.
In the Azure portal menu, or on the Home page, select All resources. Then select the API Management service that you created earlier.
In the APIs menu, select APIs. The APIs pane for your API Management service appears. It offers numerous templates for you to choose from.
In the Create from definition section, choose OpenAPI. The Create from OpenAPI specification dialog box appears.
In the OpenAPI specification box, paste the Swagger JSON URL that you copied previously.
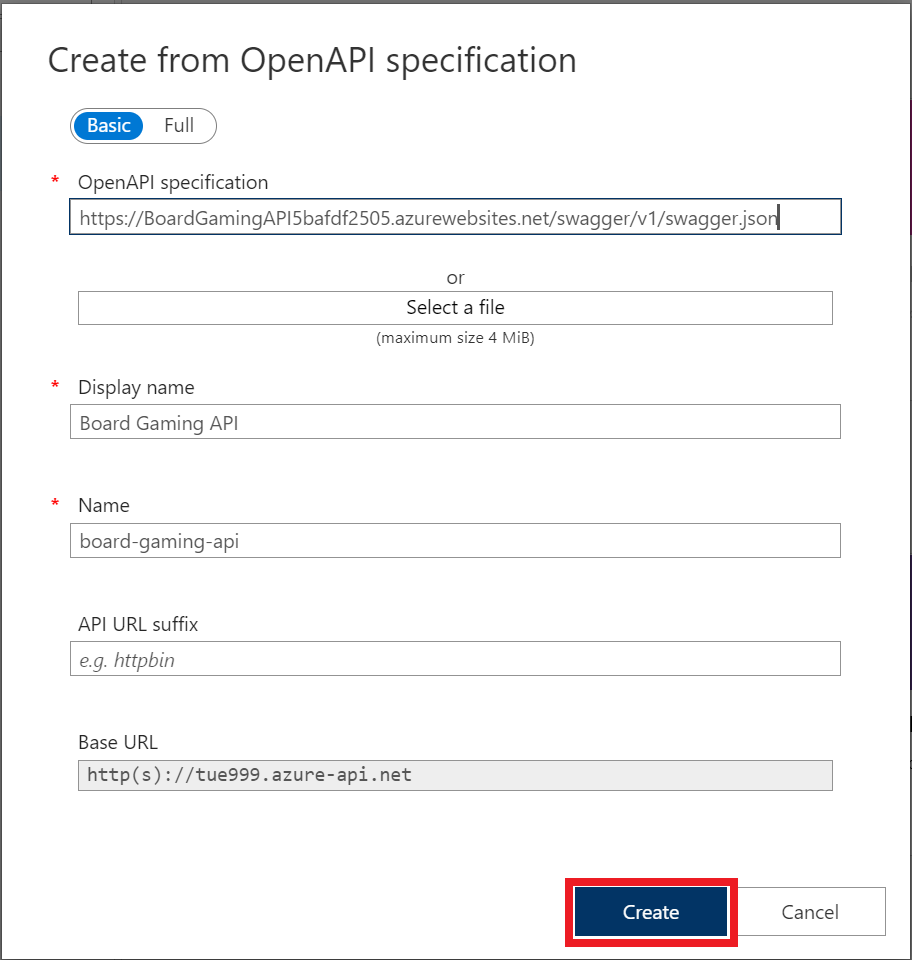
Select Create. The APIs pane for your API Management service reappears. It lists all available API operations for that management instance.
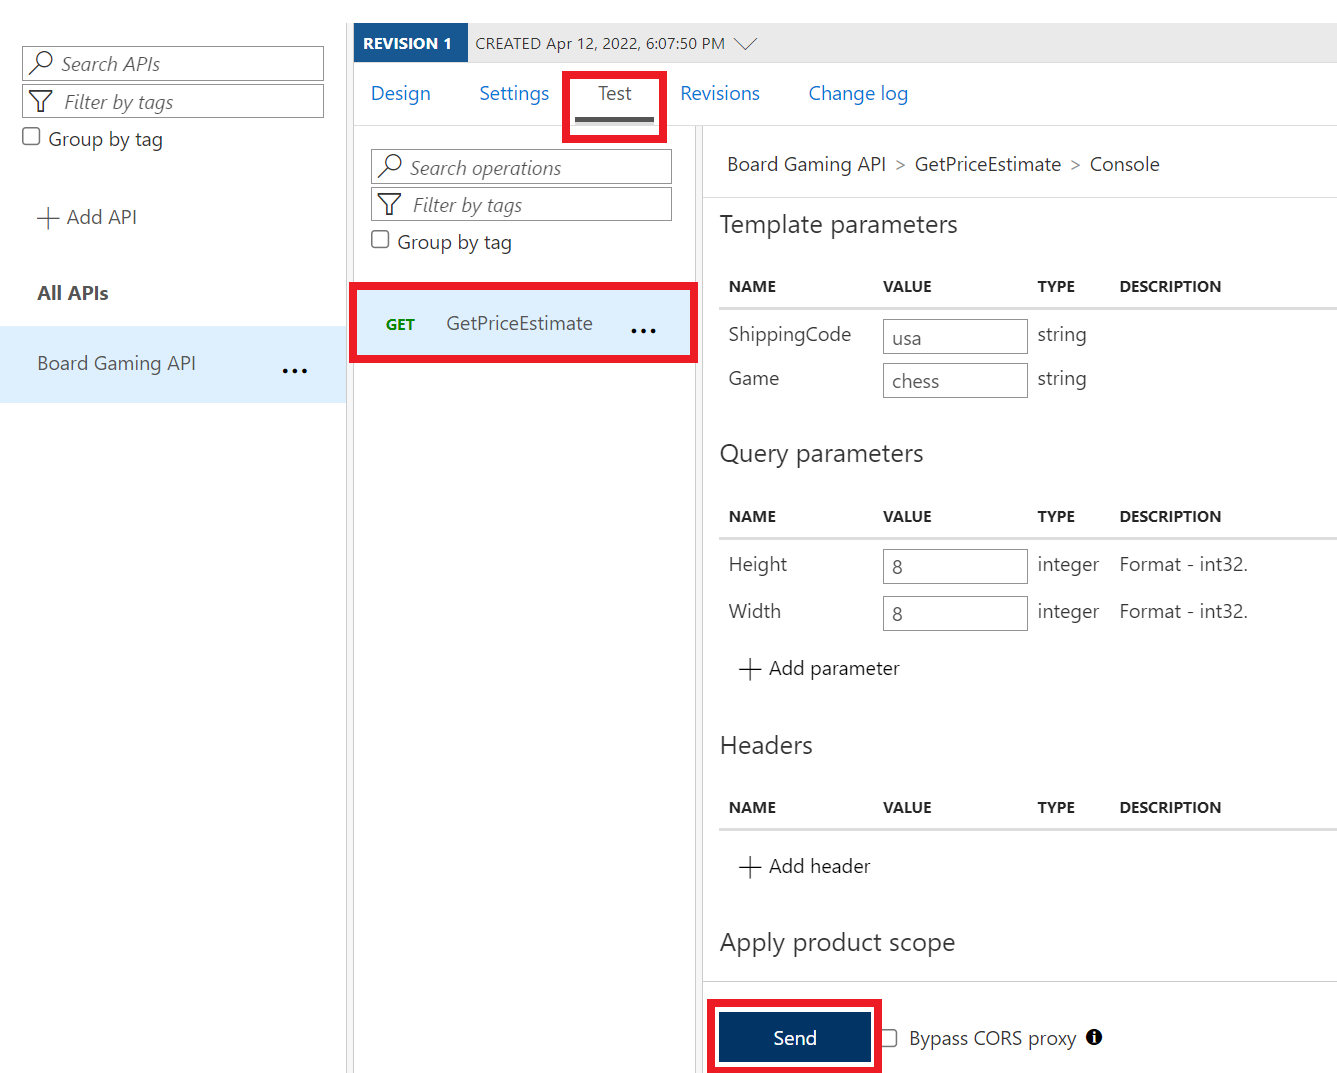
Test the API in API Management
The API is now added to the management instance. Let's test how the API functions before any policies are applied.
In the APIs pane for your API Management service, select the Test tab and then select the GET - GetPriceEstimate operation. The GetPriceEstimate pane appears.
Enter the following values as Template parameters and Query parameters.
NAME VALUE ShippingCode usa Game chess Height 8 Width 8 Select Send.
Review the results. Notice that the precise
quotePreparedTimeis included in the HTTP response payload.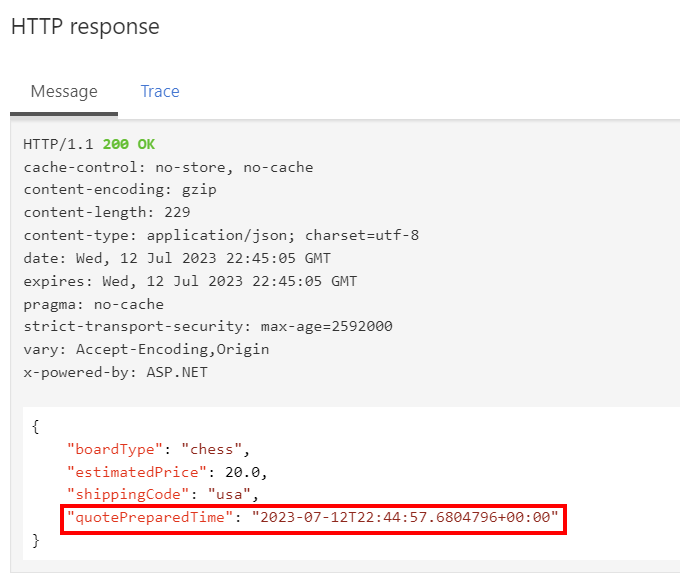
Select Send to repeat the request. Notice that the time in the HTTP response payload has changed.
Add a caching policy
We can now enable caching by adding response caching policies.
Select your API Management service and then select the APIs link. Next select the Design tab and choose the GET - GetPriceEstimate operation. The GetPriceEstimate pane appears.
In the Inbound processing section, select + Add policy. The Add inbound policy pane appears.
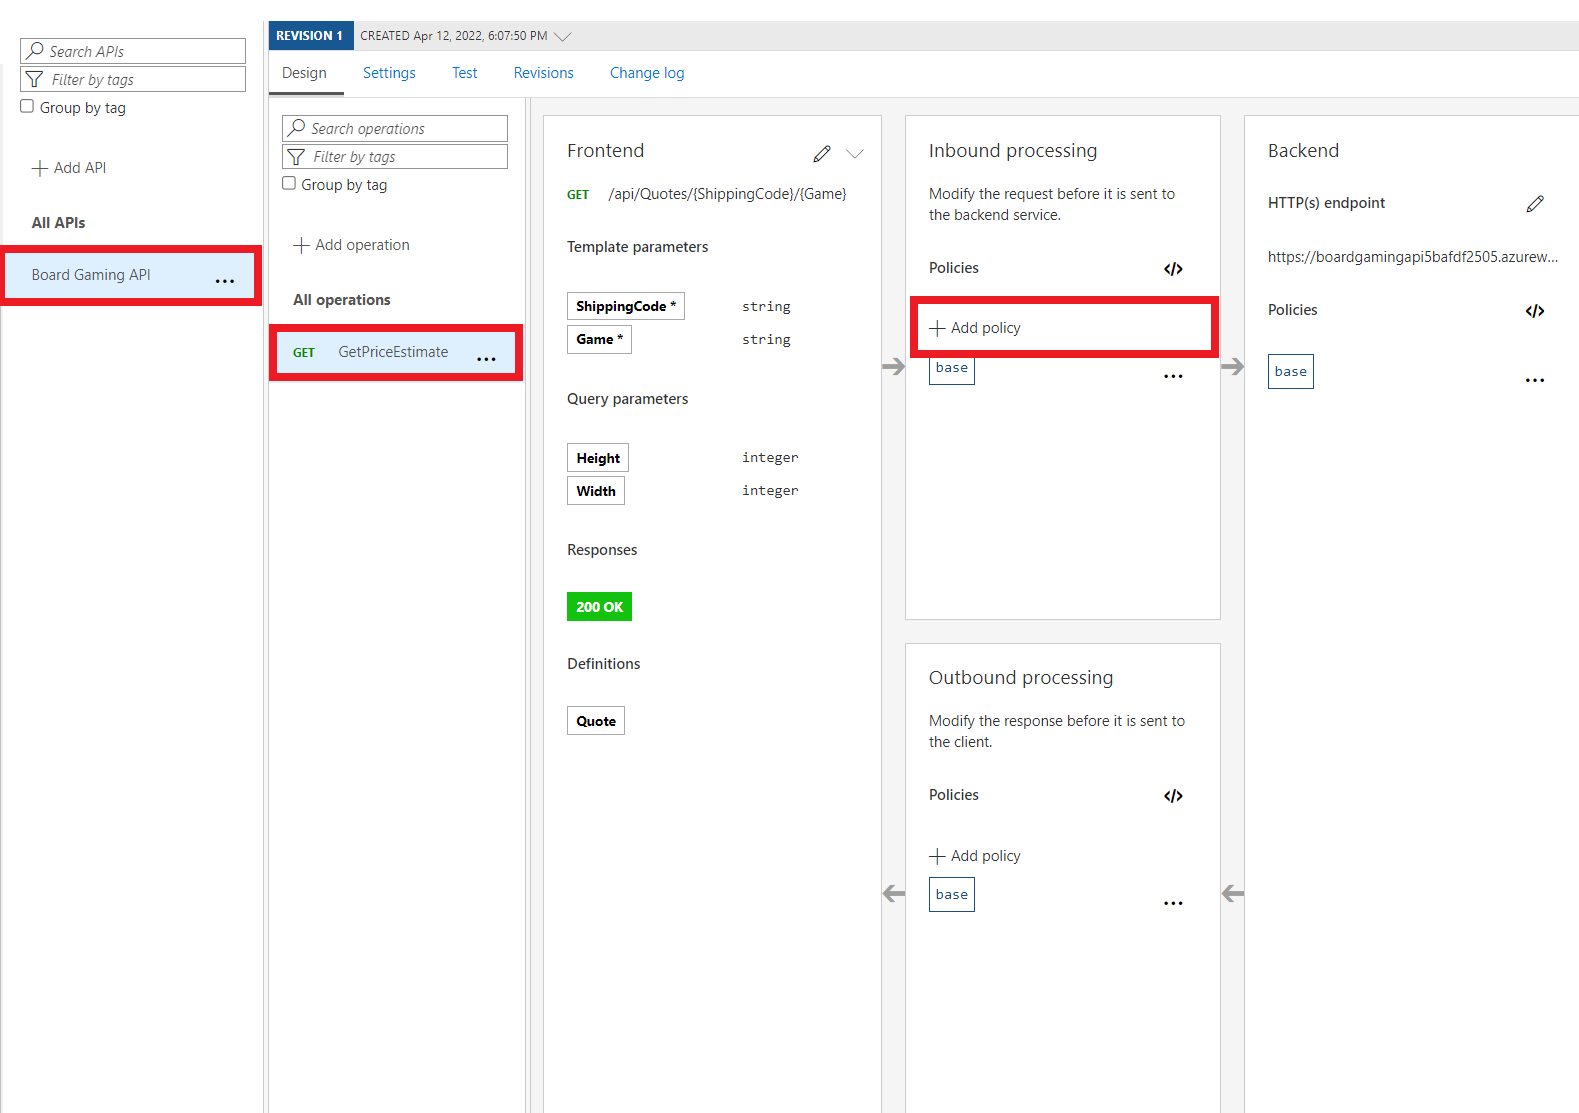
Select Cache responses. The Inbound processing pane reappears.
Under Cache responses, in the Duration in seconds box, enter 600. Then select Save.
In the Inbound processing section, select </>. The policy XML editor appears.
Notice that a
<cache-lookup>tag has been added to the<inbound>section. A<cache-store>tag has also been added to the<outbound>section.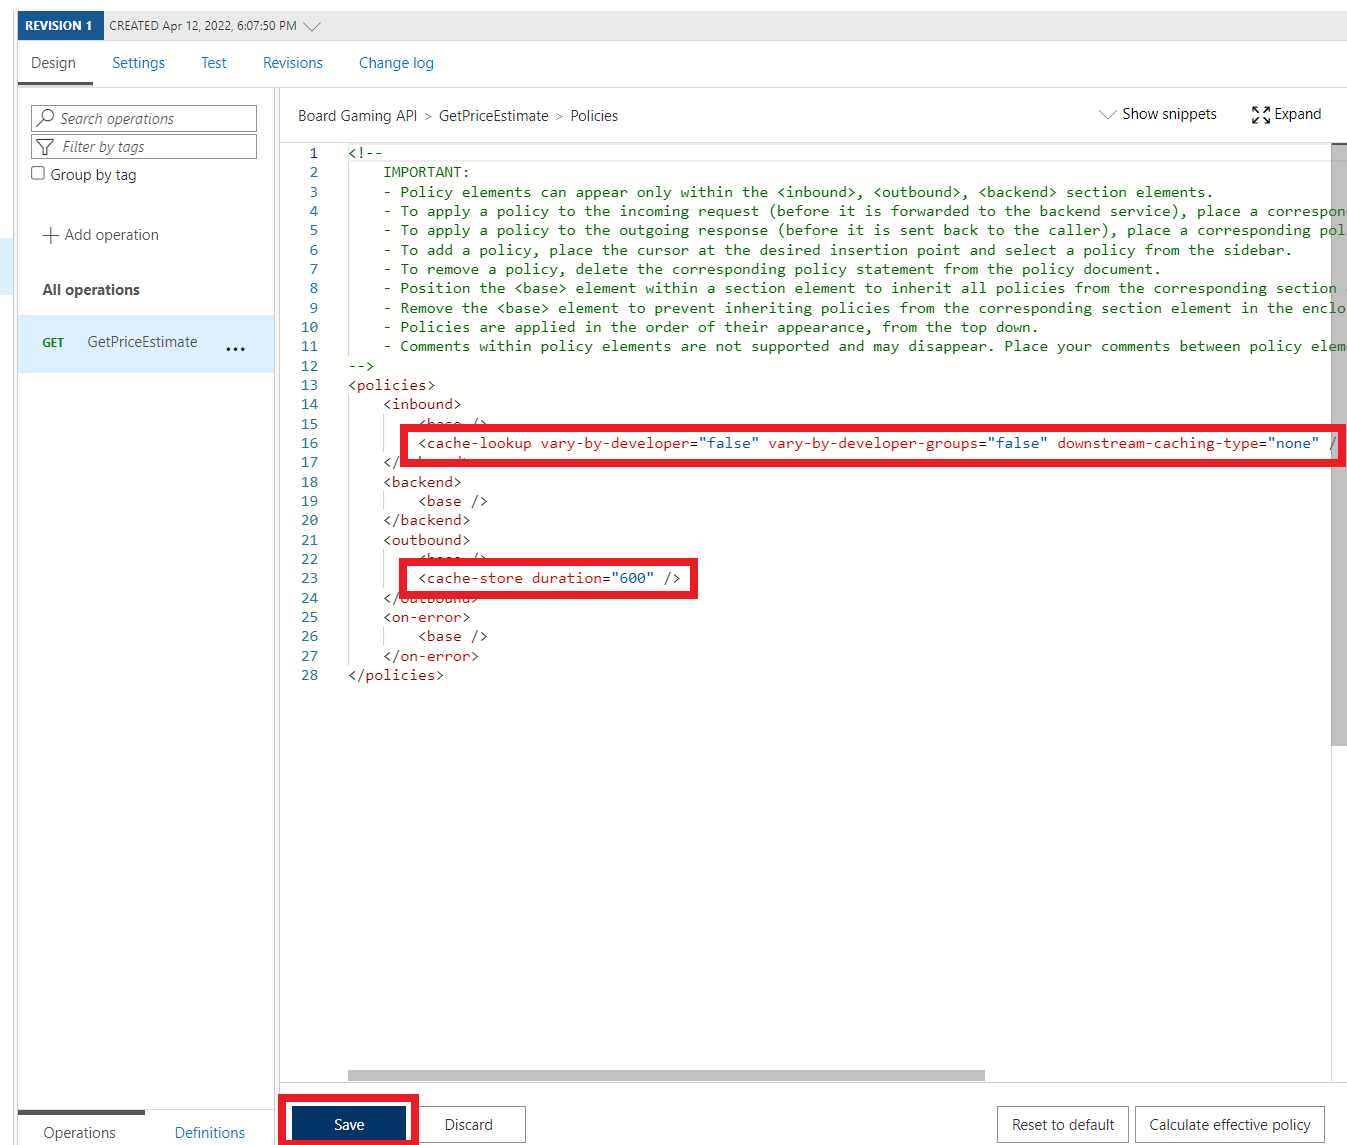
Select Save.
Test the cache
We'll run the same test on the API as in the previous section, from within API Management. We'll then review the results.
In the APIs pane for your API Management service, select the Test tab. Then select the GET - GetPriceEstimate operation. The GetPriceEstimate pane appears.
Enter the following values as Template parameters and Query parameters.
NAME VALUE ShippingCode usa Game chess Height 8 Width 8
Select Send.
Review the results. Notice that the precise
quotePreparedTimeis included in the HTTP response payload.Select Send to repeat the request. Notice that the
quotePreparedTimevalue in the response is still the same. That's because a cached response is served.
Configure the cache to vary results based on query parameters
The cache needs to be configured to serve unique prices based on the Height query parameter. Board Width isn't used to calculate cost, so it won't be configured.
In the APIs pane for your API Management service, select the Design tab. Then select the GET - GetPriceEstimate operation. The GetPriceEstimate pane appears.
In the Inbound processing section, select </> to edit the policy code.
Replace the entire
<cache-lookup>tag with the following XML:<cache-lookup vary-by-developer="false" vary-by-developer-groups="false" downstream-caching-type="none"> <vary-by-query-parameter>height</vary-by-query-parameter> </cache-lookup>Select Save.
Test the new cache configuration
The cache should now deliver unique responses based on the Height query parameter. Since the Width parameter doesn't affect cost, a cached response is used even when the width changes. Let's test that:
In the APIs pane for your API Management service, select the Test tab. Then select the GET - GetPriceEstimate operation. The GetPriceEstimate pane appears.
Enter the following values as Template parameters and Query parameters.
NAME VALUE ShippingCode usa Game chess Height 8 Width 8 Select Send.
Review the results. Notice that the
quotePreparedTimeis included in the response.
Select Send to repeat the request. Notice that like before, the time value in the response hasn't changed. That's because a cached response was served.
To test the Height parameter, use the following values as Template parameters and Query parameters.
NAME VALUE ShippingCode usa Game chess Height 100 Width 8 Select Send.
Review the result. This time, the result is updated and changed. A cache wasn't used because the Height query parameter was changed in the request. This response is correct for our API.
Let's test the Width parameter. Enter the following values as Template parameters and Query parameters.
NAME VALUE ShippingCode usa Game chess Height 100 Width 500 Select Send.
Review the result. This time, although the Width query parameter is different, the result doesn't change. That's because a cached response is served.