Manage VMs with Windows Admin Center
Applies to: Azure Stack HCI, versions 23H2 and 22H2; Windows Server 2022, Windows Server 2019
Windows Admin Center can be used to create and manage your virtual machines (VMs) on Azure Stack HCI.
Note
The recommended way to create and manage VMs on Azure Stack HCI 23H2 is using the Azure Arc control plane. However, since the functionality described in this article is not yet provided by Azure Arc, you can use Windows Admin Center or PowerShell as described below.
Create a new VM
You can easily create a new VM using Windows Admin Center.

On the Windows Admin Center home screen, under All connections, select the server or cluster you want to create the VM on.
Under Tools, scroll down and select Virtual machines.
Under Virtual machines, select the Inventory tab, then select Add and New.
Under New virtual machine, enter a name for your VM.
Select Generation 2 (Recommended).
Under Host, select the server you want the VM to reside on.
Under Path, select a preassigned file path from the dropdown list or click Browse to choose the folder to save the VM configuration and virtual hard disk (VHD) files to. You can browse to any available SMB share on the network by entering the path as \server\share.
Note
We strongly recommend that you select a cluster shared volume to ensure high availability of your VM.
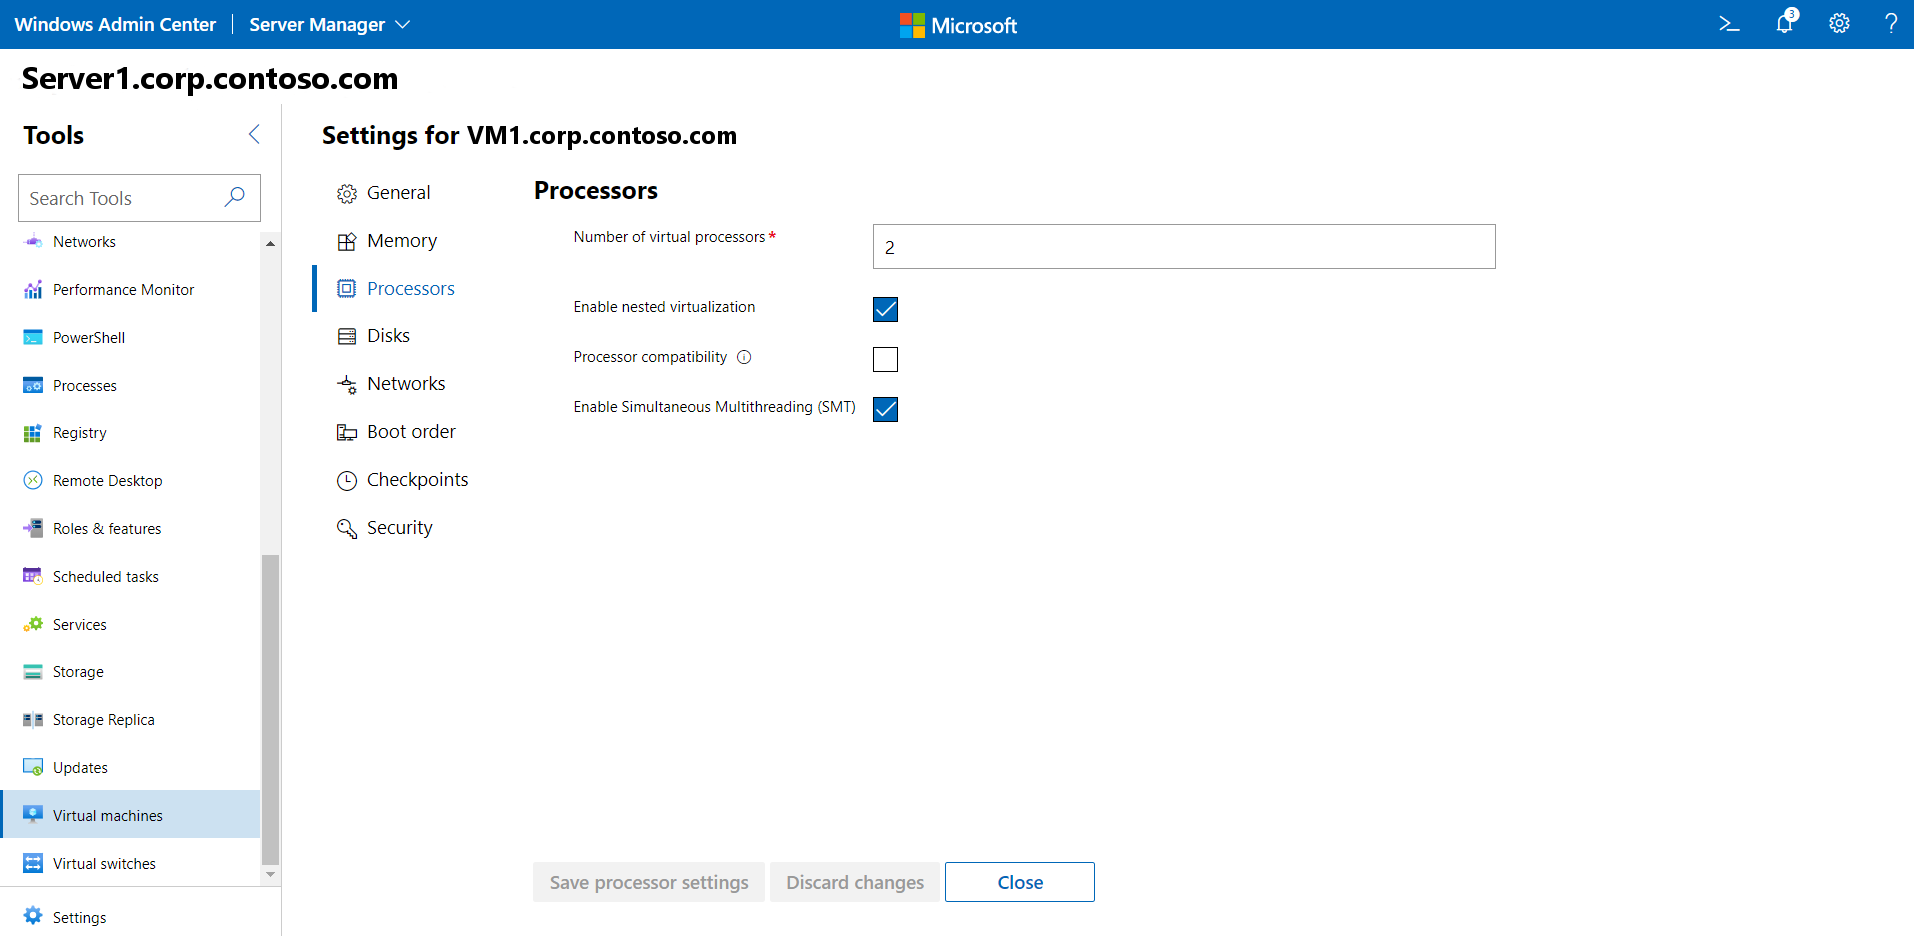
Under Virtual processors, select the number of virtual processors and whether you want nested virtualization enabled for the VM. If the cluster is running Azure Stack HCI, version 21H2, you'll also see a checkbox to enable processor compatibility mode on the VM.
Under Memory, select the amount of startup memory (4 GB is recommended as a minimum), and a min and max range of dynamic memory as applicable to be allocated to the VM.
Under Network, select a virtual switch from the dropdown list.
Under Network, select one of the following for the isolation mode from the dropdown list:
- Set to Default (None) if the VM is connected to the virtual switch in access mode.
- Set to VLAN if the VM is connected to the virtual switch over a VLAN. Specify the VLAN identifier as well.
- Set to Virtual Network (SDN) if the VM is part of an SDN virtual network. Select a virtual network name, subnet, and specify the IP Address. Optionally, select a network security group that can be applied to the VM.
- Set to Logical Network (SDN) if the VM is part of an SDN logical network. Select the logical network name, subnet, and specify the IP Address. Optionally, select a network security group that can be applied to the VM.
Under Storage, click Add and select whether to create a new empty virtual hard disk or to use an existing virtual hard disk. If you're using an existing virtual hard disk, click Browse and select the applicable file path.
Under Operating system, do one of the following:
- Select Install an operating system later if you want to install an operating system for the VM after the VM is created.
- Select Install an operating system from an image file (*.iso), click Browse, then select the applicable .iso image file to use.
- When finished, click Create to create the VM.
- To start the VM, in the Virtual Machines list, hover over the new VM, enable the checkbox for it on the left, and select Start.
- Under State, verify that the VM state is Running.
Get a list of VMs
You can easily see all VMs on a server or in your cluster.

- In Windows Admin Center, under Tools, scroll down and select Virtual Machines.
- The Inventory tab on the right lists all VMs available on the current server or the cluster, and provides commands to manage individual VMs. You can:
- View a list of the VMs running on the current server or cluster.
- View the VM's state and host server if you are viewing VMs for a cluster. Also view CPU and memory usage from the host perspective, including memory pressure, memory demand and assigned memory, and the VM's uptime, heartbeat status, and protection status (using Azure Site Recovery).
- Create a new VM.
- Delete, start, turn off, shut down, pause, resume, reset or rename a VM. Also save the VM, delete a saved state, or create a checkpoint.
- Change settings for a VM.
- Connect to a VM console via the Hyper-V host.
- Replicate a VM using Azure Site Recovery.
- For operations that can be run on multiple VMs, such as Start, Shut down, Save, Pause, Delete, or Reset, you can select multiple VMs and run the operation once.
View VM details
You can view detailed information and performance charts for a specific VM from its dedicated page.

Under Tools, scroll down and select Virtual machines.
Click the Inventory tab on the right, then select the VM. On the subsequent page, you can do the following:
- View live and historical data line charts for CPU, memory, network, IOPS and IO throughput (historical data is only available for hyperconverged clusters)
- View, create, apply, rename, and delete checkpoints.
- View details for the virtual hard disk (.vhd) files, network adapters, and host server.
- View the state of the VM.
- Save the VM, delete a saved state, export, or clone the VM.
- Change settings for the VM.
- Connect to the VM console using VMConnect via the Hyper-V host.
- Replicate the VM using Azure Site Recovery.
View aggregate VM metrics
You can view resources usage and performance metrics for all VMs in your cluster.

- Under Tools, scroll down and select Virtual machines.
- The Summary tab on the right provides a holistic view of Hyper-V host resources and performance for a selected server or cluster, including the following:
- The number of VMs that are running, stopped, paused, and saved
- Recent health alerts or Hyper-V event log events for clusters
- CPU and memory usage with host vs guest breakdown
- Live and historical data line charts for IOPS and I/O throughput for clusters
Change VM settings
There are a variety of settings that you can change for a VM.
Note
Some settings cannot be changed for a VM that is running and you will need to stop the VM first.
Under Tools, scroll down and select Virtual machines.
Click the Inventory tab on the right, select the VM, then click Settings.
To change VM start/stop actions and general settings, select General and do the following:
To change the VM name, enter it in the Name field
To change default VM start/stop actions, select the appropriate settings from the dropdown boxes.
To change time intervals for pausing or starting a VM, enter the appropriate values in the fields shown

Select Memory to change VM startup memory, dynamic memory range, memory buffer percentage, and memory weight.

Select Processors to change the number of virtual processors, to enable nested virtualization, or to enable simultaneous multithreading (SMT).
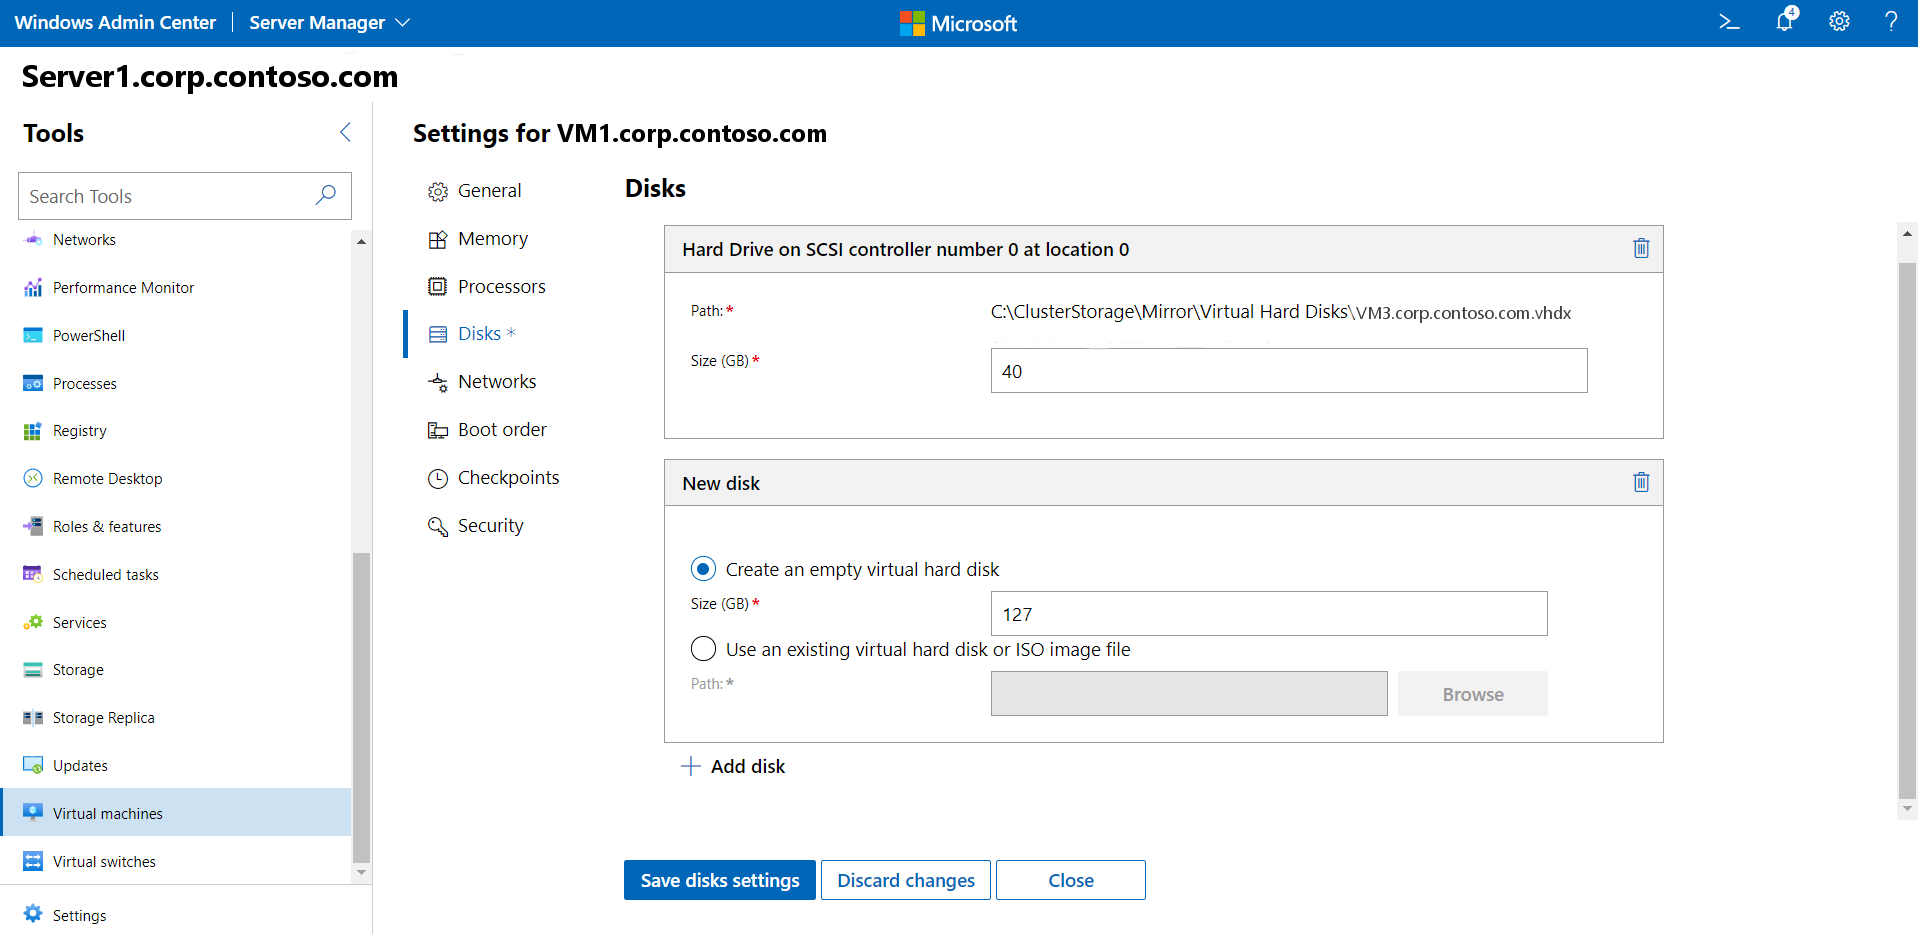
To change the size of an existing disk, modify the value in Size (GB). To add a new virtual disk, select Disks and then select whether to create an empty virtual disk or to use an existing virtual disk or ISO (.iso) image file. Click Browse and select the path to the virtual disk or image file.
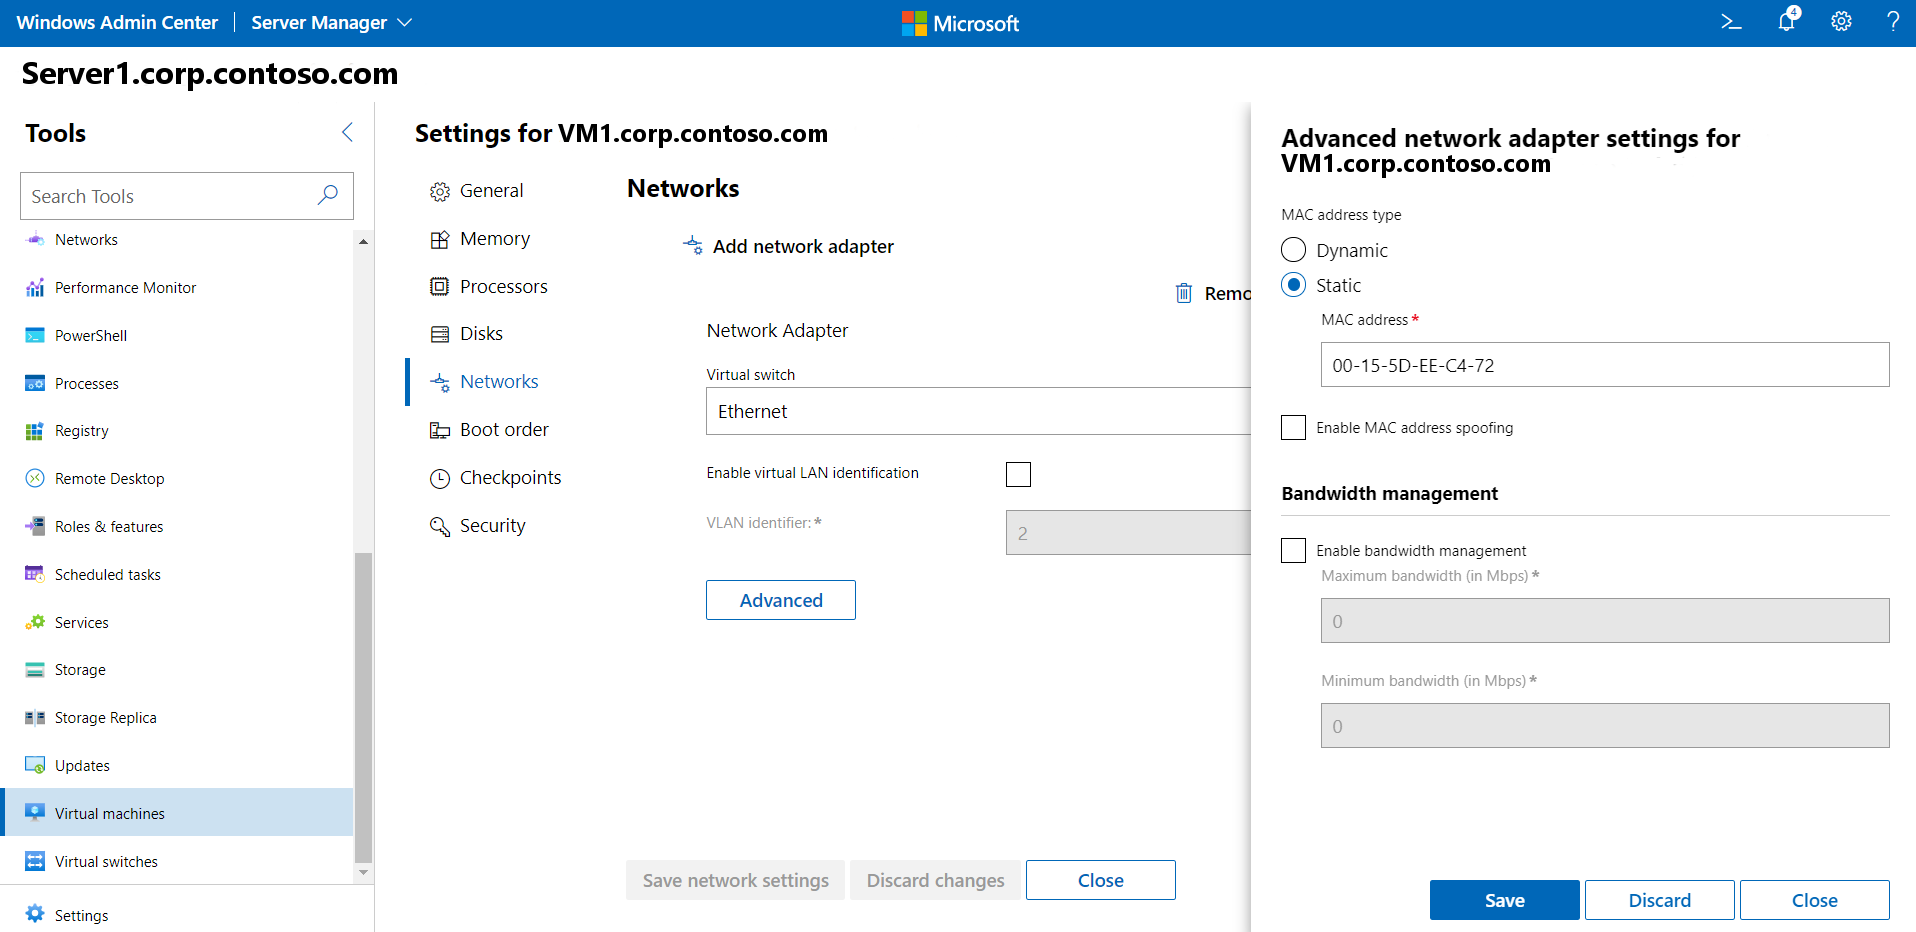
To add, remove, or change network adapter settings, select Networks and do the following:
Select a virtual switch from the dropdown list.
Select one of the following for the isolation mode from the dropdown list:
- Set to Default (None) if the VM is connected to the virtual switch in access mode.
- Set to VLAN if the VM is connected to the virtual switch over a VLAN. Specify the VLAN identifier as well.
- Set to Virtual Network (SDN) if the VM is part of an SDN virtual network. Select a virtual network name, subnet, and specify the IP Address. Optionally, select a network security group that can be applied to the VM.
- Set to Logical Network (SDN) if the VM is part of an SDN logical network. Select the logical network name, subnet, and specify the IP Address. Optionally, select a network security group that can be applied to the VM.
To change additional settings for a network adapter, click Advanced to be able to:
- Select between dynamic or static MAC address type
- Enable MAC address spoofing
- Enable bandwidth management and specify the max/min range
Select Boot order to add boot devices or change the VM boot sequence.

Select Checkpoints to enable VM checkpoints, select checkpoint type, and specify checkpoint file location.
Note
The Production checkpoint setting is recommended and uses backup technology in the guest operating system to create data-consistent checkpoints. The Standard setting uses VHD snapshots to create checkpoints with application and service state.

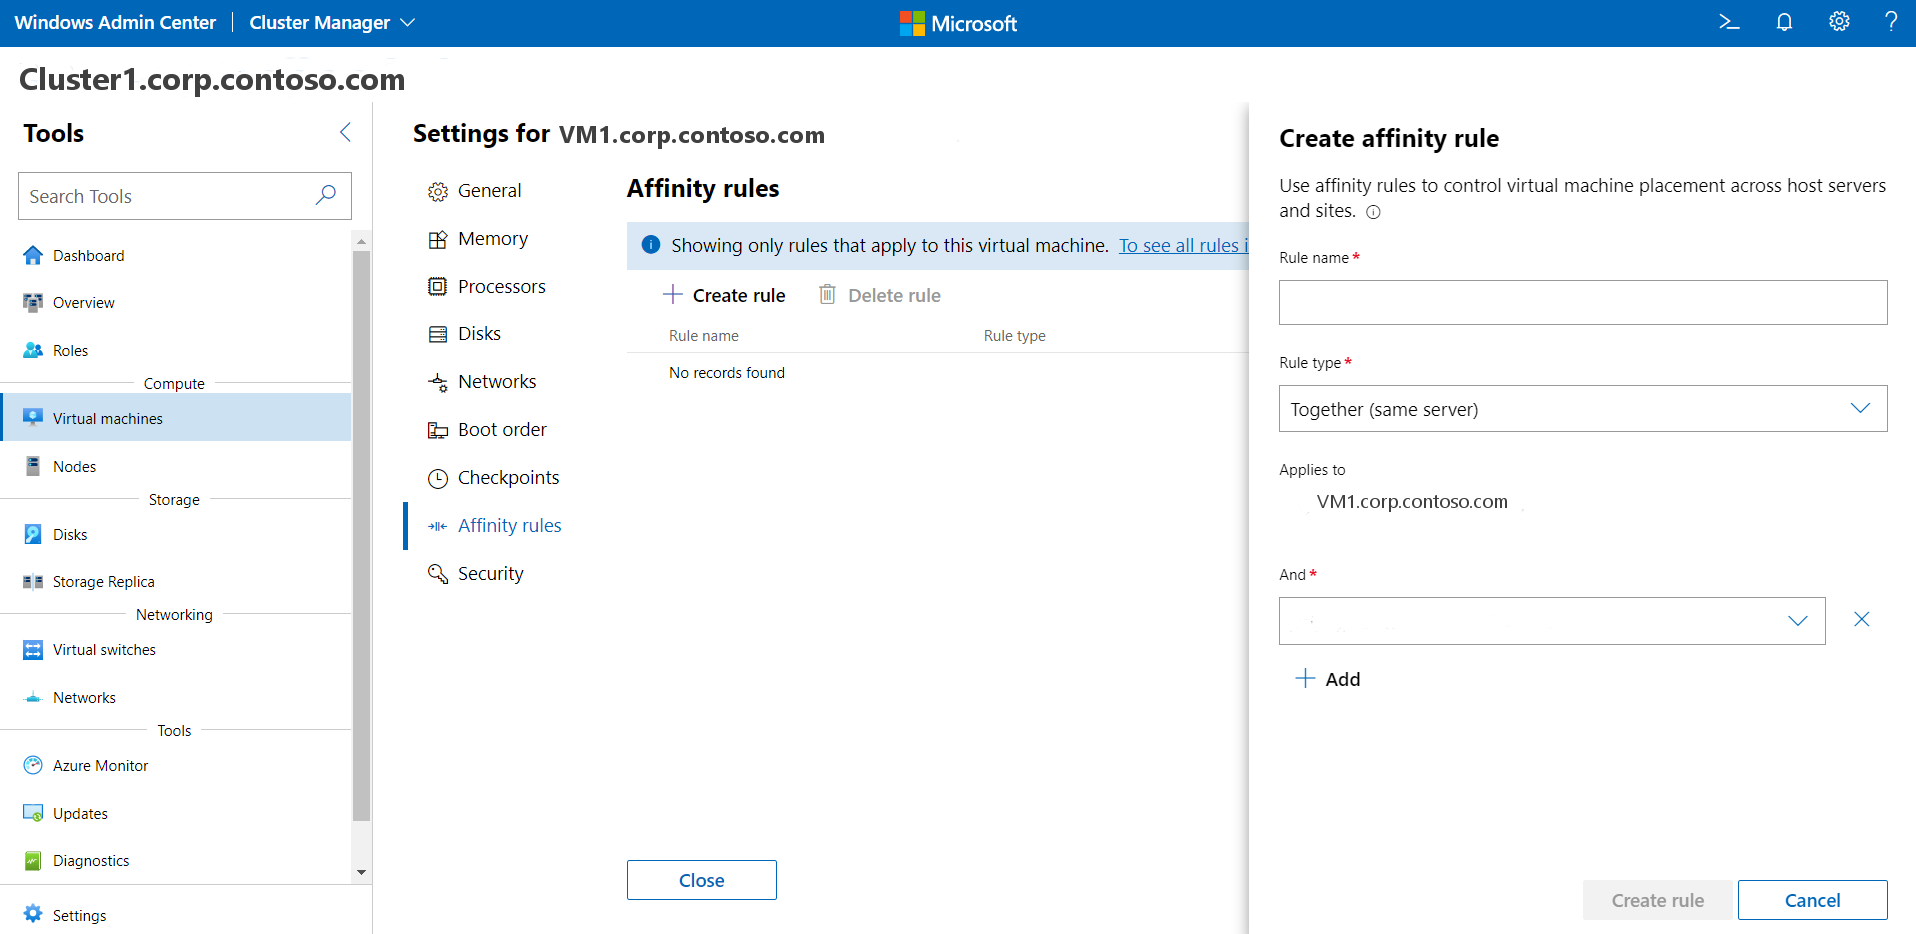
Select Affinity rules to create an affinity rule for a VM. For more information on creating affinity rules, see Create server and site affinity rules for VMs.
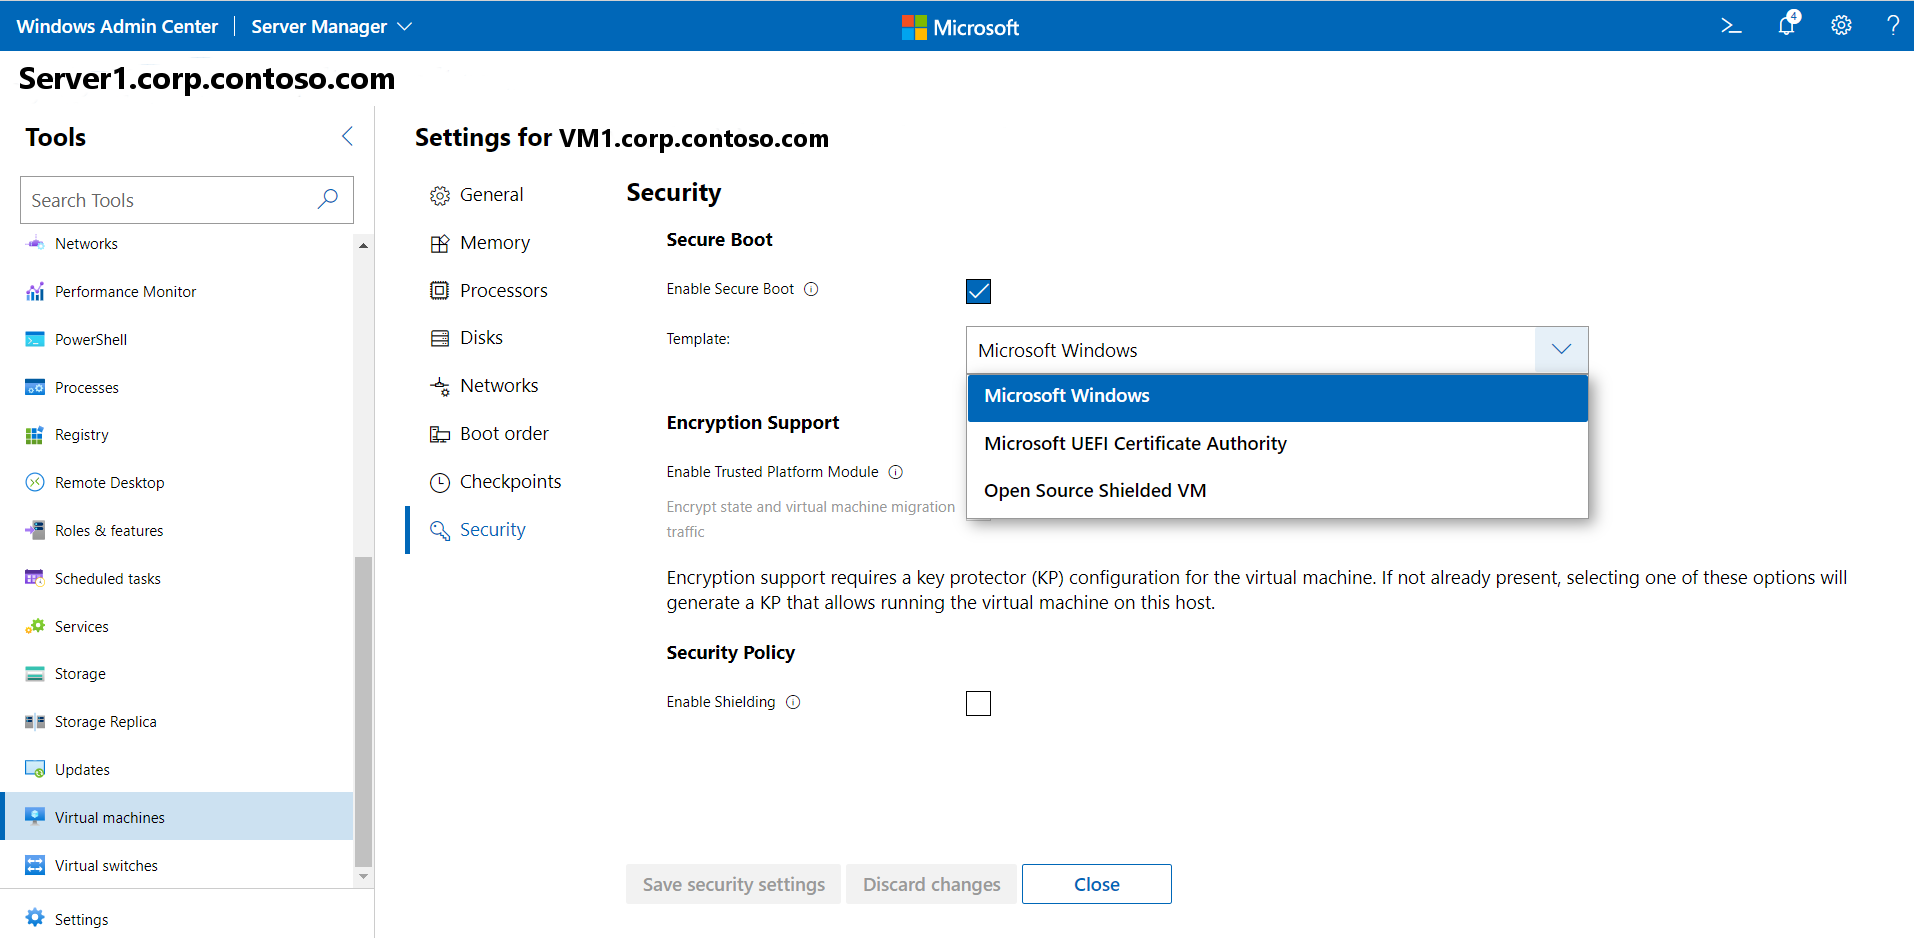
To change VM security settings, select Security and do the following:
Select Enable Secure Boot to help prevent unauthorized code from running at boot time (recommended). Also select a Microsoft or open-source template from the drop-down box
For Template, select a security template to use
Under Encryption Support, you can
Select Enable Trusted Platform Module to be able to use a hardware cryptographic service module
Enable encryption of state and virtual machine migration traffic
Note
Encryption support requires a key protector (KP) for the VM. If not already present, selecting one of these options will generate a KP that allows running the VM on this host.
Under Security Policy, select Enable Shielding for additional protection options for the VM.


Move a VM to another server or cluster
You can easily move a virtual machine to another server or another cluster as follows:
Under Tools, scroll down and select Virtual machines.
Under the Inventory tab, select a VM from the list and select Manage > Move.
Choose a server from the list and select Move.
If you want to move both the VM and its storage, choose whether to move it to another cluster or to another server in the same cluster.

If you want to move just the VM's storage, select either to move it to the same path or select different paths for configuration, checkpoint, or smart paging.


Join a VM to a domain
You can easily join a VM to a domain as follows:

- Under Tools, scroll down and select Virtual machines.
- Under the Inventory tab, select a VM from the list and select Manage > Domain join.
- Enter the name of the domain to join to, along with the domain user name and password.
- Enter the VM user name and password.
- When finished, click Join.
Clone a VM
You can easily clone a VM as follows:
- Under Tools, scroll down and select Virtual machines.
- Select the Inventory tab on the right. Choose a VM from the list and select Manage > Clone.
- Specify a name and path to the cloned VM.
- Run Sysprep on your VM if you haven't already done so.

Import or export a VM
You can easily import or export a VM. The following procedure describes the import process.

- Under Tools, scroll down and select Virtual machines.
- On the Inventory tab, select Add > Import.
- Enter the folder name containing the VM or click Browse and select a folder.
- Select the VM you want to import.
- Create a unique ID for the VM if needed.
- When finished, select Import.
For exporting a VM, the process is similar:
- Under Tools, scroll down and select Virtual machines.
- On the Inventory tab, select the VM to export in the list.
- Select Manage > Export.
- Enter the path to export the VM to.

View VM event logs
You can view VM event logs as follows:
- Under Tools, scroll down and select Virtual machines.
- On the Summary tab on the right, select View all events.
- Select an event category and expand the view.
Connect to a VM by using Remote Desktop
Instead of using Windows Admin Center, you can also manage your VMs through a Hyper-V host using a Remote Desktop Protocol (RDP) connection.
Under Tools, scroll down and select Virtual machines.
On the Inventory tab, select Choose a virtual machine from the list and select the Connect > Connect or Connect > Download RDP file option. Both options use the VMConnect tool to connect to the guest VM through the Hyper-V host and requires you to enter your administrator username and password credentials for the Hyper-V host.
The Connect option connects to the VM using Remote Desktop in your web browser.
The Download RDP file option downloads an .rdp file that you can open to connect with the Remote Desktop Connection app (mstsc.exe).
Protect VMs with Azure Site Recovery
You can use Windows Admin Center to configure Azure Site Recovery and replicate your on-premises VMs to Azure. This is an optional value-add service. To get started, see Protect VMs using Azure Site Recovery.

Remove a VM and resources
To remove VM and its resources, see Remove a VM.
Next steps
You can also create and manage VMs using Windows PowerShell. For more information, see Manage VMs on Azure Stack HCI using Windows PowerShell.
See Create and manage Azure virtual networks for Windows virtual machines.
Feedback
Coming soon: Throughout 2024 we will be phasing out GitHub Issues as the feedback mechanism for content and replacing it with a new feedback system. For more information see: https://aka.ms/ContentUserFeedback.
Submit and view feedback for