Tutorial: Use Key Vault references in an ASP.NET Core app
In this tutorial, you learn how to use the Azure App Configuration service together with Azure Key Vault. App Configuration and Key Vault are complementary services used side by side in most application deployments.
App Configuration helps you use the services together by creating keys that reference values stored in Key Vault. When App Configuration creates such keys, it stores the URIs of Key Vault values rather than the values themselves.
Your application uses the App Configuration client provider to retrieve Key Vault references, just as it does for any other keys stored in App Configuration. In this case, the values stored in App Configuration are URIs that reference the values in the Key Vault. They are not Key Vault values or credentials. Because the client provider recognizes the keys as Key Vault references, it uses Key Vault to retrieve their values.
Your application is responsible for authenticating properly to both App Configuration and Key Vault. The two services don't communicate directly.
This tutorial shows you how to implement Key Vault references in your code. It builds on the web app introduced in the quickstarts. Before you continue, finish Create an ASP.NET Core app with App Configuration first.
You can use any code editor to do the steps in this tutorial. For example, Visual Studio Code is a cross-platform code editor that's available for the Windows, macOS, and Linux operating systems.
In this tutorial, you learn how to:
- Create an App Configuration key that references a value stored in Key Vault.
- Access the value of this key from an ASP.NET Core web application.
Prerequisites
Before you start this tutorial, install the .NET SDK 6.0 or later.
If you don't have an Azure subscription, create an Azure free account before you begin.
Create a vault
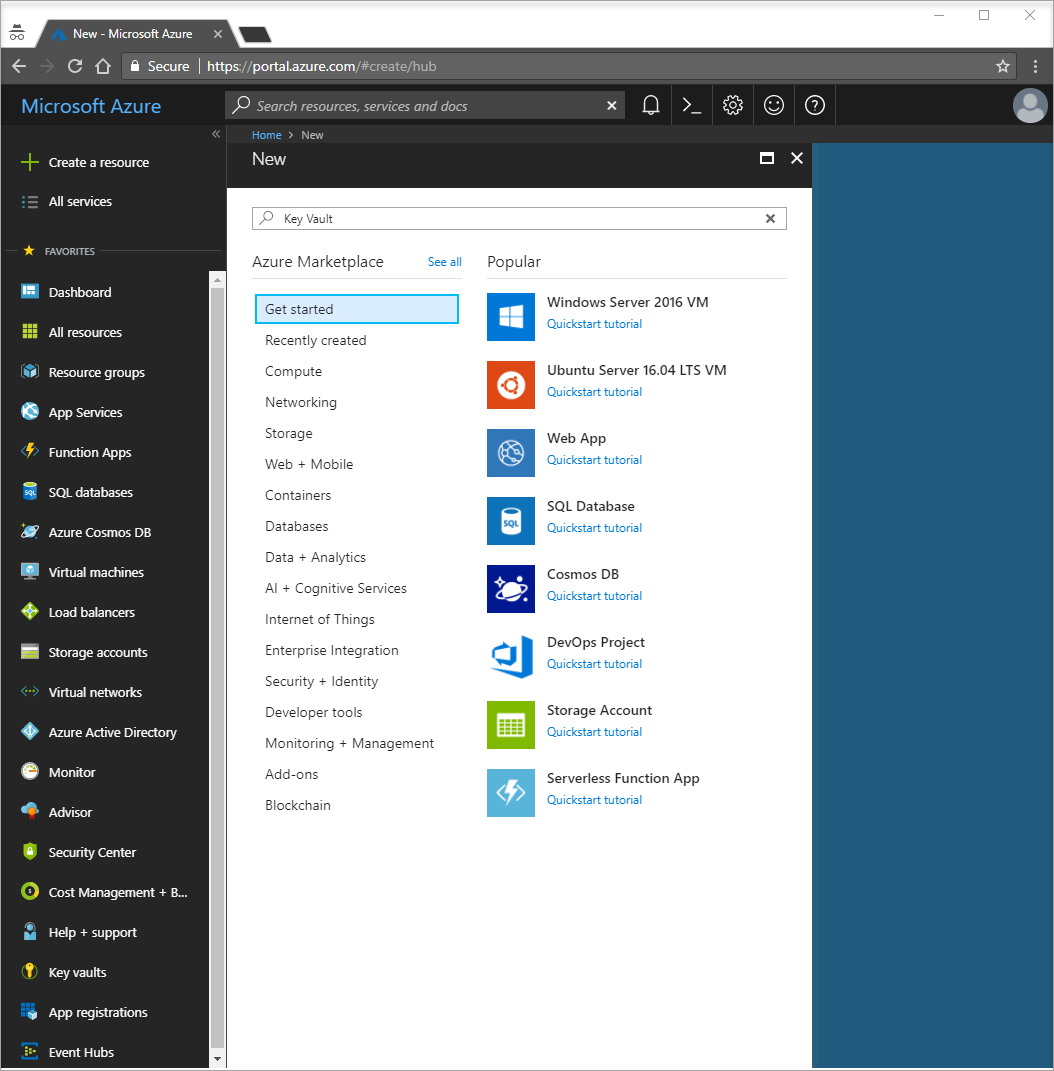
Select the Create a resource option in the upper-left corner of the Azure portal:
In the search box, type Key Vault and select Key Vault from the drop-down.
From the results list, select Key vaults on the left.
In Key vaults, select Add.
On the right in Create key vault, provide the following information:
- Select Subscription to choose a subscription.
- In Resource Group, enter an existing resource group name or select Create new and enter a resource group name.
- In Key vault name, a unique name is required.
- In the Region drop-down list, choose a location.
Leave the other Create key vault options with their default values.
Click Review + Create.
The system will validate and display the data you entered. Click Create.
At this point, your Azure account is the only one authorized to access this new vault.
Add a secret to Key Vault
To add a secret to the vault, you need to take just a few additional steps. In this case, add a message that you can use to test Key Vault retrieval. The message is called Message, and you store the value "Hello from Key Vault" in it.
- From the Key Vault properties pages, select Secrets.
- Select Generate/Import.
- In the Create a secret pane, enter the following values:
- Upload options: Enter Manual.
- Name: Enter Message.
- Value: Enter Hello from Key Vault.
- Leave the other Create a secret properties with their default values.
- Select Create.
Add a Key Vault reference to App Configuration
Sign in to the Azure portal. Select All resources, and then select the App Configuration store instance that you created in the quickstart.
Select Configuration Explorer.
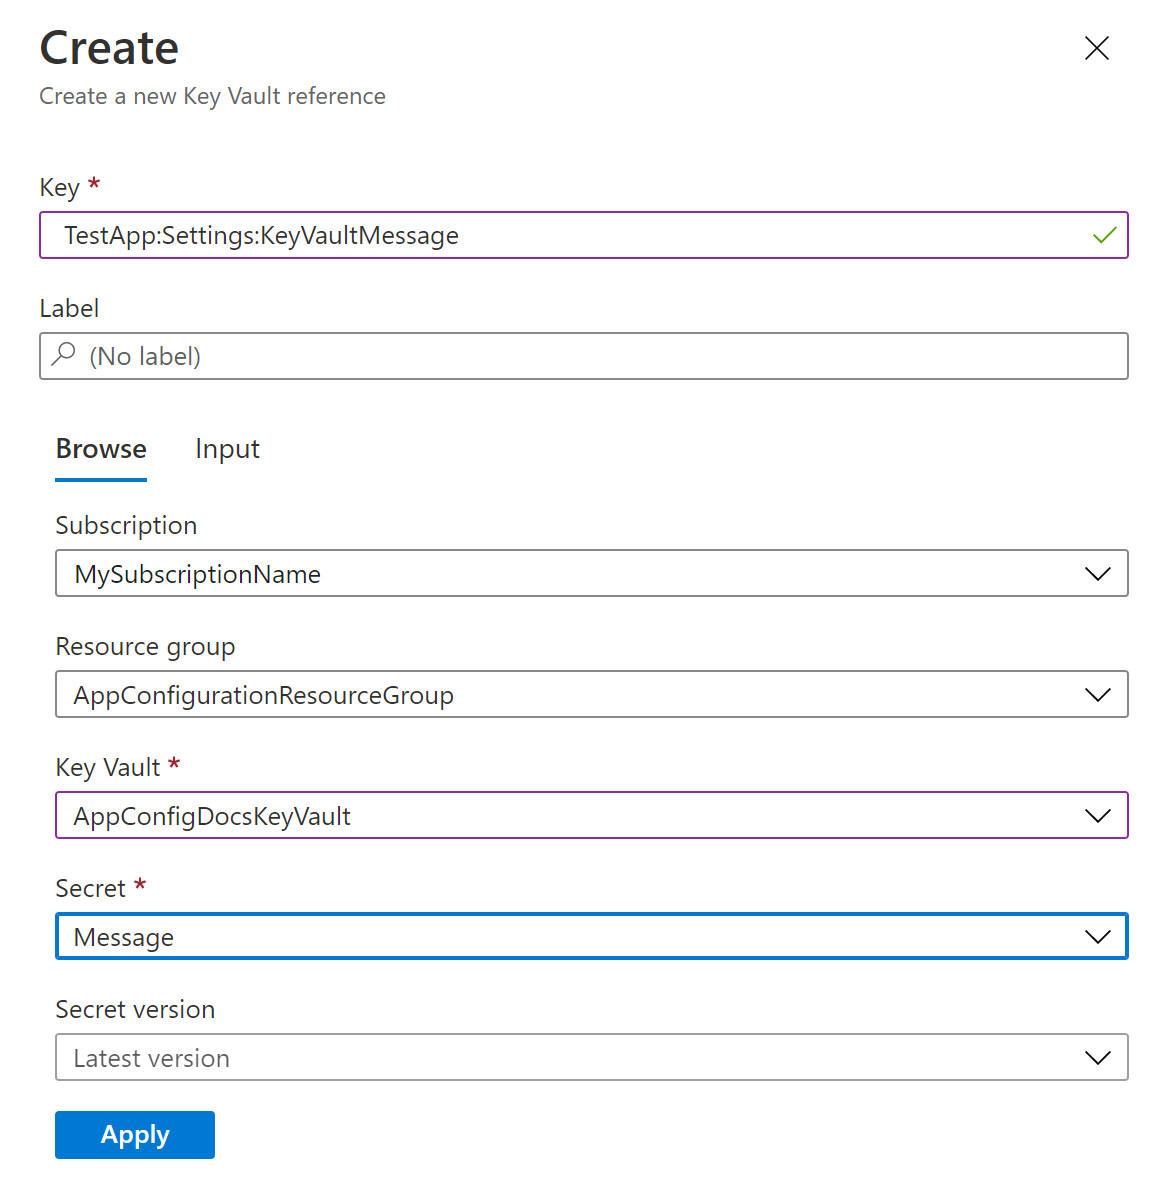
Select + Create > Key vault reference, and then specify the following values:
- Key: Select TestApp:Settings:KeyVaultMessage.
- Label: Leave this value blank.
- Subscription, Resource group, and Key vault: Enter the values corresponding to those in the key vault you created in the previous section.
- Secret: Select the secret named Message that you created in the previous section.
Update your code to use a Key Vault reference
Add a reference to the required NuGet packages by running the following command:
dotnet add package Azure.IdentityOpen Program.cs, and add references to the following required packages:
using Azure.Identity;Use App Configuration by calling the
AddAzureAppConfigurationmethod. Include theConfigureKeyVaultoption, and pass the correct credential to your Key Vault using theSetCredentialmethod.var builder = WebApplication.CreateBuilder(args); // Retrieve the connection string string connectionString = builder.Configuration.GetConnectionString("AppConfig"); // Load configuration from Azure App Configuration builder.Configuration.AddAzureAppConfiguration(options => { options.Connect(connectionString); options.ConfigureKeyVault(keyVaultOptions => { keyVaultOptions.SetCredential(new DefaultAzureCredential()); }); });Tip
If you have multiple Key Vaults, the same credential will be used for all of them. If your Key Vaults require different credentials, you can set them using
RegisterorSetSecretResolvermethods from theAzureAppConfigurationKeyVaultOptionsclass.When you initialized the connection to App Configuration, you set up the connection to Key Vault by calling the
ConfigureKeyVaultmethod. After the initialization, you can access the values of Key Vault references in the same way you access the values of regular App Configuration keys.To see this process in action, open Index.cshtml in the Views > Home folder. Replace its contents with the following code:
@page
@using Microsoft.Extensions.Configuration
@inject IConfiguration Configuration

<style>
    body {
        background-color: @Configuration["TestApp:Settings:BackgroundColor"]
    }
    h1 {
        color: @Configuration["TestApp:Settings:FontColor"];
        font-size: @Configuration["TestApp:Settings:FontSize"]px;
    }
</style>

<h1>@Configuration["TestApp:Settings:Message"]
    and @Configuration["TestApp:Settings:KeyVaultMessage"]</h1>
You access the value of the Key Vault reference TestApp:Settings:KeyVaultMessage in the same way as for the configuration value of TestApp:Settings:Message.
Grant your app access to Key Vault
Azure App Configuration won't access your key vault. Your app will read from Key Vault directly, so you need to grant your app access to the secrets in your key vault. This way, the secret always stays with your app. The access can be granted using either a Key Vault access policy or Azure role-based access control.
You use DefaultAzureCredential in your code above. It's an aggregated token credential that automatically tries a number of credential types, like EnvironmentCredential, ManagedIdentityCredential, SharedTokenCacheCredential, and VisualStudioCredential. For more information, see DefaultAzureCredential Class. You can replace DefaultAzureCredential with any credential type explicitly. However, using DefaultAzureCredential enables you to have the same code that runs in both local and Azure environments. For example, you grant your own credential access to your key vault. DefaultAzureCredential automatically falls back to SharedTokenCacheCredential or VisualStudioCredential when you use Visual Studio for local development.
Alternatively, you can set the AZURE_TENANT_ID, AZURE_CLIENT_ID, and AZURE_CLIENT_SECRET environment variables, and DefaultAzureCredential will use the client secret you have via the EnvironmentCredential to authenticate with your key vault. After your app is deployed to an Azure service with managed identity enabled, such as Azure App Service, Azure Kubernetes Service, or Azure Container Instance, you grant the managed identity of the Azure service permission to access your key vault. DefaultAzureCredential automatically uses ManagedIdentityCredential when your app is running in Azure. You can use the same managed identity to authenticate with both App Configuration and Key Vault. For more information, see How to use managed identities to access App Configuration.
Build and run the app locally
To build the app by using the .NET CLI, run the following command in the command shell:
dotnet buildAfter the build is complete, use the following command to run the web app locally:
dotnet runOpen a browser window, and go to
http://localhost:5000, which is the default URL for the web app hosted locally.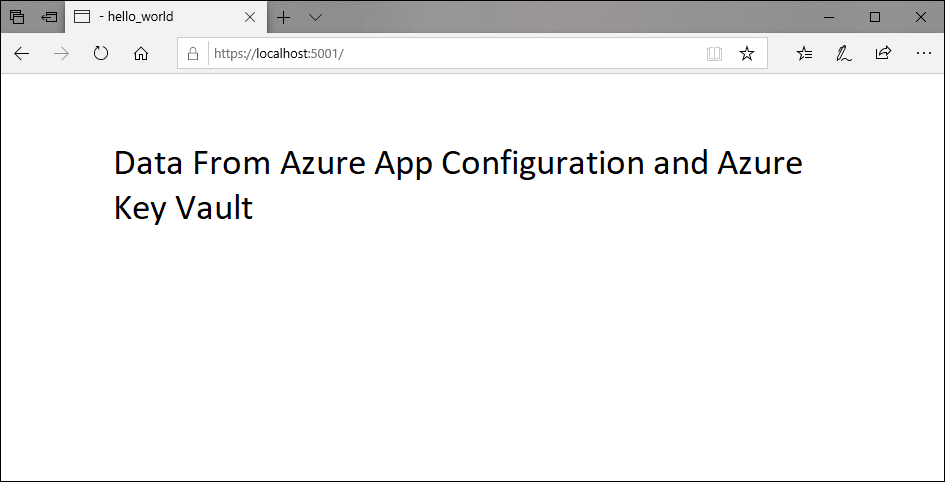
Clean up resources
If you don't want to continue using the resources created in this article, delete the resource group you created here to avoid charges.
Important
Deleting a resource group is irreversible. The resource group and all the resources in it are permanently deleted. Ensure that you don't accidentally delete the wrong resource group or resources. If you created the resources for this article inside a resource group that contains other resources you want to keep, delete each resource individually from its respective pane instead of deleting the resource group.
- Sign in to the Azure portal, and select Resource groups.
- In the Filter by name box, enter the name of your resource group.
- In the result list, select the resource group name to see an overview.
- Select Delete resource group.
- You're asked to confirm the deletion of the resource group. Enter the name of your resource group to confirm, and select Delete.
After a few moments, the resource group and all its resources are deleted.
Next steps
In this tutorial, you created a key in App Configuration that references a secret stored in Key Vault. To learn how to automatically reload secrets and certificates from Key Vault, continue to the next tutorial:
To learn how to use Managed Identity to streamline access to App Configuration and Key Vault, refer to the following tutorial:
Feedback
Coming soon: Throughout 2024 we will be phasing out GitHub Issues as the feedback mechanism for content and replacing it with a new feedback system. For more information see: https://aka.ms/ContentUserFeedback.
Submit and view feedback for