Configure a site-to-site VPN in vWAN for Azure VMware Solution
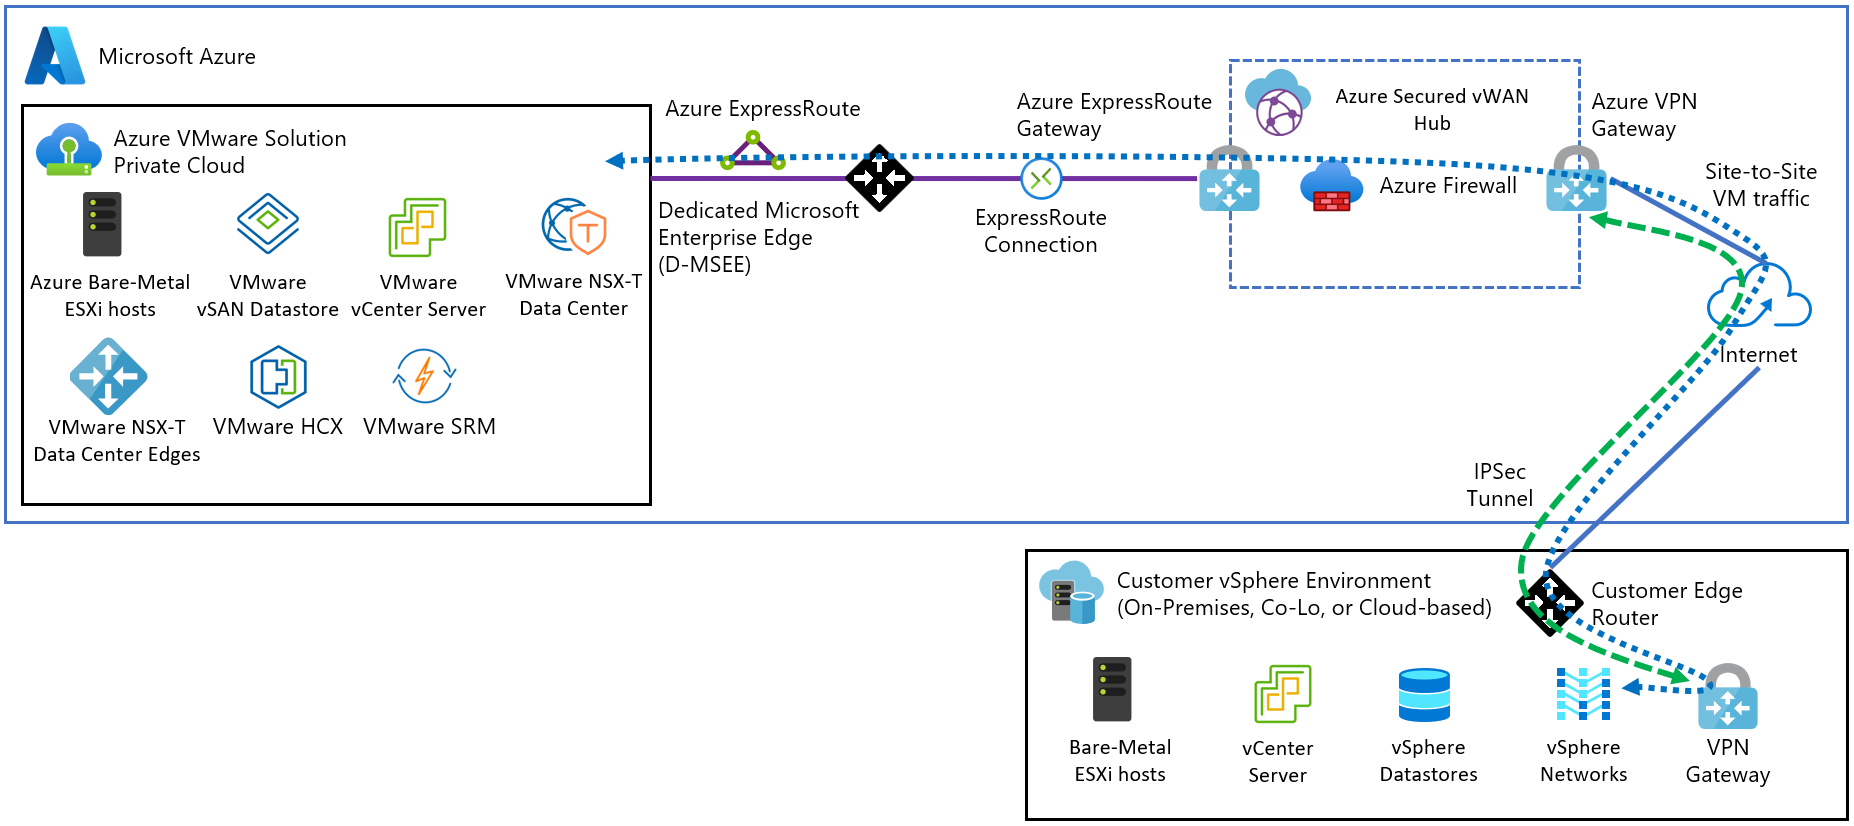
In this article, learn how to establish a VPN (IPsec IKEv1 and IKEv2) site-to-site tunnel terminating in the Microsoft Azure Virtual WAN hub. The hub contains the Azure VMware Solution ExpressRoute gateway and the site-to-site VPN gateway. It connects an on-premises VPN device with an Azure VMware Solution endpoint.
Prerequisites
You must have a public-facing IP address terminating on an on-premises VPN device.
Create an Azure Virtual WAN
In the portal, in the Search resources bar, type Virtual WAN in the search box and select Enter.
Select Virtual WANs from the results. On the Virtual WANs page, select + Create to open the Create WAN page.
On the Create WAN page, on the Basics tab, fill in the fields. Modify the example values to apply to your environment.
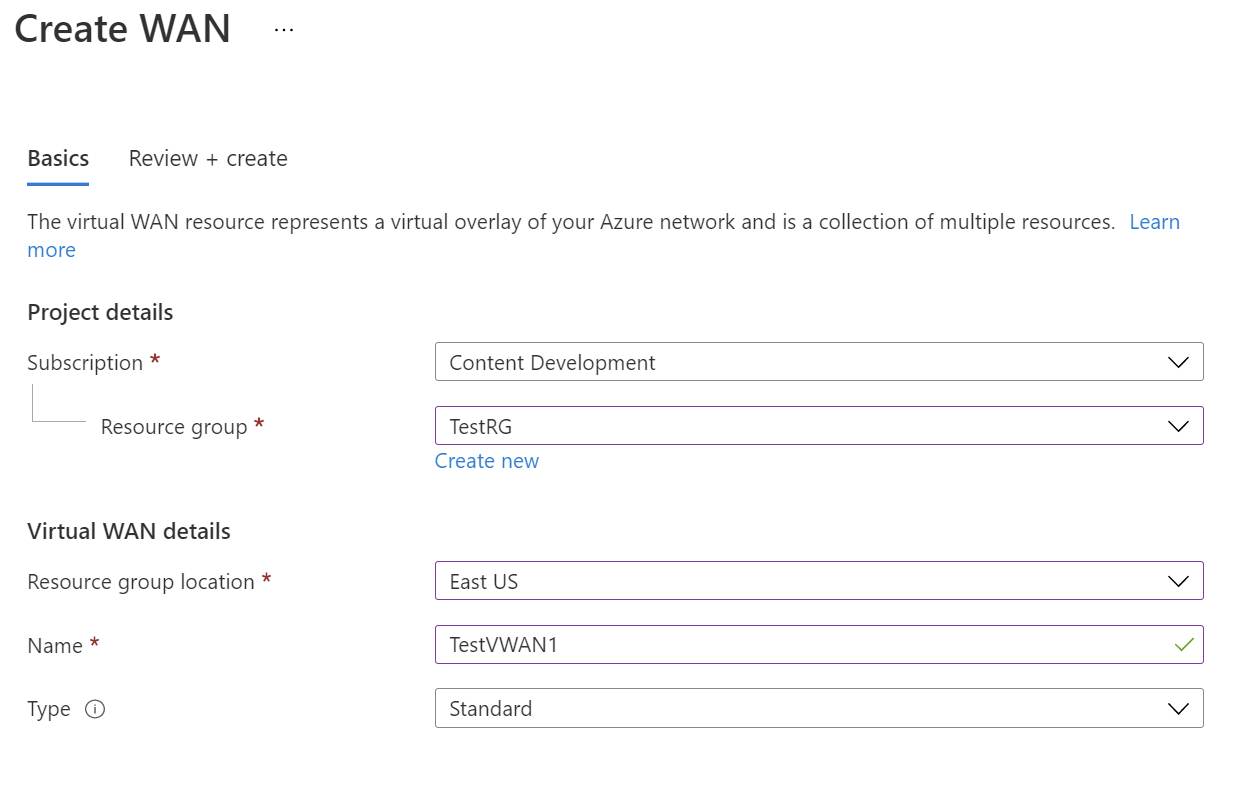
- Subscription: Select the subscription that you want to use.
- Resource group: Create new or use existing.
- Resource group location: Choose a resource location from the dropdown. A WAN is a global resource and doesn't live in a particular region. However, you must select a region in order to manage and locate the WAN resource that you create.
- Name: Type the Name that you want to call your virtual WAN.
- Type: Basic or Standard. Select Standard. If you select Basic, understand that Basic virtual WANs can only contain Basic hubs. Basic hubs can only be used for site-to-site connections.
After you finish filling out the fields, at the bottom of the page, select Review +Create.
Once validation passes, click Create to create the virtual WAN.
Create a virtual hub
A virtual hub is a virtual network that is created and used by Azure Virtual WAN. It's the core of your Virtual WAN network in a region. It can contain gateways for site-to-site and ExpressRoute.
Tip
You can also create a gateway in an existing hub.
Go to the virtual WAN that you created. On the virtual WAN page left pane, under the Connectivity, select Hubs.
On the Hubs page, select +New Hub to open the Create virtual hub page.

On the Create virtual hub page Basics tab, complete the following fields:
- Region: Select the region in which you want to deploy the virtual hub.
- Name: The name by which you want the virtual hub to be known.
- Hub private address space: The hub's address range in CIDR notation. The minimum address space is /24 to create a hub.
- Virtual hub capacity: Select from the dropdown. For more information, see Virtual hub settings.
- Hub routing preference: Leave as default. For more information, see Virtual hub routing preference.

Create a VPN gateway
On the Create virtual hub page, click Site to site to open the Site to site tab.
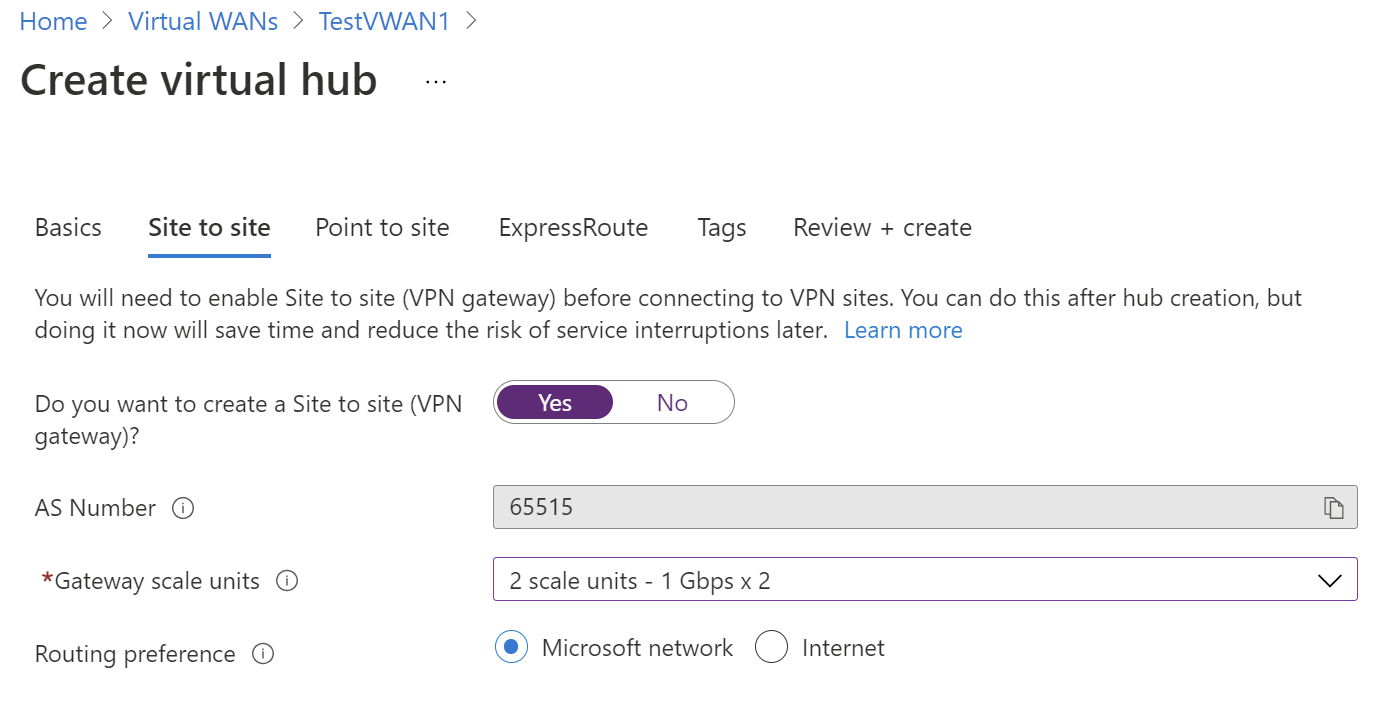
On the Site to site tab, complete the following fields:
Select Yes to create a Site-to-site VPN.
AS Number: The AS Number field can't be edited.
Gateway scale units: Select the Gateway scale units value from the dropdown. The scale unit lets you pick the aggregate throughput of the VPN gateway being created in the virtual hub to connect sites to.
If you pick 1 scale unit = 500 Mbps, it implies that two instances for redundancy will be created, each having a maximum throughput of 500 Mbps. For example, if you had five branches, each doing 10 Mbps at the branch, you'll need an aggregate of 50 Mbps at the head end. Planning for aggregate capacity of the Azure VPN gateway should be done after assessing the capacity needed to support the number of branches to the hub.
Routing preference: Azure routing preference lets you choose how your traffic routes between Azure and the internet. You can choose to route traffic either via the Microsoft network, or via the ISP network (public internet). These options are also referred to as cold potato routing and hot potato routing, respectively.
The public IP address in Virtual WAN is assigned by the service, based on the routing option selected. For more information about routing preference via Microsoft network or ISP, see the Routing preference article.
Select Review + Create to validate.
Select Create to create the hub and gateway. This can take up to 30 minutes. After 30 minutes, Refresh to view the hub on the Hubs page. Select Go to resource to navigate to the resource.
Create a site-to-site VPN
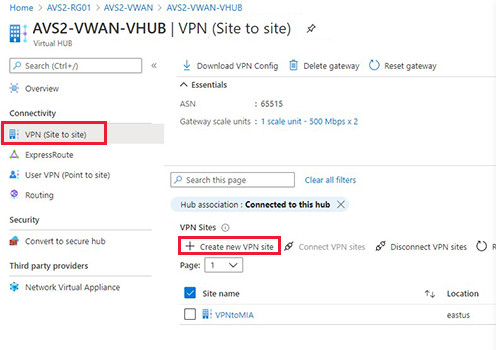
In the Azure portal, select the virtual WAN you created earlier.
In the Overview of the virtual hub, select Connectivity > VPN (Site-to-site) > Create new VPN site.
On the Basics tab, enter the required fields.
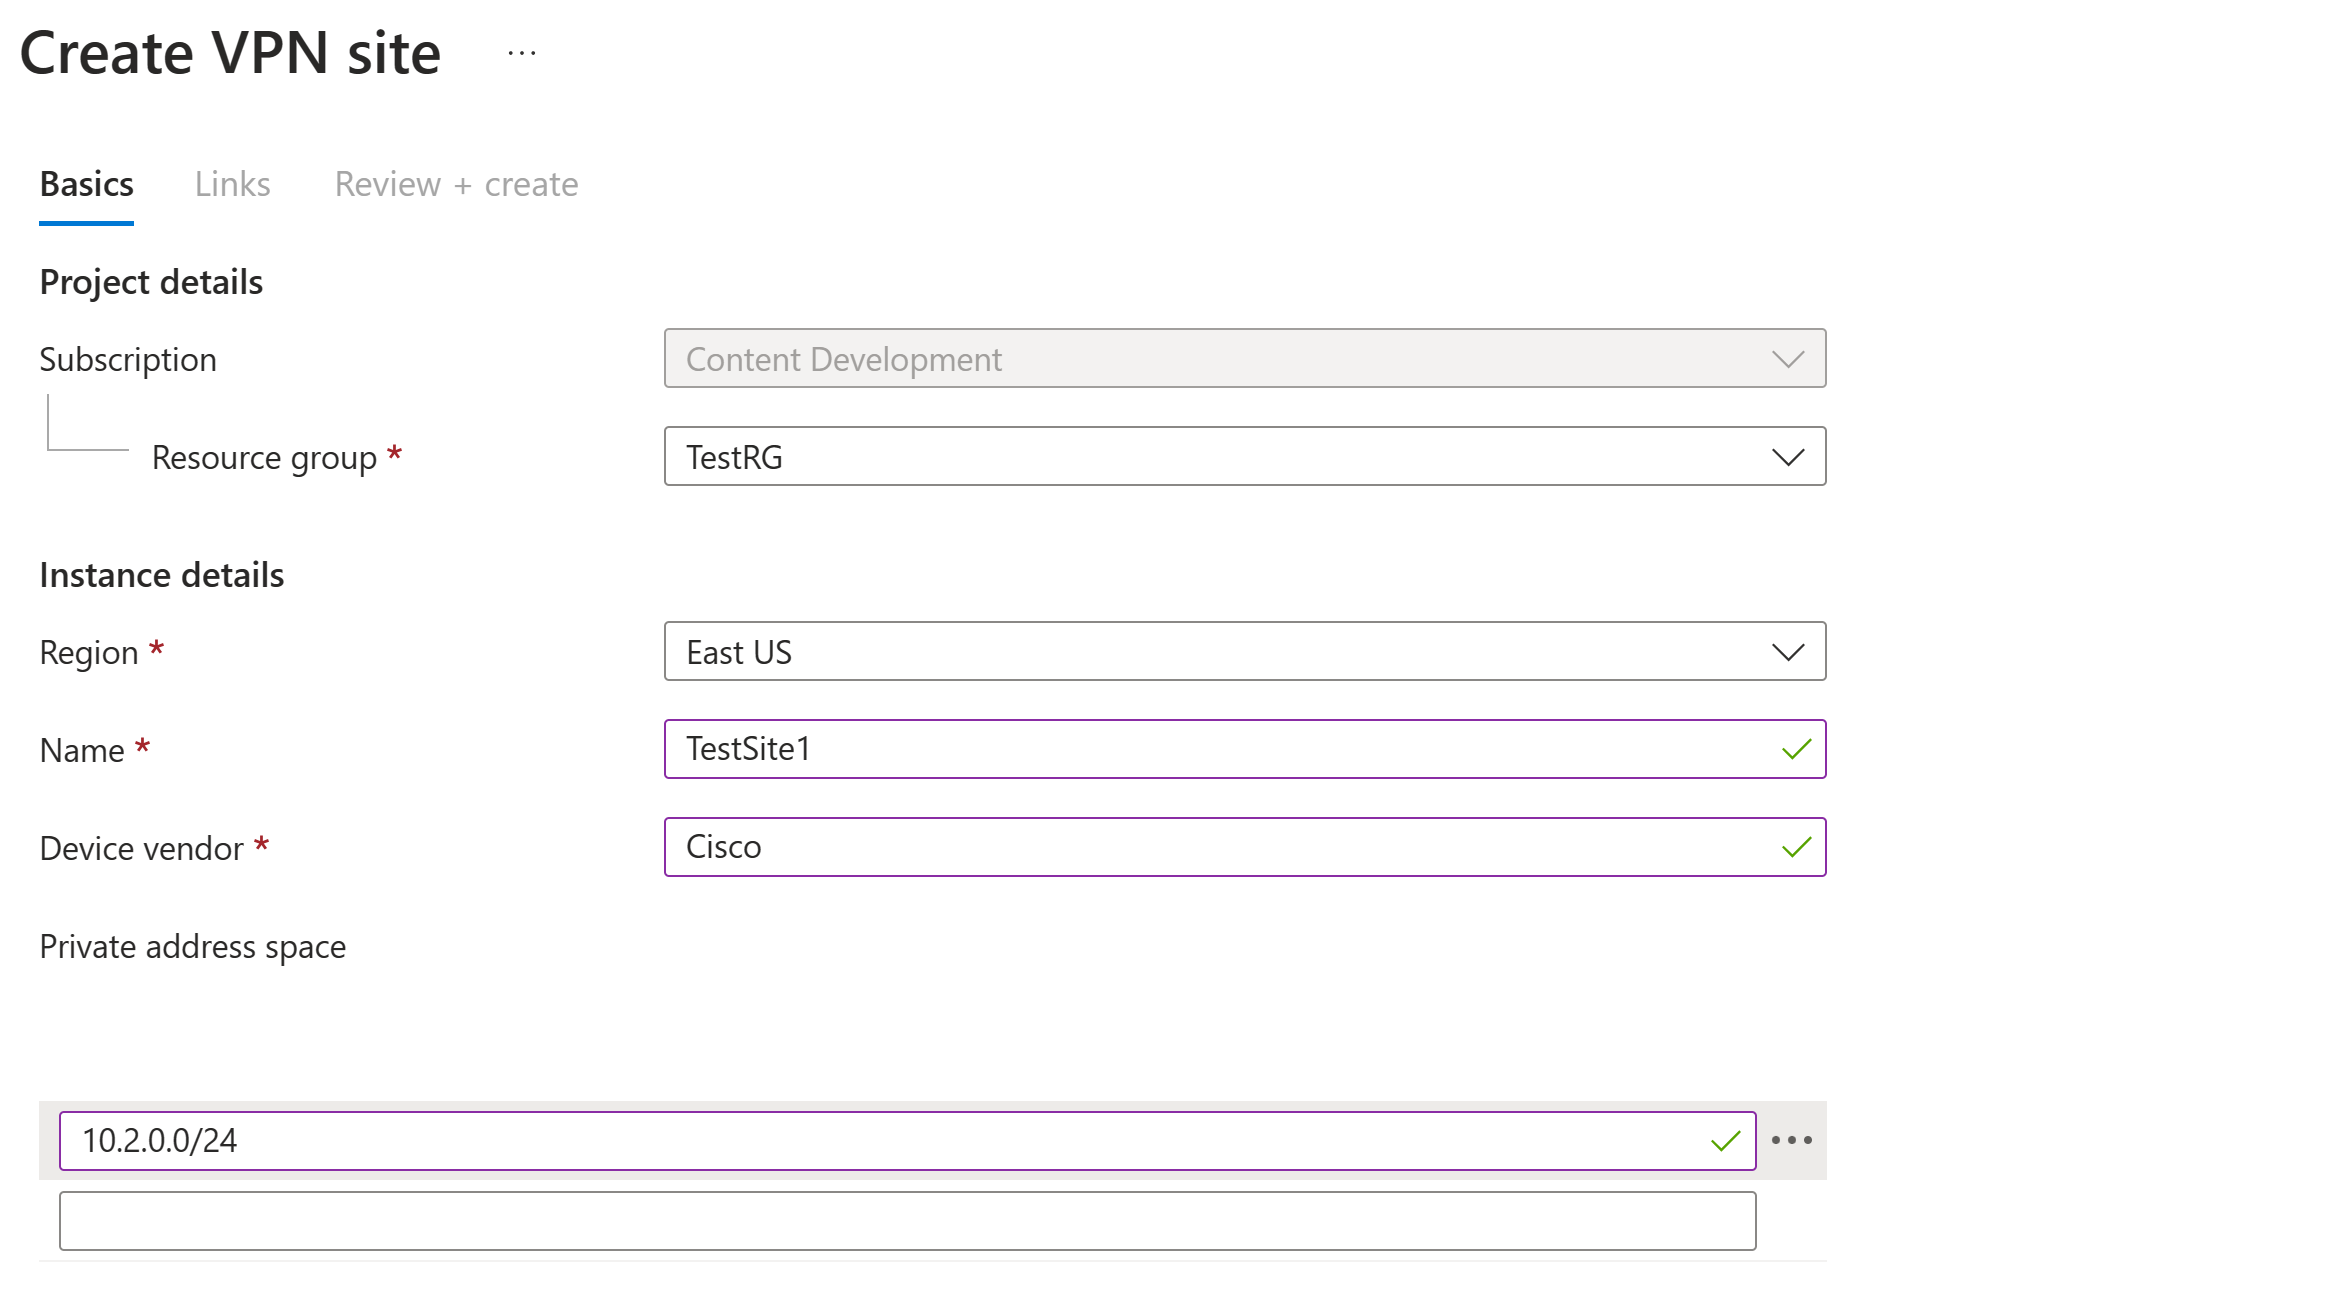
Region - Previously referred to as location. It's the location you want to create this site resource in.
Name - The name by which you want to refer to your on-premises site.
Device vendor - The name of the VPN device vendor, for example, Citrix, Cisco, or Barracuda. It helps the Azure Team better understand your environment to add more optimization possibilities in the future or help you troubleshoot.
Private address space - The CIDR IP address space located on your on-premises site. Traffic destined for this address space is routed to your local site. The CIDR block is only required if you BGP isn't enabled for the site.
Note
If you edit the address space after creating the site (for example, add an additional address space) it can take 8-10 minutes to update the effective routes while the components are recreated.
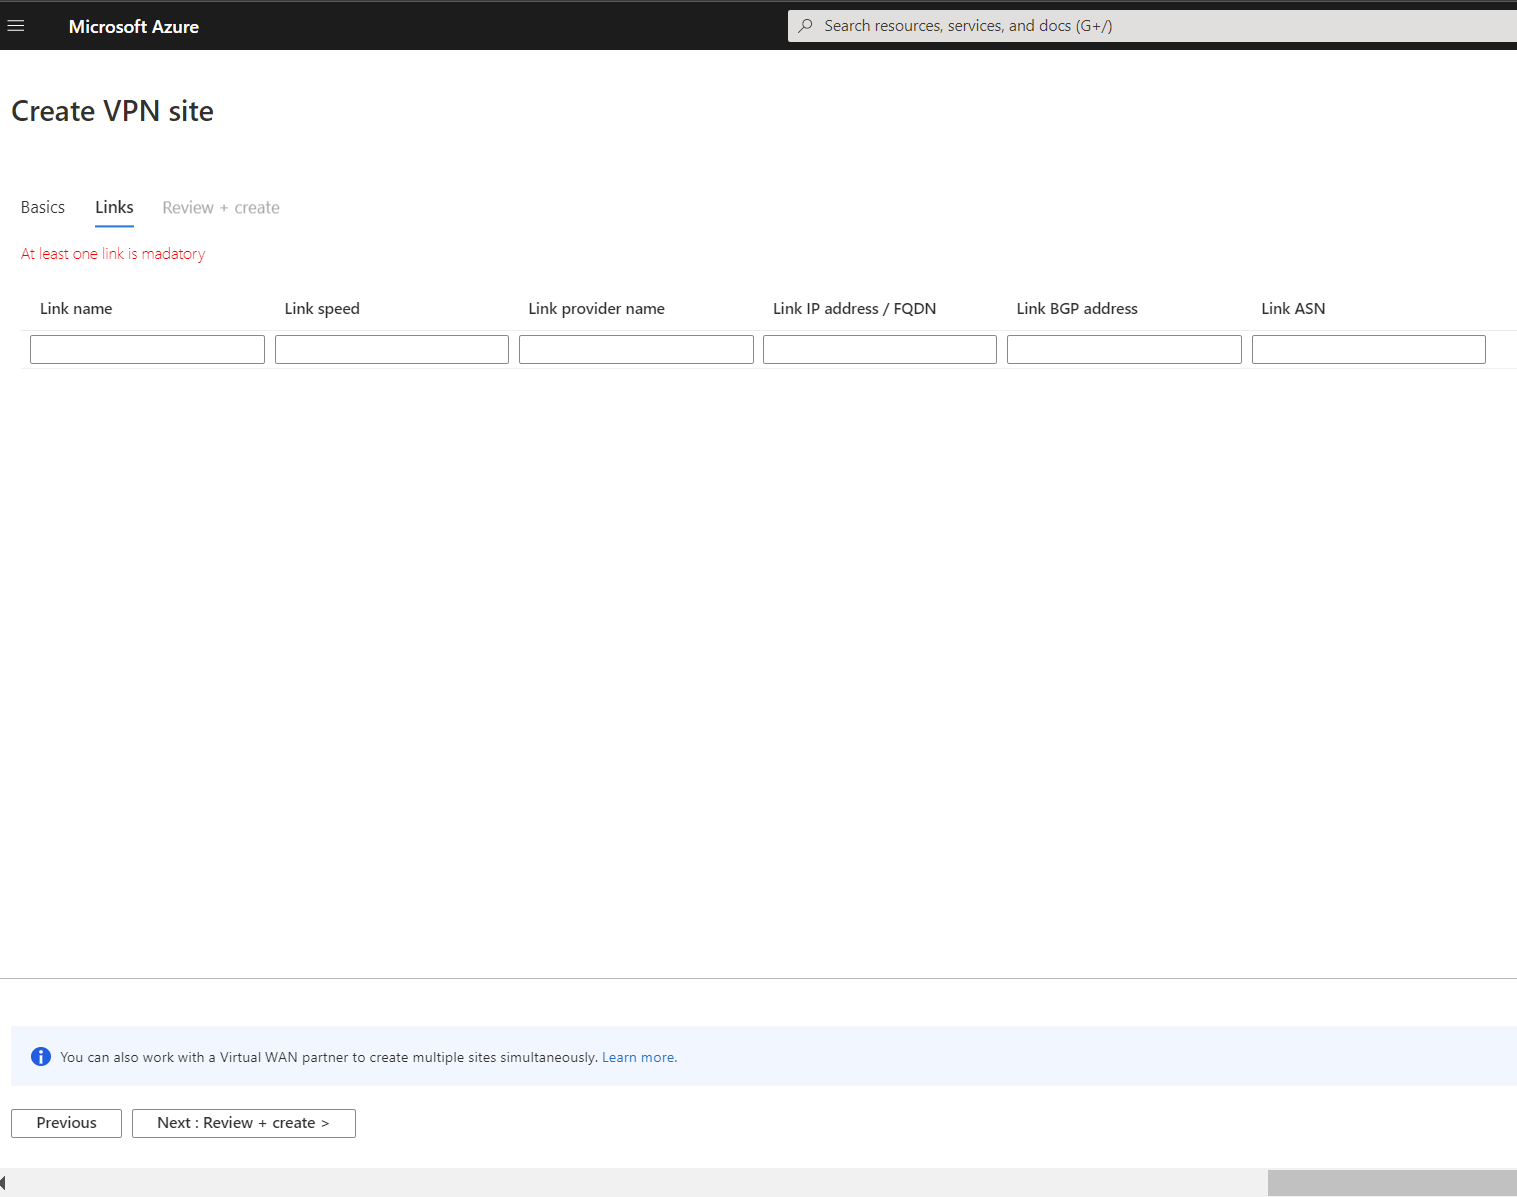
Select Links to add information about the physical links at the branch. If you have a Virtual WAN partner CPE device, check with them to see if this information gets exchanged with Azure as a part of the branch information upload set up from their systems.
Specifying link and provider names allow you to distinguish between any number of gateways that can eventually be created as part of the hub. BGP and autonomous system number (ASN) must be unique inside your organization. BGP ensures that both Azure VMware Solution and the on-premises servers advertise their routes across the tunnel. If disabled, the subnets that need to be advertised must be manually maintained. If subnets are missed, HCX fails to form the service mesh.
Important
By default, Azure assigns a private IP address from the GatewaySubnet prefix range automatically as the Azure BGP IP address on the Azure VPN gateway. The custom Azure APIPA BGP address is needed when your on premises VPN devices use an APIPA address (169.254.0.1 to 169.254.255.254) as the BGP IP. Azure VPN Gateway will choose the custom APIPA address if the corresponding local network gateway resource (on-premises network) has an APIPA address as the BGP peer IP. If the local network gateway uses a regular IP address (not APIPA), Azure VPN Gateway will revert to the private IP address from the GatewaySubnet range.
Select Review + create.
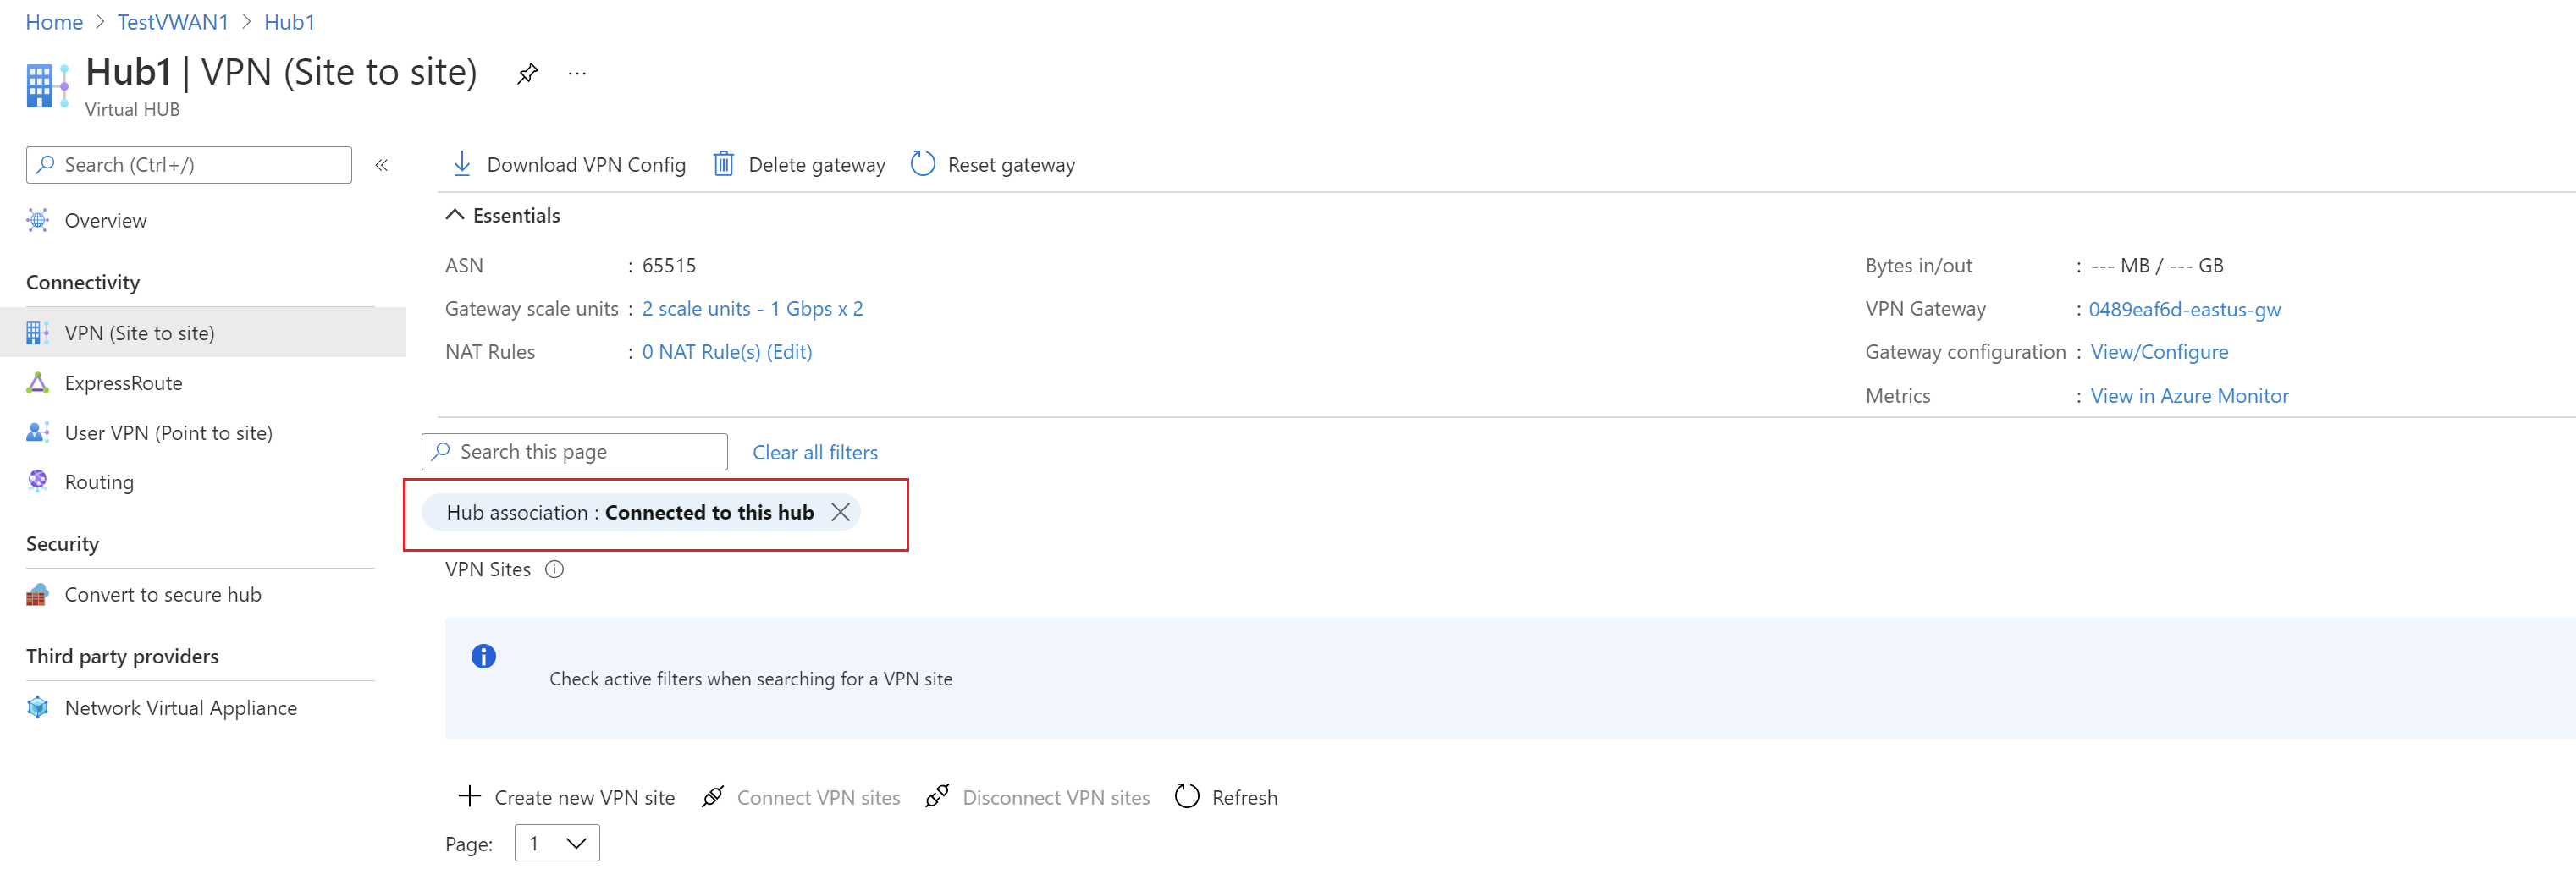
Navigate to the virtual hub you want, and deselect Hub association to connect your VPN site to the hub.


(Optional) Create policy-based VPN site-to-site tunnels
Important
This is an optional step and applies only to policy-based VPNs.
Policy-based VPN setups require on-premises and Azure VMware Solution networks to be specified, including the hub ranges. These ranges specify the encryption domain of the policy-based VPN tunnel on-premises endpoint. The Azure VMware Solution side only requires the policy-based traffic selector indicator to be enabled.
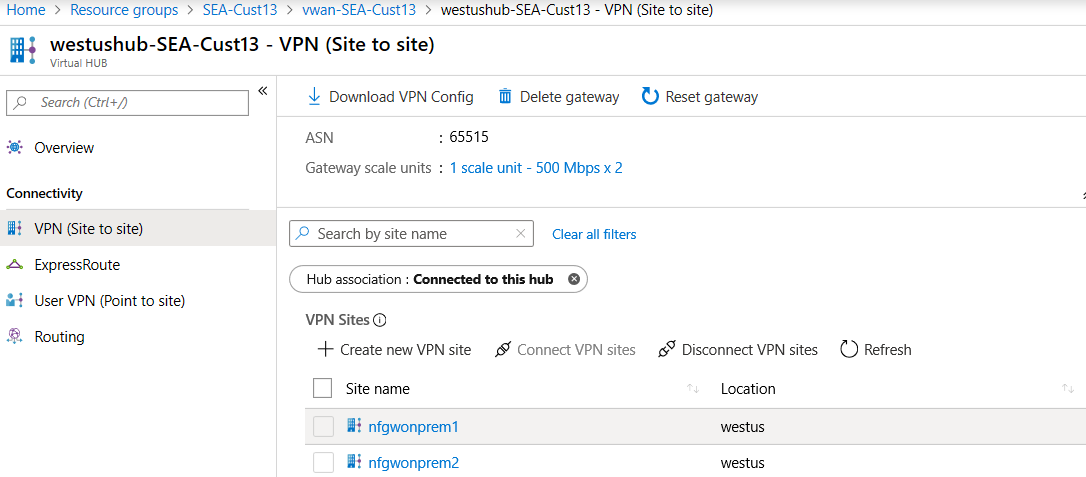
In the Azure portal, go to your Virtual WAN hub site and, under Connectivity, select VPN (Site to site).
Select the VPN Site for which you want to set up a custom IPsec policy.
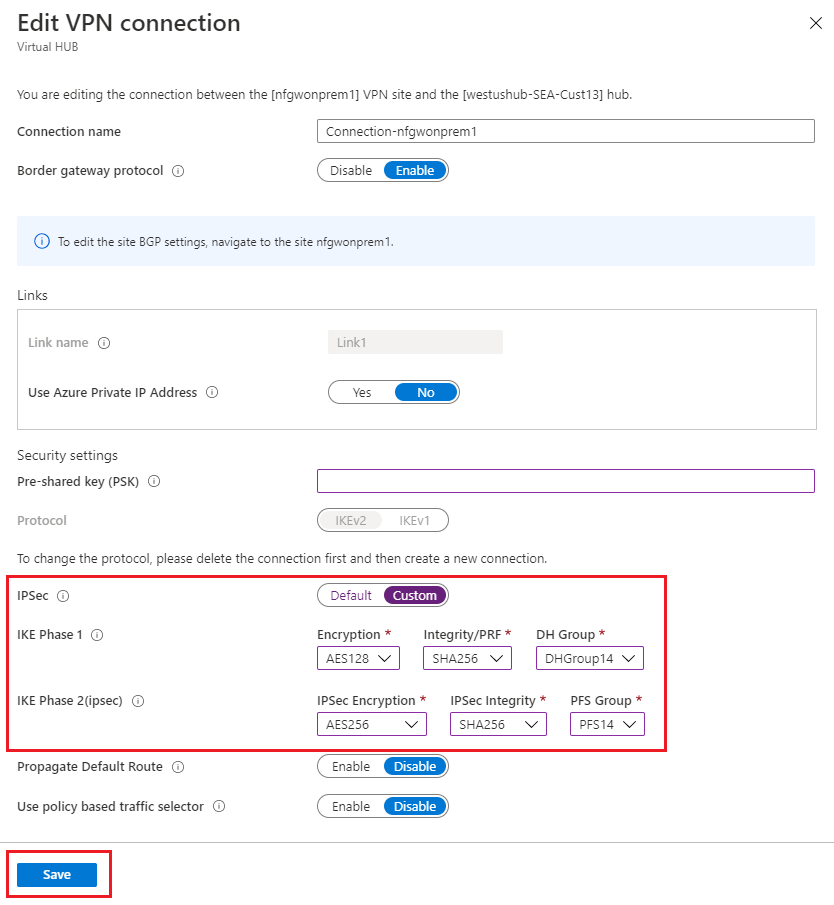
Select your VPN site name, select More (...) at the far right, and then select Edit VPN Connection.

Internet Protocol Security (IPSec), select Custom.
Use policy-based traffic selector, select Enable
Specify the details for IKE Phase 1 and IKE Phase 2(ipsec).
Change the IPsec setting from default to custom and customize the IPsec policy. Then select Save.
Your traffic selectors or subnets that are part of the policy-based encryption domain should be:
Virtual WAN hub
/24Azure VMware Solution private cloud
/22Connected Azure virtual network (if present)


Connect your VPN site to the hub
Select your VPN site name and then select Connect VPN sites.
In the Pre-shared key field, enter the key previously defined for the on-premises endpoint.
Tip
If you don't have a previously defined key, you can leave this field blank. A key is generated for you automatically.
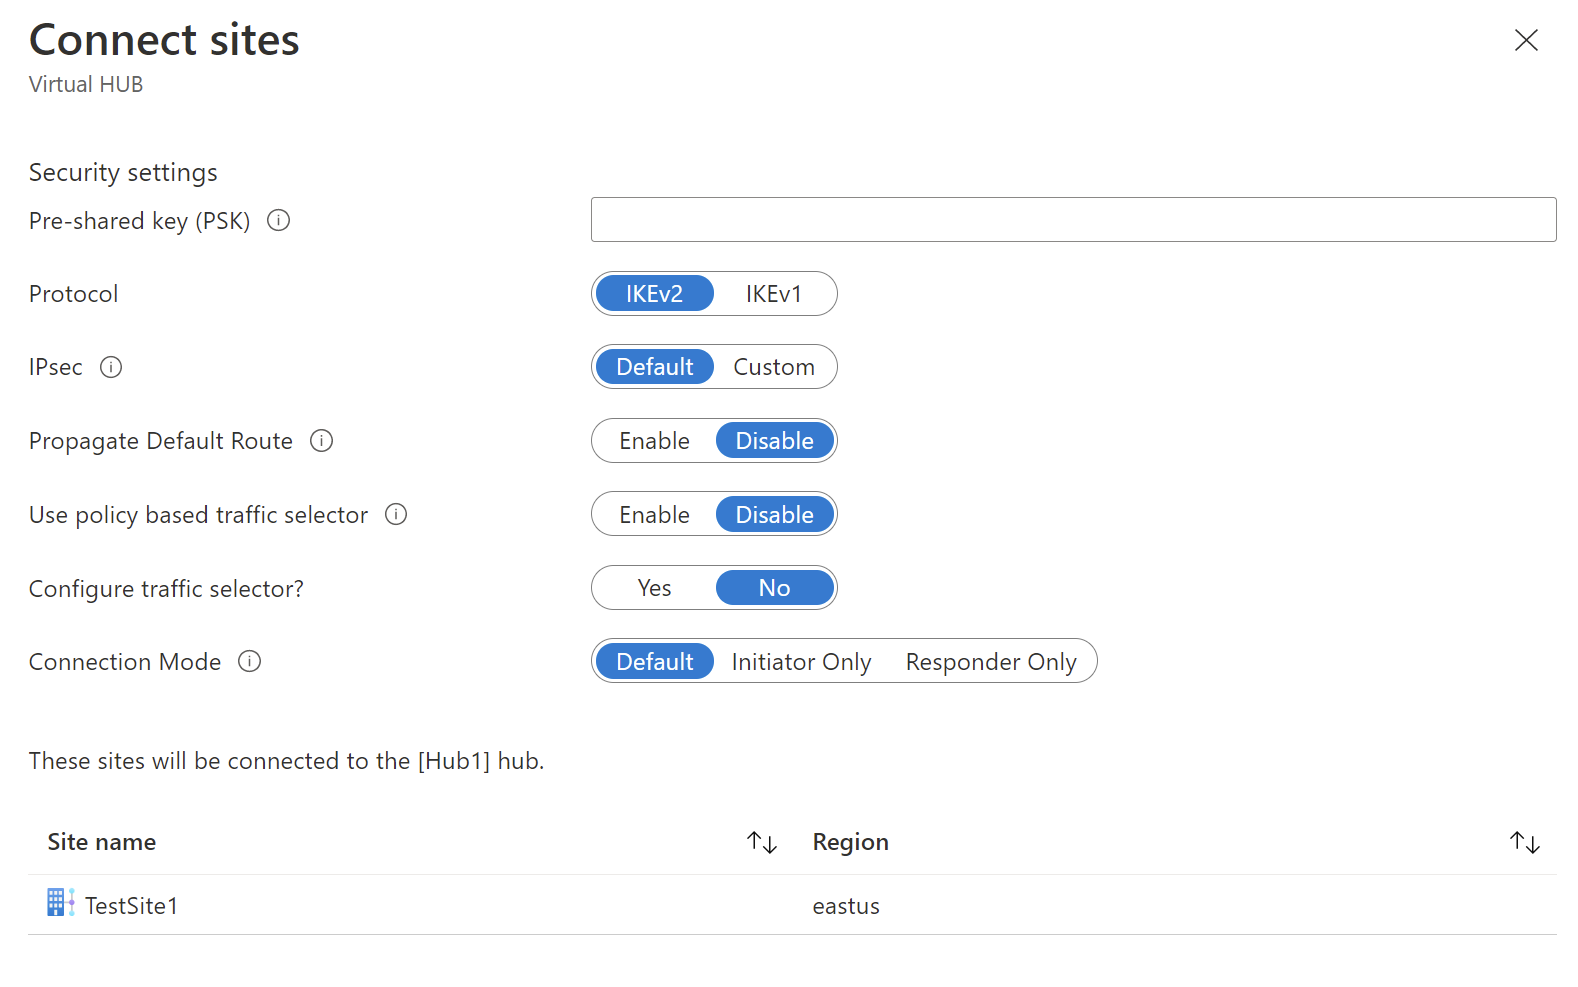
If you're deploying a firewall in the hub and it's the next hop, set the Propagate Default Route option to Enable.
When enabled, the Virtual WAN hub propagates to a connection only if the hub already learned the default route when deploying a firewall in the hub or if another connected site forced tunneling enabled. The default route doesn't originate in the Virtual WAN hub.
Select Connect. After a few minutes, the site shows the connection and connectivity status.
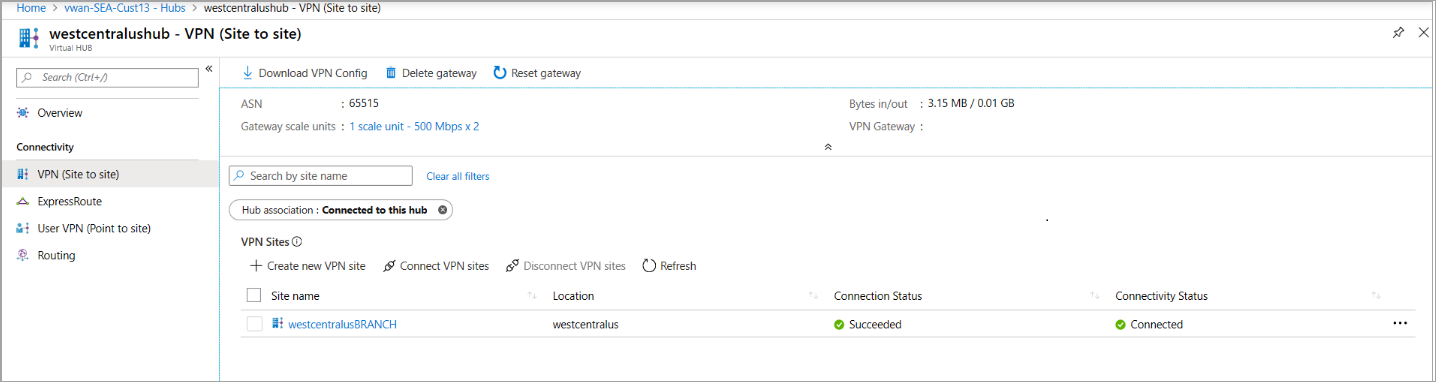
Connection Status: Status of the Azure resource for the connection that connects the VPN site to the Azure hub’s VPN gateway. Once this control plane operation is successful, the Azure VPN gateway and the on-premises VPN device establish connectivity.
Connectivity Status: Actual connectivity (data path) status between Azure’s VPN gateway in the hub and VPN site. It can show any of the following states:
- Unknown: Typically seen if the backend systems are working to transition to another status.
- Connecting: Azure VPN gateway is trying to reach out to the actual on-premises VPN site.
- Connected: Connectivity established between Azure VPN gateway and on-premises VPN site.
- Disconnected: Typically seen if disconnected for any reason (on-premises or in Azure)
Download the VPN configuration file and apply it to the on-premises endpoint.
On the VPN (Site to site) page, near the top, select Download VPN Config. Azure creates a storage account in the resource group 'microsoft-network-[location]', where location is the location of the WAN. After you apply the configuration to your VPN devices, you can delete this storage account.
Once created, select the link to download it.
Apply the configuration to your on-premises VPN device.
For more information about the configuration file, see About the VPN device configuration file.
Patch the Azure VMware Solution ExpressRoute in the Virtual WAN hub.
Important
You must first have a private cloud created before you can patch the platform.
Important
You must also have an ExpressRoute Gateway configured as part of your Virtual WAN Hub.
In the Azure portal, navigate to the Azure VMware Solution private cloud. Select Manage > Connectivity > ExpressRoute and then select + Request an authorization key.
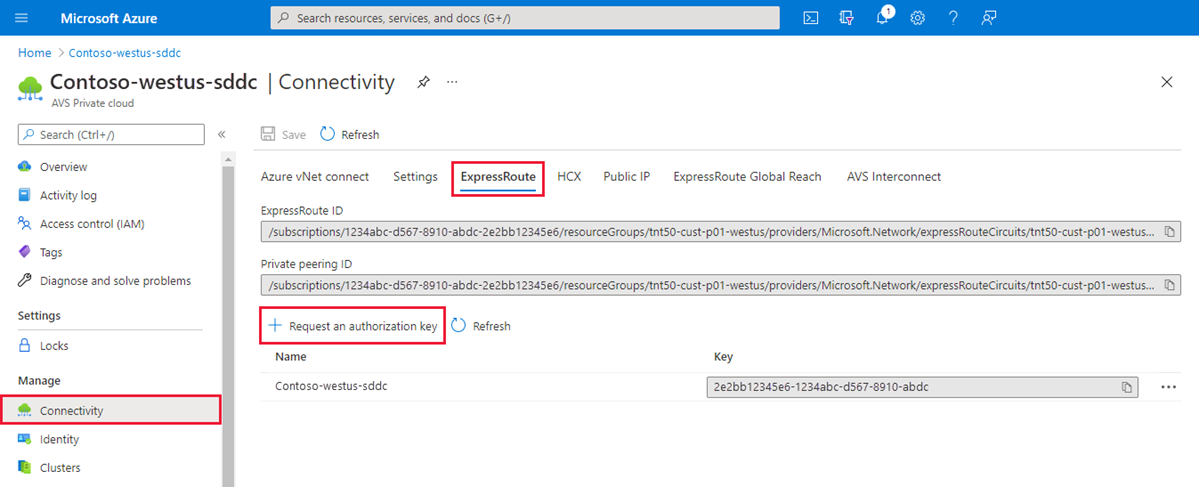
Provide a name for it and select Create.
It can take about 30 seconds to create the key. Once created, the new key appears in the list of authorization keys for the private cloud.
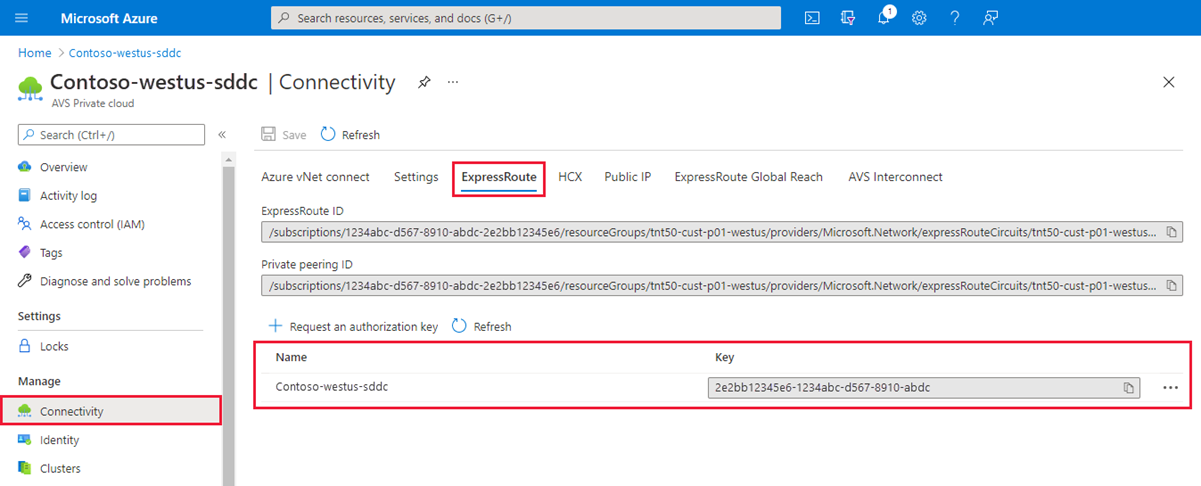
Copy the authorization key and ExpressRoute ID. You need them to complete the peering. The authorization key disappears after some time, so copy it as soon as it appears.
Link Azure VMware Solution and the VPN gateway together in the Virtual WAN hub. You use the authorization key and ExpressRoute ID (peer circuit URI) from the previous step.
Select your ExpressRoute gateway and then select Redeem authorization key.
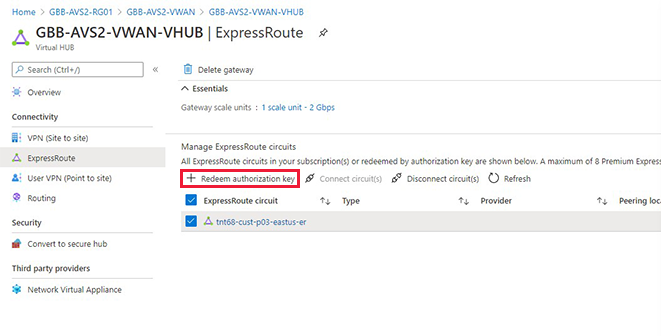
Paste the authorization key in the Authorization Key field.
Paste the ExpressRoute ID into the Peer circuit URI field.
Select Automatically associate this ExpressRoute circuit with the hub check box.
Select Add to establish the link.
Test your connection by creating an NSX-T Data Center segment and provisioning a VM on the network. Ping both the on-premises and Azure VMware Solution endpoints.
Note
Wait approximately 5 minutes before you test connectivity from a client behind your ExpressRoute circuit, for example, a VM in the VNet that you created earlier.


Feedback
Coming soon: Throughout 2024 we will be phasing out GitHub Issues as the feedback mechanism for content and replacing it with a new feedback system. For more information see: https://aka.ms/ContentUserFeedback.
Submit and view feedback for