Create and manage schedules for labs in Azure Lab Services
Schedules allow you to configure a lab such that VMs in the lab automatically start and shut down at a specified time. You can define a one-time schedule or a recurring schedule. The following procedures give you steps to create and manage schedules for a lab:
Important
The scheduled running time of VMs does not count against the quota allotted to a user. The quota is for the time outside of schedule hours that a student spends on VMs.
Set a schedule for the lab
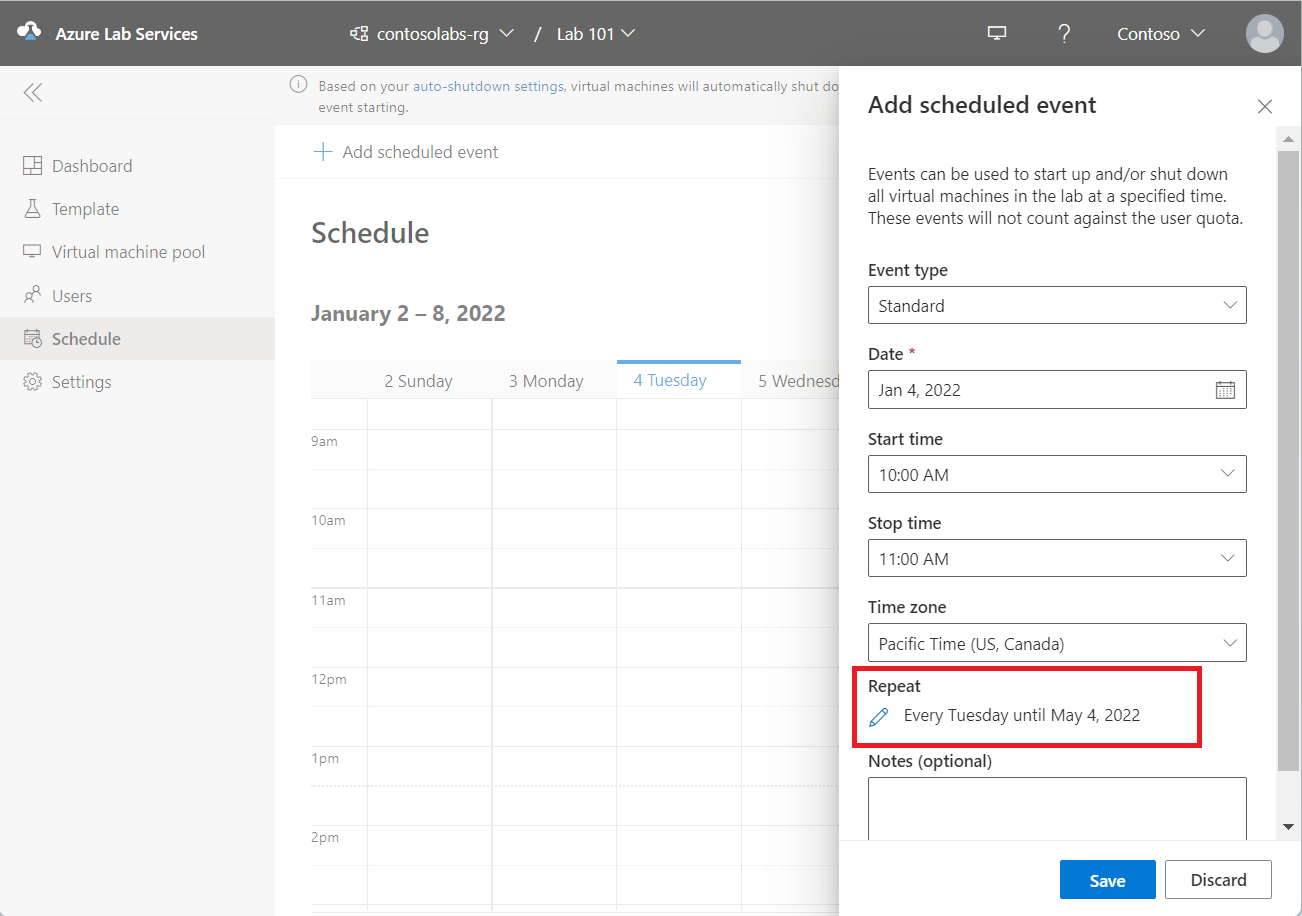
Create a scheduled event for the lab so that VMs in the lab are automatically started/stopped at specific times. The user quota you specified earlier is the additional time assigned to each user outside this scheduled time.
Note
Before we get started, here's how schedules affect lab virtual machines:
- Only assigned virtual machines are started. If a machine is not claimed by an end user (student), then the machine will not start on the scheduled hours. Schedules also don't start template VMs.
- All virtual machines (whether claimed or unclaimed, template or non template) are stopped based on the lab schedule.
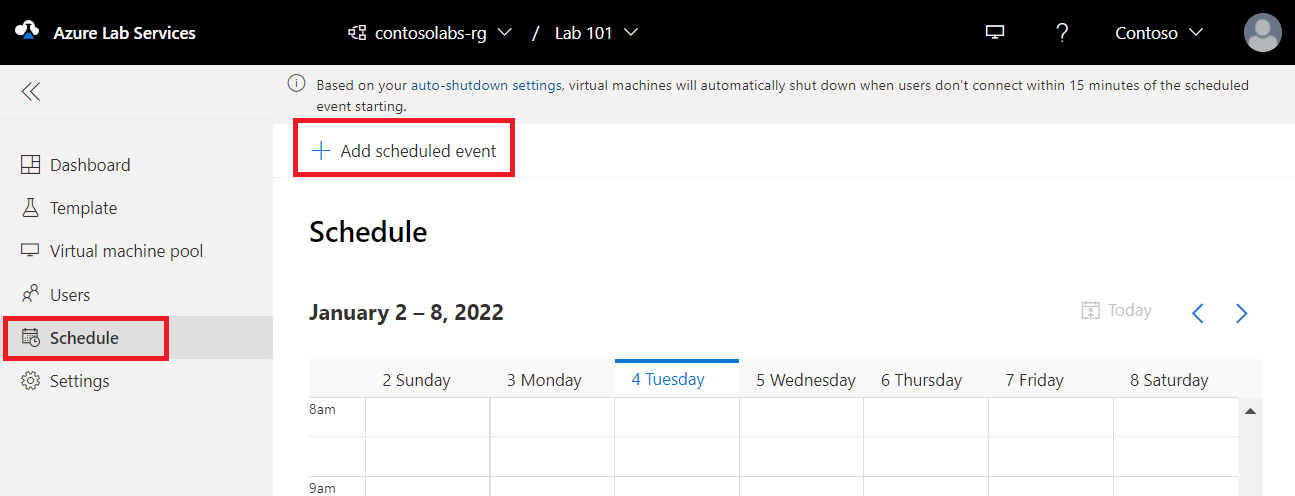
Switch to the Schedules page, and select Add scheduled event on the toolbar.
Confirm that Standard is selected the Event type. You select Start only to specify only the start time for the VMs. You select Stop only to specify only the stop time for the VMs.
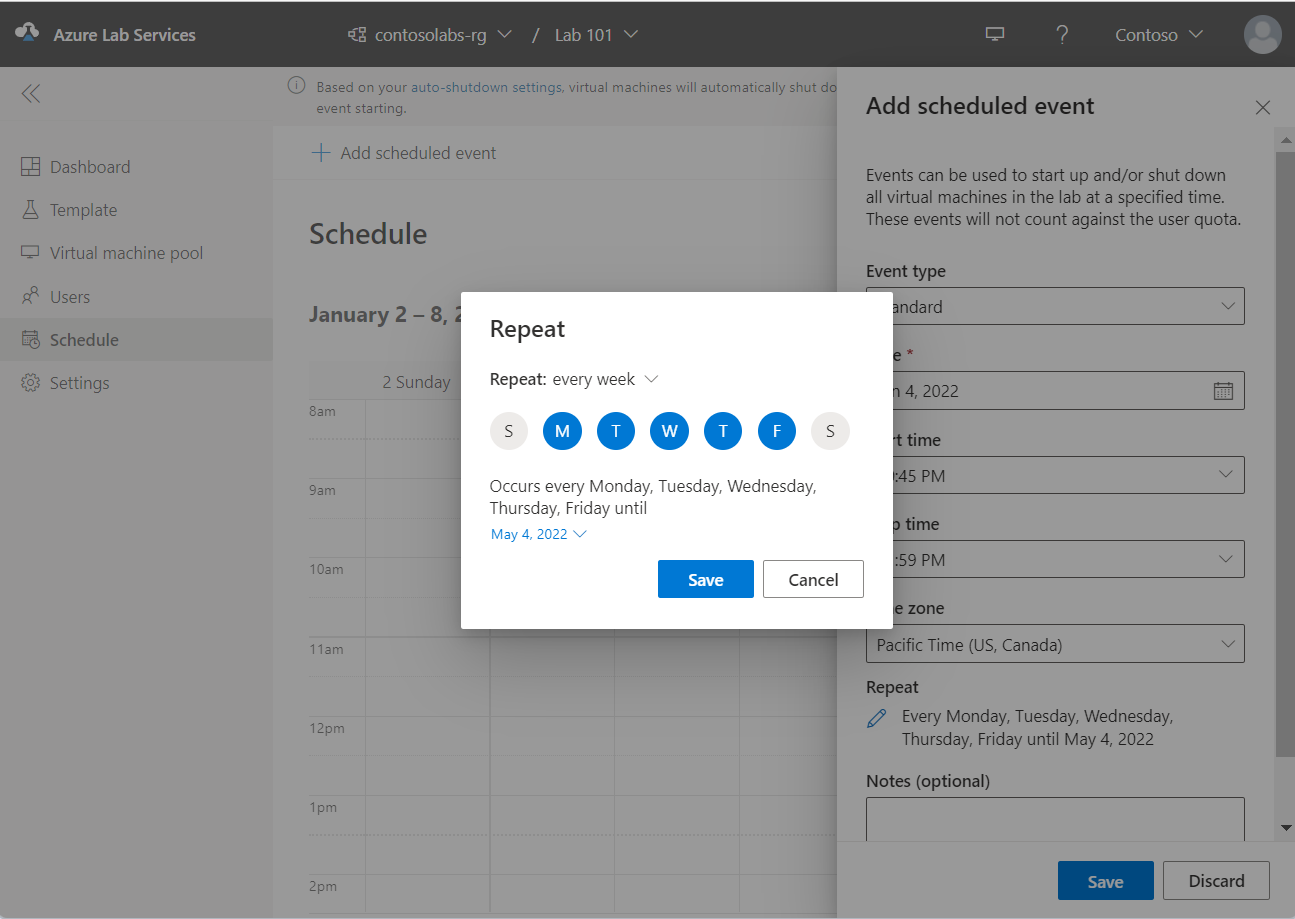
In the Repeat section, select the current schedule.
On the Repeat dialog box, do the following steps:
Confirm that every week is set for the Repeat field.
Specify the start date.
Specify the start time at which you want the VMs to be started.
Specify the stop time on which the VMs are to be shut down.
Specify the time zone for the start and stop times you specified.
Select the days on which you want the schedule to take effect. In the following example, Monday-Thursday is selected.
Select Save.
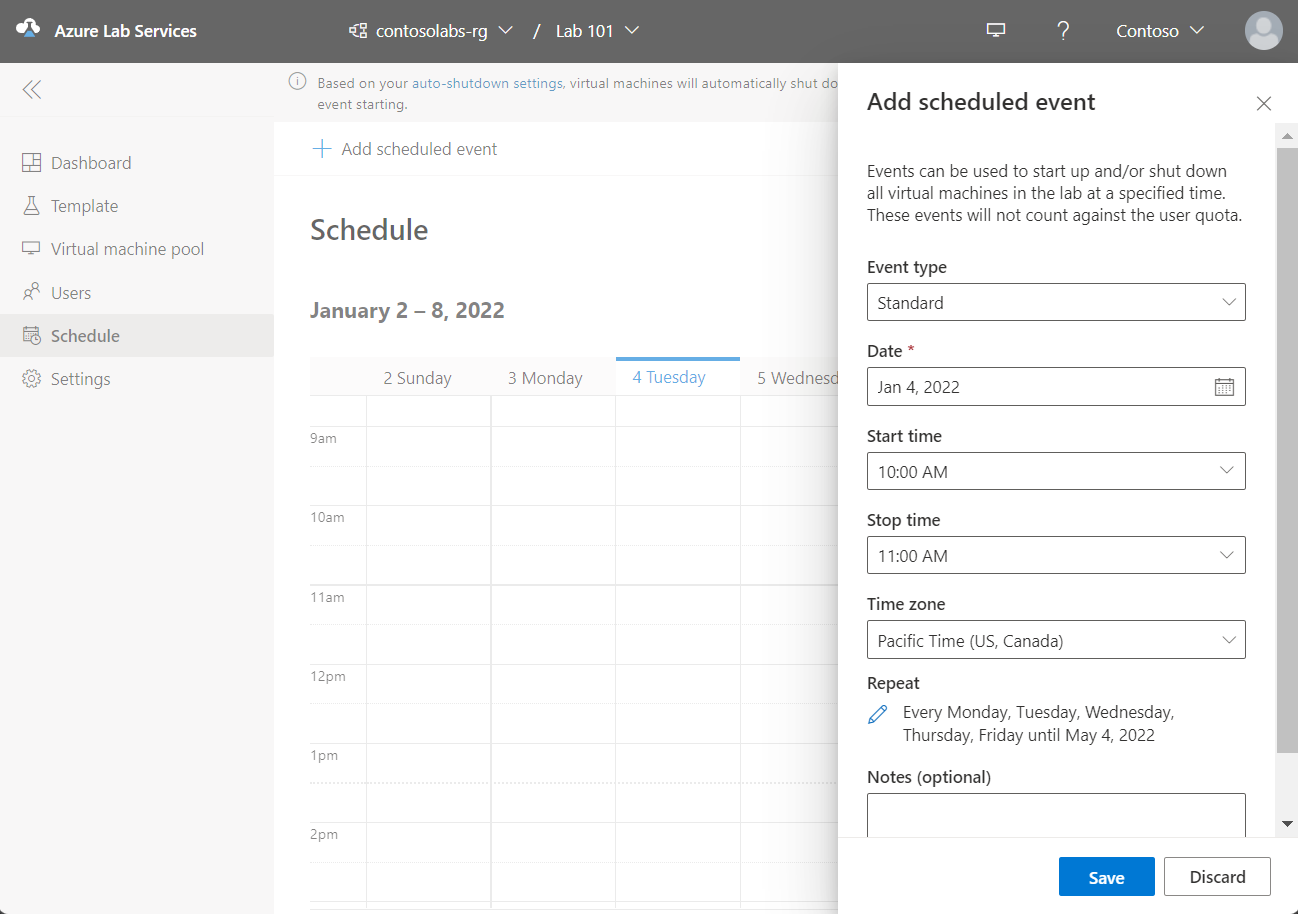
Now, on the Add scheduled event page, for Notes (optional), enter any description or notes for the schedule.
On the Add scheduled event page, select Save.
View schedules in calendar
You can see the scheduled dates and times highlighted in the calendar view as shown in the following image:
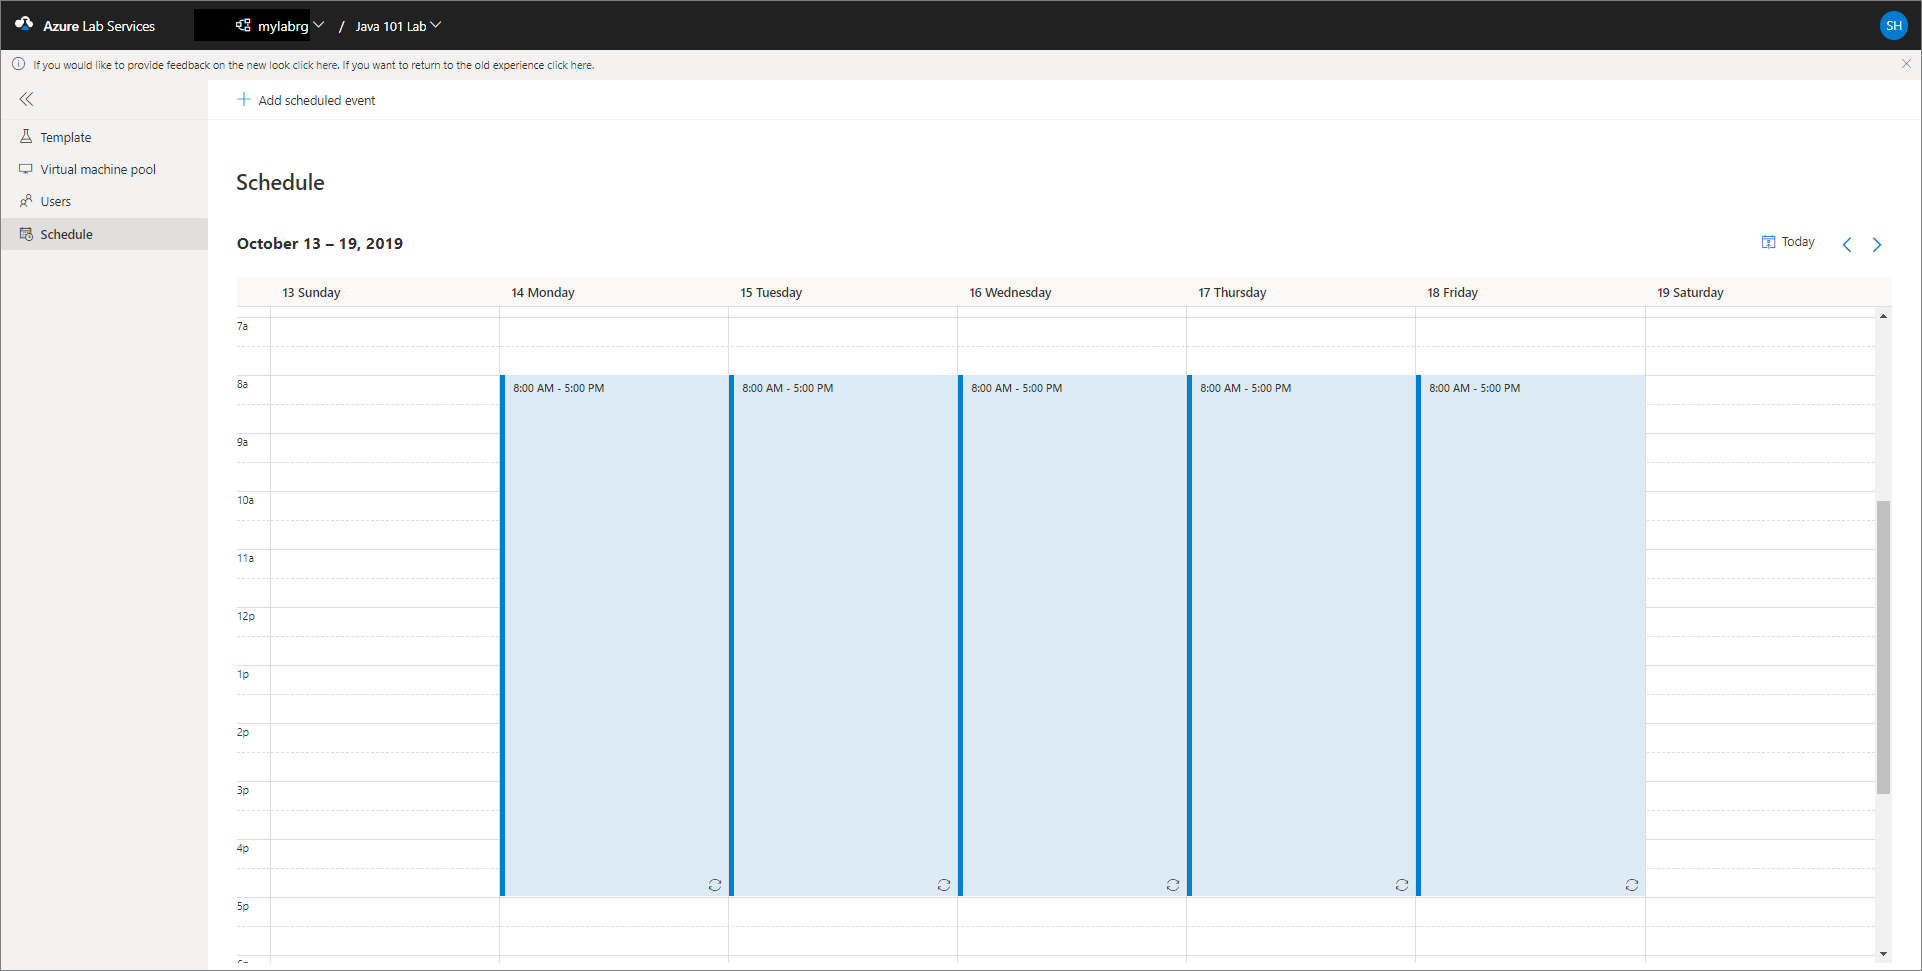
Select the Today button in the top-right corner to switch to current date in the calendar. Select left arrow to switch to the previous week and right arrow to switch to the next week in the calendar.
Edit a schedule
When you select a highlighted schedule in the calendar, you see buttons to edit or delete the schedule.
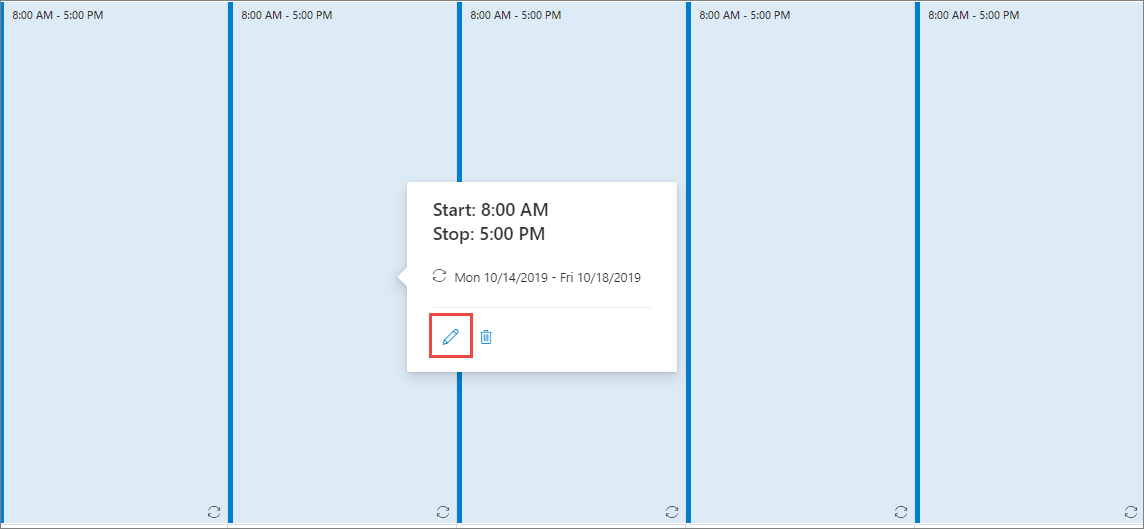
On the Edit scheduled event page, you can update the schedule, and select Save.
Delete a schedule
To delete a schedule, select a highlighted schedule in the calendar, and select the trash icon (delete) button:
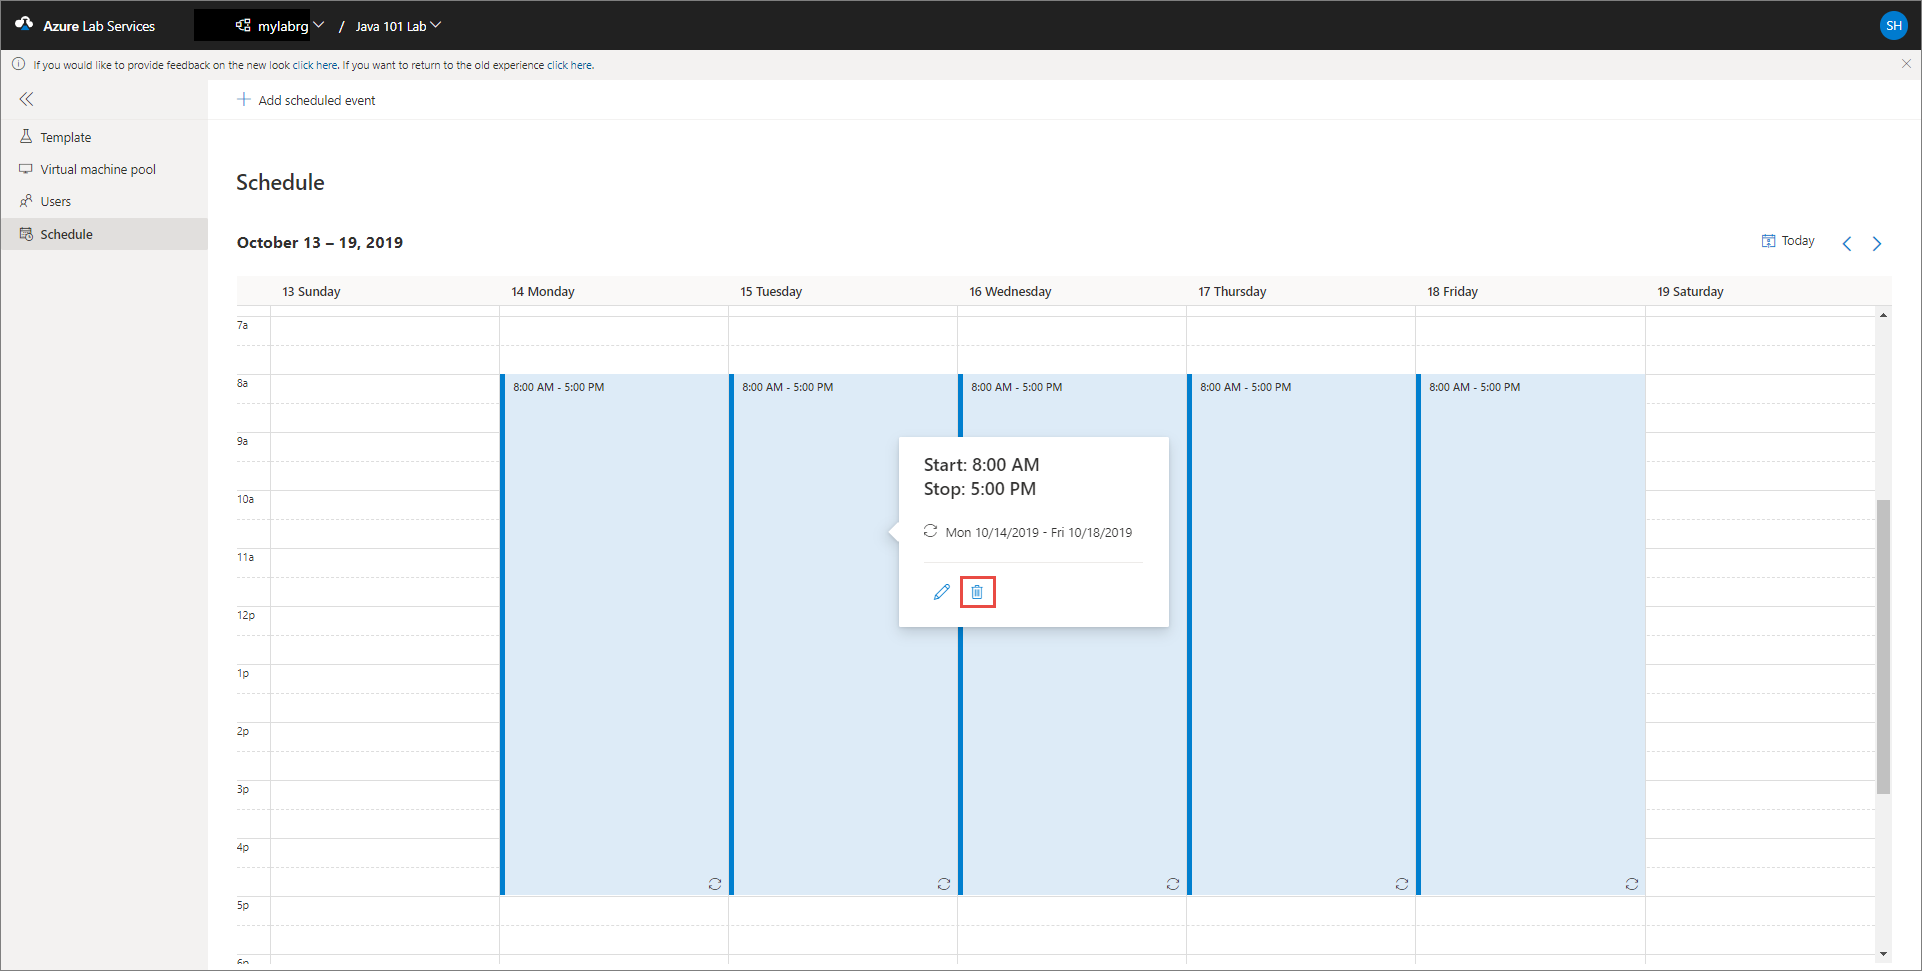
On the Delete scheduled event dialog box, select Yes to confirm the deletion.
Next steps
See the following articles:
Feedback
Coming soon: Throughout 2024 we will be phasing out GitHub Issues as the feedback mechanism for content and replacing it with a new feedback system. For more information see: https://aka.ms/ContentUserFeedback.
Submit and view feedback for