Authoring and publishing Microsoft Purview Data owner policies (preview)
Important
This feature is currently in preview. The Supplemental Terms of Use for Microsoft Azure Previews include additional legal terms that apply to Azure features that are in beta, in preview, or otherwise not yet released into general availability.
Data owner policies are a type of Microsoft Purview access policies. They allow you to manage access to user data in sources that have been registered for Data Policy Enforcement in Microsoft Purview. These policies can be authored directly in the Microsoft Purview governance portal, and after publishing, they get enforced by the data source.
This guide describes how to create, update, and publish data owner policies in the Microsoft Purview governance portal.
Prerequisites
An Azure account with an active subscription. Create an account for free.
A new or existing Microsoft Purview account. Follow this quickstart guide to create one.
Configuration
Before authoring policies in the Microsoft Purview policy portal, you'll need to configure Microsoft Purview and the data sources so that they can enforce those policies.
- Follow any policy-specific prerequisites for your source. Check the Microsoft Purview supported data sources table and select the link in the Access Policy column for sources where access policies are available. Follow any steps listed in the Access policy or Prerequisites sections.
- Register the data source in Microsoft Purview. Follow the Prerequisites and Register sections of the source pages for your resources.
- Enable the Data policy enforcement option on the data source registration. Data Policy Enforcement needs certain permissions and can affect the security of your data, as it delegates to certain Microsoft Purview roles to manage access to the data sources. Go through the secure practices related to Data Policy Enforcement in this guide: How to enable Data Policy Enforcement
Create a new policy
This section describes the steps to create a new policy in Microsoft Purview. Ensure you have the Policy Author permission as described here.
Sign in to the Microsoft Purview governance portal.
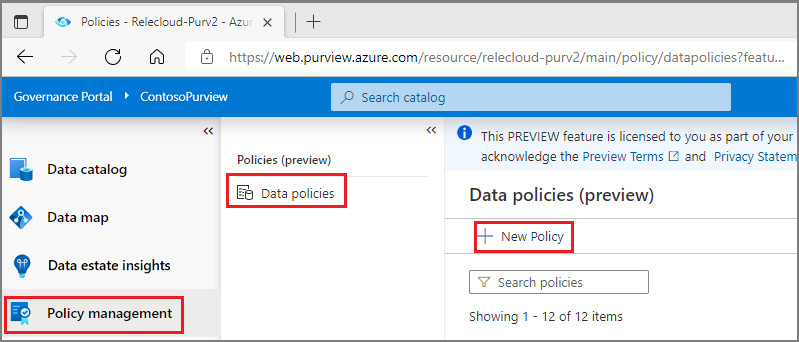
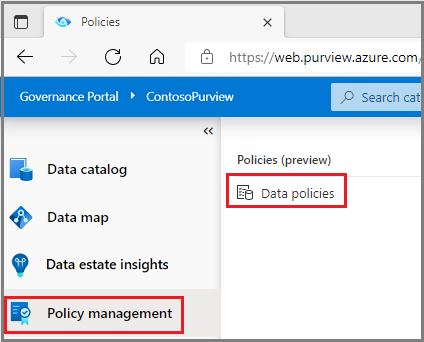
Navigate to the Data policy feature using the left side panel. Then select Data policies.
Select the New Policy button in the policy page.
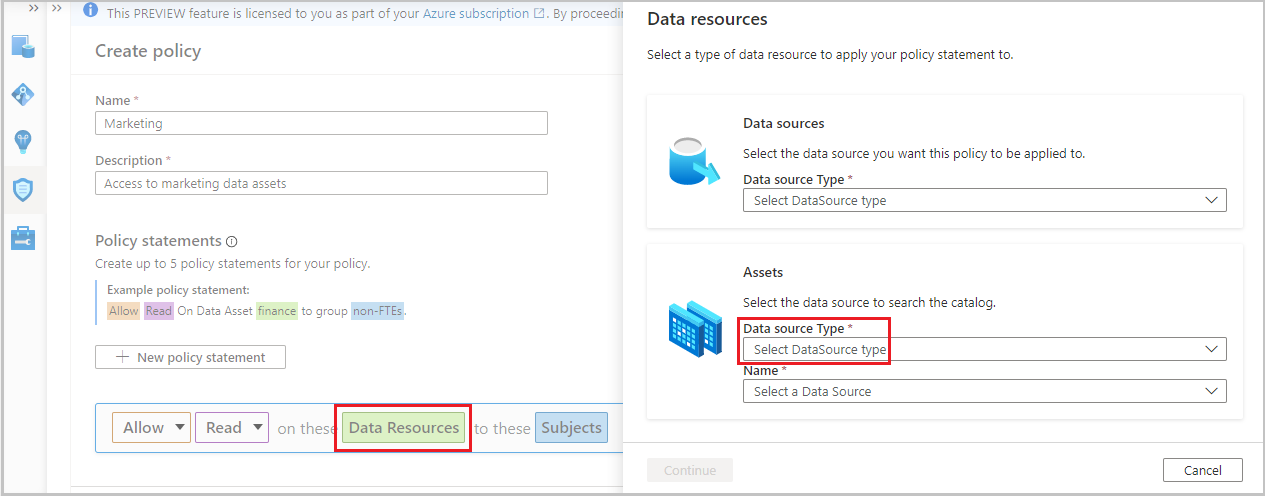
The new policy page will appear. Enter the policy Name and Description.
To add a policy statement to the new policy, select the New policy statement button. This will bring up the policy statement builder.

Select the Effect button and choose Allow from the drop-down list.
Select the Action button and choose Read or Modify from the drop-down list.
Select the Data Resources button to bring up the window to enter Data resource information, which will open to the right.
Under the Data Resources Panel do one of two things depending on the granularity of the policy:
- To create a broad policy statement that covers an entire data source, resource group, or subscription that was previously registered, use the Data sources box and select its Type.
- To create a fine-grained policy, use the Assets box instead. Enter the Data Source Type and the Name of a previously registered and scanned data source. See example in the image.
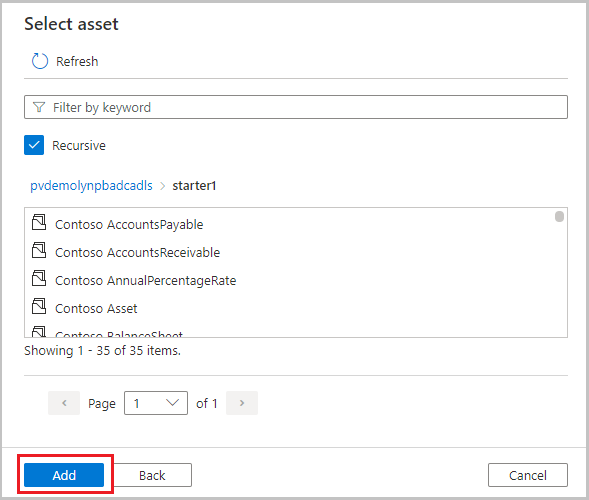
Select the Continue button and transverse the hierarchy to select and underlying data-object (for example: folder, file, etc.). Select Recursive to apply the policy from that point in the hierarchy down to any child data-objects. Then select the Add button. This will take you back to the policy editor.
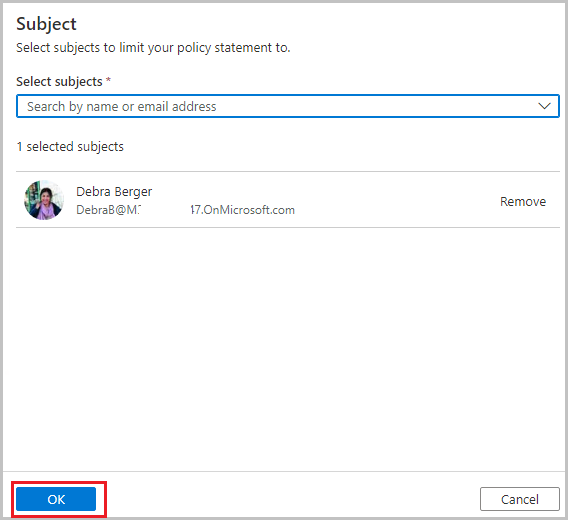
Select the Subjects button and enter the subject identity as a principal, group, or MSI. Note that Microsoft 365 groups are supported but updates to group membership take up to 1 hour to get reflected by Microsoft Entra ID. Then select the OK button. This will take you back to the policy editor.
Select the Save button to save the policy.
Now that you have created your policy, you will need to publish it for it to become active.
Publish a policy
A newly created policy is in the draft state. The process of publishing associates the new policy with one or more data sources under governance. This is called "binding" a policy to a data source.
Ensure you have the Data Source Admin permission as described here
The steps to publish a policy are as follows:
Sign in to the Microsoft Purview governance portal.
Navigate to the Data policy feature using the left side panel. Then select Data policies.
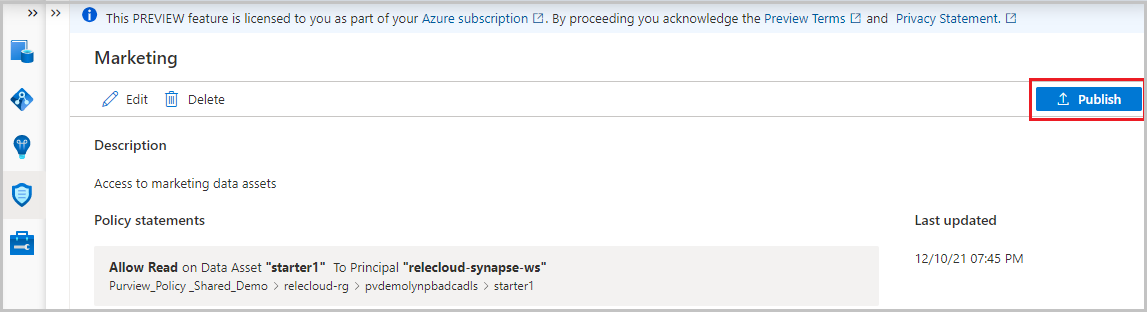
The Policy portal will present the list of existing policies in Microsoft Purview. Locate the policy that needs to be published. Select the Publish button on the right top corner of the page.
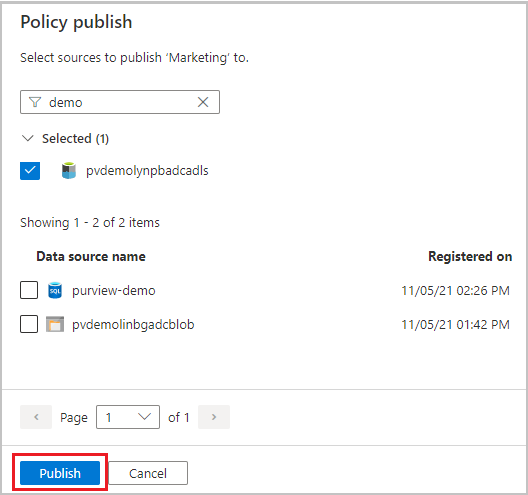
A list of data sources is displayed. You can enter a name to filter the list. Then, select each data source where this policy is to be published and then select the Publish button.
Note
After making changes to a policy, there is no need to publish it again for it to take effect if the data source(s) continues to be the same.
Unpublish a policy
Ensure you have the Data Source Admin permission as described here
The steps to publish a policy are as follows:
Sign in to the Microsoft Purview governance portal.
Navigate to the Data policy feature using the left side panel. Then select Data policies.
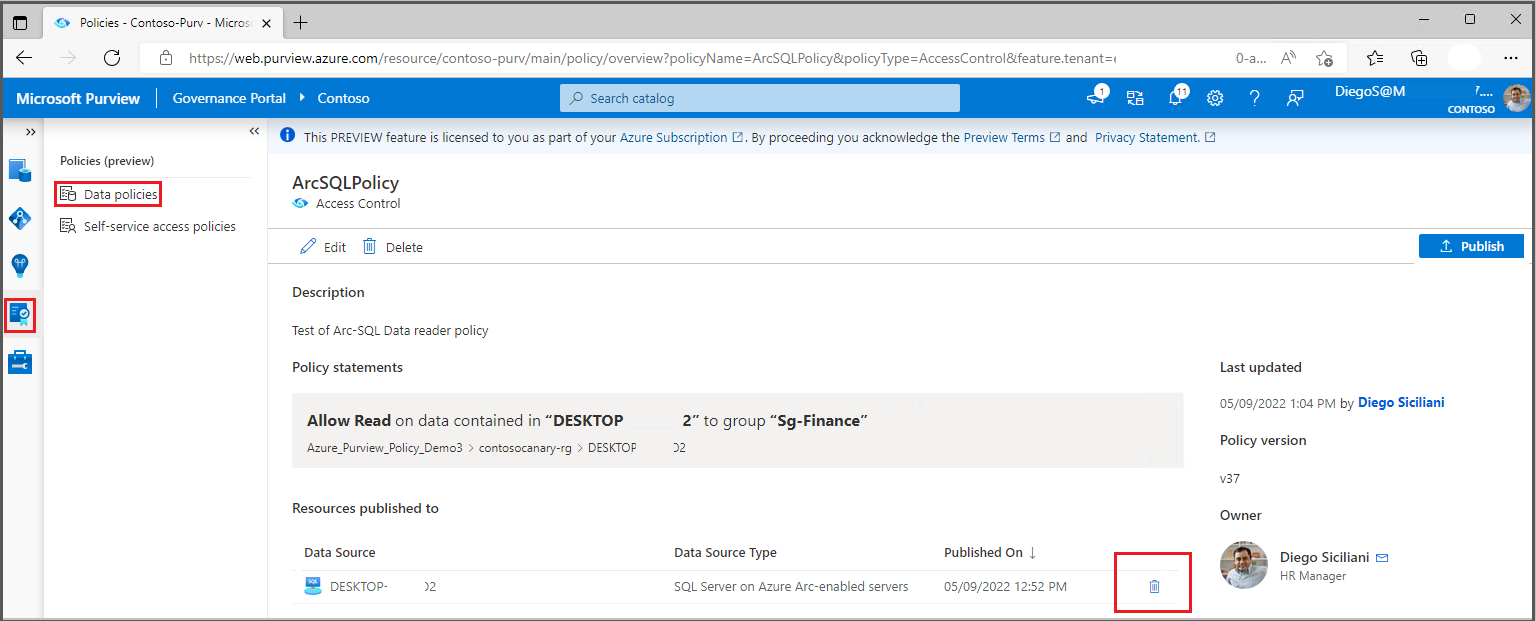
The Policy portal will present the list of existing policies in Microsoft Purview. Locate the policy that needs to be unpublished. Select the trash can icon.
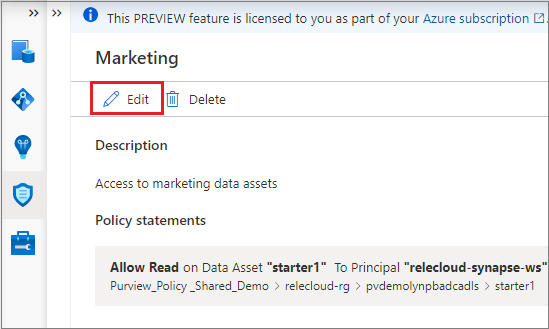
Update or delete a policy
Steps to update or delete a policy in Microsoft Purview are as follows. Ensure you have the Policy Author permission as described here
Sign in to the Microsoft Purview governance portal.
Navigate to the Data policy feature using the left side panel. Then select Data policies.
The Policy portal will present the list of existing policies in Microsoft Purview. Select the policy that needs to be updated.
The policy details page will appear, including Edit and Delete options. Select the Edit button, which brings up the policy statement builder. Now, any parts of the statement in this policy can be updated. To delete the policy, use the Delete button.
Next steps
For specific guides on creating policies, you can follow these tutorials:
Feedback
Coming soon: Throughout 2024 we will be phasing out GitHub Issues as the feedback mechanism for content and replacing it with a new feedback system. For more information see: https://aka.ms/ContentUserFeedback.
Submit and view feedback for