Credentials for source authentication in the Microsoft Purview Data Map
This article describes how you can create credentials in the Microsoft Purview Data Map. These saved credentials let you quickly reuse and apply saved authentication information to your data source scans.
Prerequisites
- An Azure key vault. To learn how to create one, see Quickstart: Create a key vault using the Azure portal.
Introduction
A credential is authentication information that Microsoft Purview can use to authenticate to your registered data sources. A credential object can be created for various types of authentication scenarios, such as Basic Authentication requiring username/password. Credential capture specific information required to authenticate, based on the chosen type of authentication method. Credentials use your existing Azure Key Vaults secrets for retrieving sensitive authentication information during the Credential creation process.
In Microsoft Purview, there are few options to use as authentication method to scan data sources such as the following options. Learn from each data source article for its supported authentication.
- Microsoft Purview system-assigned managed identity
- User-assigned managed identity (preview)
- Account Key (using Key Vault)
- SQL Authentication (using Key Vault)
- Service Principal (using Key Vault)
- Consumer Key (using Key Vault)
- And more
Before creating any credentials, consider your data source types and networking requirements to decide which authentication method you need for your scenario.
Use Microsoft Purview system-assigned managed identity to set up scans
If you're using the Microsoft Purview system-assigned managed identity (SAMI) to set up scans, you won't need to create a credential and link your key vault to Microsoft Purview to store them. For detailed instructions on adding the Microsoft Purview SAMI to have access to scan your data sources, refer to the data source-specific authentication sections below:
- Azure Blob Storage
- Azure Data Lake Storage Gen1
- Azure Data Lake Storage Gen2
- Azure SQL Database
- Azure SQL Managed Instance
- Azure Synapse Workspace
- Azure Synapse dedicated SQL pools (formerly SQL DW)
Grant Microsoft Purview access to your Azure Key Vault
To give Microsoft Purview access to your Azure Key Vault, there are two things you'll need to confirm:
Firewall access to Azure Key Vault
If your Azure Key Vault has disabled public network access, you have two options to allow access for Microsoft Purview.
Trusted Microsoft services
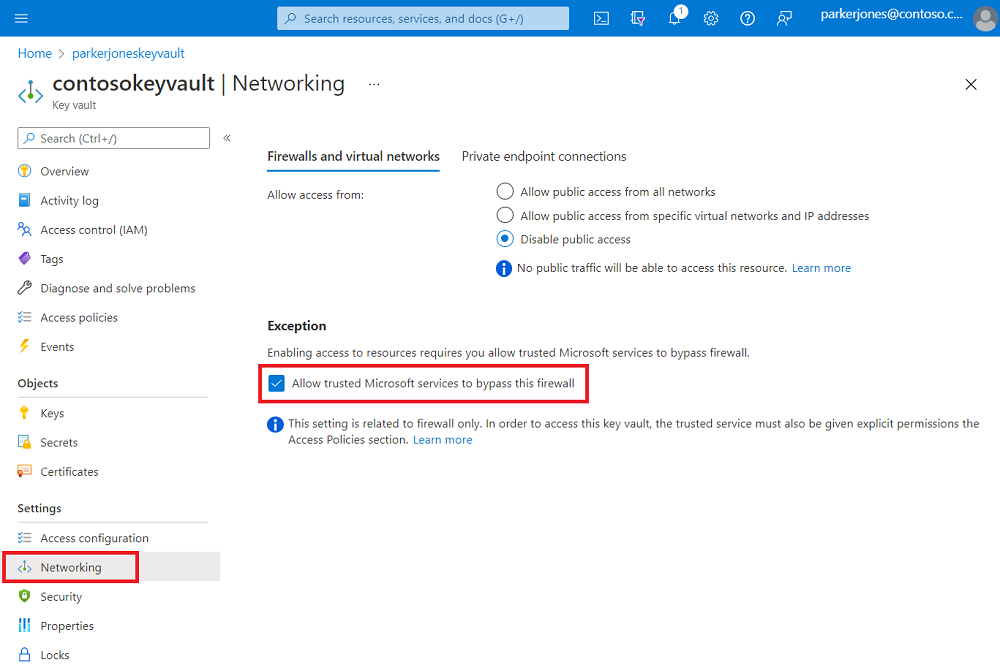
Microsoft Purview is listed as one of Azure Key Vault's trusted services, so if public network access is disabled on your Azure Key Vault you can enable access only to trusted Microsoft services, and Microsoft Purview will be included.
You can enable this setting in your Azure Key Vault under the Networking tab.
At the bottom of the page, under Exception, enable the Allow trusted Microsoft services to bypass this firewall feature.
Private endpoint connections
To connect to Azure Key Vault with private endpoints, follow Azure Key Vault's private endpoint documentation.
Note
Private endpoint connection option is supported when using Azure integration runtime in managed virtual network to scan the data sources. For self-hosted integration runtime, you need to enable trusted Microsoft services.
Microsoft Purview permissions on the Azure Key Vault
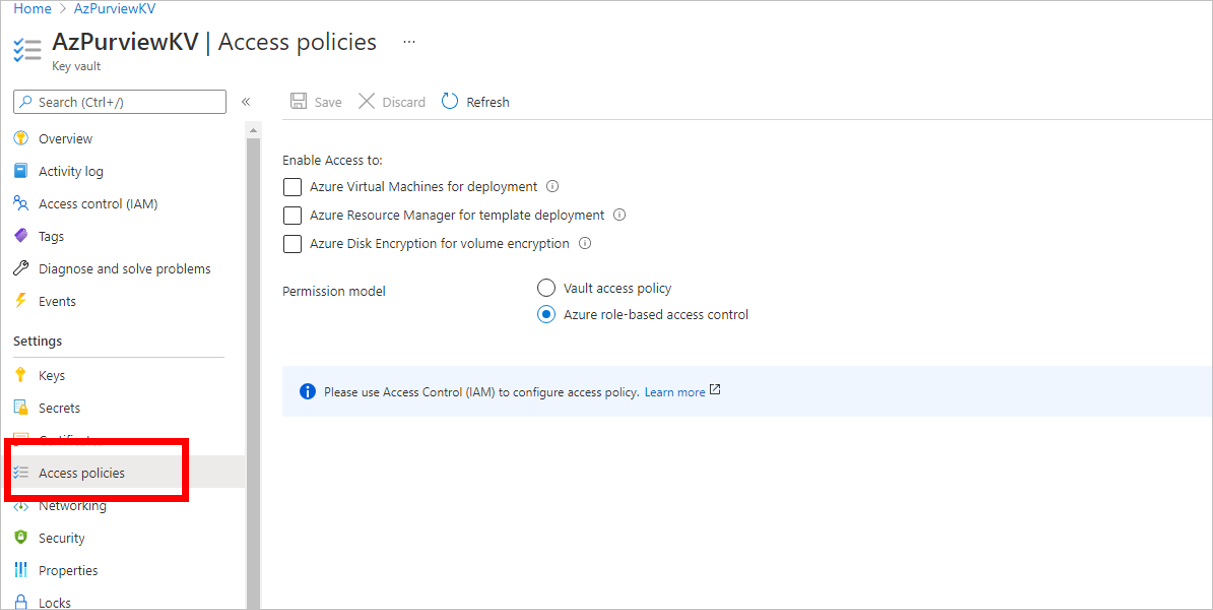
Currently Azure Key Vault supports two permission models:
Before assigning access to the Microsoft Purview system-assigned managed identity (SAMI), first identify your Azure Key Vault permission model from Key Vault resource Access Policies in the menu. Follow steps below based on relevant the permission model.
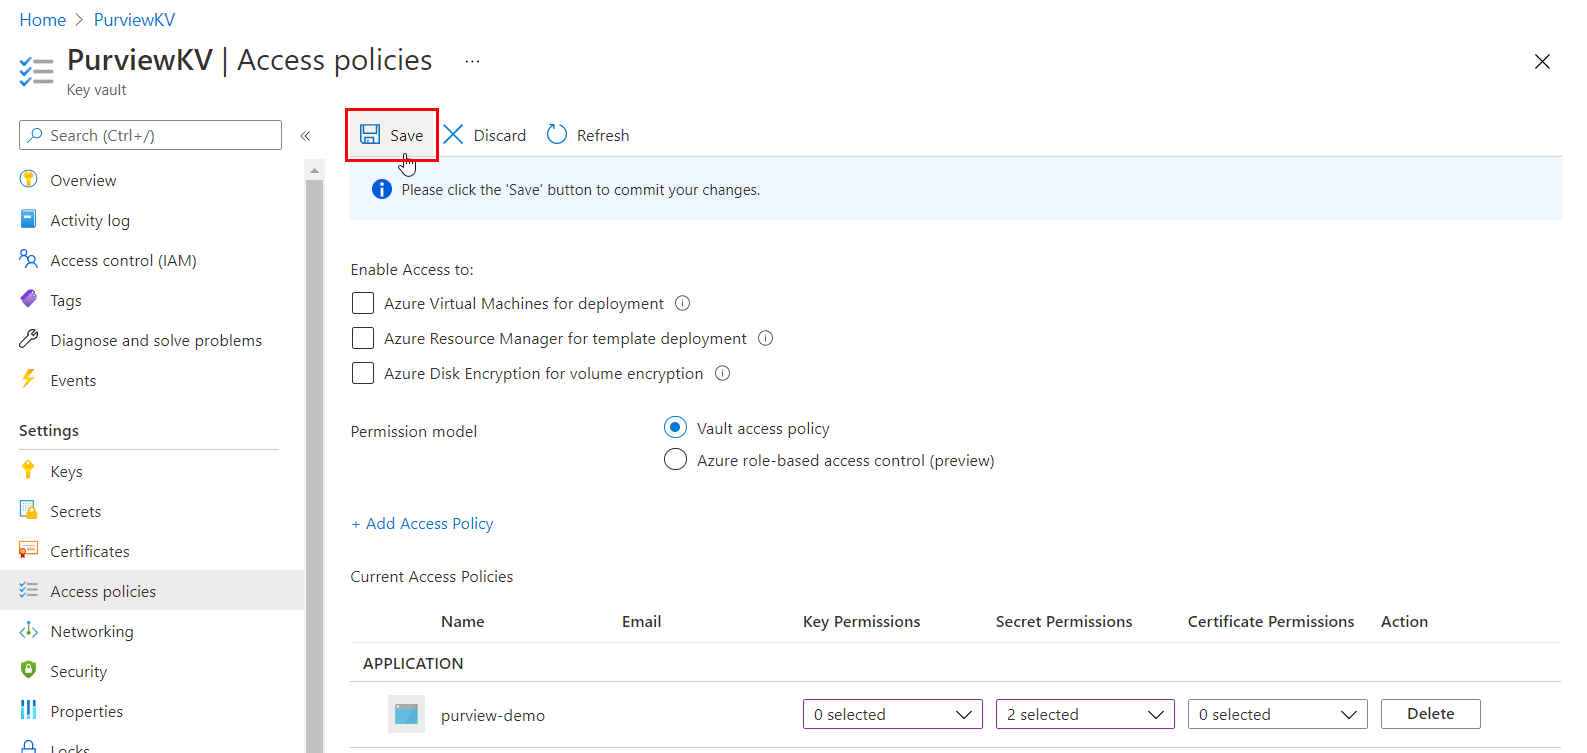
Option 1 - Assign access using Key Vault Access Policy
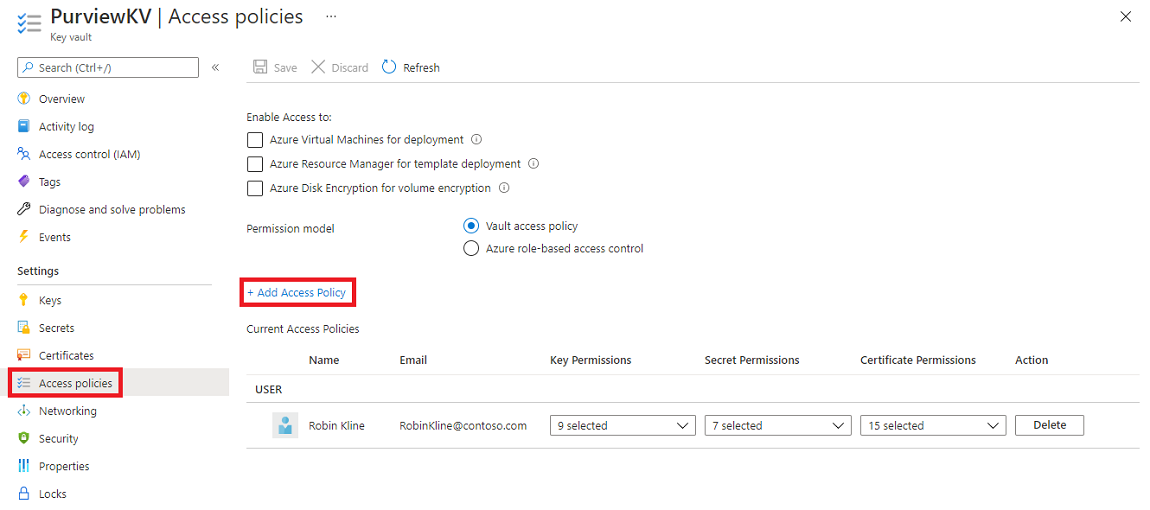
Follow these steps only if permission model in your Azure Key Vault resource is set to Vault Access Policy:
Navigate to your Azure Key Vault.
Select the Access policies page.
Select Add Access Policy.
In the Secrets permissions dropdown, select Get and List permissions.
For Select principal, choose the Microsoft Purview system managed identity. You can search for the Microsoft Purview SAMI using either the Microsoft Purview instance name or the managed identity application ID. We don't currently support compound identities (managed identity name + application ID).
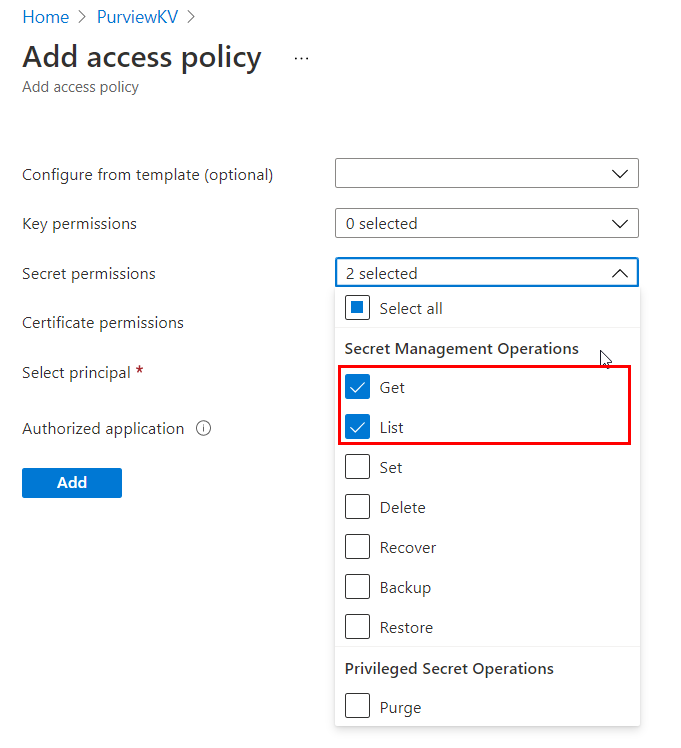
Select Add.
Select Save to save the Access policy.
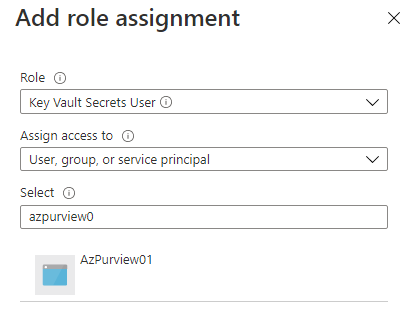
Option 2 - Assign access using Key Vault Azure role-based access control
Follow these steps only if permission model in your Azure Key Vault resource is set to Azure role-based access control:
Navigate to your Azure Key Vault.
Select Access Control (IAM) from the left navigation menu.
Select + Add.
Set the Role to Key Vault Secrets User and enter your Microsoft Purview account name under Select input box. Then, select Save to give this role assignment to your Microsoft Purview account.
Create Azure Key Vaults connections in your Microsoft Purview account
Before you can create a Credential, first associate one or more of your existing Azure Key Vault instances with your Microsoft Purview account.
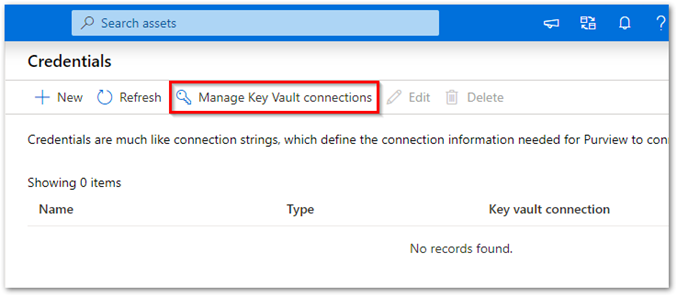
If you're using the classic Microsoft Purview portal, navigate to the Management Center in the studio and then navigate to Credentials. If you're using the new Microsoft Purview portal open the Data map solution, select the Source management drop-down, and then select Credentials.
From the Credentials page, select Manage Key Vault connections.
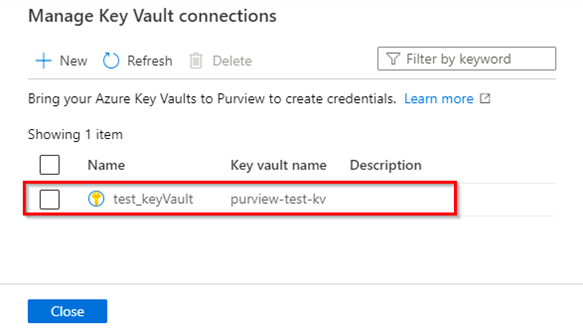
Select + New from the Manage Key Vault connections page.
Provide the required information, then select Create.
Confirm that your Key Vault has been successfully associated with your Microsoft Purview account as shown in this example:
Create a new credential
These credential types are supported in Microsoft Purview:
- Basic authentication: You add the password as a secret in key vault.
- Service Principal: You add the service principal key as a secret in key vault.
- SQL authentication: You add the password as a secret in key vault.
- Windows authentication: You add the password as a secret in key vault.
- Account Key: You add the account key as a secret in key vault.
- Role ARN: For an Amazon S3 data source, add your role ARN in AWS.
- Consumer Key: For Salesforce data sources, you can add the password and the consumer secret in key vault.
- User-assigned managed identity (preview): You can add user-assigned managed identity credentials. For more information, see the create a user-assigned managed identity section below.
For more information, see Add a secret to Key Vault and Create a new AWS role for Microsoft Purview.
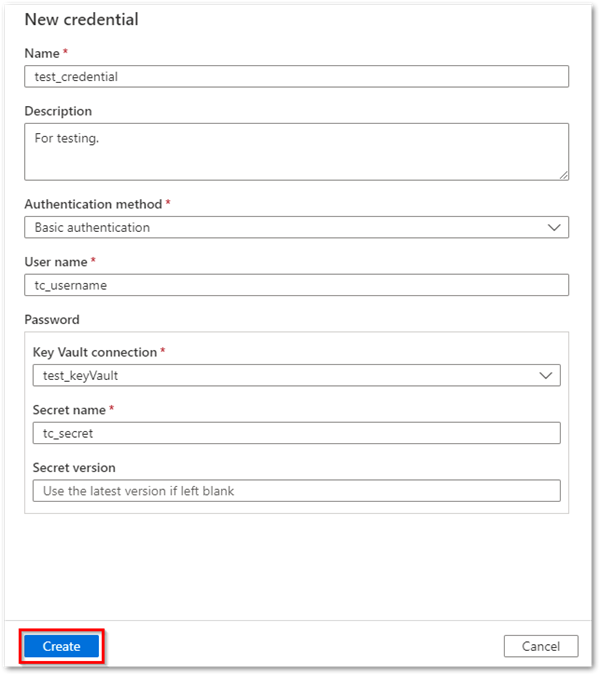
After storing your secrets in the key vault:
In Microsoft Purview, go to the Credentials page.
Create your new Credential by selecting + New.
Provide the required information. Select the Authentication method and a Key Vault connection from which to select a secret from.
Once all the details have been filled in, select Create.
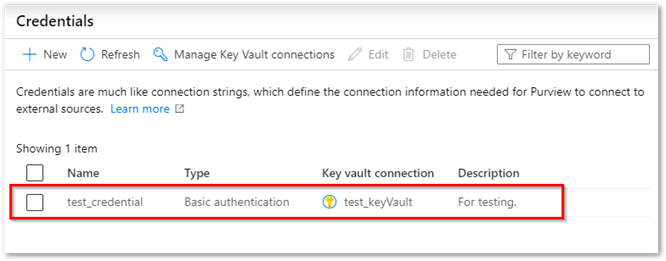
Verify that your new credential shows up in the list view and is ready to use.
Manage your key vault connections
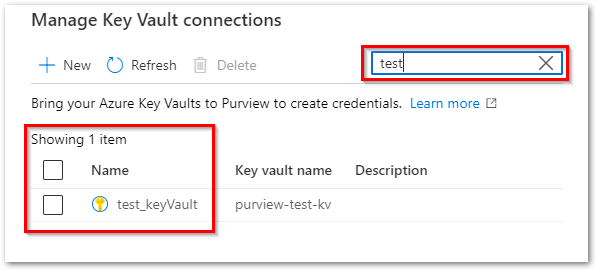
Search/find Key Vault connections by name
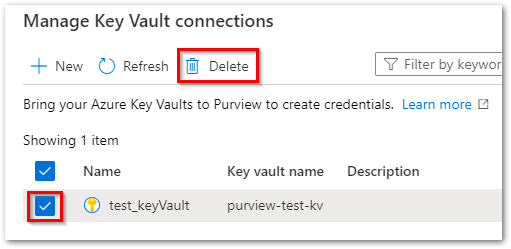
Delete one or more Key Vault connections
Manage your credentials
Search/find Credentials by name.
Select and make updates to an existing Credential.
Delete one or more Credentials.
Create a user-assigned managed identity
User-assigned managed identities (UAMI) enable Azure resources to authenticate directly with other resources using Microsoft Entra authentication, without the need to manage those credentials. They allow you to authenticate and assign access just like you would with a system assigned managed identity, Microsoft Entra user, Microsoft Entra group, or service principal. User-assigned managed identities are created as their own resource (rather than being connected to a pre-existing resource). For more information about managed identities, see the managed identities for Azure resources documentation.
The following steps will show you how to create a UAMI for Microsoft Purview to use.
Supported data sources for UAMI
- Azure Data Lake Gen 1
- Azure Data Lake Gen 2
- Azure SQL Database
- Azure SQL Managed Instance
- Azure SQL Dedicated SQL pools
- Azure Blob Storage
Create a user-assigned managed identity
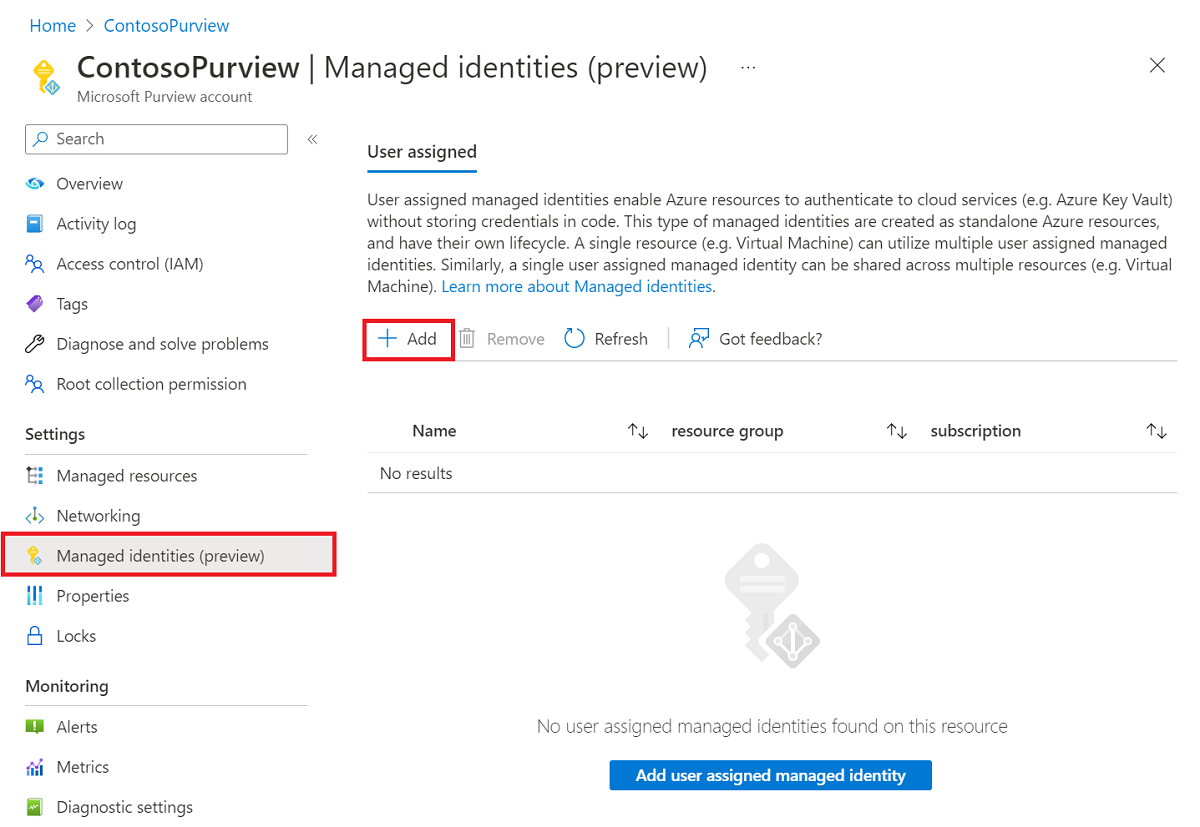
In the Azure portal navigate to your Microsoft Purview account.
In the Managed identities section on the left menu, select the + Add button to add user assigned managed identities.
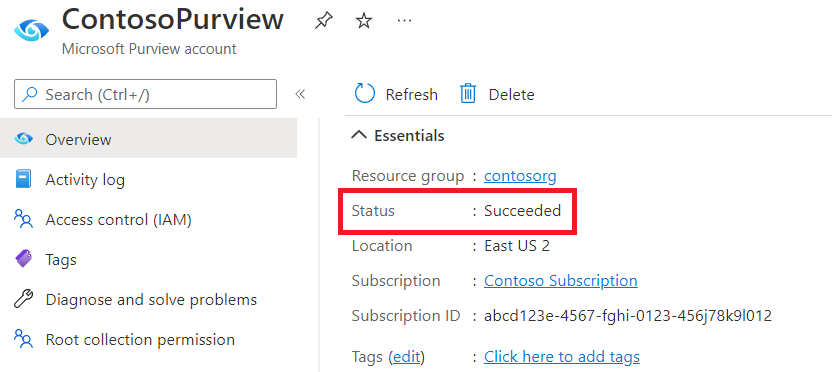
After finishing the setup, go back to your Microsoft Purview account in the Azure portal. If the managed identity is successfully deployed, you'll see the Microsoft Purview account's status as Succeeded.
Once the managed identity is successfully deployed, navigate to the Microsoft Purview governance portal, by selecting the Open Microsoft Purview governance portal button.
In the Microsoft Purview governance portal, navigate to the Management Center in the studio and then navigate to the Credentials section.
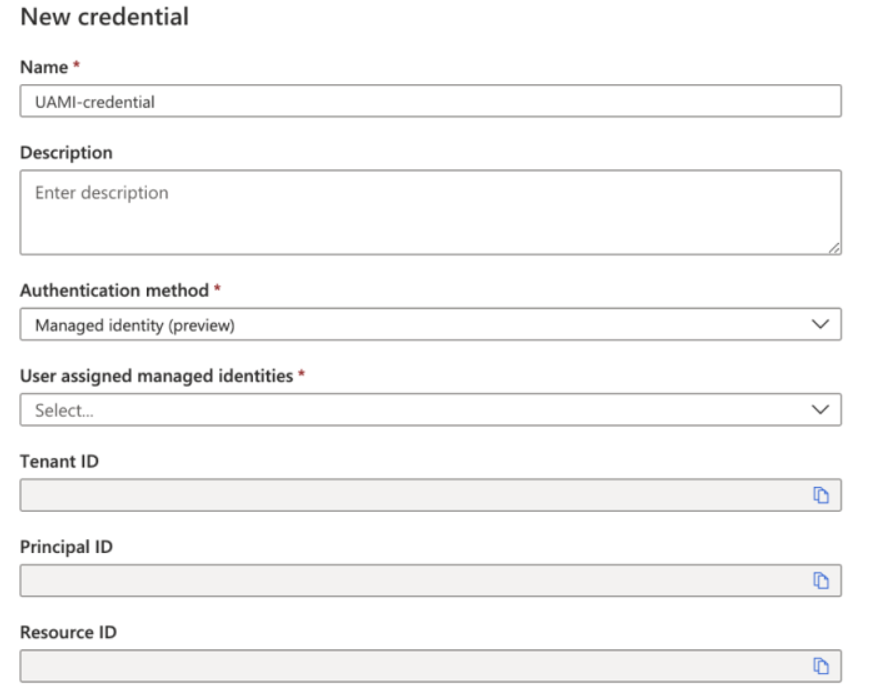
Create a user-assigned managed identity by selecting +New.
Select the Managed identity authentication method, and select your user assigned managed identity from the drop-down menu.
Note
If the portal was open during creation of your user assigned managed identity, you'll need to refresh the Microsoft Purview web portal to load the settings finished in the Azure portal.
After all the information is filled in, select Create.
Delete a user-assigned managed identity
In the Azure portal navigate to your Microsoft Purview account.
In the Managed identities section on the left menu, select the identity you want to delete.
Select the Remove button.
Once the managed identity is successfully removed, navigate to the Microsoft Purview governance portal, by selecting the Open Microsoft Purview governance portal button.
Navigate to the Management Center in the studio and then navigate to the Credentials section.
Select the identity you want to delete, and then select the Delete button.
Note
If you have deleted a user-assigned managed identity in the Azure portal, you need to delete the original identiy and create a new one in the Microsoft Purview governance portal.
Next steps
Feedback
Coming soon: Throughout 2024 we will be phasing out GitHub Issues as the feedback mechanism for content and replacing it with a new feedback system. For more information see: https://aka.ms/ContentUserFeedback.
Submit and view feedback for