Add Business Central tab in Microsoft Teams
APPLIES TO: Business Central online
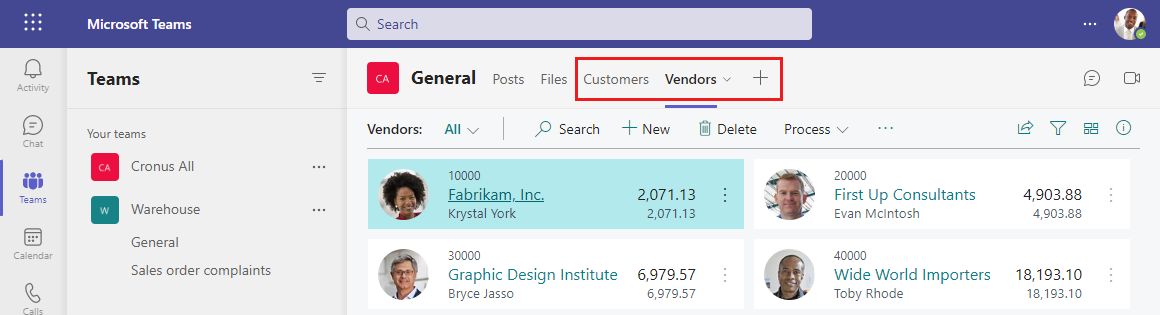
In Teams, tabs appear at the top of channels and chats, giving participants quick access to pertinent information. This article explains different ways to add a tab that displays Business Central data.
About Business Central tabs
A Business Central tab provides a focused view of Business Central list and card pages. The tab doesn't display the full Business Central web client. There's no browser border, Business Central banner (for example with Tell Me, search, help) or top navigation menu—just page content and its actions. The content is interactive, meaning that you can select actions and links, change data, and more. You're limited to what you see and can do by the same permissions assigned to your account in Business Central.
To learn about who can view the content in a Business Central tab, see Who can see the content of a tab?.
Tip
Are you a developer? You can also add tabs programmatically using the Microsoft Graph API. For more information, see Add Business Central Tabs to Teams.
Prerequisites
To add a Business Central tab, the following requirements must be met:
- You have access to Microsoft Teams.
- You have a Business Central licence.
- You've installed the Business Central app in Teams. For more information, see Install the Business Central App for Microsoft Teams.
To view Business Central tab that was added by another participant in the channel or chat, the following requirements must be met:
- You have access to Microsoft Teams.
- You have a Business Central licence or limited access to Business Central with a Microsoft 365 licence only. For more information, see Business Central Access with Microsoft 365 Licences.
- You've installed the Business Central app in Teams.
Add tab using recommended content
Use these steps to add a tab by choosing what to display from a readily available list of recommended content that's based your role centre—without leaving Teams. To learn more about the content that you can choose from, see Where does the recommended content come from?.
At the top of a channel or chat in Teams, select + Add a tab.
In the Search box, type business central, then select the Business Central icon and wait for the Business Central tab configuration window to appear.
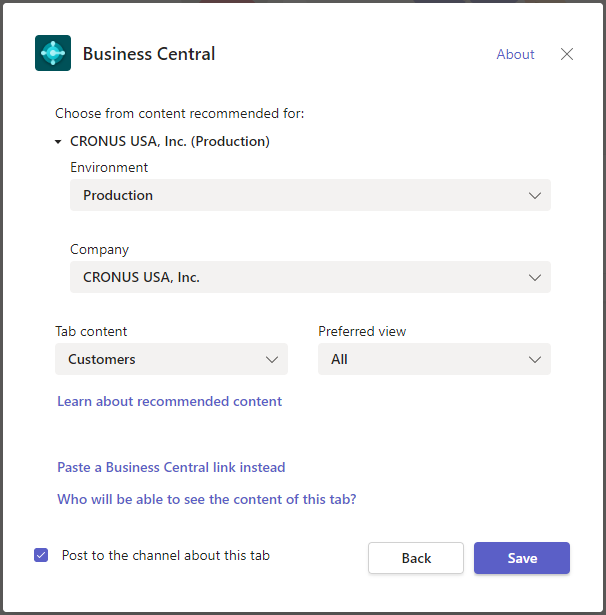
The Choose from content recommended for option shows the company in Business Central that you working with. If you want to show content from another company, select the current company, then use the Environment and Company options to specify company you want to work with.
Select down arrow in the Tab content option and choose the content that you want to display.
Some pages may include different views, which are variations of the page that's filtered to show specific data. To change the view for the content, select the down arrow for the Preferred view option and choose the view from the list.
For more information about views, see Save and Personalize Views.
Select Post to the channel about this tab to automatically post an announcement in the Teams channel or chat to let participants know that you've added this tab.
Select Save.
Add tab using a page link
Another way to add a tab by using a link (URL) to the page that you want to show. This way is useful when you want to display a specific Business Central record or a list page that isn't bookmarked on your role centre.
At the top of a channel or chat in Teams, select + Add a tab.
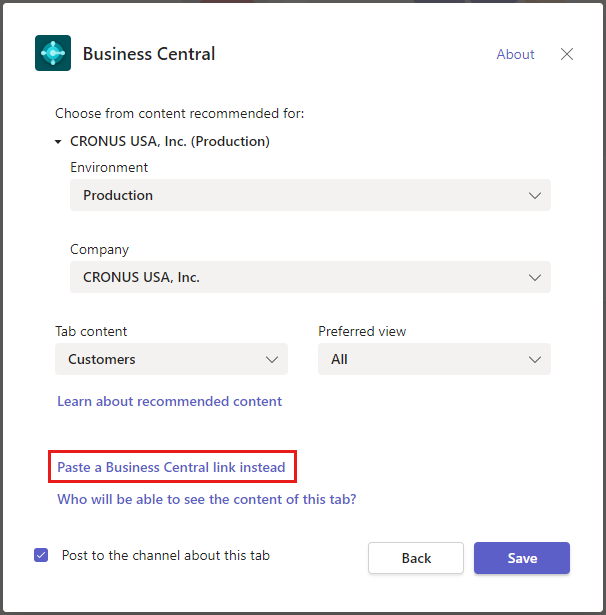
In the Search box, type business central, then select the Business Central icon.
Wait for the Business Central tab configuration window to appear, then select Paste a Business Central link instead option.
Go to Business Central, and open the page that you want to display in the tab.
Copy the link to the page.
There are two ways to copy the link. The easiest and preferred way is to select Share
 > Copy Link. The other way is to copy the entire URL from the browser's address bar. To learn more about this step, see Sharing Business Central Records and Page Links.
Go back to Teams and paste the link in the URL box.
In the Tab name box, enter a name that displays on the tab.
Select Post to the channel about this tab to automatically post an announcement in the Teams channel or chat to let participants know that you've added this tab.
Select Save.
Add tab by pinning card details
Use these steps to add a tab for a record that was shared or pasted in a Teams channel or chat. To learn how to share records and page links in Teams, see Share Records and Page Links in Teams.
- In Teams, select the Details button on the card.
- In the upper-right corner of the card details, select Pin to top of chat
 icon.
icon.
Change a tab and its content
After a tab has been added, you can make certain changes to the tab. For example, you can rename the tab, move it, and remove it. You find these actions in the tab options that are available by selecting the down arrow on the tab.
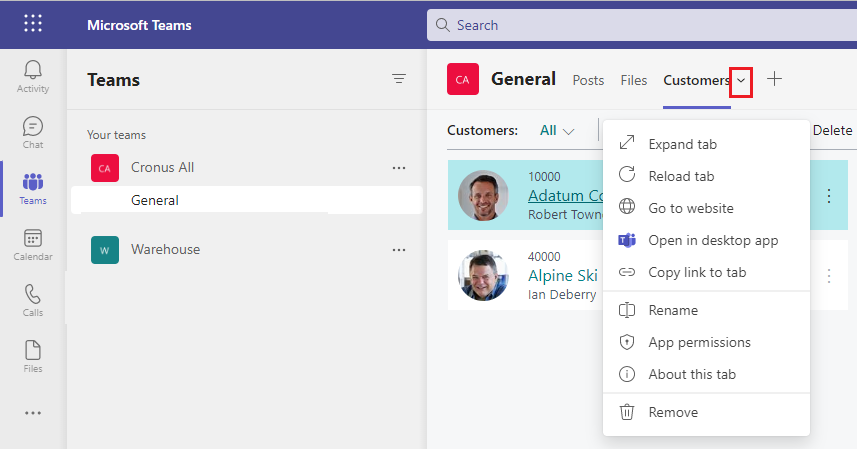
As for the content of a tab, you can modify the data, if you have permission. If you change the data, others won't see the changes until they leave the tab and come back. The same is true for you if someone else makes changes to data. You can't change the page that displays on the tab, so just remove the tab and add another one the suits.
You can also change your view of the page and its data, like sorting and switching the layout between list and tile views. When you make these kinds of changes, they won't affect what others see. They see what you originally posted, until they make similar changes themselves.
See also
Business Central and Microsoft Teams Integration Overview
Install the Business Central App for Microsoft Teams
Sharing Business Central Records and Page Links in Microsoft Teams.
Teams FAQ
Searching for Customers, Vendors, and Other Contacts from Microsoft Teams
Changing Company and Other Settings in Teams
Troubleshooting Teams
Developing for Teams Integration
Start a free trial!
Feedback
Coming soon: Throughout 2024 we will be phasing out GitHub Issues as the feedback mechanism for content and replacing it with a new feedback system. For more information see: https://aka.ms/ContentUserFeedback.
Submit and view feedback for