Prepare for analytic reporting with Power BI
Important
This article only applies to outbound marketing.
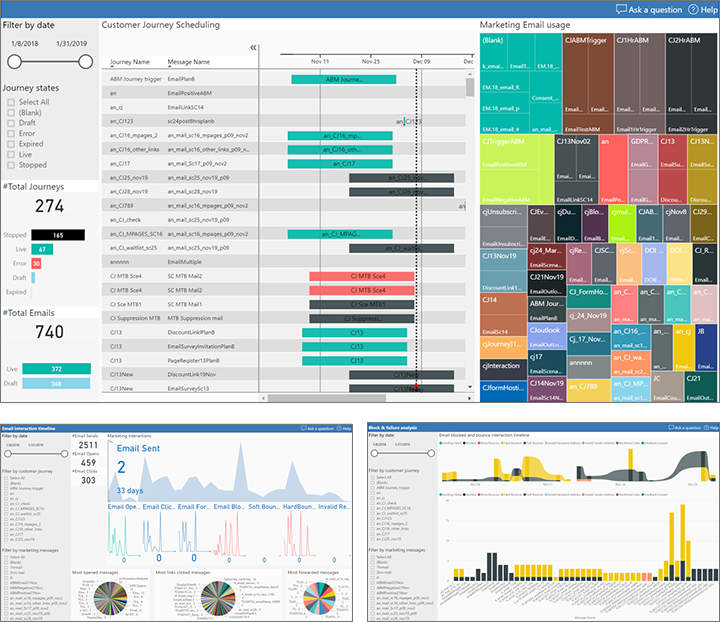
Outbound marketing provides a wide selection of built-in analytics throughout the application. But you can also create your own custom analytics and reports from your Customer Insights - Journeys data by using Power BI. We provide endpoints that you can use to connect Power BI to Customer Insights - Journeys, plus a downloadable Power BI template that you can open in Power BI Desktop, connect to your Dynamics 365 data sources, and then customize as needed. When you're done setting it up, you can publish and share your Power BI report using the standard Power BI online tools.
Data sources for custom analytics
To create custom analytics, you can connect two different data sources, each of which provides a different type of data:
- Profile data is stored in the organizational database and includes the entities and records that you see, edit, and create when working directly in Customer Insights - Journeys. These include common entities like contacts, accounts, leads, events, customer journeys, and more. You'll use the Power BI data connector called "Common Data Services for Apps" for this type of data.
- Interaction data is stored in the marketing-insights service database and includes information about how your contacts interacted with your marketing initiatives, including email opens, email clicks, event registrations, page submissions, and more. You can see this type of information when you look at the insights built into Customer Insights - Journeys, but you can't create these records nor view them directly. In the current release, you'll use the Power BI "Azure Blob Storage" connector for this type of data. In future releases, you'll also be able to use the dataflow connector.
You'll be able to connect directly to your Customer Insights - Journeys database from Power BI to fetch your profile data, but to access interaction data you'll need to set up Azure Blob Storage, configure Customer Insights - Journeys to save interaction data there, and then connect Power BI to your blob storage.
Set up Azure Blob storage and connect it to Customer Insights - Journeys
Important
As of November 2021, blob naming and data update logic has changed. Previously, exporting Customer Insights - Journeys insights created a new blob file each time a batch of new interactions arrived. Each batch typically contained a single or a few interactions. The file name was a randomly generated GUID, which prevented collision and any interpretation. Once the blob was created, it was never changed. The blob export process created a large number of small blobs in the storage, which significantly slowed Power BI refresh.
The updated Customer Insights - Journeys insights export process appends interaction batches to recent blobs. When a blob grows to the configurable size (10MB by default), the export creates a new blob. After, the blob name changes to allow the system to find the most recent blob to append, but the naming should be assumed random and not be interpreted as before. The internal format remains the same: a comma-separated list of interactions with header. All Power BI reports (out-of-the-box and custom) should keep working.
If your storage is overwhelmed by blobs from previous exports, resync the insights data from scratch. To resync the data:
- Stop ongoing export using the configuration in the Customer Insights - Journeys app.
- Delete the container with existing interactions data.
- Create a new container and start a new export as usual.
Important
Here are some considerations related to configuring the Azure Storage Account firewall (limited public network access) when exporting analytics data:
- If you do not need to limit public network access to the Storage Account (Configure Azure Storage firewalls and virtual networks), proceed with further configuration steps. If you do not need to limit public network access, you can complete this guide and connect Azure Blob storage to Customer Insights - Journeys.
- If you need to limit public network access to the Storage Account—for example, if you want to limit access to selected virtual networks and IP addresses only—you must contact our customer support team to assist you with the Azure Storage Account firewall configuration. This is a complicated scenario and support team assistance is required based on the Storage Account location and service instance data. You can continue with steps 1 through 7 below, but you can't create a new analytics configuration (steps 8 through 10) until your firewall configuration is set up properly.
- If the Storage Account is required to have public network access disabled entirely and you want to limit access to Private Link Endpoint only, then this is not a supported scenario for this feature. Consider using a different Storage Account with lower access restrictions.
Sign into portal.azure.com using the same account where you're running Customer Insights - Journeys.
If you don't already have one, then create a general-purpose storage account in the Azure Blob storage as described in Quickstart: Upload, download, and list blobs using the Azure portal.
Note
Your general-purpose storage account can be either V1 or V2. Both will work with the Power BI template supplied by Microsoft, but we recommend using V2 if possible because it will support more advanced Power BI capabilities in the future.
Create a blob storage container in your storage account, also as described in Quickstart: Upload, download, and list blobs using the Azure portal.
Launch the Microsoft Azure Storage Explorer, which is a desktop app, and connect it to your Azure account. If you don't already have it, you can download if for free from https://azure.microsoft.com/features/storage-explorer/.
In the Storage Explorer, navigate down to the blob storage container you just created.
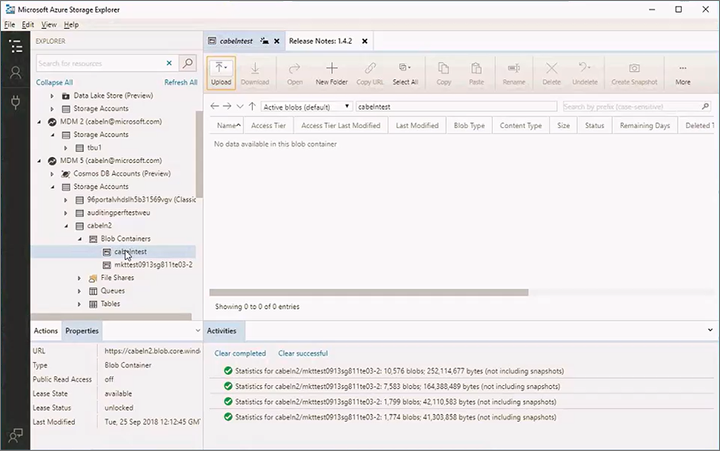
Right-click on your blob storage container and then select Get shared access signature from the context menu. The Shared Access Signature dialog opens.
Make the following settings:
- Choose a Start time and Expiry time to establish the period during which your signature will remain valid. Note that the signature must remain valid for as long as you intend to run the export—the export will stop immediately when the signature expires.
- Enable the following Permissions by selecting their check boxes:
- Read
- Add
- Create
- Write
- Delete
- List
The following services and resource types should be allowed to have the Power BI report work (when using shared access keys):
- Allowed services: Blob, File, Queue, Table
- Allowed resource types: Service, Container, Object

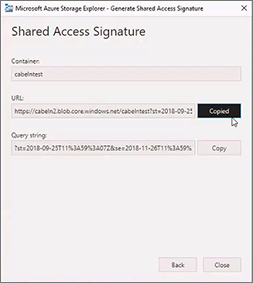
Select Create to create the signature. The dialog refreshes to show a URL and Query string. Select the Copy button to copy the URL shown here and paste in a temporary text file so you can use it later in this procedure.
Sign into Customer Insights - Journeys and go to the Settings area in the area switcher, then go to Data management > Analytics configuration. A list of marketing analytics configurations opens. If a record is already listed here, then select it to open it; otherwise, select New from the command bar to create a new record.
The Customer Insights - Journeys analytics configuration page opens.
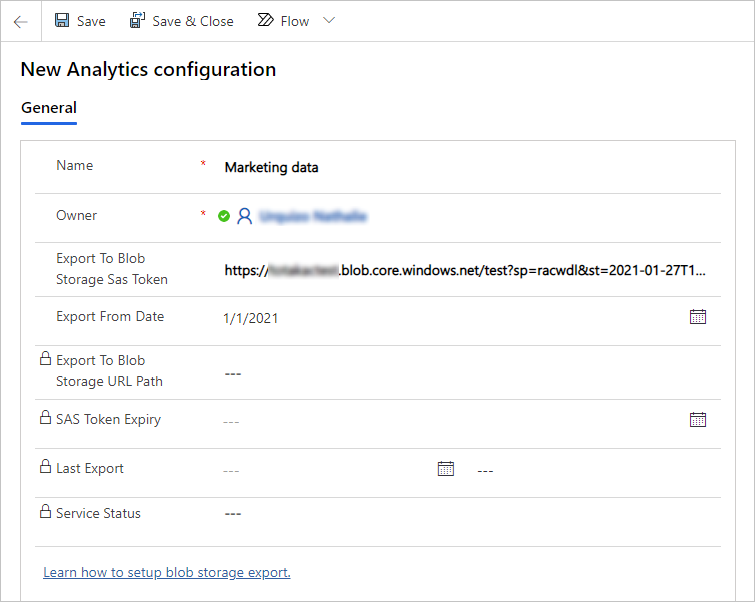
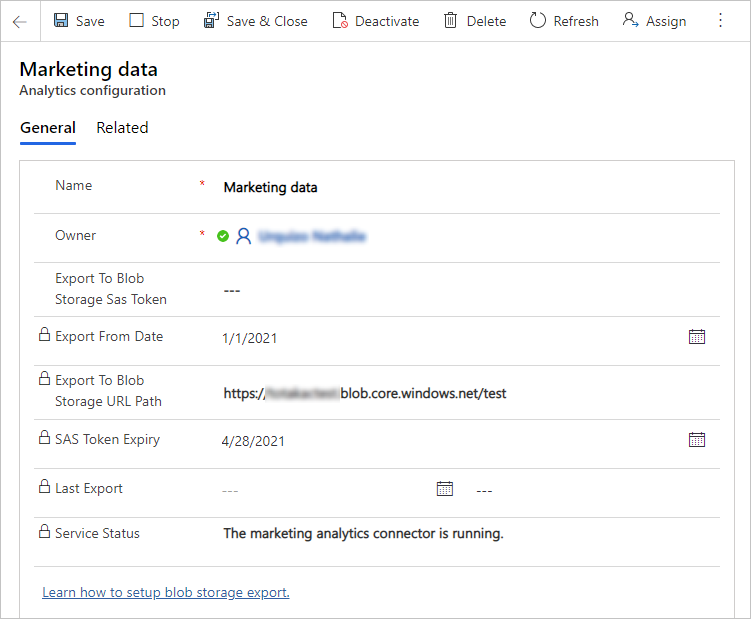
Make the following settings:
- Name: Enter a name to identify this configuration record.
- Export to blob storage SAS token: Paste the URL you copied earlier in this procedure.
- Export from date: Optional. When left empty, all interactions available in the Customer Insights - Journeys application will be exported. If a date value is specified, then only the interactions that happened after this date will be exported. This is useful for reducing the amount of data exported if you aren't interested in creating reports for older interactions.
Note
Parallel exports are not supported, only one export configuration is allowed.
Save your settings.
Note
The URL you pasted here has two parts: a storage URL identifying your storage account and container name, and an SAS token that allows Customer Insights - Journeys to connect to your blob storage. To prevent other people from being able to connect to your blob storage, only the storage URL will be saved in the Dynamics 365 database. The full URL, including the SAS token, will be stored securely in Customer Insights - Journeys. This is why you can never see the full URL in this form.
After a short time, Customer Insights - Journeys will begin to export interaction data as individual files to your blob storage container, where you'll be able to pick it up using Power BI. You'll also be able to see these files and an associated JSON file in the Azure Storage Explorer.
Note
Interactions are exported on the fly, but only until the provided SAS token expires. You can update the SAS token at any time by pasting a new URL in the Export to blob storage sas token field and saving the configuration. The already stopped export will be automatically restarted. This is only possible for the same storage account or container. If you need to export to a different storage account and container, stop the current export, delete the configuration, and create a new one.
Get Power BI templates and connect them your Customer Insights - Journeys data
Once your Azure Blob storage is set up and connected to Customer Insights - Journeys, you're ready to start working in Power BI to connect to your data sources and design your analytics. To help get you started, we provide a gallery of pre-built templates and sample reports that you can download, explore, customize, and connect to your Customer Insights - Journeys instance.
More information: Download and use marketing analytics templates and sample reports for Power BI
