Exercise - Create an IoT Central application
Create an IoT Central application for your IoT Edge devices to connect to and be managed from.
Recall that you plan to deploy an IoT Edge device in each store to manage the local sensors and filter the data that's sent to IoT Central.
Here, you'll use the Azure CLI to create an IoT Central application from the Custom application template. You'll run the CLI commands in the Azure sandbox and then navigate to the application's web UI. In the web UI, you complete the setup by adding a device template for your IoT Edge device.
Note
This exercise is optional. If you want to complete this exercise, you'll need to create an Azure subscription before you begin. If you don't have an Azure account or you don't want to create one at this time, you can read through the instructions so you understand the information that's being presented.
Download the deployment manifest
When you create the device template for your IoT Edge device, you'll need the deployment manifest and an interface definition on your local machine. You can download these files by right-clicking on the following links and choosing Save as:
Remember where you save these files, you'll use them later.
Create and configure the IoT Central application
The following steps create an IoT Central application and generate an API token to use later in this module.
Run the following commands in the Cloud Shell to generate a unique name for your IoT Central application and save it in an environment variable to use later:
APP_NAME="store-manager-$RANDOM"
echo "Your application name is: $APP_NAME"
Make a note of the application name just in case the shell times out and loses the environment variable.
Run the following command in the Cloud Shell to create an IoT Central application in the sandbox:
az iot central app create \
--resource-group <rgn>[sandbox resource group name]</rgn> \
--name $APP_NAME --sku ST2 --location centralus \
--subdomain $APP_NAME --template iotc-pnp-preview \
--display-name 'Store Management'
echo "You can now navigate to: https://$APP_NAME.azureiotcentral.com/edge-manifests"
Expect this command to take a minute or two to run.
In another browser tab or window, navigate to the URL shown in the output of the previous command. This page in the web UI is where you upload an IoT Edge deployment manifest:
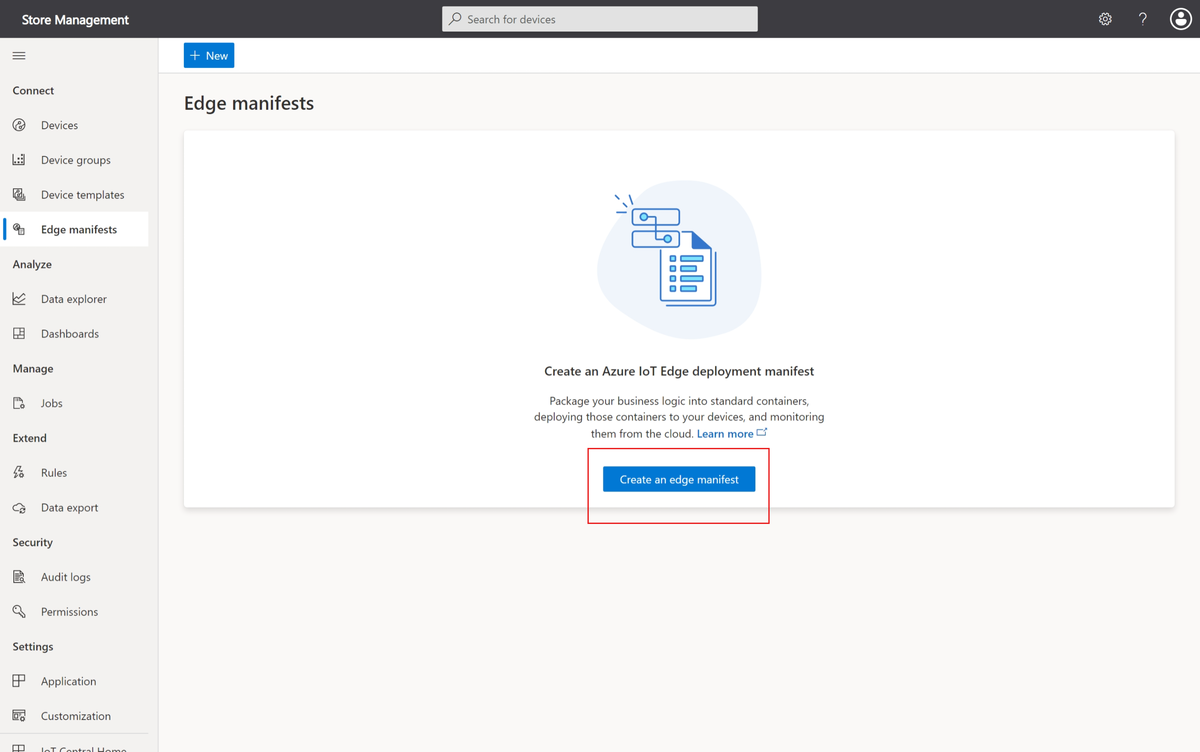
Select Create an edge manifest, enter the name Environmental Sensor, select Upload a file, and then browse to select the EnvironmentalSensorManifest-1-4.json file you downloaded previously.
Select Next and then Create to upload the manifest. The manifest configures three IoT Edge modules: edgeAgent, edgeHub, and SimulatedTemperatureSensor.
Next select Device templates. This page in the web UI is where you create a device template:
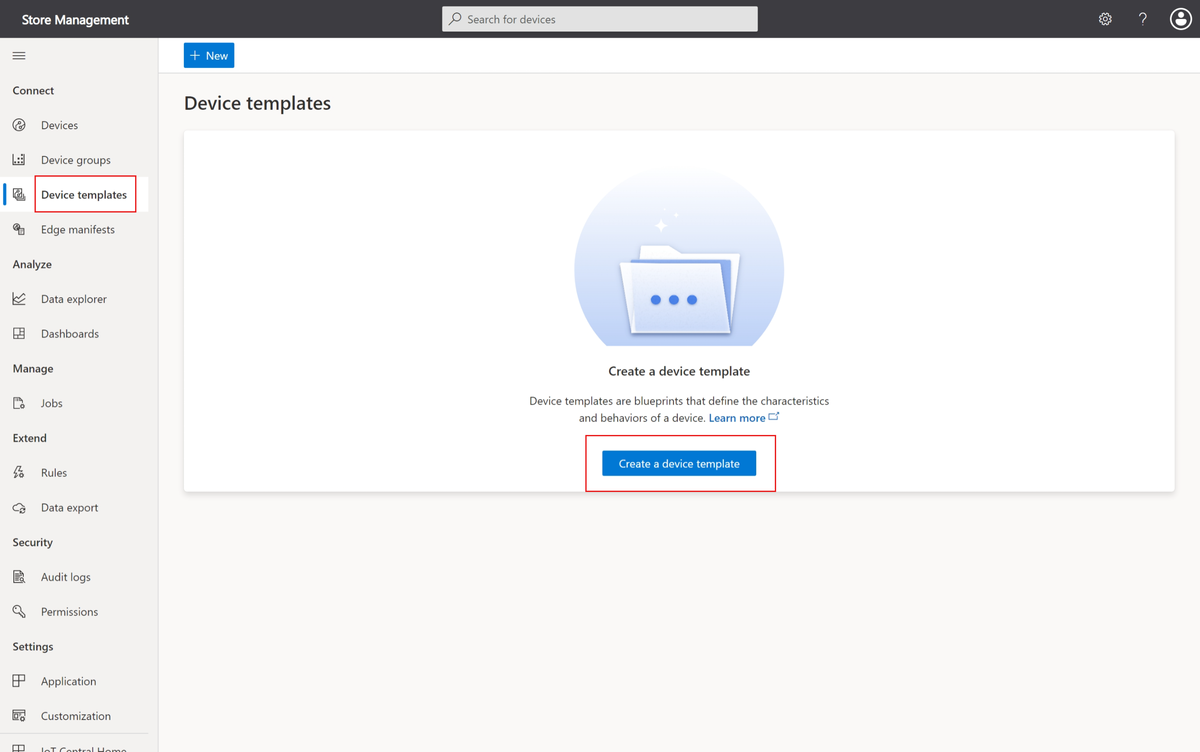
Select Create a device template, choose the Azure IoT Edge tile, and then select Next: Customize.
Enter Environmental Sensor Edge Device as the device template name. Then select Next: Review.
Select Create to create the device template. Then select Custom model to start with a blank model.
The deployment manifest you uploaded has a module called SimulatedTemperatureSensor with an interface called management. The management interface includes the writable properties SendData and SendInterval. To add this information to your new device template:
On the device template page, select Modules in the Model section.
Select Import modules from manifest:
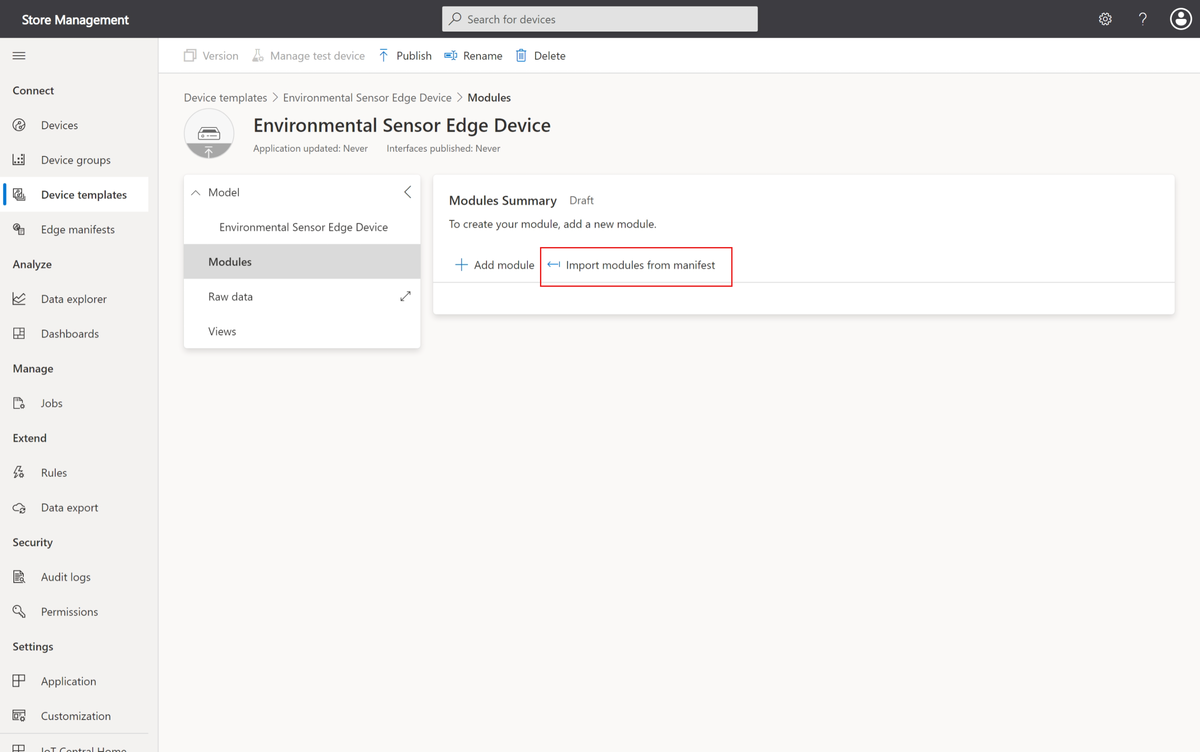
Select the Environmental Sensor deployment manifest to import the modules.
Your device template now includes the SimulatedTemperatureSensor module with a management interface. The interface defines the SendData and SendInterval writable properties.
The deployment manifest doesn't include information about the telemetry the device modules send. To enable IoT Central to create visualizations for the telemetry, add an interface with the required definitions:
Select the SimulatedTemperatureSensor module and then select + Add inherited interface. You may need to select ... to see this option.
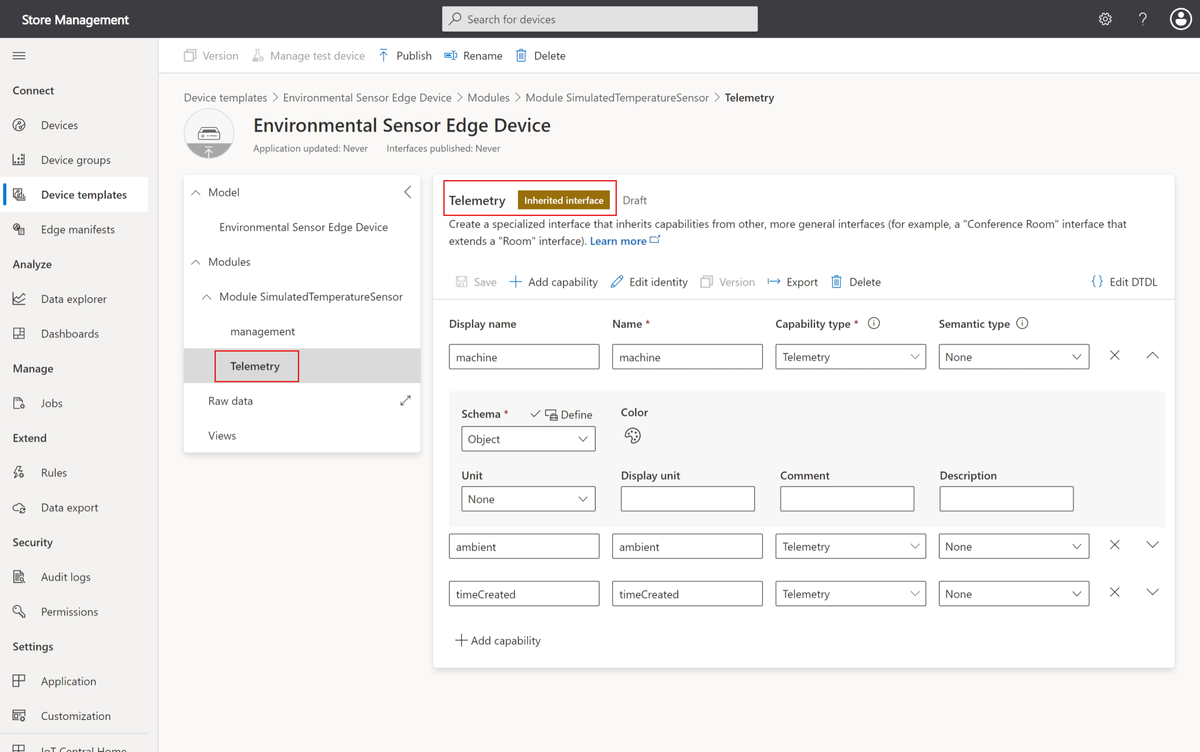
Choose the Import interface tile. Select the TelemetryInterface.json file you downloaded previously.
The Telemetry interface defines machine and ambient telemetry types as objects. The machine object includes temperature and pressure telemetry. The ambient object includes temperature and humidity telemetry. The interface also includes timeCreated as a DateTime telemetry type.
To enable an operator to record information about each IoT Edge device, add the following Cloud properties to the Environmental Sensor Edge Device model:
| Display name | Name | Capability type | Schema |
|---|---|---|---|
| Store Name | StoreName | Cloud Property | String |
| Service Date | ServiceDate | Cloud Property | Date |
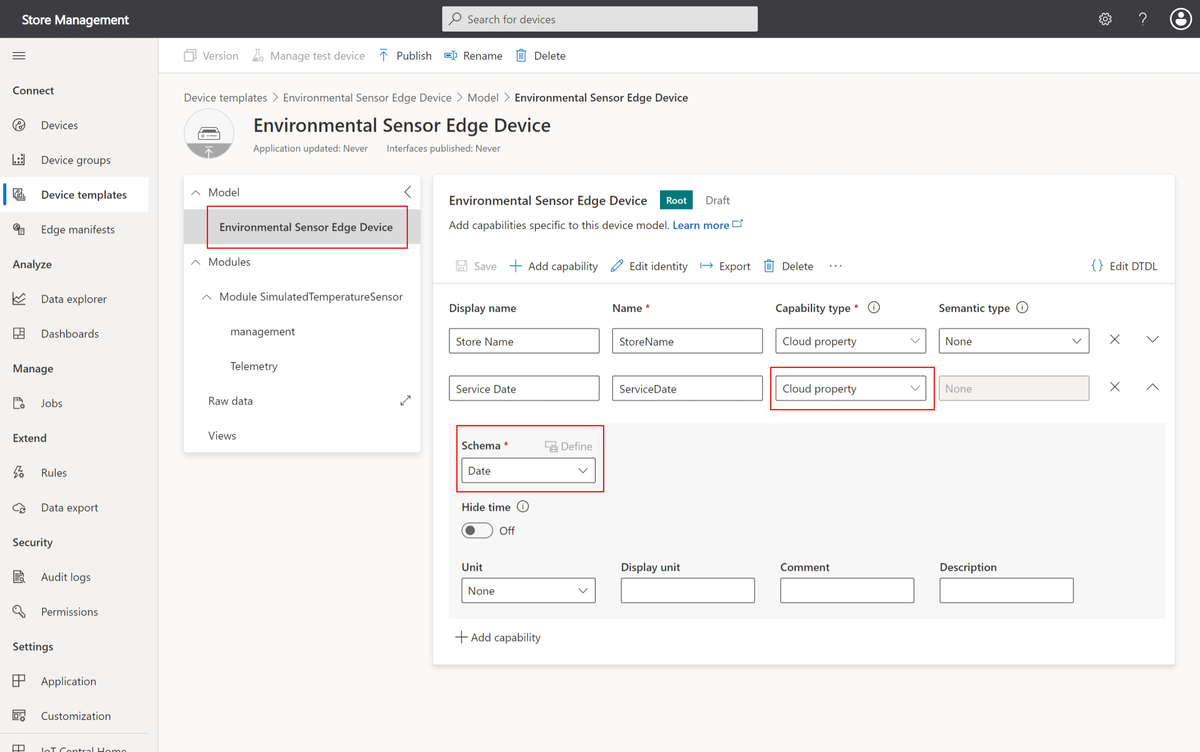
Tip
You need to expand the cloud property to see the schema setting.
Select Save to save the changes.
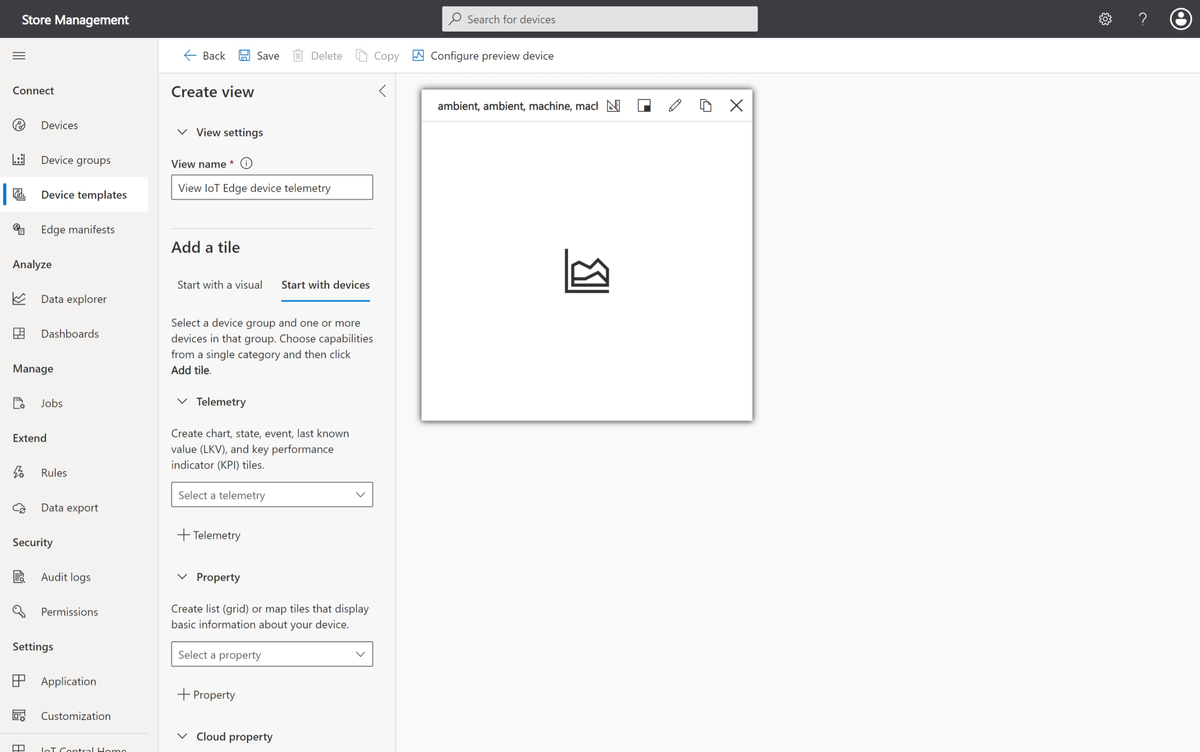
To enable an operator to view environmental data from your stores, add the following view to the device template:
To add a new view, select Views in the device template. Then choose the Visualizing the device tile.
Change the name of the view to View IoT Edge device telemetry.
Select Start with devices.
Add the ambient / temperature, humidity, machine/temperature, and pressure telemetry types, and then select Add tile.
Select Save.
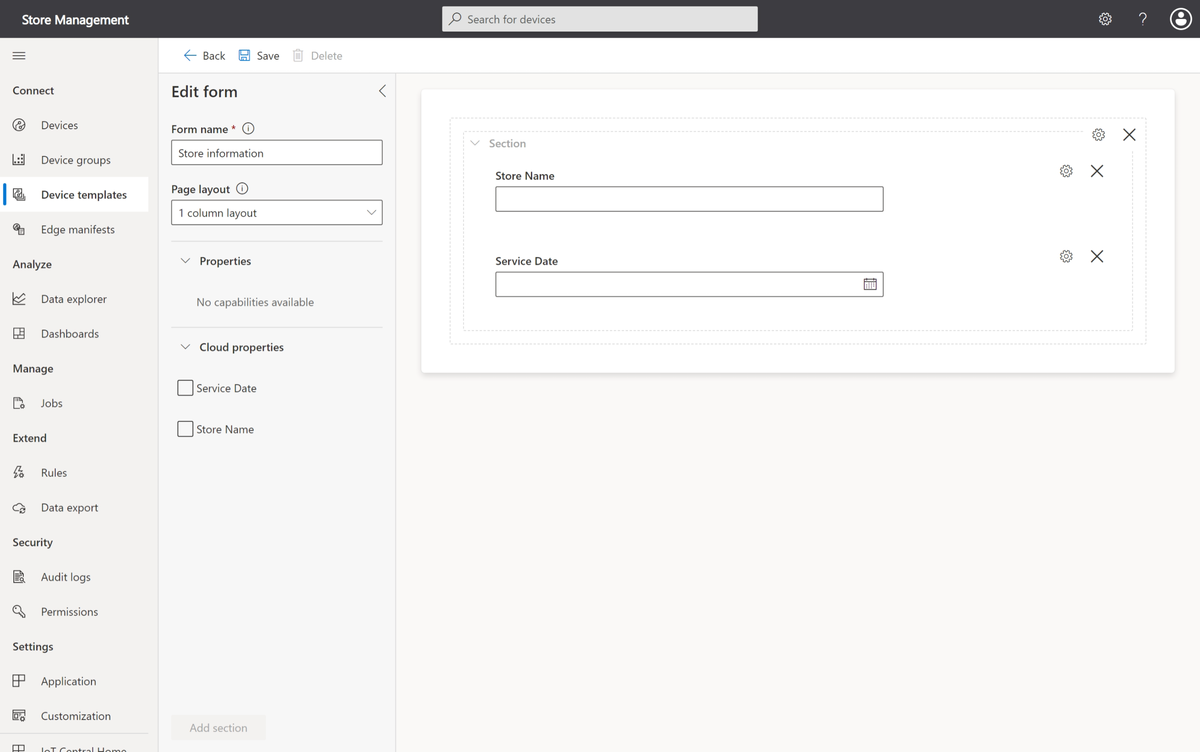
To enable the operator to record information about each store and manage the device, add the following view to the device template:
To add a new view, select Views in the device template. Then choose the Editing device and cloud data tile.
Change the form name to Store information.
Select the Store Name and Service Date cloud properties. Then select Add section.
Select Save.
You're now ready to publish the template and add a device:
Select Publish, and then in the Publish this device template to the application dialog, select Publish.
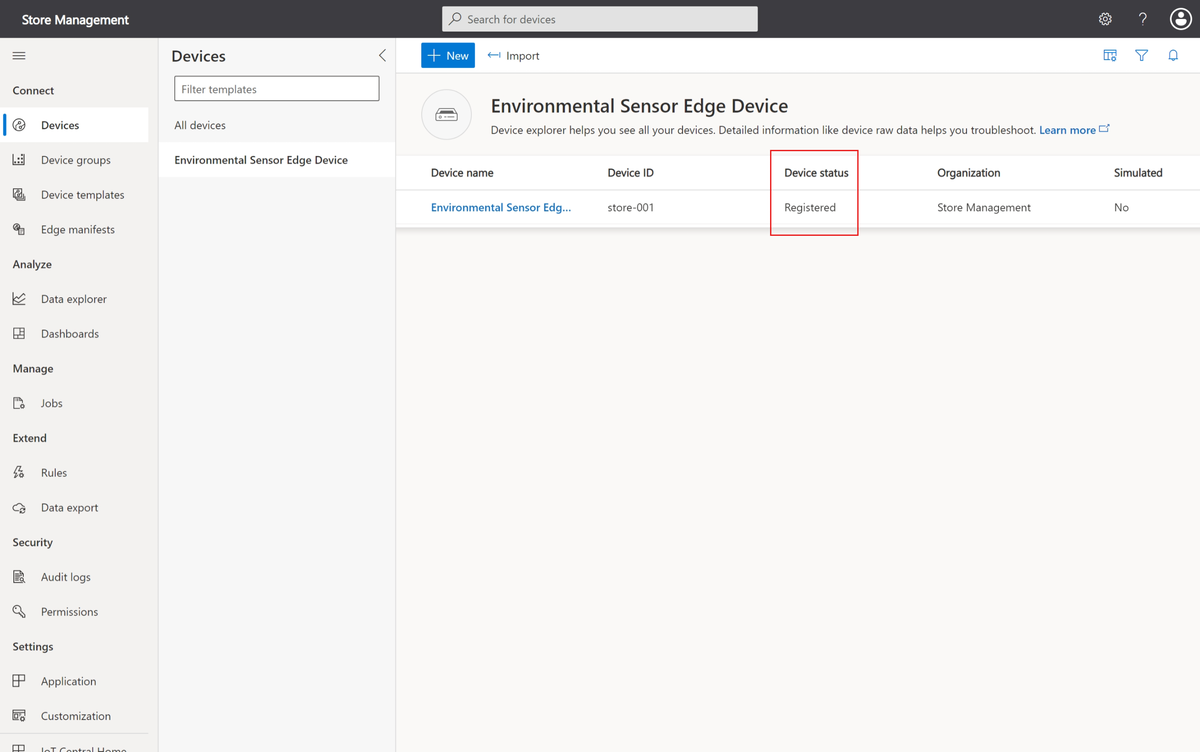
Go to the Devices page in your IoT Central application.
Select the Environmental Sensor Edge device template and then select + New.
In the Create a new device dialog, enter store-001 as the device ID. Make sure that the device template is Environmental Sensor Edge Device. The Azure IoT Edge device? is already set to Yes. Then select Environmental Sensor as the edge manifest. Select Create.
The store-001 device appears in the list of devices with the status Registered.
Check your work
In the list of devices, click on the device name Environmental Sensor Edge Device - store-001. You can see the available views for the device, including Store information and View IoT Edge device telemetry.
Select Connect. Make a note of the ID scope and Primary key. You'll use these values later to configure your IoT Edge device to connect to your application.
Keep this page open in your web browser - you'll return to this IoT Central application later.
You've now created an application to manage your stores, created a device template that includes an IoT Edge deployment manifest for the devices you plan to install in your stores. The template includes views that will enable an operator to monitor the environmental conditions in the store and manage the devices remotely.