Create partitions
Applies to:  SQL Server 2019 and later Analysis Services
Azure Analysis Services
Fabric/Power BI Premium
SQL Server 2019 and later Analysis Services
Azure Analysis Services
Fabric/Power BI Premium
In this lesson, you create partitions to divide the FactInternetSales table into smaller logical parts that can be processed (refreshed) independent of other partitions. By default, every table you include in your model has one partition, which includes all the table's columns and rows. For the FactInternetSales table, we want to divide the data by year; one partition for each of the table's five years. Each partition can then be processed independently. To learn more, see Partitions.
Estimated time to complete this lesson: 15 minutes
Prerequisites
This article is part of a tabular modeling tutorial, which should be completed in order. Before performing the tasks in this lesson, you should have completed the previous lesson: Lesson 9: Create Hierarchies.
Create partitions
To create partitions in the FactInternetSales table
In Tabular Model Explorer, expand Tables, and then right-click FactInternetSales > Partitions.
In Partition Manager, click Copy, and then change the name to FactInternetSales2001.
Because you want the partition to include only those rows within a certain period, for the year 2001, you must modify the query expression.
Click Design to open Query Editor, and then click the FactInternetSales2001 query.
In preview, click the down arrow in the OrderDateKey column heading, and then click Number Filters > Between.
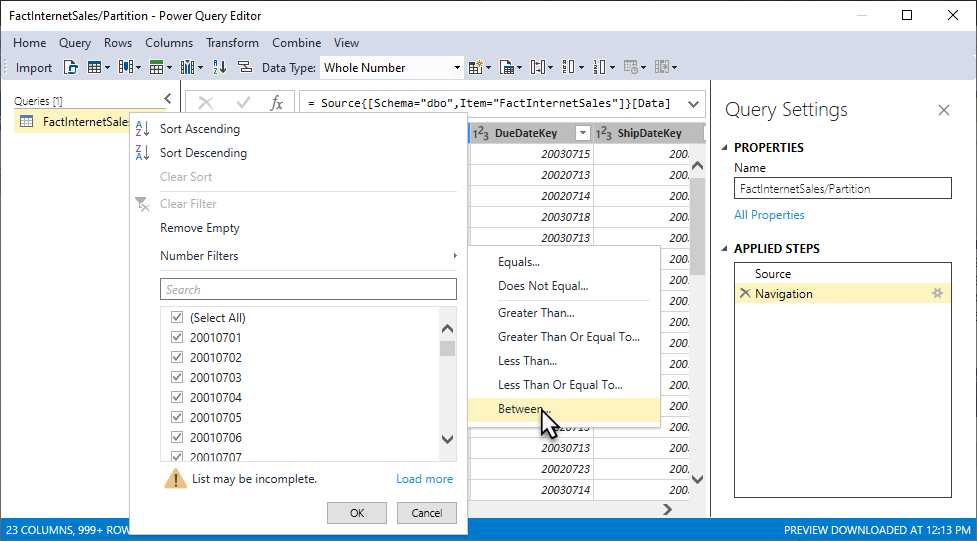
You'll see the Data Type for OrderDateKey is Whole Number (integer). This is the most common way to express dates in a date key column in a data warehouse. We want to filter on year, which is the first four numbers of the values in OrderDateKey.
In the Filter Rows dialog box, in Keep rows where: OrderDateKey, leave is greater than or equal to, and then in the number field, enter 20010101. Leave the And operator selected, then leave is less than or equal to, then in the number field, enter 20011231, and then click OK.
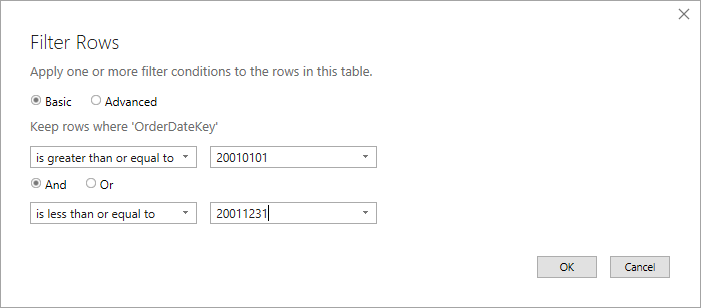
After clicking OK, you're returned to the query editor. Notice in APPLIED STEPS, you see another step named Filtered Rows. This filter is to select only order dates from 2001.
Click Import.
In Partition Manager, notice the query expression now has an additional Filtered Rows clause.

This statement specifies this partition should include only the data in those rows where the OrderDateKey is in the 2001 calendar year as specified in the filtered rows clause.
To create a partition for the 2002 year
In the partitions list, click the FactInternetSales2001 partition you created, and then click Copy. Change the partition name to FactInternetSales2002.
You do not need to use Query Editor to create a new filtered rows clause. Because you created a copy of the query for 2001, all you need to do is make a slight change in the query for 2002.
In Query Expression, in-order for this partition to include only those rows for the 2002 year, replace the year portion of the integer in the Filtered Rows clause with 20020101 and 20021231, respectively, like:
let
    Source = #"SQL/probiuesqlserver database windows net;AdventureWorksDW",
    dbo_FactInternetSales = Source{[Schema="dbo",Item="FactInternetSales"]}[Data],
    #"Filtered Rows" = Table.SelectRows(dbo_FactInternetSales, each [OrderDateKey] >= 20020101 and [OrderDateKey] <= 20021231)
in
    #"Filtered Rows"
To create partitions for 2003, 2004, and 2005.
- Follow the previous steps, creating partitions for 2003, 2004, and 2005, changing the years in the Filtered Rows clause to include only rows for that year.
Delete the FactInternetSales partition
Now that you have partitions for each year, you can delete the FactInternetSales partition; preventing overlap when choosing Process all when processing partitions.
To delete the FactInternetSales partition
- Click the default Partition partition, and then click Delete.
Process partitions
In Partition Manager, notice the Last Processed column for each of the new partitions you created shows these partitions have never been processed. When you create partitions, you should run a Process Partitions or Process Table operation to refresh the data in those partitions.
To process the FactInternetSales partitions
Click OK to close Partition Manager.
Click Extensions > Model > Process > Process Partitions.
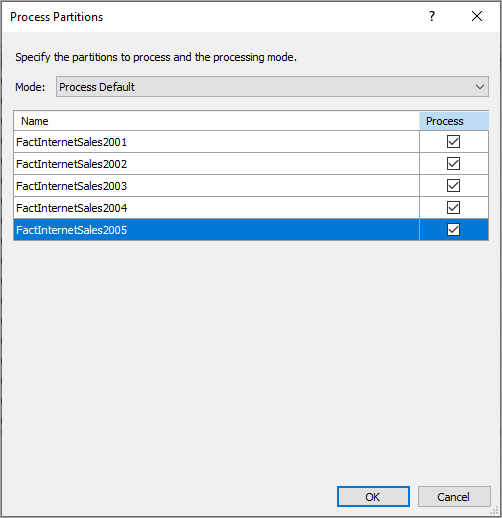
In the Process Partitions dialog box, verify Mode is set to Process Default.
Select the checkbox in the Process column for each of the five partitions you created, and then click OK.
If you're prompted for credentials, enter the credentials you specified in Lesson 2.
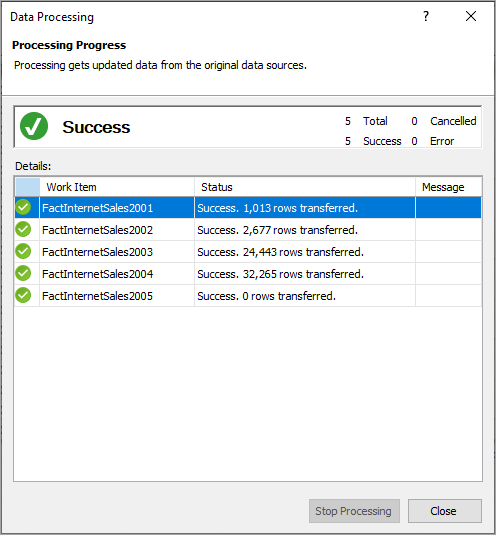
The Data Processing dialog box appears and displays process details for each partition. Notice that a different number of rows for each partition are transferred. Each partition includes only those rows for the year specified in the Filtered rows statement. When processing is finished, go ahead and close the Data Processing dialog box.
Next step
Go to the next lesson: Lesson 11: Create Roles
Feedback
Coming soon: Throughout 2024 we will be phasing out GitHub Issues as the feedback mechanism for content and replacing it with a new feedback system. For more information see: https://aka.ms/ContentUserFeedback.
Submit and view feedback for