Set up an Azure IoT Hub for Azure Sphere
To use your Azure Sphere devices with Azure IoT Hub, you need to create a hub and set it up to work with your Azure Sphere catalog, then configure x509 certificate authentication for each device.
Before you begin
The steps in this section assume that:
- Your Azure Sphere device is connected to your PC by USB.
- You have an Azure subscription.
Important
Although you can create an Azure subscription for no charge, the sign-up process requires you to enter a credit card number. Azure provides several levels of subscription service. By default, the Standard tier, which requires a monthly service charge, is selected when you create an Azure IoT Hub instance. To avoid a monthly charge, select the Free tier. The Free tier includes the services required to use your device with Azure IoT Hub, including the Device Twin. If you don’t have an Azure subscription, create a free account before you begin.
Step 1. Create an IoT hub
Go to Create an IoT hub using the Azure portal.
Important
In "Create an IoT hub using the Azure portal," only follow the directions in the first section, "Create an IoT hub," then return to this topic.
Step 2. Download the catalog authentication CA certificate
From the command prompt, sign in with your Azure login:
az loginDownload the CA certificate for your Azure Sphere catalog. This command downloads the certificate to a file named CAcertificate.cer in the current working directory. Ensure that you download the file to a directory in which you have write permission, or the download operation will fail. The output file must have a .cer extension.
az sphere ca-certificate download --resource-group MyResourceGroup --catalog MyCatalog --output-file CAcertificate.cer
Step 3. Upload and prove possession of the catalog CA certificate
Upload your catalog certification authority (CA) certificate to Azure IoT Hub, then automatically or manually prove that you own the certificate.
- In the Azure Portal, navigate to the IoT hub you created.
- Select Certificates in the Security settings section.
- Select Add to add a new certificate.
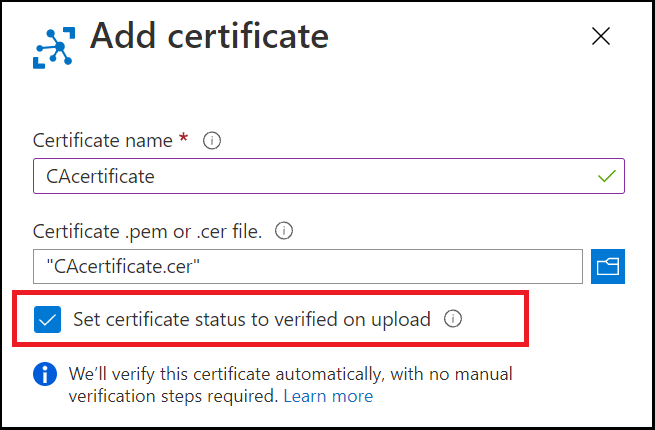
- In Certificate name, enter a display name for the certificate.
- In Certificate .pem or .cer file, select the folder icon to choose the certificate file you downloaded in the previous step.
- Prove possession of a CA certificate using one of the following methods:
Verify certificate automatically
To add a certificate and automatically verify it (prove possession of the catalog CA certificate):
- In the Add certificate box, check the box for Set certificate status to verified on upload.
- After verification, the status of your certificate changes to Verified in the Certificates list view. Select Refresh if the status does not update automatically.
Next, proceed to Step 4. Create an X.509 device in your IoT hub for your Azure Sphere device.
Verify certificate manually
To add a certificate and manually verify it (prove possession of the catalog CA certificate):
- Get a unique verification code from the Azure portal.
- Download the proof-of-possession certificate that proves you own the catalog CA certificate from the Azure CLI.
- Upload the signed verification certificate on the Azure portal. The service validates the verification certificate using the public portion of the CA certificate to be verified, thus proving that you are in possession of the CA certificate's private key.
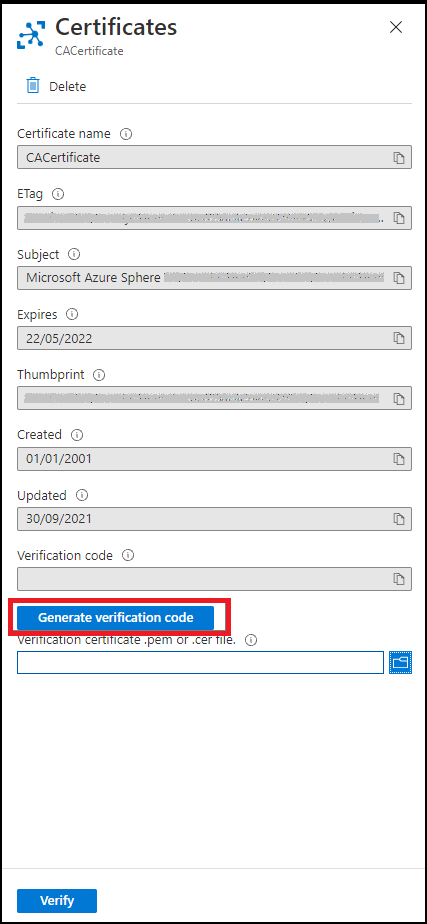
Get a unique verification code from the Azure portal
After you have selected a certificate in the Add certificate blade, leave the box Set certificate status to verified on upload unchecked. Select Save.
The Certificates list view shows your certificates. The Status of the certificate you created is Unverified.

Select the name of your certificate to display its details. In the Certificates blade, select Generate verification code. Copy the verification code to your clipboard for use in the next step. (Do not select Verify yet.)
Download a proof-of-possession certificate that proves you own the catalog CA certificate
Return to the Azure CLI and download a proof-of-possession certificate for your Azure Sphere catalog. Use the verification code to generate the certificate as an X.509 .cer file.
az sphere ca-certificate download-proof --output-file ValidationCertification.cer --verification-code <code>
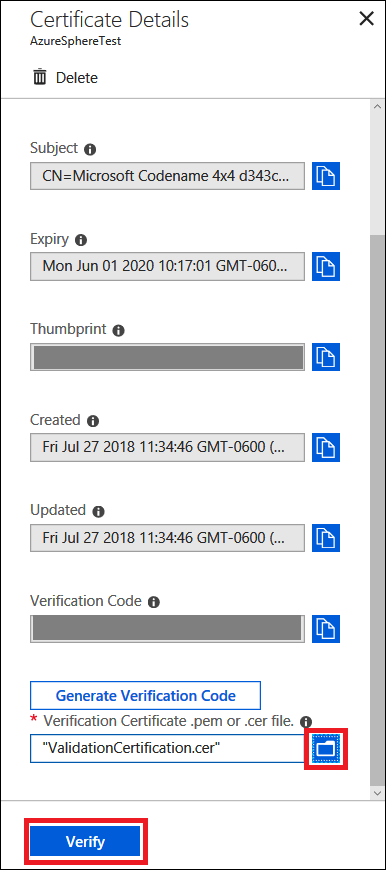
Upload the signed verification certificate
The Azure Sphere Security Service signs the validation certificate with the verification code to prove that you own the CA.
From Certificates on the Azure Portal, in the Verification certificate .pem or .cer file field, browse to select and upload the signed verification certificate. The certificate is located in the directory in which you invoked the download command.
When the certificate is successfully uploaded, select Verify.
After verification, the status of your certificate changes to Verified in the Certificates list view. Select Refresh if the status does not update automatically.
Note
Perform Steps 1-3 only once per Azure Sphere catalog.
Step 4. Create an X.509 device in your IoT hub for your Azure Sphere device
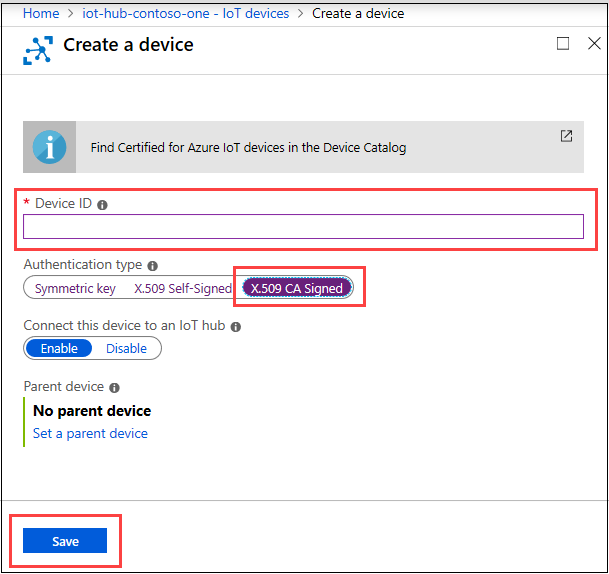
In the Azure portal, navigate to your IoT hub. In the Device management section, select Devices > Add Device.
Select New to add a new device.
In Device ID, provide the Device ID. Note that the Device ID must be in lowercase characters. (You can run
az sphere device show-attachedin the Azure CLI to obtain the Device ID.)For Authentication type, choose X.509 CA Signed, then select Save.
Next steps
You can now run the Azure IoT sample or build your own application that uses your Azure IoT Hub.
Additional information
To use Device Provisioning Service instead of direct authentication, see Set up an IoT hub for Azure Sphere with DPS.
To add an Azure IoT Edge device that provides a filtering and data processing layer between your Azure Sphere device and Azure IoT Hub, see Set up Azure IoT Edge for Azure Sphere.
Feedback
Coming soon: Throughout 2024 we will be phasing out GitHub Issues as the feedback mechanism for content and replacing it with a new feedback system. For more information see: https://aka.ms/ContentUserFeedback.
Submit and view feedback for