Add and remove a custom VM image to Azure Stack Hub
In Azure Stack Hub, as an operator you can add your custom virtual machine (VM) image to the marketplace and make it available to your users. You can add VM images to the Azure Stack Hub Marketplace through the administrator portal or Windows PowerShell. Use either an image from global Microsoft Azure Marketplace as a base for your custom image, or create your own using Hyper-V.
Note
Blob access is required to allow the read access.
Add an image
You can find instructions for adding generalized and specialized images in the Compute section of the user guide. You will want to create a generalized image before offering the image to your users. For instructions, see Move a VM to Azure Stack Hub Overview. When creating images available for your tenants, use the Azure Stack Hub administrative portal or administrator endpoints rather than the user portal or tenant directory endpoints.
You have two options for making an image available to your users:
Offer an image only accessible via Azure Resource Manager
If you add the image via the Azure Stack Hub administrative portal in Compute > Images, all of your tenants can access the image. However your users will need to use an Azure Resource Manager template to access it. It won't be visible in your Azure Stack Hub Marketplace.Offer an image through the Azure Stack Hub Marketplace
Once you have added your image through the Azure Stack Hub administrative portal, you can then create a marketplace offering. For instructions, see Create and publish a custom Azure Stack Hub Marketplace item.
Add a platform image
To add a platform image to Azure Stack Hub, use the Azure Stack Hub administrator portal or endpoint using PowerShell. You must first create a generalized VHD. For more information, see Move a VM to Azure Stack Hub Overview.
Add a VM image as an Azure Stack Hub operator using the portal.
Sign in to Azure Stack Hub as an operator. Select Dashboard from the left-hand navigation.
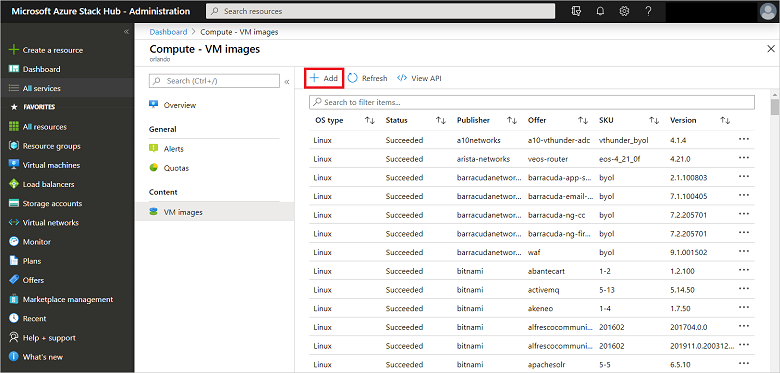
In the Resource providers list, select Compute.

Select VM images, then select Add.
Under Create image, enter the Publisher, Offer, SKU, Version, and OS disk blob URI. Then, select Create to begin creating the VM image.
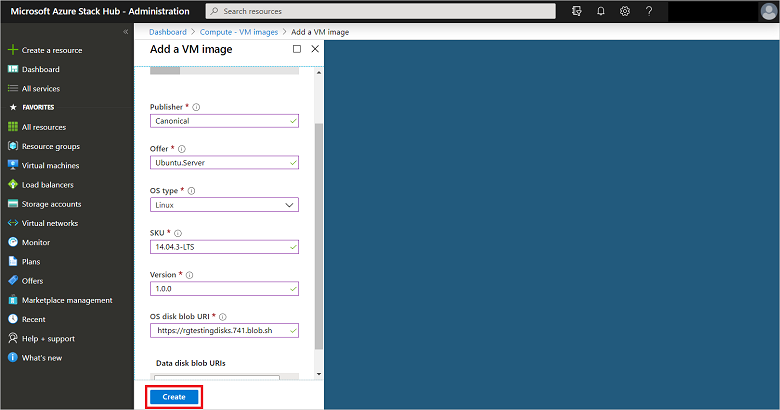
When the image is successfully created, the VM image status changes to Succeeded.
When you add an image, it is only available for Azure Resource Manager-based templates and PowerShell deployments. To make an image available to your users as a marketplace item, publish the marketplace item using the steps in the article Create and publish a Marketplace item. Make sure you note the Publisher, Offer, SKU, and Version values. You will need them when you edit the Resource Manager template and Manifest.json in your custom .azpkg.


Remove a platform image
You can remove a platform image using the portal or PowerShell.
To remove the VM image as an Azure Stack Hub operator using the Azure Stack Hub portal, follow these steps:
Open the Azure Stack Hub administrator portal.
If the VM image has an associated Marketplace item, select Marketplace management, and then select the VM marketplace item you want to delete.
If the VM image does not have an associated Marketplace item, navigate to All services > Compute > VM Images, and then select the ellipsis (...) next to the VM image.
Select Delete.
Next steps
Feedback
Coming soon: Throughout 2024 we will be phasing out GitHub Issues as the feedback mechanism for content and replacing it with a new feedback system. For more information see: https://aka.ms/ContentUserFeedback.
Submit and view feedback for