Attribute mapping in Microsoft Entra Cloud Sync
You can use the cloud sync attribute mapping feature to map attributes between your on-premises user or group objects and the objects in Microsoft Entra ID.

You can customize (change, delete, or create) the default attribute mappings according to your business needs. For a list of attributes that are synchronized, see Attributes synchronized to Microsoft Entra ID.
Note
This article describes how to use the Microsoft Entra admin center to map attributes. For information on using Microsoft Graph, see Transformations.
Understand types of attribute mapping
With attribute mapping, you control how attributes are populated in Microsoft Entra ID. Microsoft Entra ID supports four mapping types:
| Mapping Type | Description |
|---|---|
| Direct | The target attribute is populated with the value of an attribute of the linked object in Active Directory. |
| Constant | The target attribute is populated with a specific string that you specify. |
| Expression | The target attribute is populated based on the result of a script-like expression. For more information, see Expression Builder and Writing expressions for attribute mappings in Microsoft Entra ID. |
| None | The target attribute is left unmodified. However, if the target attribute is ever empty, it's populated with the default value that you specify. |
Along with these basic types, custom attribute mappings support the concept of an optional default value assignment. The default value assignment ensures that a target attribute is populated with a value if Microsoft Entra ID or the target object doesn't have a value. The most common configuration is to leave this blank.
Schema updates and mappings
Cloud sync will occasionally update the schema and the list of default attributes that are synchronized. These default attribute mappings will be available for new installations but won't automatically be added to existing installations. To add these mappings you can follow the steps below.
- Click on “add attribute mapping”
- Select the Target attribute dropdown
- You should see the new attributes that are available here.
The following is a list of new mappings that were added.
| Attribute Added | Mapping Type | Added with Agent Version |
|---|---|---|
| preferredDatalocation | Direct | 1.1.359.0 |
| EmployeeNumber | Direct | 1.1.359.0 |
| UserType | Direct | 1.1.359.0 |
For more information on how to map UserType, see Map UserType with cloud sync.
Understand properties of attribute mappings
Along with the type property, attribute mappings support certain attributes. These attributes will depend on the type of mapping you have selected. The following sections describe the supported attribute mappings for each of the individual types. The following type of attribute mapping is available.
- Direct
- Constant
- Expression
Direct mapping attributes
The following are the attributes supported by a direct mapping:
- Source attribute: The user attribute from the source system (example: Active Directory).
- Target attribute: The user attribute in the target system (example: Microsoft Entra ID).
- Default value if null (optional): The value that will be passed to the target system if the source attribute is null. This value will be provisioned only when a user is created. It won't be provisioned when you're updating an existing user.
- Apply this mapping:
- Always: Apply this mapping on both user-creation and update actions.
- Only during creation: Apply this mapping only on user-creation actions.

Constant mapping attributes
The following are the attributes supported by a constant mapping:
- Constant value: The value that you want to apply to the target attribute.
- Target attribute: The user attribute in the target system (example: Microsoft Entra ID).
- Apply this mapping:
- Always: Apply this mapping on both user-creation and update actions.
- Only during creation: Apply this mapping only on user-creation actions.
Expression mapping attributes
The following are the attributes supported by an expression mapping:
Expression: This is the expression that is going to be applied to the target attribute. For more information, see Expression Builder and Writing expressions for attribute mappings in Microsoft Entra ID.
Default value if null (optional): The value that will be passed to the target system if the source attribute is null. This value will be provisioned only when a user is created. It won't be provisioned when you're updating an existing user.
Target attribute: The user attribute in the target system (example: Microsoft Entra ID).
Apply this mapping:
- Always: Apply this mapping on both user-creation and update actions.
- Only during creation: Apply this mapping only on user-creation actions.
Add an attribute mapping - AD to Microsoft Entra ID
Use the following steps for configuring attribute mapping with a AD to Microsoft Entra configuration.
- Sign in to the Microsoft Entra admin center as at least a Hybrid Administrator.
- Browse to Identity > Hybrid management > Microsoft Entra Connect > Cloud sync.


- Under Configuration, select your configuration.
- On the left, select Attribute mapping.
- At the top, ensure that you have the correct object type selected. That is, user, group, or contact.
- Click Add attribute mapping.

Select the mapping type. This can be one of the following:
- Direct: The target attribute is populated with the value of an attribute of the linked object in Active Directory.
- Constant: The target attribute is populated with a specific string that you specify.
- Expression: The target attribute is populated based on the result of a script-like expression.
- None: The target attribute is left unmodified.
Depending on what you have selected in the previous step, different options will be available for filling in.
Select when to apply this mapping, and then select Apply.

Back on the Attribute mappings screen, you should see your new attribute mapping.
Select Save schema. You'll be notified that once you save the schema, a synchronization will occur. Click OK.
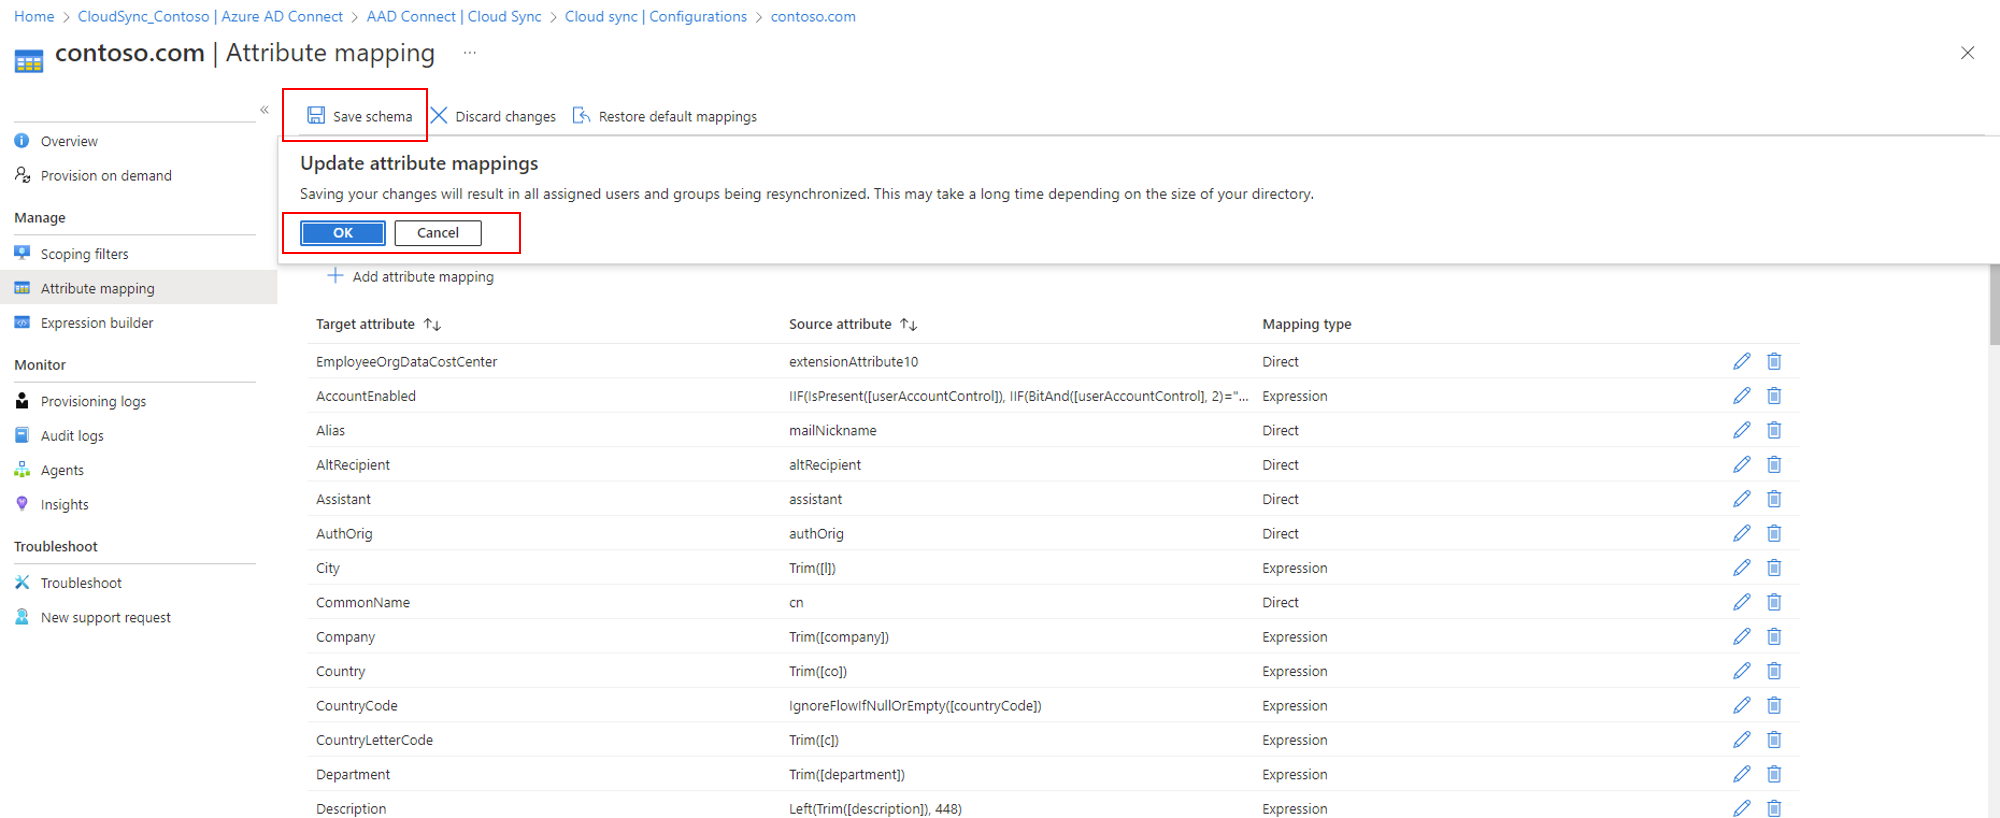
Once the save is successful you'll see a notification on the right.


Add an attribute mapping - Microsoft Entra ID to Active Directory (Preview)
Use the following steps for configuring attribute mapping with a Microsoft Entra ID to Active Directory configuration.
- Sign in to the Microsoft Entra admin center as at least a Hybrid Administrator.
- Browse to Identity > Hybrid management > Microsoft Entra Connect > Cloud sync.
- Under Configuration, select your Microsoft Entra ID to Active Directory configuration.
- On the left, select Attribute mapping.
- At the top, ensure that you have the correct object type selected. That is, user, group, or contact.
- Click Add attribute mapping.

Select the mapping type. This can be one of the following:
- Direct: The target attribute is populated with the value of an attribute of the linked object in Active Directory.
- Constant: The target attribute is populated with a specific string that you specify.
- Expression: The target attribute is populated based on the result of a script-like expression.
- None: The target attribute is left unmodified.
Depending on what you have selected in the previous step, different options will be available for filling in.
Select when to apply this mapping, and then select Apply.
Back on the Attribute mappings screen, you should see your new attribute mapping.
Select Save schema. You'll be notified that once you save the schema, a synchronization will occur. Click OK.
Once the save is successful you'll see a notification on the right.
Test your attribute mapping
To test your attribute mapping, you can use on-demand provisioning:
- Sign in to the Microsoft Entra admin center as at least a Hybrid Administrator.
- Browse to Identity > Hybrid management > Microsoft Entra Connect > Cloud sync.
- Under Configuration, select your configuration.
- On the left, select Provision on demand.
- Enter the distinguished name of a user and select the Provision button.

- A success screen appears with four green check marks. Any errors appear to the left.

Next steps
Feedback
Coming soon: Throughout 2024 we will be phasing out GitHub Issues as the feedback mechanism for content and replacing it with a new feedback system. For more information see: https://aka.ms/ContentUserFeedback.
Submit and view feedback for