Assign eligibility for a group in Privileged Identity Management
In Microsoft Entra ID, formerly known as Azure Active Directory, you can use Privileged Identity Management (PIM) to manage just-in-time membership in the group or just-in-time ownership of the group.
When a membership or ownership is assigned, the assignment:
- Can't be assigned for a duration of less than five minutes
- Can't be removed within five minutes of it being assigned
Note
Every user who is eligible for membership in or ownership of a PIM for Groups must have a Microsoft Entra ID P2 or Microsoft Entra ID Governance license. For more information, see License requirements to use Privileged Identity Management.
Assign an owner or member of a group
Tip
Steps in this article might vary slightly based on the portal you start from.
Follow these steps to make a user eligible member or owner of a group. You'll need permissions to manage groups. For role-assignable groups, you need to have Global Administrator, Privileged Role Administrator role, or be an Owner of the group. For non-role-assignable groups, you need to have Global Administrator, Directory Writer, Groups Administrator, Identity Governance Administrator, User Administrator role, or be an Owner of the group. Role assignments for administrators should be scoped at directory level (not administrative unit level).
Note
Other roles with permissions to manage groups (such as Exchange Administrators for non-role-assignable M365 groups) and administrators with assignments scoped at administrative unit level can manage groups through Groups API/UX and override changes made in Microsoft Entra PIM.
Sign in to the Microsoft Entra admin center
Browse to Identity governance > Privileged Identity Management > Groups.
Here you can view groups that are already enabled for PIM for Groups.

Select the group you need to manage.
Select Assignments.
Use Eligible assignments and Active assignments blades to review existing membership or ownership assignments for selected group.

Select Add assignments.
Under Select role, choose between Member and Owner to assign membership or ownership.
Select the members or owners you want to make eligible for the group.

Select Next.
In the Assignment type list, select Eligible or Active. Privileged Identity Management provides two distinct assignment types:
- Eligible assignment requires member or owner to perform an activation to use the role. Activations may also require providing a multi-factor authentication (MFA), providing a business justification, or requesting approval from designated approvers.
Important
For groups used for elevating into Microsoft Entra roles, Microsoft recommends that you require an approval process for eligible member assignments. Assignments that can be activated without approval can leave you vulnerable to a security risk from another administrator with permission to reset an eligible user's passwords.
- Active assignments don't require the member to perform any activations to use the role. Members or owners assigned as active have the privileges assigned to the role at all times.
If the assignment should be permanent (permanently eligible or permanently assigned), select the Permanently checkbox. Depending on the group's settings, the check box might not appear or might not be editable. For more information, check out the Configure PIM for Groups settings in Privileged Identity Management article.
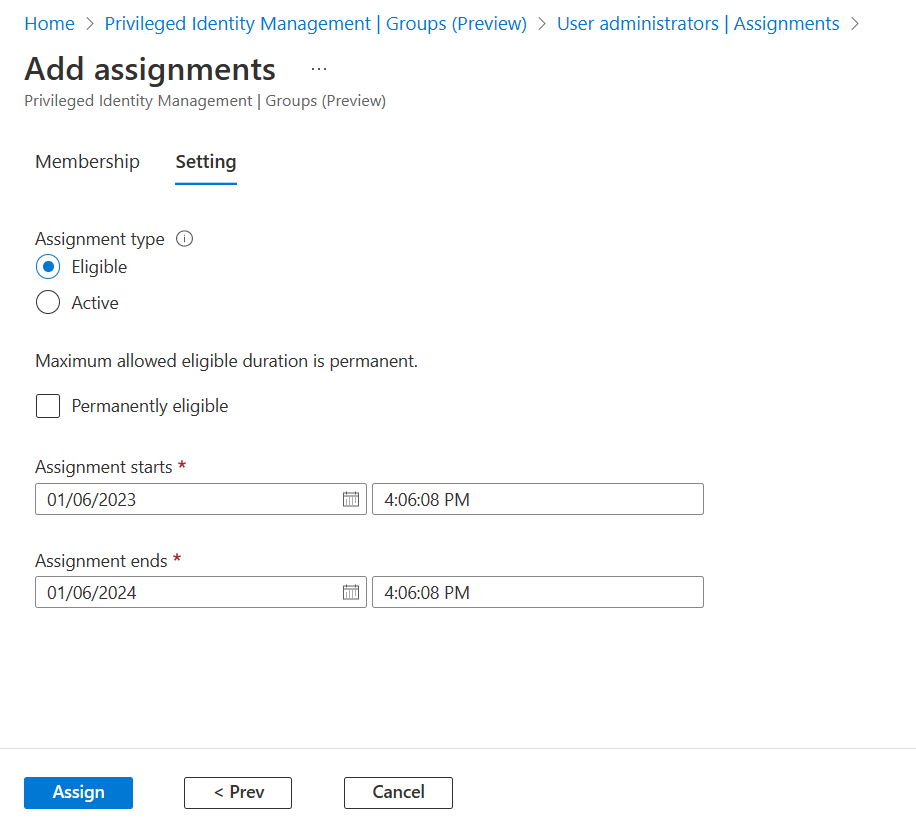
Select Assign.


Update or remove an existing role assignment
Tip
Steps in this article might vary slightly based on the portal you start from.
Follow these steps to update or remove an existing role assignment. You'll need permissions to manage groups. For role-assignable groups, you need to have Global Administrator, Privileged Role Administrator role, or be an Owner of the group. For non-role-assignable groups, you need to have Global Administrator, Directory Writer, Groups Administrator, Identity Governance Administrator, User Administrator role, or be an Owner of the group. Role assignments for administrators should be scoped at directory level (not administrative unit level).
Note
Other roles with permissions to manage groups (such as Exchange Administrators for non-role-assignable M365 groups) and administrators with assignments scoped at administrative unit level can manage groups through Groups API/UX and override changes made in Microsoft Entra PIM.
Sign in to the Microsoft Entra admin center as at least a Privileged Role Administrator.
Browse to Identity governance > Privileged Identity Management > Groups.
Here you can view groups that are already enabled for PIM for Groups.
Select the group you need to manage.
Select Assignments.
Use Eligible assignments and Active assignments blades to review existing membership or ownership assignments for selected group.
Select Update or Remove to update or remove the membership or ownership assignment.
Next steps
Feedback
Coming soon: Throughout 2024 we will be phasing out GitHub Issues as the feedback mechanism for content and replacing it with a new feedback system. For more information see: https://aka.ms/ContentUserFeedback.
Submit and view feedback for