Create an unmanaged ingress controller
An ingress controller is a piece of software that provides reverse proxy, configurable traffic routing, and TLS termination for Kubernetes services. Kubernetes ingress resources are used to configure the ingress rules and routes for individual Kubernetes services. When you use an ingress controller and ingress rules, a single IP address can be used to route traffic to multiple services in a Kubernetes cluster.
This article shows you how to deploy the NGINX ingress controller in an Azure Kubernetes Service (AKS) cluster. Two applications are then run in the AKS cluster, each of which is accessible over the single IP address.
Important
The Application routing add-on is recommended for ingress in AKS. For more information, see Managed nginx Ingress with the application routing add-on.
Note
There are two open source ingress controllers for Kubernetes based on Nginx: one is maintained by the Kubernetes community (kubernetes/ingress-nginx), and one is maintained by NGINX, Inc. (nginxinc/kubernetes-ingress). This article will be using the Kubernetes community ingress controller.
Before you begin
- This article uses Helm 3 to install the NGINX ingress controller on a supported version of Kubernetes. Make sure that you're using the latest release of Helm and have access to the ingress-nginx Helm repository. The steps outlined in this article may not be compatible with previous versions of the Helm chart, NGINX ingress controller, or Kubernetes.
- This article assumes you have an existing AKS cluster with an integrated Azure Container Registry (ACR). For more information on creating an AKS cluster with an integrated ACR, see Authenticate with Azure Container Registry from Azure Kubernetes Service.
- The Kubernetes API health endpoint,
healthzwas deprecated in Kubernetes v1.16. You can replace this endpoint with thelivezandreadyzendpoints instead. See Kubernetes API endpoints for health to determine which endpoint to use for your scenario. - If you're using Azure CLI, this article requires that you're running the Azure CLI version 2.0.64 or later. Run
az --versionto find the version. If you need to install or upgrade, see Install Azure CLI. - If you're using Azure PowerShell, this article requires that you're running Azure PowerShell version 5.9.0 or later. Run
Get-InstalledModule -Name Azto find the version. If you need to install or upgrade, see Install Azure PowerShell.
Basic configuration
To create a basic NGINX ingress controller without customizing the defaults, you'll use Helm. The following configuration uses the default configuration for simplicity. You can add parameters for customizing the deployment, like --set controller.replicaCount=3.
Note
If you would like to enable client source IP preservation for requests to containers in your cluster, add --set controller.service.externalTrafficPolicy=Local to the Helm install command. The client source IP is stored in the request header under X-Forwarded-For. When you're using an ingress controller with client source IP preservation enabled, TLS pass-through won't work.
NAMESPACE=ingress-basic

helm repo add ingress-nginx https://kubernetes.github.io/ingress-nginx
helm repo update

helm install ingress-nginx ingress-nginx/ingress-nginx \
  --create-namespace \
  --namespace $NAMESPACE \
  --set controller.service.annotations."service\.beta\.kubernetes\.io/azure-load-balancer-health-probe-request-path"=/healthz \
  --set controller.service.externalTrafficPolicy=Local
Note
In this tutorial, service.beta.kubernetes.io/azure-load-balancer-health-probe-request-path is being set to /healthz. This means if the response code of the requests to /healthz is not 200, the entire ingress controller will be down. You can modify the value to other URI in your own scenario. You cannot delete this part or unset the value, or the ingress controller will still be down.
The package ingress-nginx used in this tutorial, which is provided by Kubernetes official, will always return 200 response code if requesting /healthz, as it is designed as default backend for users to have a quick start, unless it is being overwritten by ingress rules.
Customized configuration
As an alternative to the basic configuration presented in the above section, the next set of steps will show how to deploy a customized ingress controller. You'll have the option of using an internal static IP address, or using a dynamic public IP address.
Import the images used by the Helm chart into your ACR
To control image versions, you'll want to import them into your own Azure Container Registry. The NGINX ingress controller Helm chart relies on three container images. Use az acr import to import those images into your ACR.
REGISTRY_NAME=<REGISTRY_NAME>
SOURCE_REGISTRY=registry.k8s.io
CONTROLLER_IMAGE=ingress-nginx/controller
CONTROLLER_TAG=v1.8.1
PATCH_IMAGE=ingress-nginx/kube-webhook-certgen
PATCH_TAG=v20230407
DEFAULTBACKEND_IMAGE=defaultbackend-amd64
DEFAULTBACKEND_TAG=1.5

az acr import --name $REGISTRY_NAME --source $SOURCE_REGISTRY/$CONTROLLER_IMAGE:$CONTROLLER_TAG --image $CONTROLLER_IMAGE:$CONTROLLER_TAG
az acr import --name $REGISTRY_NAME --source $SOURCE_REGISTRY/$PATCH_IMAGE:$PATCH_TAG --image $PATCH_IMAGE:$PATCH_TAG
az acr import --name $REGISTRY_NAME --source $SOURCE_REGISTRY/$DEFAULTBACKEND_IMAGE:$DEFAULTBACKEND_TAG --image $DEFAULTBACKEND_IMAGE:$DEFAULTBACKEND_TAG
Note
In addition to importing container images into your ACR, you can also import Helm charts into your ACR. For more information, see Push and pull Helm charts to an Azure Container Registry.
Create an ingress controller
To create the ingress controller, use Helm to install ingress-nginx. The ingress controller needs to be scheduled on a Linux node. Windows Server nodes shouldn't run the ingress controller. A node selector is specified using the --set nodeSelector parameter to tell the Kubernetes scheduler to run the NGINX ingress controller on a Linux-based node.
For added redundancy, two replicas of the NGINX ingress controllers are deployed with the --set controller.replicaCount parameter. To fully benefit from running replicas of the ingress controller, make sure there's more than one node in your AKS cluster.
The following example creates a Kubernetes namespace for the ingress resources named ingress-basic and is intended to work within that namespace. Specify a namespace for your own environment as needed. If your AKS cluster isn't Kubernetes role-based access control enabled, add --set rbac.create=false to the Helm commands.
Note
If you would like to enable client source IP preservation for requests to containers in your cluster, add --set controller.service.externalTrafficPolicy=Local to the Helm install command. The client source IP is stored in the request header under X-Forwarded-For. When you're using an ingress controller with client source IP preservation enabled, TLS pass-through won't work.
# Add the ingress-nginx repository
helm repo add ingress-nginx https://kubernetes.github.io/ingress-nginx
helm repo update

# Set variable for ACR location to use for pulling images
ACR_LOGIN_SERVER=<REGISTRY_LOGIN_SERVER>

# Use Helm to deploy an NGINX ingress controller
helm install ingress-nginx ingress-nginx/ingress-nginx \
    --version 4.7.1 \
    --namespace ingress-basic \
    --create-namespace \
    --set controller.replicaCount=2 \
    --set controller.nodeSelector."kubernetes\.io/os"=linux \
    --set controller.image.registry=$ACR_LOGIN_SERVER \
    --set controller.image.image=$CONTROLLER_IMAGE \
    --set controller.image.tag=$CONTROLLER_TAG \
    --set controller.image.digest="" \
    --set controller.admissionWebhooks.patch.nodeSelector."kubernetes\.io/os"=linux \
    --set controller.service.annotations."service\.beta\.kubernetes\.io/azure-load-balancer-health-probe-request-path"=/healthz \
    --set controller.service.externalTrafficPolicy=Local \
    --set controller.admissionWebhooks.patch.image.registry=$ACR_LOGIN_SERVER \
    --set controller.admissionWebhooks.patch.image.image=$PATCH_IMAGE \
    --set controller.admissionWebhooks.patch.image.tag=$PATCH_TAG \
    --set controller.admissionWebhooks.patch.image.digest="" \
    --set defaultBackend.nodeSelector."kubernetes\.io/os"=linux \
    --set defaultBackend.image.registry=$ACR_LOGIN_SERVER \
    --set defaultBackend.image.image=$DEFAULTBACKEND_IMAGE \
    --set defaultBackend.image.tag=$DEFAULTBACKEND_TAG \
    --set defaultBackend.image.digest=""
Create an ingress controller using an internal IP address
By default, an NGINX ingress controller is created with a dynamic public IP address assignment. A common configuration requirement is to use an internal, private network and IP address. This approach allows you to restrict access to your services to internal users, with no external access.
Use the --set controller.service.loadBalancerIP and --set controller.service.annotations."service\.beta\.kubernetes\.io/azure-load-balancer-internal"=true parameters to assign an internal IP address to your ingress controller. Provide your own internal IP address for use with the ingress controller. Make sure that this IP address isn't already in use within your virtual network. If you're using an existing virtual network and subnet, you must configure your AKS cluster with the correct permissions to manage the virtual network and subnet. For more information, see Use kubenet networking with your own IP address ranges in Azure Kubernetes Service (AKS) or Configure Azure CNI networking in Azure Kubernetes Service (AKS).
# Add the ingress-nginx repository
helm repo add ingress-nginx https://kubernetes.github.io/ingress-nginx
helm repo update

# Set variable for ACR location to use for pulling images
ACR_LOGIN_SERVER=<REGISTRY_LOGIN_SERVER>

# Use Helm to deploy an NGINX ingress controller
helm install ingress-nginx ingress-nginx/ingress-nginx \
    --version 4.7.1 \
    --namespace ingress-basic \
    --create-namespace \
    --set controller.replicaCount=2 \
    --set controller.nodeSelector."kubernetes\.io/os"=linux \
    --set controller.image.registry=$ACR_LOGIN_SERVER \
    --set controller.image.image=$CONTROLLER_IMAGE \
    --set controller.image.tag=$CONTROLLER_TAG \
    --set controller.image.digest="" \
    --set controller.admissionWebhooks.patch.nodeSelector."kubernetes\.io/os"=linux \
    --set controller.service.loadBalancerIP=10.224.0.42 \
    --set controller.service.annotations."service\.beta\.kubernetes\.io/azure-load-balancer-internal"=true \
    --set controller.service.annotations."service\.beta\.kubernetes\.io/azure-load-balancer-health-probe-request-path"=/healthz \
    --set controller.admissionWebhooks.patch.image.registry=$ACR_LOGIN_SERVER \
    --set controller.admissionWebhooks.patch.image.image=$PATCH_IMAGE \
    --set controller.admissionWebhooks.patch.image.tag=$PATCH_TAG \
    --set controller.admissionWebhooks.patch.image.digest="" \
    --set defaultBackend.nodeSelector."kubernetes\.io/os"=linux \
    --set defaultBackend.image.registry=$ACR_LOGIN_SERVER \
    --set defaultBackend.image.image=$DEFAULTBACKEND_IMAGE \
    --set defaultBackend.image.tag=$DEFAULTBACKEND_TAG \
    --set defaultBackend.image.digest=""
Check the load balancer service
Check the load balancer service by using kubectl get services.
kubectl get services --namespace ingress-basic -o wide -w ingress-nginx-controller
When the Kubernetes load balancer service is created for the NGINX ingress controller, an IP address is assigned under EXTERNAL-IP, as shown in the following example output:
NAME                       TYPE           CLUSTER-IP    EXTERNAL-IP     PORT(S)                      AGE   SELECTOR
ingress-nginx-controller   LoadBalancer   10.0.65.205   EXTERNAL-IP     80:30957/TCP,443:32414/TCP   1m   app.kubernetes.io/component=controller,app.kubernetes.io/instance=ingress-nginx,app.kubernetes.io/name=ingress-nginx
If you browse to the external IP address at this stage, you see a 404 page displayed. This is because you still need to set up the connection to the external IP, which is done in the next sections.
Run demo applications
To see the ingress controller in action, run two demo applications in your AKS cluster. In this example, you use kubectl apply to deploy two instances of a simple Hello world application.
Create an
aks-helloworld-one.yamlfile and copy in the following example YAML:apiVersion: apps/v1 kind: Deployment metadata: name: aks-helloworld-one spec: replicas: 1 selector: matchLabels: app: aks-helloworld-one template: metadata: labels: app: aks-helloworld-one spec: containers: - name: aks-helloworld-one image: mcr.microsoft.com/azuredocs/aks-helloworld:v1 ports: - containerPort: 80 env: - name: TITLE value: "Welcome to Azure Kubernetes Service (AKS)" --- apiVersion: v1 kind: Service metadata: name: aks-helloworld-one spec: type: ClusterIP ports: - port: 80 selector: app: aks-helloworld-oneCreate an
aks-helloworld-two.yamlfile and copy in the following example YAML:apiVersion: apps/v1 kind: Deployment metadata: name: aks-helloworld-two spec: replicas: 1 selector: matchLabels: app: aks-helloworld-two template: metadata: labels: app: aks-helloworld-two spec: containers: - name: aks-helloworld-two image: mcr.microsoft.com/azuredocs/aks-helloworld:v1 ports: - containerPort: 80 env: - name: TITLE value: "AKS Ingress Demo" --- apiVersion: v1 kind: Service metadata: name: aks-helloworld-two spec: type: ClusterIP ports: - port: 80 selector: app: aks-helloworld-twoRun the two demo applications using
kubectl apply:kubectl apply -f aks-helloworld-one.yaml --namespace ingress-basic kubectl apply -f aks-helloworld-two.yaml --namespace ingress-basic
Create an ingress route
Both applications are now running on your Kubernetes cluster. To route traffic to each application, create a Kubernetes ingress resource. The ingress resource configures the rules that route traffic to one of the two applications.
In the following example, traffic to EXTERNAL_IP/hello-world-one is routed to the service named aks-helloworld-one. Traffic to EXTERNAL_IP/hello-world-two is routed to the aks-helloworld-two service. Traffic to EXTERNAL_IP/static is routed to the service named aks-helloworld-one for static assets.
Create a file named
hello-world-ingress.yamland copy in the following example YAML:apiVersion: networking.k8s.io/v1 kind: Ingress metadata: name: hello-world-ingress annotations: nginx.ingress.kubernetes.io/ssl-redirect: "false" nginx.ingress.kubernetes.io/use-regex: "true" nginx.ingress.kubernetes.io/rewrite-target: /$2 spec: ingressClassName: nginx rules: - http: paths: - path: /hello-world-one(/|$)(.*) pathType: Prefix backend: service: name: aks-helloworld-one port: number: 80 - path: /hello-world-two(/|$)(.*) pathType: Prefix backend: service: name: aks-helloworld-two port: number: 80 - path: /(.*) pathType: Prefix backend: service: name: aks-helloworld-one port: number: 80 --- apiVersion: networking.k8s.io/v1 kind: Ingress metadata: name: hello-world-ingress-static annotations: nginx.ingress.kubernetes.io/ssl-redirect: "false" nginx.ingress.kubernetes.io/rewrite-target: /static/$2 spec: ingressClassName: nginx rules: - http: paths: - path: /static(/|$)(.*) pathType: Prefix backend: service: name: aks-helloworld-one port: number: 80Create the ingress resource using the
kubectl applycommand.kubectl apply -f hello-world-ingress.yaml --namespace ingress-basic
Test the ingress controller
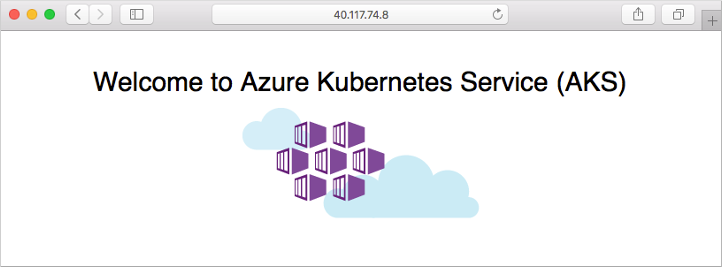
To test the routes for the ingress controller, browse to the two applications. Open a web browser to the IP address of your NGINX ingress controller, such as EXTERNAL_IP. The first demo application is displayed in the web browser, as shown in the following example:
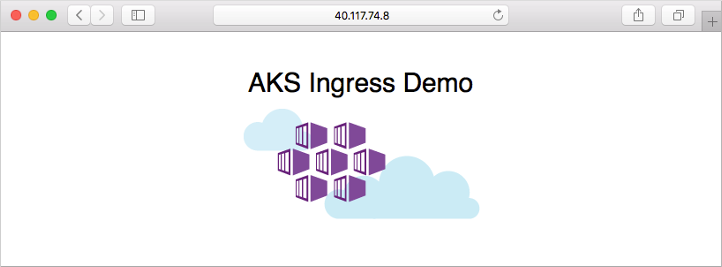
Now add the /hello-world-two path to the IP address, such as EXTERNAL_IP/hello-world-two. The second demo application with the custom title is displayed:
Test an internal IP address
Create a test pod and attach a terminal session to it.
kubectl run -it --rm aks-ingress-test --image=mcr.microsoft.com/dotnet/runtime-deps:6.0 --namespace ingress-basicInstall
curlin the pod usingapt-get.apt-get update && apt-get install -y curlAccess the address of your Kubernetes ingress controller using
curl, such as http://10.224.0.42. Provide your own internal IP address specified when you deployed the ingress controller.curl -L http://10.224.0.42No path was provided with the address, so the ingress controller defaults to the / route. The first demo application is returned, as shown in the following condensed example output:
<!DOCTYPE html>
<html xmlns="http://www.w3.org/1999/xhtml">
<head>
    <link rel="stylesheet" type="text/css" href="/static/default.css">
    <title>Welcome to Azure Kubernetes Service (AKS)</title>
[...]
Add the /hello-world-two path to the address, such as http://10.224.0.42/hello-world-two.
curl -L -k http://10.224.0.42/hello-world-twoThe second demo application with the custom title is returned, as shown in the following condensed example output:
<!DOCTYPE html>
<html xmlns="http://www.w3.org/1999/xhtml">
<head>
    <link rel="stylesheet" type="text/css" href="/static/default.css">
    <title>AKS Ingress Demo</title>
[...]
Clean up resources
This article used Helm to install the ingress components and sample apps. When you deploy a Helm chart, many Kubernetes resources are created. These resources include pods, deployments, and services. To clean up these resources, you can either delete the entire sample namespace, or the individual resources.
Delete the sample namespace and all resources
To delete the entire sample namespace, use the kubectl delete command and specify your namespace name. All the resources in the namespace are deleted.
kubectl delete namespace ingress-basic
Delete resources individually
Alternatively, a more granular approach is to delete the individual resources created.
List the Helm releases with the
helm listcommand.helm list --namespace ingress-basicLook for charts named ingress-nginx and aks-helloworld, as shown in the following example output:
NAME                    NAMESPACE       REVISION        UPDATED                                 STATUS          CHART                   APP VERSION
ingress-nginx           ingress-basic   1               2020-01-06 19:55:46.358275 -0600 CST    deployed        nginx-ingress-1.27.1    0.26.1
Uninstall the releases with the
helm uninstallcommand.helm uninstall ingress-nginx --namespace ingress-basicRemove the two sample applications.
kubectl delete -f aks-helloworld-one.yaml --namespace ingress-basic
kubectl delete -f aks-helloworld-two.yaml --namespace ingress-basic
Remove the ingress route that directed traffic to the sample apps.
kubectl delete -f hello-world-ingress.yamlDelete the namespace using the
kubectl deletecommand and specifying your namespace name.kubectl delete namespace ingress-basic
Next steps
To configure TLS with your existing ingress components, see Use TLS with an ingress controller.
To configure your AKS cluster to use HTTP application routing, see Enable the HTTP application routing add-on.
This article included some external components to AKS. To learn more about these components, see the following project pages:
Feedback
Coming soon: Throughout 2024 we will be phasing out GitHub Issues as the feedback mechanism for content and replacing it with a new feedback system. For more information see: https://aka.ms/ContentUserFeedback.
Submit and view feedback for