Create your first containerized Azure Functions on Azure Arc (preview)
In this article, you create a function app running in a Linux container and deploy it to an Azure Arc-enabled Kubernetes cluster from a container registry. When you create your own container, you can customize the execution environment for your function app. To learn more, see App Service, Functions, and Logic Apps on Azure Arc.
Note
Support for deploying a custom container to an Azure Arc-enabled Kubernetes cluster is currently in preview.
You can also publish your functions to an Azure Arc-enabled Kubernetes cluster without first creating a container. To learn more, see Create your first function on Azure Arc (preview)
Choose your development language
First, you use Azure Functions tools to create your project code as a function app in a Docker container using a language-specific Linux base image. Make sure to select your language of choice at the top of the article.
Core Tools automatically generates a Dockerfile for your project that uses the most up-to-date version of the correct base image for your functions language. You should regularly update your container from the latest base image and redeploy from the updated version of your container. For more information, see Creating containerized function apps.
Prerequisites
Before you begin, you must have the following requirements in place:
Install the .NET 8.0 SDK.
Install Azure Functions Core Tools version 4.0.5198, or a later version.
- Install Azure Functions Core Tools version 4.x.
- Install a version of Node.js that is supported by Azure Functions.
- Install a version of Python that is supported by Azure Functions.
- Install the .NET 6 SDK.
Install a version of the Java Developer Kit that is supported by Azure Functions.
Install Apache Maven version 3.0 or above.
- Azure CLI version 2.4 or a later version.
If you don't have an Azure subscription, create an Azure free account before you begin.
To publish the containerized function app image you create to a container registry, you need a Docker ID and Docker running on your local computer. If you don't have a Docker ID, you can create a Docker account.
You also need to complete the Create a container registry section of the Container Registry quickstart to create a registry instance. Make a note of your fully qualified login server name.
Create and activate a virtual environment
In a suitable folder, run the following commands to create and activate a virtual environment named .venv. Make sure to use one of the Python versions supported by Azure Functions.
python -m venv .venv
source .venv/bin/activate
If Python didn't install the venv package on your Linux distribution, run the following command:
sudo apt-get install python3-venv
You run all subsequent commands in this activated virtual environment.
Create and test the local functions project
In a terminal or command prompt, run the following command for your chosen language to create a function app project in the current folder:
func init --worker-runtime dotnet-isolated --docker
func init --worker-runtime node --language javascript --docker
func init --worker-runtime powershell --docker
func init --worker-runtime python --docker
func init --worker-runtime node --language typescript --docker
In an empty folder, run the following command to generate the Functions project from a Maven archetype:
mvn archetype:generate -DarchetypeGroupId=com.microsoft.azure -DarchetypeArtifactId=azure-functions-archetype -DjavaVersion=8 -Ddocker
The -DjavaVersion parameter tells the Functions runtime which version of Java to use. Use -DjavaVersion=11 if you want your functions to run on Java 11. When you don't specify -DjavaVersion, Maven defaults to Java 8. For more information, see Java versions.
Important
The JAVA_HOME environment variable must be set to the install location of the correct version of the JDK to complete this article.
Maven asks you for values needed to finish generating the project on deployment. Follow the prompts and provide the following information:
| Prompt | Value | Description |
|---|---|---|
| groupId | com.fabrikam |
A value that uniquely identifies your project across all projects, following the package naming rules for Java. |
| artifactId | fabrikam-functions |
A value that is the name of the jar, without a version number. |
| version | 1.0-SNAPSHOT |
Select the default value. |
| package | com.fabrikam.functions |
A value that is the Java package for the generated function code. Use the default. |
Type Y or press Enter to confirm.
Maven creates the project files in a new folder named artifactId, which in this example is fabrikam-functions.
The --docker option generates a Dockerfile for the project, which defines a suitable container for use with Azure Functions and the selected runtime.
Navigate into the project folder:
cd fabrikam-functions
Use the following command to add a function to your project, where the --name argument is the unique name of your function and the --template argument specifies the function's trigger. func new creates a C# code file in your project.
func new --name HttpExample --template "HTTP trigger"
Use the following command to add a function to your project, where the --name argument is the unique name of your function and the --template argument specifies the function's trigger. func new creates a subfolder matching the function name that contains a configuration file named function.json.
func new --name HttpExample --template "HTTP trigger"
To test the function locally, start the local Azure Functions runtime host in the root of the project folder.
func start
func start
npm install
npm start
mvn clean package
mvn azure-functions:run
After you see the HttpExample endpoint written to the output, navigate to that endpoint. You should see a welcome message in the response output.
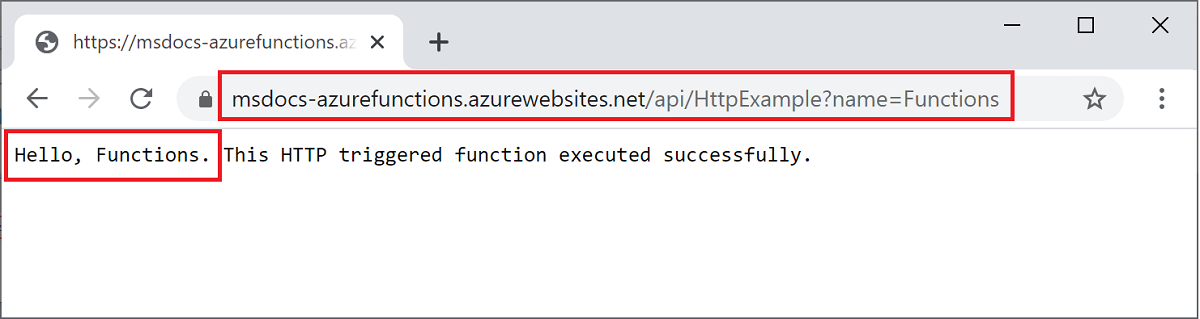
After you see the HttpExample endpoint written to the output, navigate to http://localhost:7071/api/HttpExample?name=Functions. The browser must display a "hello" message that echoes back Functions, the value supplied to the name query parameter.
Press Ctrl+C (Command+C on macOS) to stop the host.
Build the container image and verify locally
(Optional) Examine the Dockerfile in the root of the project folder. The Dockerfile describes the required environment to run the function app on Linux. The complete list of supported base images for Azure Functions can be found in the Azure Functions base image page.
In the root project folder, run the docker build command, provide a name as azurefunctionsimage, and tag as v1.0.0. Replace <DOCKER_ID> with your Docker Hub account ID. This command builds the Docker image for the container.
docker build --tag <DOCKER_ID>/azurefunctionsimage:v1.0.0 .
When the command completes, you can run the new container locally.
To verify the build, run the image in a local container using the docker run command, replace <DOCKER_ID> again with your Docker Hub account ID, and add the ports argument as -p 8080:80:
docker run -p 8080:80 -it <DOCKER_ID>/azurefunctionsimage:v1.0.0
After the image starts in the local container, browse to http://localhost:8080/api/HttpExample, which must display the same greeting message as before. Because the HTTP triggered function you created uses anonymous authorization, you can call the function running in the container without having to obtain an access key. For more information, see authorization keys.
After the image starts in the local container, browse to http://localhost:8080/api/HttpExample?name=Functions, which must display the same "hello" message as before. Because the HTTP triggered function you created uses anonymous authorization, you can call the function running in the container without having to obtain an access key. For more information, see authorization keys.
After verifying the function app in the container, press Ctrl+C (Command+C on macOS) to stop execution.
Publish the container image to a registry
To make your container image available for deployment to a hosting environment, you must push it to a container registry.
Azure Container Registry is a private registry service for building, storing, and managing container images and related artifacts. You should use a private registry service for publishing your containers to Azure services.
Use this command to sign in to your registry instance using your current Azure credentials:
az acr login --name <REGISTRY_NAME>In the previous command, replace
<REGISTRY_NAME>with the name of your Container Registry instance.Use this command to tag your image with the fully qualified name of your registry login server:
docker tag <DOCKER_ID>/azurefunctionsimage:v1.0.0 <LOGIN_SERVER>/azurefunctionsimage:v1.0.0Replace
<LOGIN_SERVER>with the fully qualified name of your registry login server and<DOCKER_ID>with your Docker ID.Use this command to push the container to your registry instance:
docker push <LOGIN_SERVER>/azurefunctionsimage:v1.0.0
Create an App Service Kubernetes environment
Before you begin, you must create an App Service Kubernetes environment for an Azure Arc-enabled Kubernetes cluster.
Note
When you create the environment, make sure to make note of both the custom location name and the name of the resource group that contains the custom location. You can use these to find the custom location ID, which you'll need when creating your function app in the environment.
If you didn't create the environment, check with your cluster administrator.
Add Azure CLI extensions
Launch the Bash environment in Azure Cloud Shell.

Because these CLI commands are not yet part of the core CLI set, add them with the following commands:
az extension add --upgrade --yes --name customlocation
az extension remove --name appservice-kube
az extension add --upgrade --yes --name appservice-kube
Create Azure resources
Before you can deploy your container to your new App Service Kubernetes environment, you need to create two more resources:
- A Storage account. While this article creates a storage account, in some cases a storage account may not be required. For more information, see Azure Arc-enabled clusters in the storage considerations article.
- A function app, which provides the context for running your container. The function app runs in the App Service Kubernetes environment and maps to your local function project. A function app lets you group functions as a logical unit for easier management, deployment, and sharing of resources.
Note
Function apps run in an App Service Kubernetes environment on a Dedicated (App Service) plan. When you create your function app without an existing plan, a plan is created for you.
Create Storage account
Use the az storage account create command to create a general-purpose storage account in your resource group and region:
az storage account create --name <STORAGE_NAME> --location westeurope --resource-group myResourceGroup --sku Standard_LRS
Note
In some cases, a storage account may not be required. For more information, see Azure Arc-enabled clusters in the storage considerations article.
In the previous example, replace <STORAGE_NAME> with a name that is appropriate to you and unique in Azure Storage. Names must contain three to 24 characters numbers and lowercase letters only. Standard_LRS specifies a general-purpose account, which is supported by Functions. The --location value is a standard Azure region.
Create the function app
Run the az functionapp create command to create a new function app in the environment.
az functionapp create --name <APP_NAME> --custom-location <CUSTOM_LOCATION_ID> --storage-account <STORAGE_NAME> --resource-group AzureFunctionsContainers-rg --image <LOGIN_SERVER>/azurefunctionsimage:v1.0.0 --registry-username <USERNAME> --registry-password <SECURE_PASSWORD>
In this example, replace <CUSTOM_LOCATION_ID> with the ID of the custom location you determined for the App Service Kubernetes environment. Also, replace <STORAGE_NAME> with the name of the account you used in the previous step, <APP_NAME> with a globally unique name, and <DOCKER_ID> or <LOGIN_SERVER> with your Docker Hub account ID or Container Registry server, respectively. When you're deploying from a custom container registry, the image name indicates the URL of the registry.
When you first create the function app, it pulls the initial image from your Docker Hub.
Set required app settings
Run the following commands to create an app setting for the storage account connection string:
storageConnectionString=$(az storage account show-connection-string --resource-group AzureFunctionsContainers-rg --name <STORAGE_NAME> --query connectionString --output tsv)
az functionapp config appsettings set --name <app_name> --resource-group AzureFunctionsContainers-rg --settings AzureWebJobsStorage=$storageConnectionString
This code must be run either in Cloud Shell or in Bash on your local computer. Replace <STORAGE_NAME> with the name of the storage account and <APP_NAME> with the function app name.
Invoke the function on Azure
Because your function uses an HTTP trigger, you invoke it by making an HTTP request to its URL in the browser or with a tool like curl.
Copy the complete Invoke URL shown in the output of the publish command into a browser address bar, appending the query parameter ?name=Functions. The browser should display similar output as when you ran the function locally.

Clean up resources
If you want to continue working with Azure Function using the resources you created in this article, you can leave all those resources in place.
When you are done working with this function app deployment, delete the AzureFunctionsContainers-rg resource group to clean up all the resources in that group:
az group delete --name AzureFunctionsContainers-rg
This only removes the resources created in this article. The underlying Azure Arc environment remains in place.