Delete an Azure Backup Recovery Services vault
This article describes how to delete an Azure Backup Recovery Services vault. It contains instructions for removing dependencies and then deleting a vault.
Before you start
You can't delete a Recovery Services vault with any of the following dependencies:
- You can't delete a vault that contains protected data sources (for example, IaaS VMs, SQL databases, Azure file shares).
- You can't delete a vault that contains backup data. Once backup data is deleted, it will go into the soft deleted state.
- You can't delete a vault that contains backup data in the soft deleted state.
- You can't delete a vault that has registered storage accounts.
If you try to delete the vault without removing the dependencies, you'll encounter one of the following error messages:
Vault cannot be deleted as there are existing resources within the vault. Please ensure there are no backup items, protected servers, or backup management servers associated with this vault. Unregister the following containers associated with this vault before proceeding for deletion.
Recovery Services vault cannot be deleted as there are backup items in soft deleted state in the vault. The soft deleted items are permanently deleted after 14 days of delete operation. Please try vault deletion after the backup items are permanently deleted and there is no item in soft deleted state left in the vault. For more information, see Soft delete for Azure Backup.
Delete a Recovery Services vault
Choose a client:
Warning
The following operation is destructive and can't be undone. All backup data and backup items associated with the protected server will be permanently deleted. Proceed with caution.
Note
If you're sure that all backed-up items in the vault are no longer required and want to delete them at once without reviewing, run this PowerShell script. The script will delete all backup items recursively and eventually the entire vault.
To delete a vault, follow these steps:
Step 1: Go to vault Overview, click Delete, and then follow the instructions to complete the removal of Azure Backup and Azure Site Recovery items for vault deletion as shown below. Each link calls the respective blade to perform the corresponding vault deletion steps.
See the instructions in the following steps to understand the process. Also, you can go to each blade to delete vaults.

Alternately, go to the blades manually by following the steps below.
Step 2: If Multi-User Authorization (MUA) is enabled, seek necessary permissions from the security administrator before vault deletion. Learn more
Step 3: Disable the soft delete and Security features
- Go to Properties -> Security Settings and disable the Soft Delete feature if enabled. See how to disable soft delete.
- Go to Properties -> Security Settings and disable Security Features, if enabled. Learn more
Step 4: Delete Cloud protected items
Delete Items in soft-deleted state: After disabling soft delete, check if there are any items previously remaining in the soft deleted state. If there are items in soft deleted state, then you need to undelete and delete them again. Follow these steps to find soft delete items and permanently delete them.

Go to the vault dashboard menu -> Backup Items. Click Stop Backup to stop the backups of all listed items, and then click Delete Backup Data to delete. Follow these steps to remove those items.
Step 5: Delete Backup Servers
Go to the vault dashboard menu > Backup Infrastructure > Protected Servers. In Protected Servers, select the server to unregister. To delete the vault, you must unregister all the servers. Right-click each protected server and select Unregister.
MARS protected servers: Go to the vault dashboard menu -> Backup Infrastructure -> Protected Servers. If you've MARS protected servers, then all servers listed here must be deleted along with their backup data. Follow these steps to delete MARS protected servers.
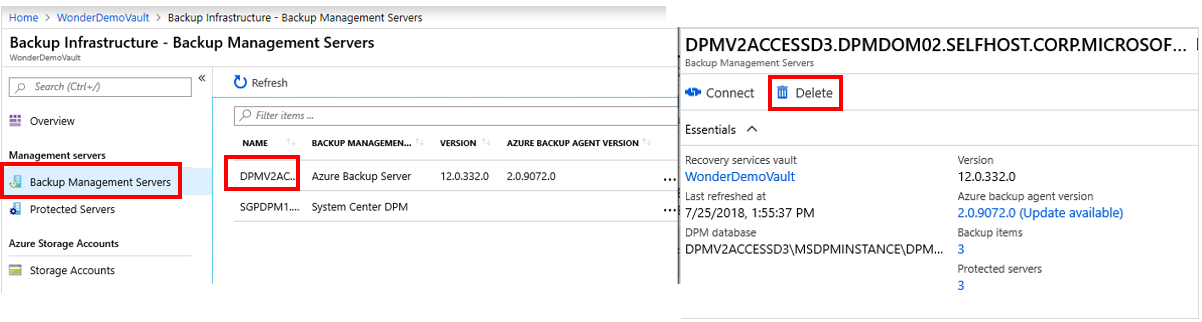
MABS or DPM management servers: Go to the vault dashboard menu > Backup Infrastructure > Backup Management Servers. If you've DPM or Azure Backup Server (MABS), then all items listed here must be deleted or unregistered along with their backup data. Follow these steps to delete the management servers.
Note
Deleting MARS/MABS/DPM servers also removes the corresponding backup items protected in the vault.
Step 6: Unregister Storage Accounts
Ensure all registered storage accounts are unregistered for successful vault deletion. Go to the vault dashboard menu > Backup Infrastructure > Storage Accounts. If you've storage accounts listed here, then you must unregister all of them. Learn more how to Unregister a storage account.
Step 7: Remove Private Endpoints
Ensure there are no Private endpoints created for the vault. Go to Vault dashboard menu > Private endpoint Connections under 'Settings' > if the vault has any Private endpoint connections created or attempted to be created, ensure they are removed before proceeding with vault delete.
Step 8: Delete vault
After you've completed these steps, you can continue to delete the vault.
If you're still unable to delete the vault that contain no dependencies then follow the steps listed in deleting vault using Azure Resource Manager client.


Delete protected items in the cloud
First, read the Before you start section to understand the dependencies and vault deletion process.
To stop protection and delete the backup data, perform the following steps:
From the portal, go to Recovery Services vault, and then go to Backup items. Then, in the Backup Management Type list, select the protected items in the cloud (for example, Azure Virtual Machines, Azure Storage (the Azure Files), or SQL Server on Azure Virtual Machines).
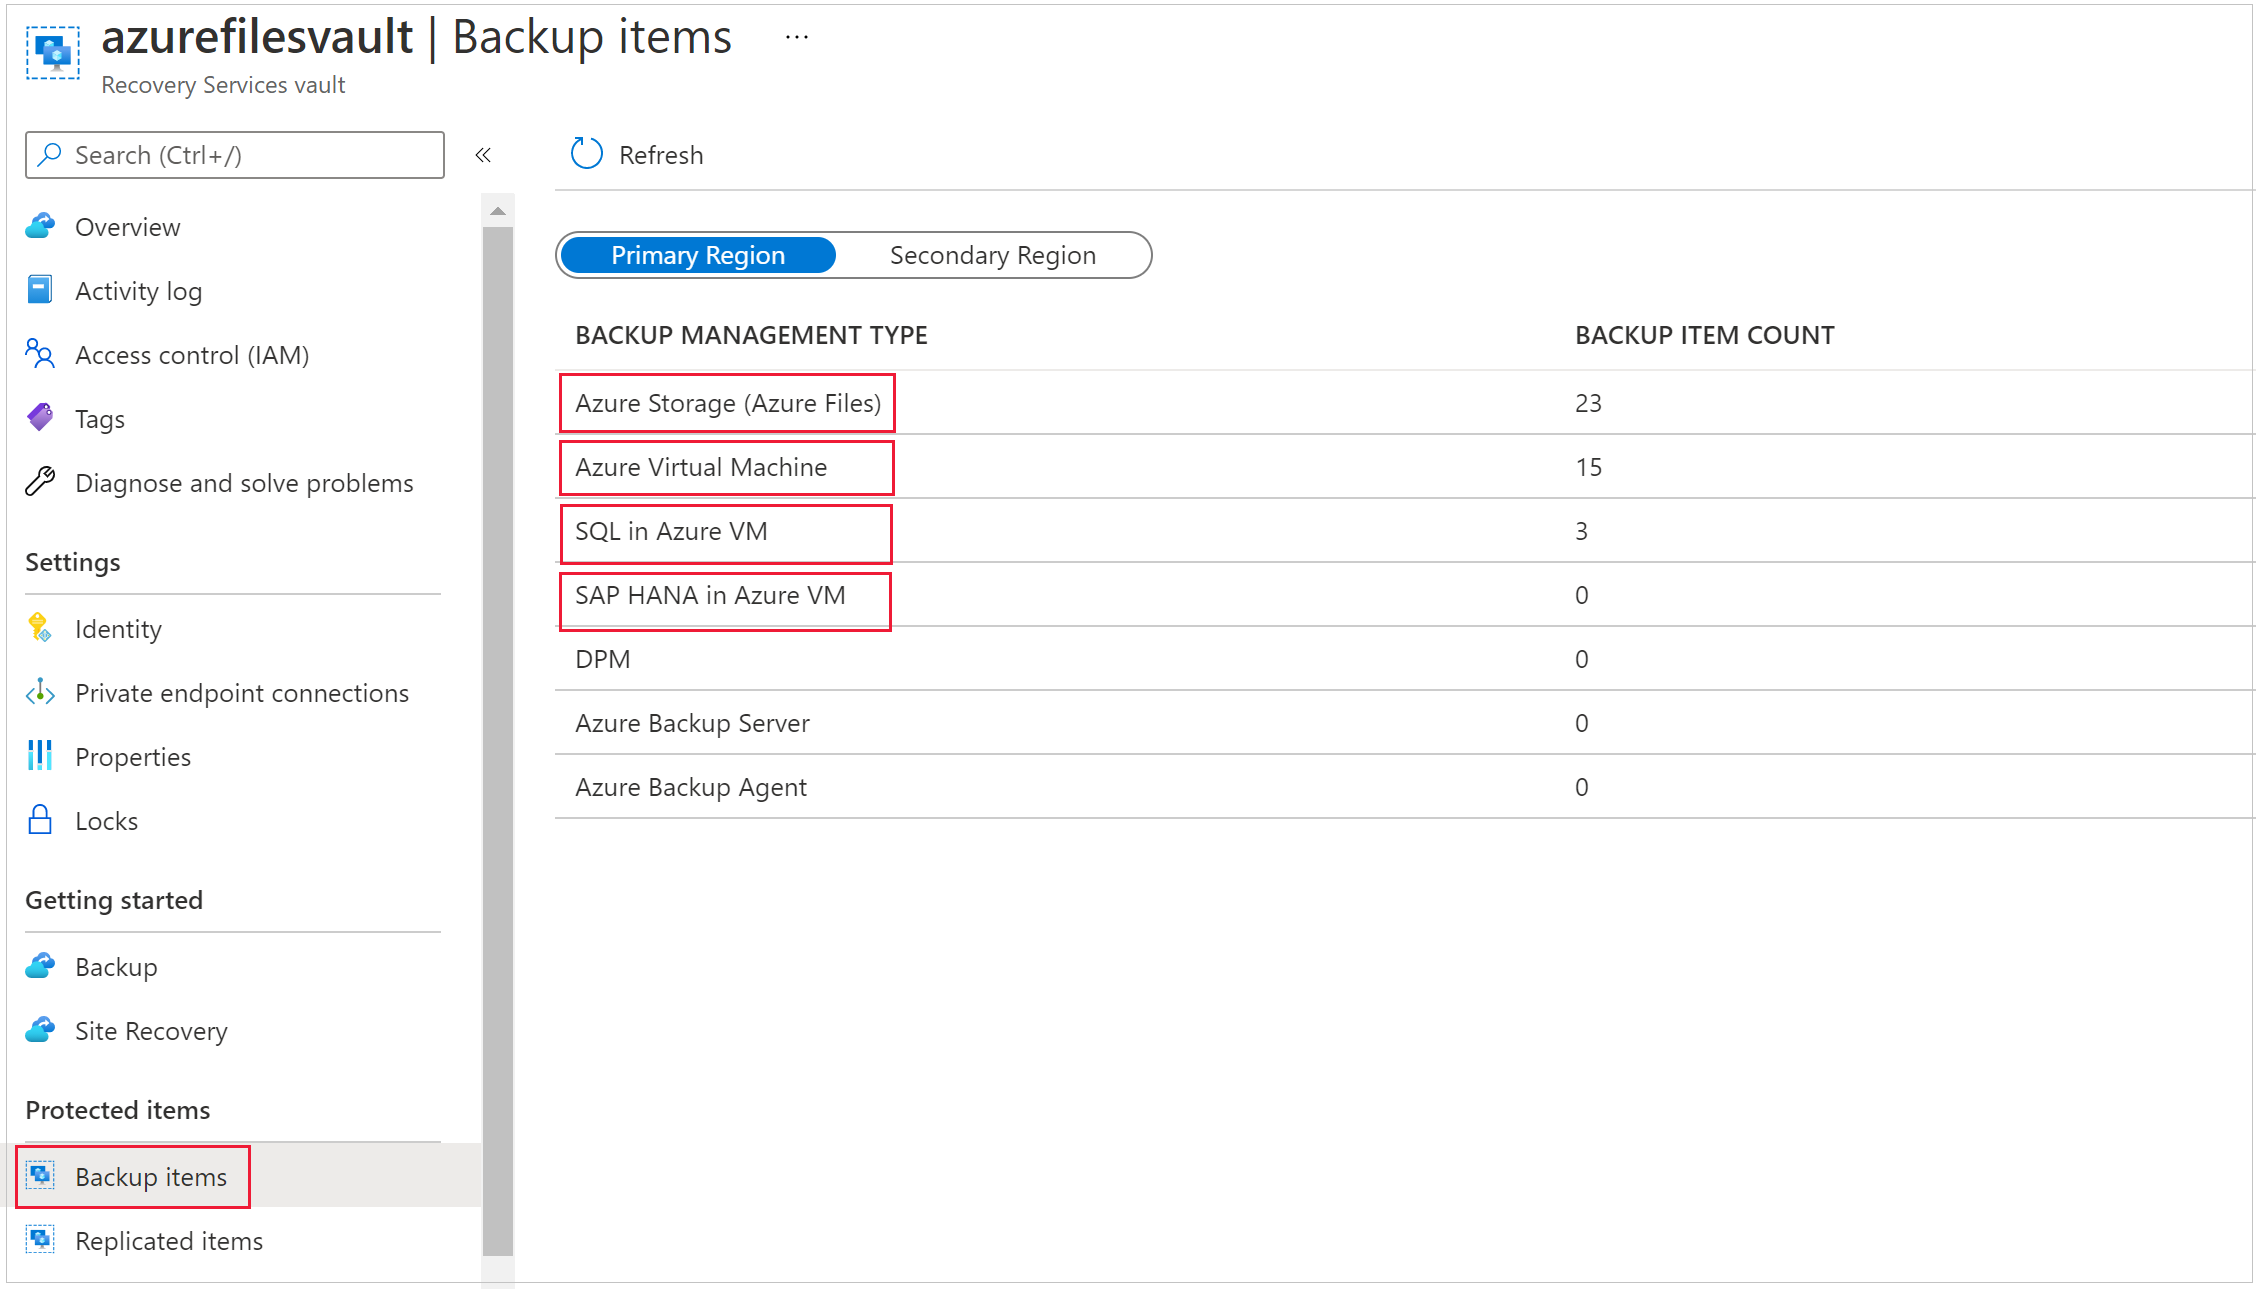
You'll see a list of all the items for the category. Right-click to select the backup item. Depending on whether the backup item is protected or not, the menu displays either the Stop Backup pane or the Delete Backup Data pane.
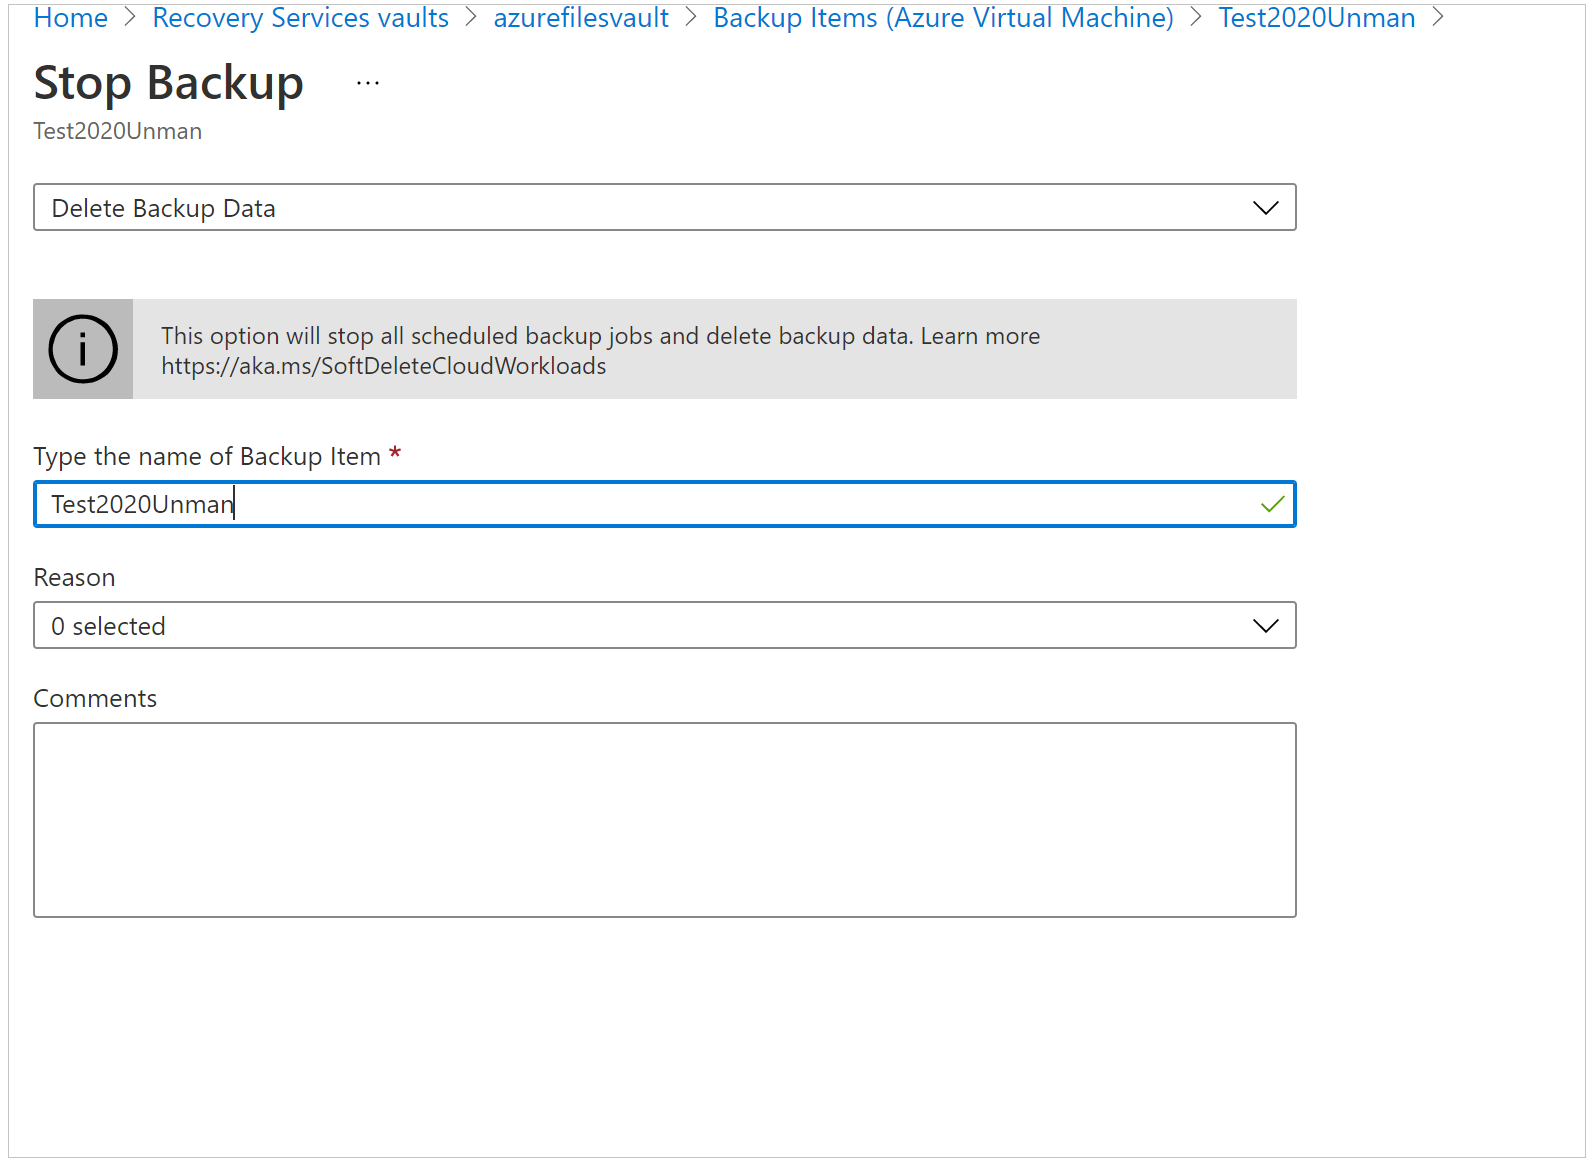
If the Stop Backup pane appears, select Delete Backup Data from the drop-down menu. Enter the name of the backup item (this field is case-sensitive), and then select a reason from the drop-down menu. Enter your comments, if you've any. Then, select Stop backup.
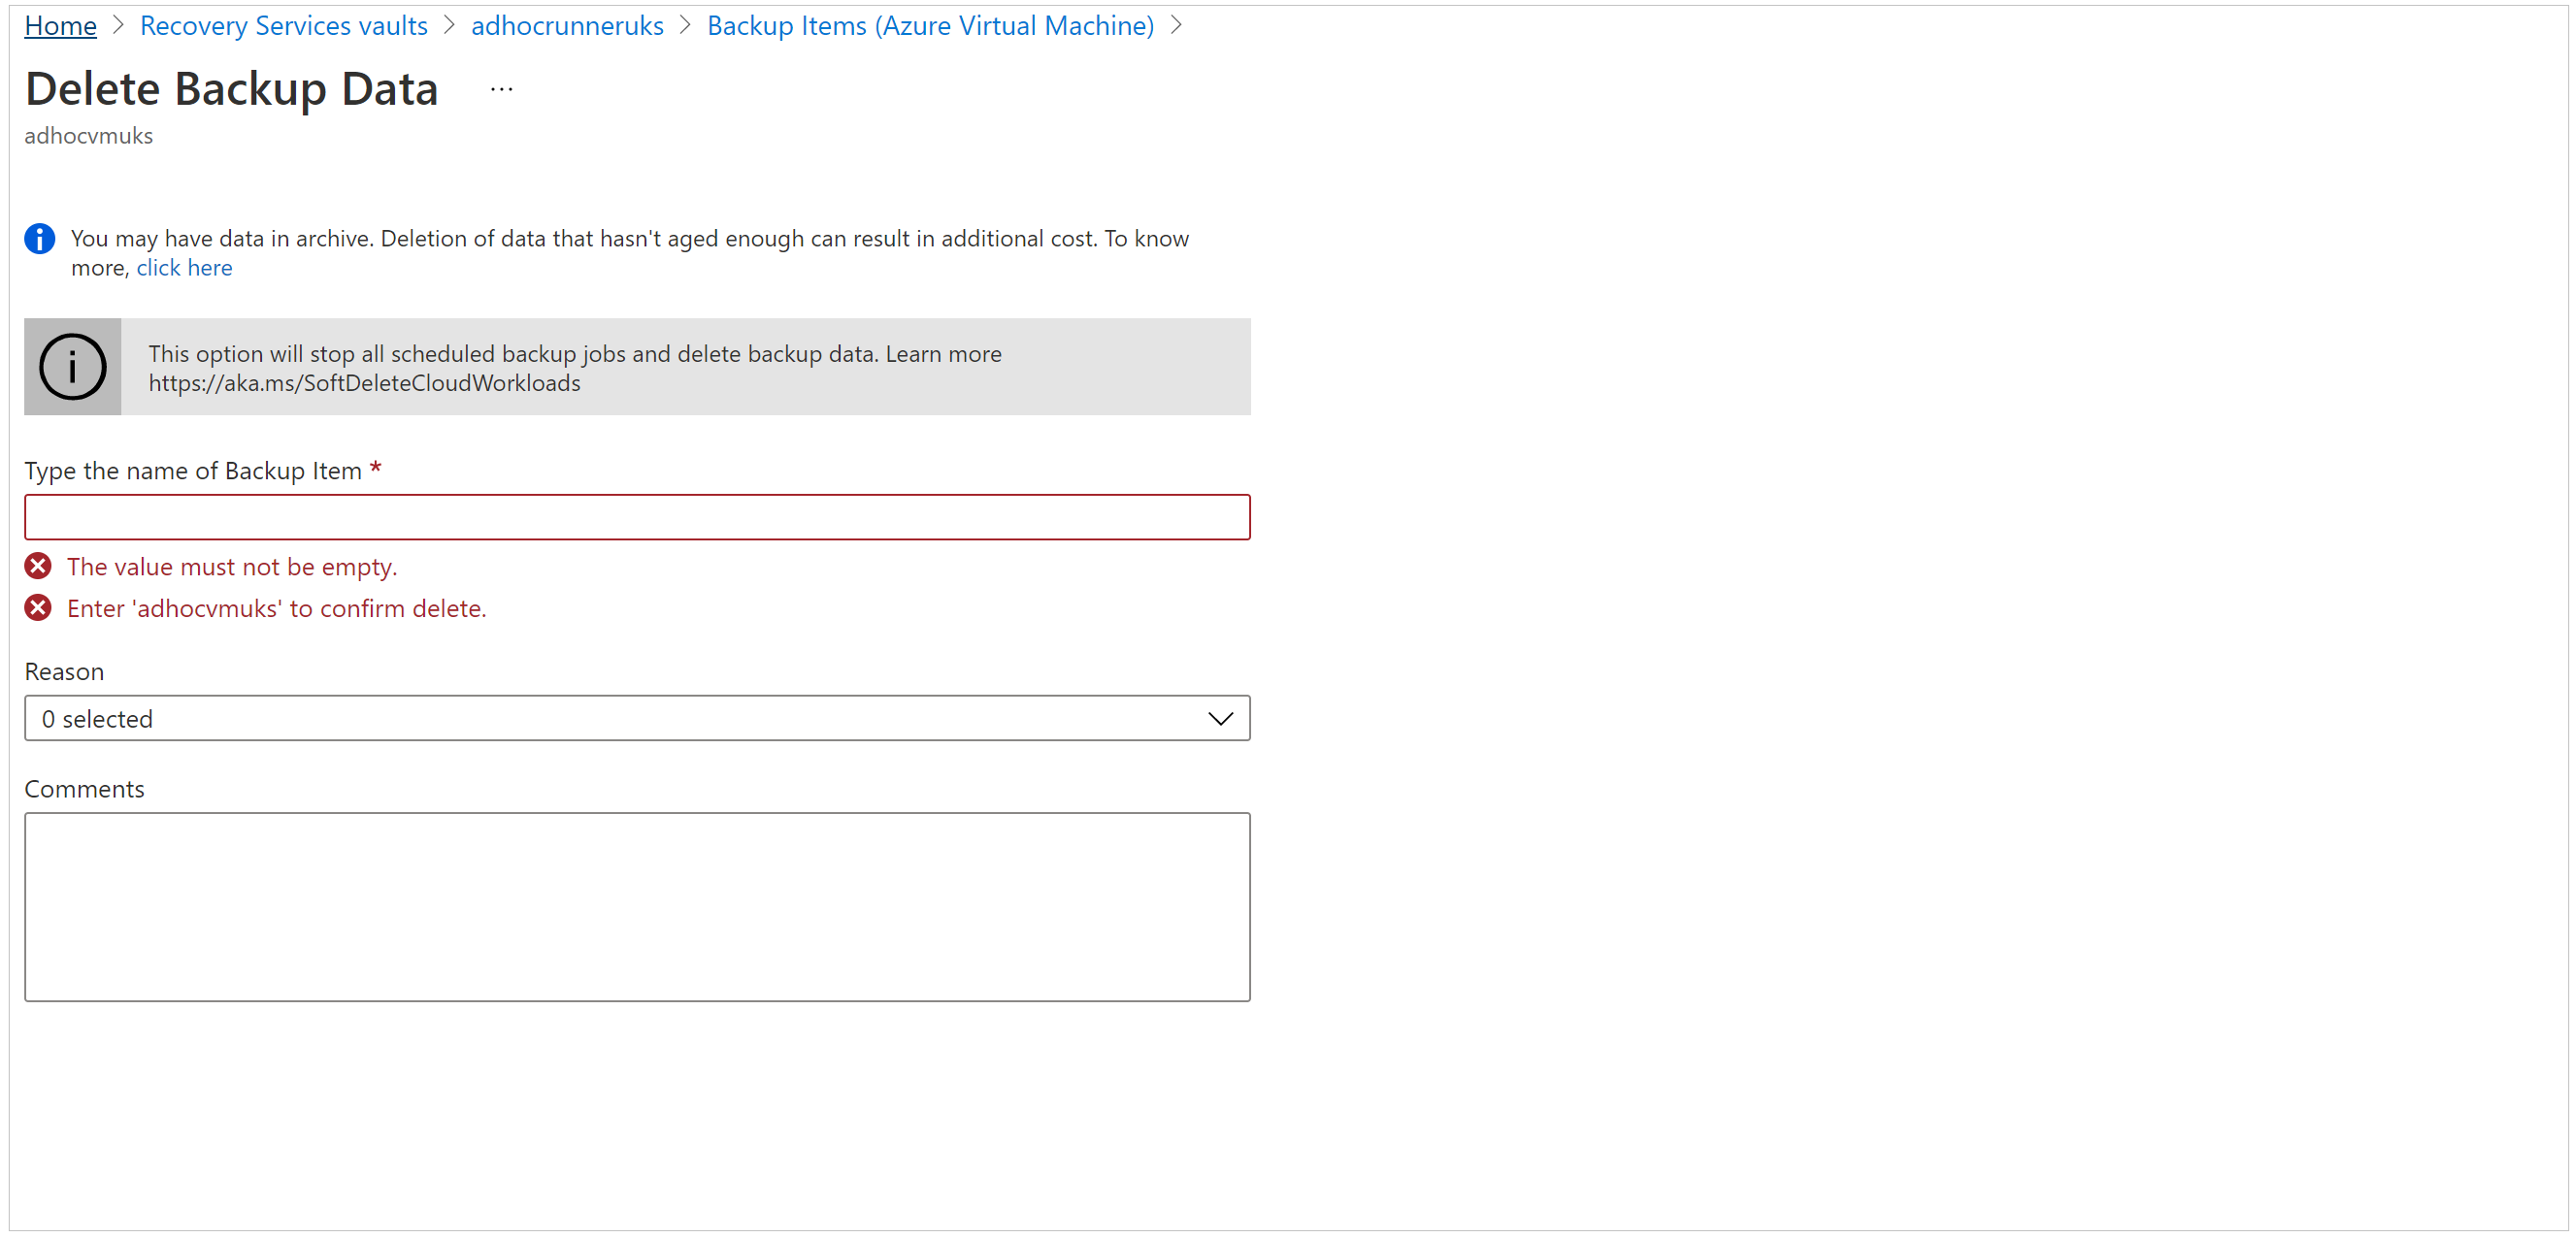
If the Delete Backup Data pane appears, enter the name of the backup item (this field is case-sensitive), and then select a reason from the drop-down menu. Enter your comments, if you've any. Then, select Delete.
This option deletes scheduled backups, also deletes on-demand backups.
Check the Notification icon:
 After the process finishes, the service displays the following message: Stopping backup and deleting backup data for "Backup Item". Successfully completed the operation.
Select Refresh on the Backup Items menu, to make sure the backup item was deleted.


Delete protected items on premises
First, read the Before you start section to understand the dependencies and vault deletion process.
From the vault dashboard menu, select Backup Infrastructure.
Depending on your on-premises scenario, choose the one of the following options:
For MARS, select Protected Servers and then Azure Backup Agent. Then, select the server that you want to delete.

For MABS or DPM, select Backup Management Servers. Then, select the server that you want to delete.
The Delete pane appears with a warning message.
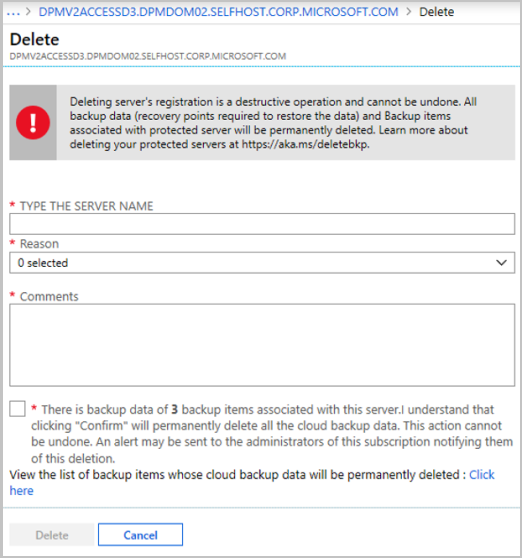
Review the warning message and the instructions in the consent check box.
Note
- If the protected server is synced with Azure services and backup items exist, the consent check box will display the number of dependent backup items and the link to view the backup items.
- If the protected server isn't synced with Azure services and backup items exist, the consent check box will display only the number of backup items.
- If there're no backup items, the consent check box will ask for deletion.
Select the consent check box, and then select Delete.
Check the Notification icon
. After the operation finishes, the service displays the message: Stopping backup and deleting backup data for "Backup Item." Successfully completed the operation.Select Refresh on the Backup Items menu, to make sure the backup item is deleted.
Note
If you delete an on-premises protected item from a portal that contains dependencies, you'll receive a warning saying "Deleting server's registration is a destructive operation and cannot be undone. All backup data (recovery points required to restore the data) and Backup items associated with protected server will be permanently deleted."
After this process finishes, you can delete the backup items from management console:
- Delete backup items from the MARS management console
- Delete backup items from the MABS or DPM management console
Delete backup items from the MARS management console
Note
If you deleted or lost the source machine without stopping the backup, the next scheduled backup will fail. The old recovery point expires according to the policy, but the last single recovery point is always retained until you stop the backup and delete the data. You can do this by following the steps in this section.
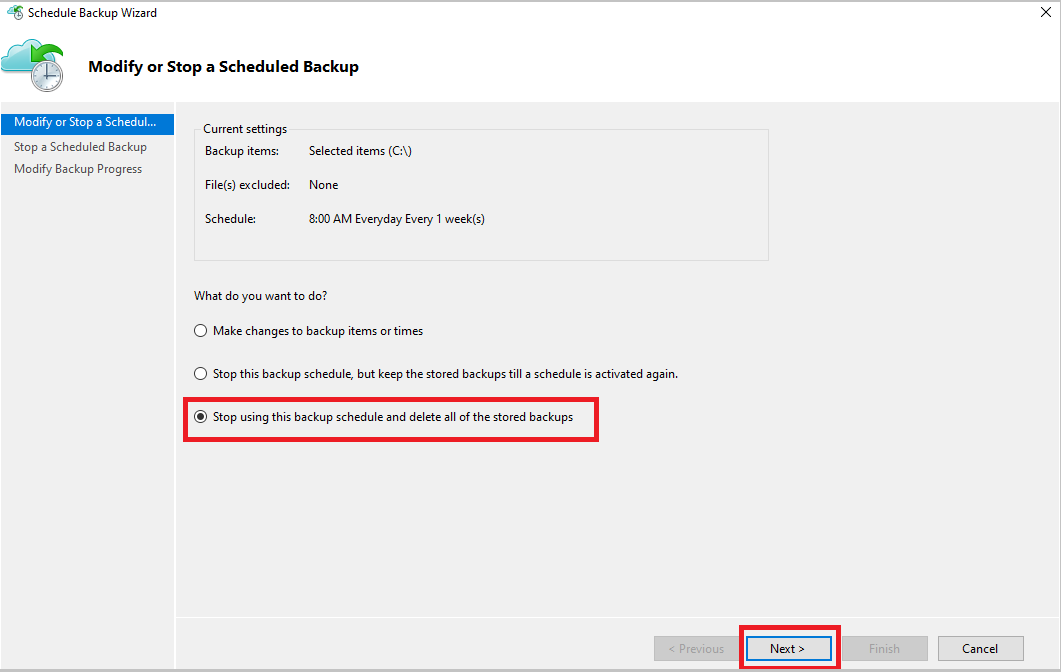
Open the MARS management console, go to the Actions pane, and select Schedule Backup.
From the Modify or Stop a Scheduled Backup page, select Stop using this backup schedule and delete all the stored backups. Then, select Next.
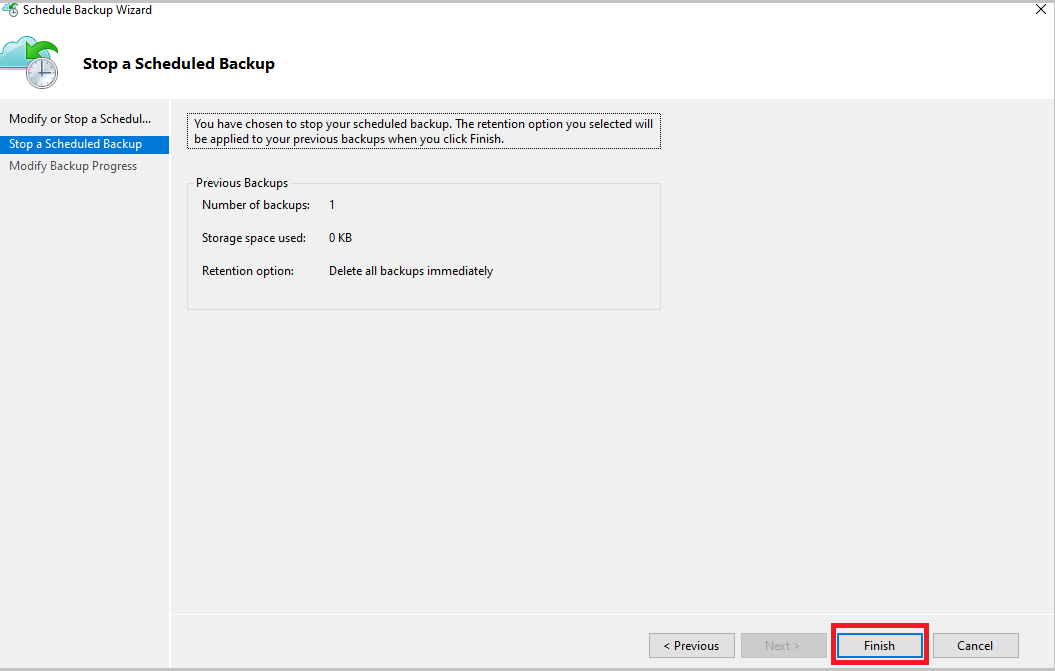
From the Stop a Scheduled Backup page, select Finish.
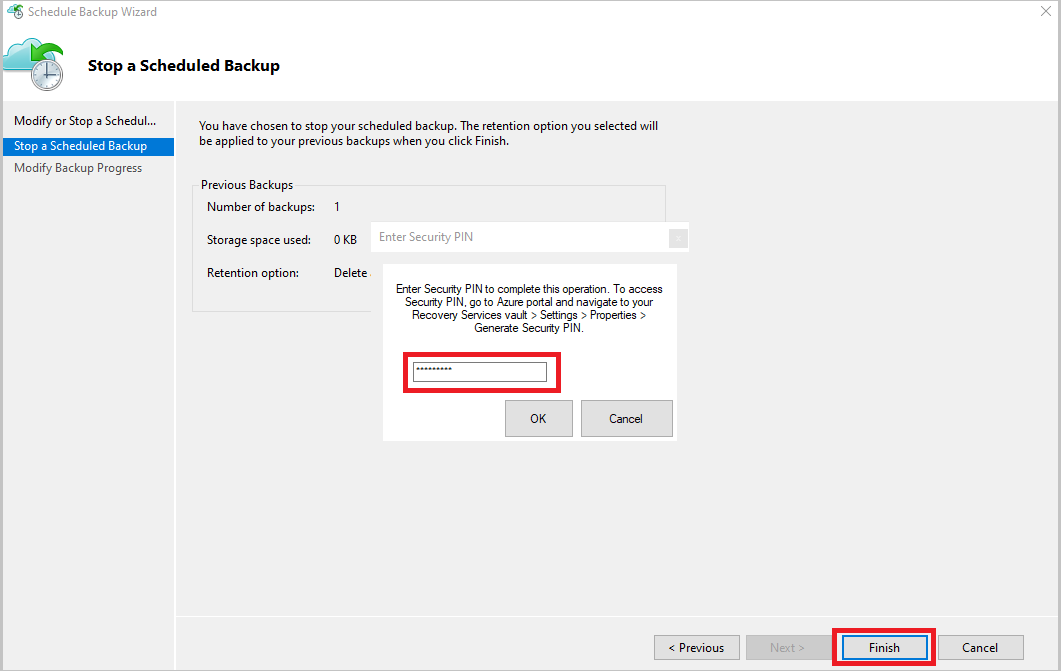
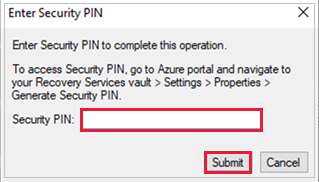
You're prompted to enter a security PIN (personal identification number), which you must generate manually. To do this, first sign in to the Azure portal.
Go to Recovery Services vault > Settings > Properties.
Under Security PIN, select Generate. Copy this PIN. The PIN is valid for only five minutes.
In the management console, paste the PIN, and then select OK.
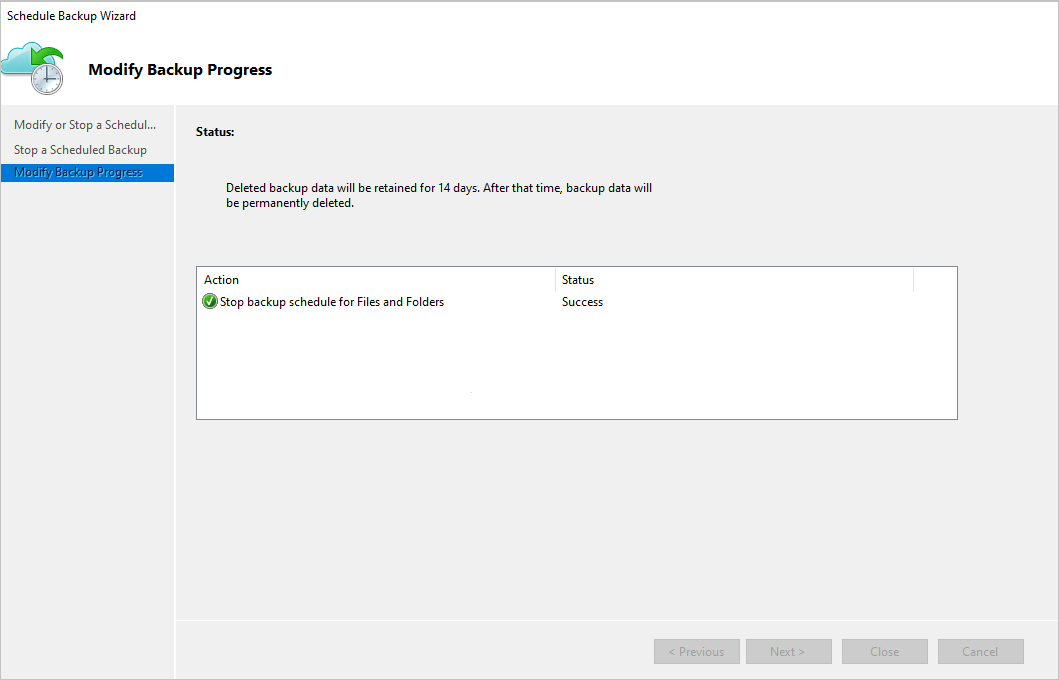
In the Modify Backup Progress page, the following message appears: Deleted backup data will be retained for 14 days. After that time, backup data will be permanently deleted.
After you delete the on-premises backup items, follow the next steps from the portal.
Delete backup items from the MABS or DPM management console
Note
If you deleted or lost the source machine without stopping the backup, the next scheduled backup will fail. The old recovery point expires according to the policy, but the last single recovery point is always retained until you stop the backup and delete the data. You can do this by following the steps in this section.
There are two methods you can use to delete backup items from the MABS or DPM management console.
Method 1
To stop protection and delete backup data, do the following steps:
Open the DPM Administrator Console, and then select Protection on the navigation bar.
In the display pane, select the protection group member that you want to remove. Right-click to select the Stop Protection of Group Members option.
From the Stop Protection dialog box, select Delete protected data, and then select the Delete storage online check box. Then, select Stop Protection.

For the following versions, you're prompted to enter a security PIN (personal identification number), which you must generate manually.
- DPM 2019 UR1 and later
- DPM 2016 UR9 and later
- MABS V3 UR1 and later
To generate the PIN, do the following steps:
- Sign in to the Azure portal.
- Go to Recovery Services vault > Settings > Properties.
- Under Security PIN, select Generate.
- Copy this PIN.
Note
The PIN is valid for only five minutes.
- In the management console, paste the PIN, and then select Submit.
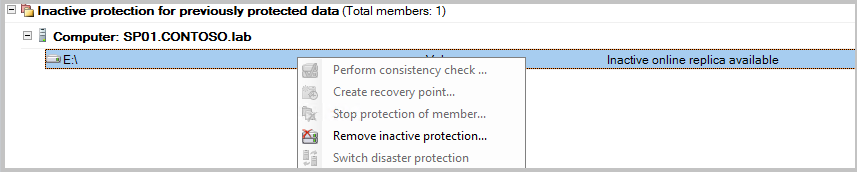
If you had selected Delete storage online in the Stop Protection dialog box earlier, ignore this step. Right-click the inactive protection group and select Remove inactive protection.
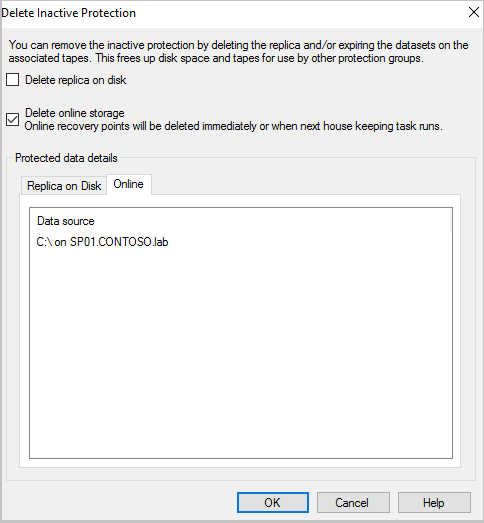
From the Delete Inactive Protection window, select the Delete online storage check box, and then select OK.
For the following versions, you're prompted to enter a security PIN (personal identification number), which you must generate manually.
- DPM 2019 UR1 and later
- DPM 2016 UR9 and later
- MABS V3 UR1 and later
To generate the PIN, do the following steps:
- Sign in to the Azure portal.
- Go to Recovery Services vault > Settings > Properties.
- Under Security PIN, select Generate.
- Copy this PIN.
Note
The PIN is valid for only five minutes.
- In the management console, paste the PIN, and then select Submit.
The protected member status changes to Inactive replica available.
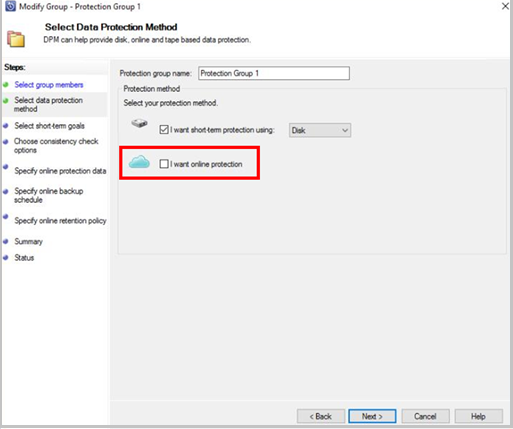
Method 2
Open the MABS management or DPM management console. Under Select data protection method, clear the I want online protection check box.
After you delete the on-premises backup items, follow the next steps from the portal.
Delete the Recovery Services vault
When all dependencies have been removed, scroll to the Essentials pane in the vault menu.
Verify that there aren't any backup items, backup management servers, or replicated items listed. If items still appear in the vault, refer to the Before you start section.
When there are no more items in the vault, select Delete on the vault dashboard.
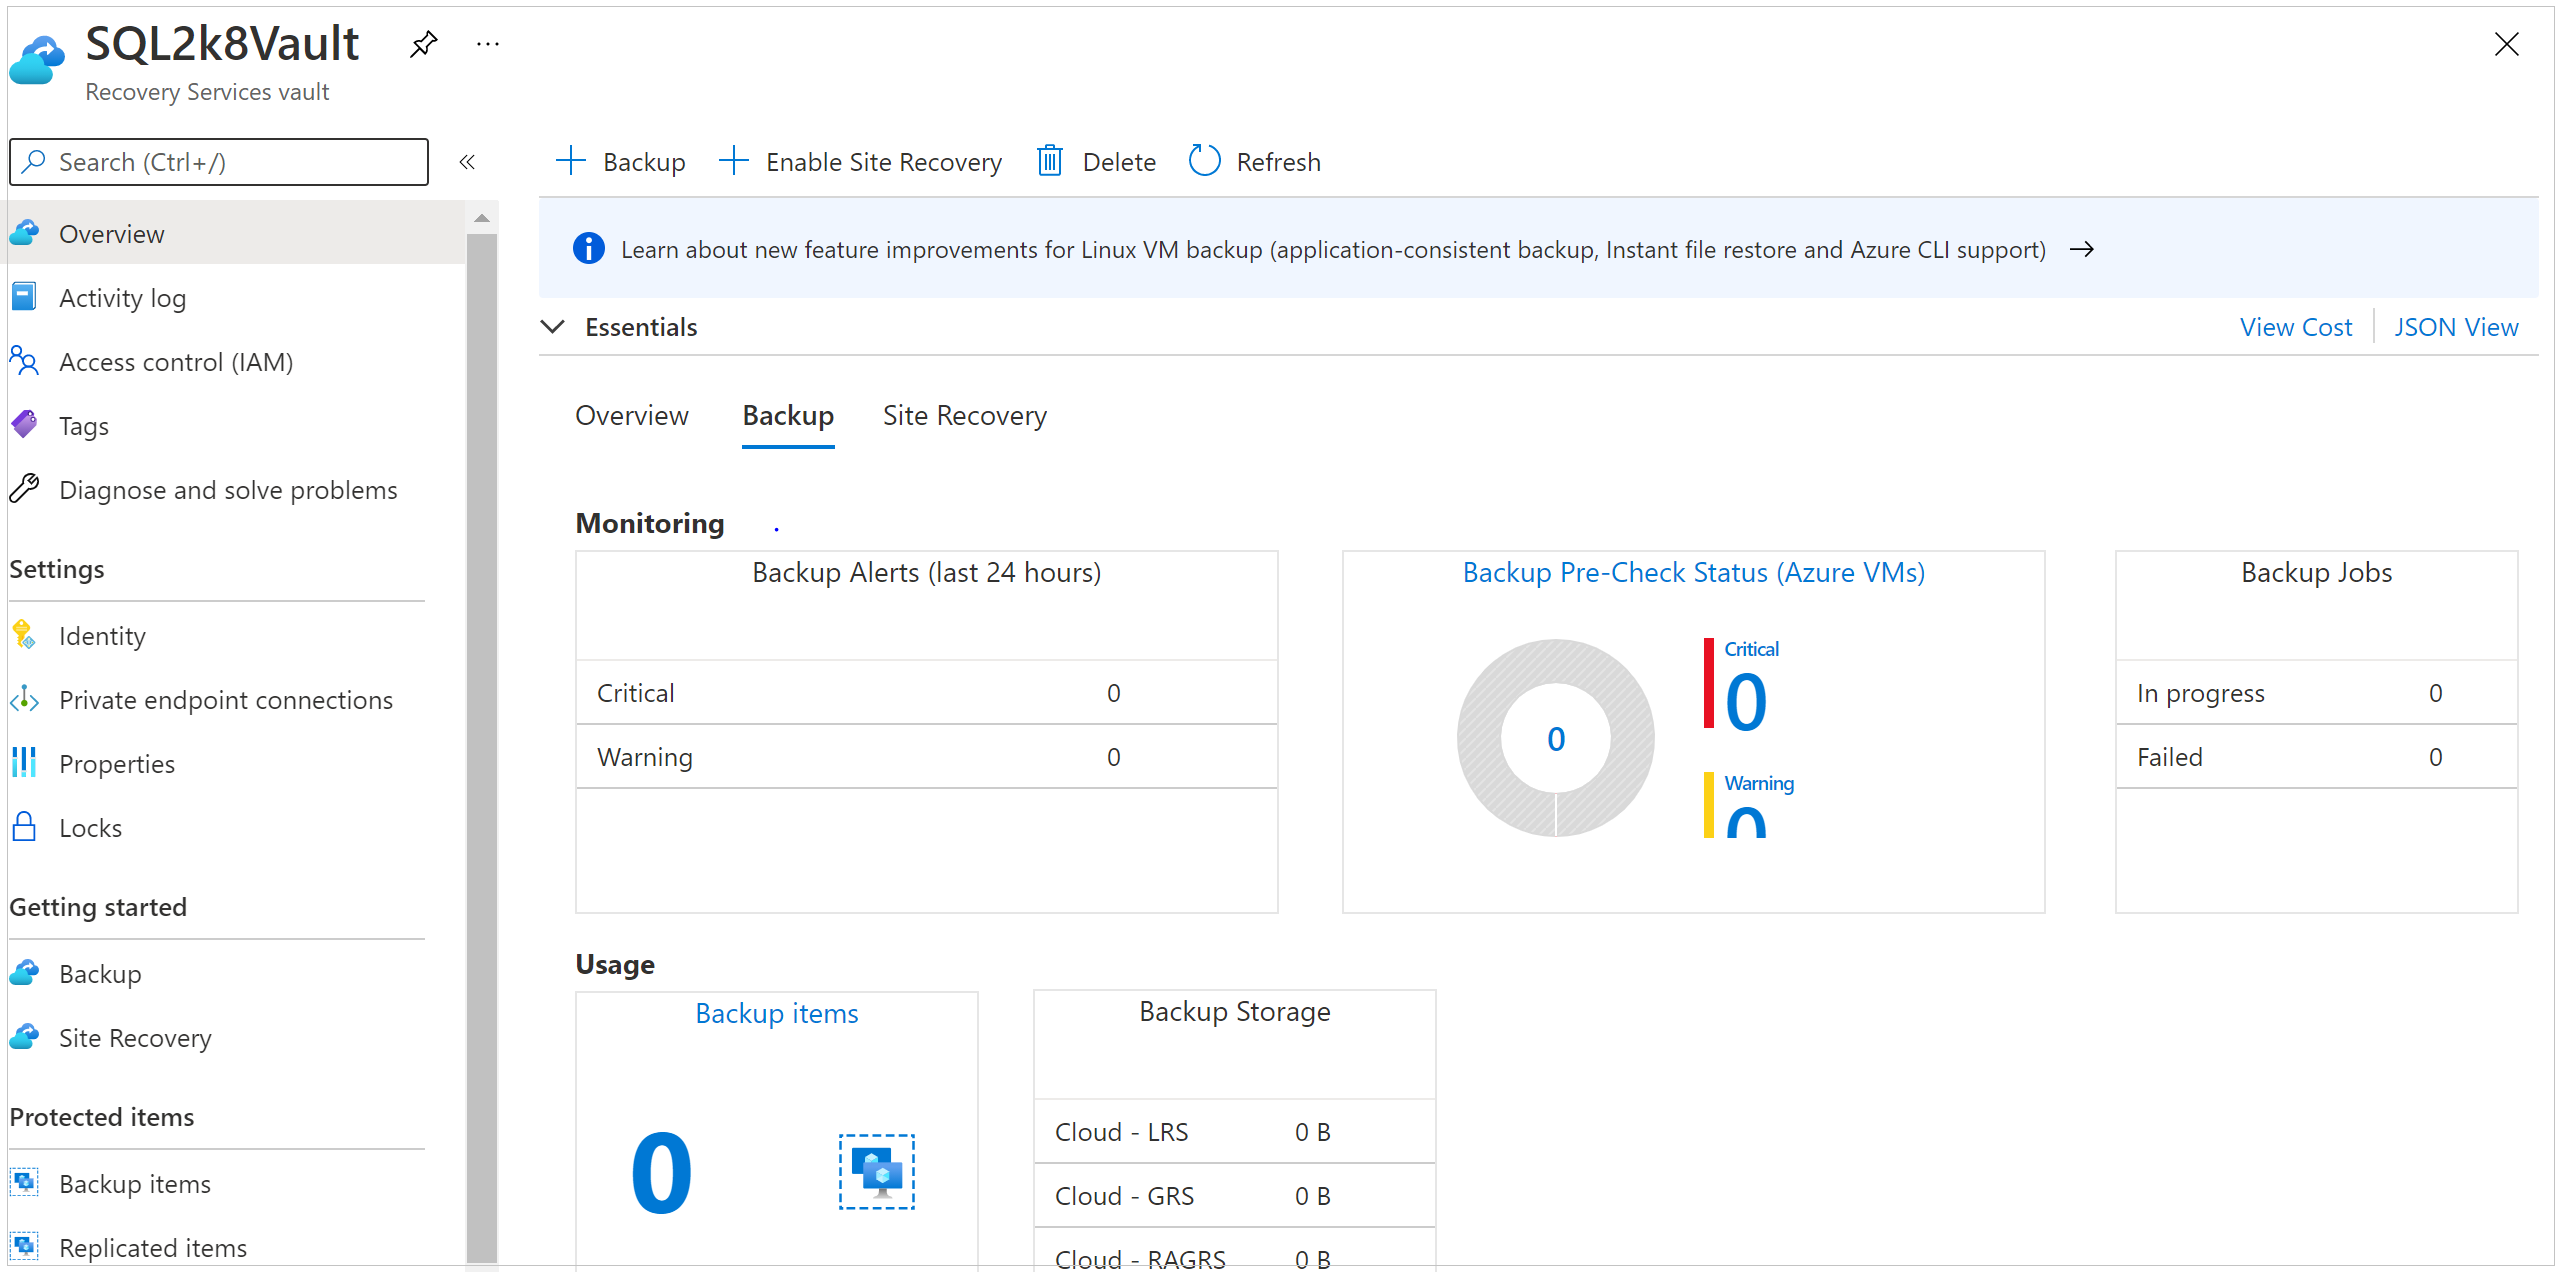
Select Yes to verify that you want to delete the vault. The vault is deleted. The portal returns to the New service menu.

Next steps
Feedback
Coming soon: Throughout 2024 we will be phasing out GitHub Issues as the feedback mechanism for content and replacing it with a new feedback system. For more information see: https://aka.ms/ContentUserFeedback.
Submit and view feedback for