Tutorial: Route MQTT messages in Azure Event Grid to Azure Functions using custom topics - Azure portal
In this tutorial, you learn how to route MQTT messages received by an Azure Event Grid namespace to an Azure function via an Event Grid custom topic by following these steps:
If you don't have an Azure subscription, you can sign up for a free trial.
Create an Azure function using Event Grid trigger
Follow instructions from Create an Azure function using Visual Studio Code, but use the Azure Event Grid Trigger instead of using the HTTP Trigger. You should see code similar to the following example:
using System;
using Azure.Messaging;
using Microsoft.Azure.Functions.Worker;
using Microsoft.Extensions.Logging;

namespace Company.Function
{
    public class MyEventGridTriggerFunc
    {
        private readonly ILogger<MyEventGridTriggerFunc> _logger;

        public MyEventGridTriggerFunc(ILogger<MyEventGridTriggerFunc> logger)
        {
            _logger = logger;
        }

        [Function(nameof(MyEventGridTriggerFunc))]
        public void Run([EventGridTrigger] CloudEvent cloudEvent)
        {
            _logger.LogInformation("Event type: {type}, Event subject: {subject}", cloudEvent.Type, cloudEvent.Subject);
        }
    }
}
You use this Azure function as an event handler for a topic's subscription later in this tutorial.
Note
- Create all resources in the same region.
- This tutorial has been tested with an Azure function that uses .NET 8.0 (isolated) runtime stack.
Create an Event Grid topic (custom topic)
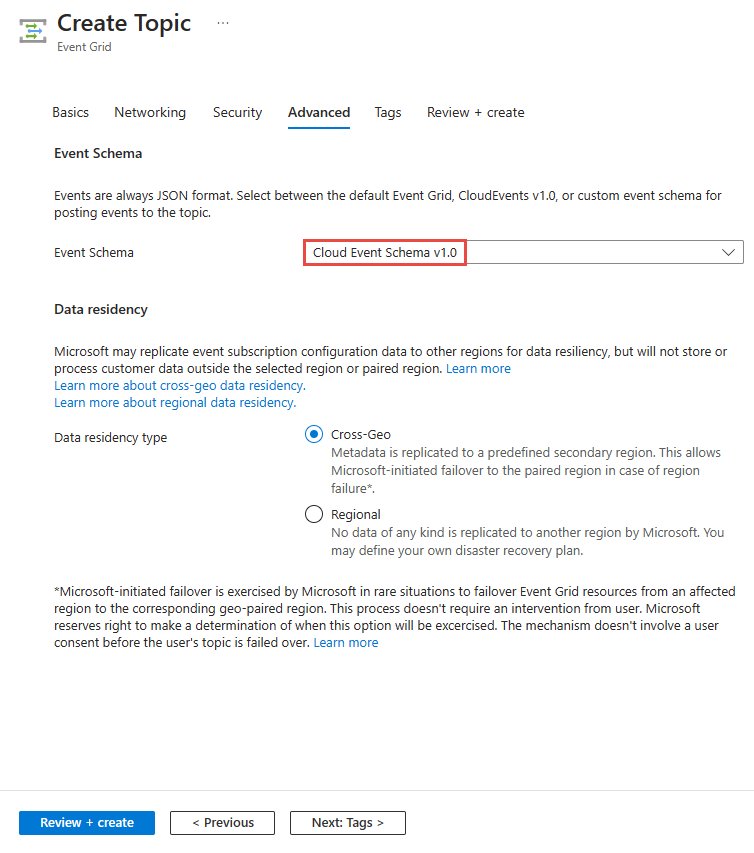
Create an Event Grid topic. See Create a custom topic using the portal. When you create the Event Grid topic, on the Advanced tab, for Event Schema, select Cloud Event Schema v1.0.
Note
Use Cloud event schema everywhere in this tutorial.
Add a subscription to the topic using the function
In this step, you create a subscription to the Event Grid topic using the Azure function you created earlier.
On the Event Grid topic page, select Subscriptions on the left navigation bar.
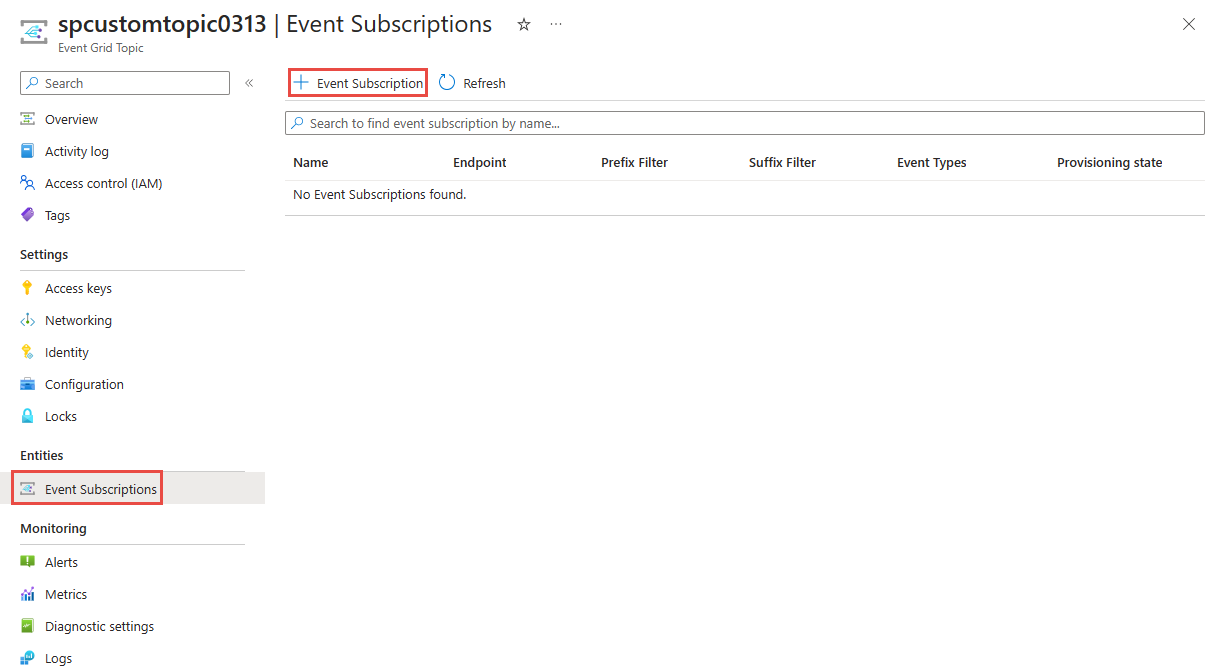
On the Create event subscription page, do these steps:
Enter a name for the event subscription.
For Event schema, select Cloud Event Schema 1.0.
For Endpoint type, select Azure Functions.
Then, select Configure an endpoint.

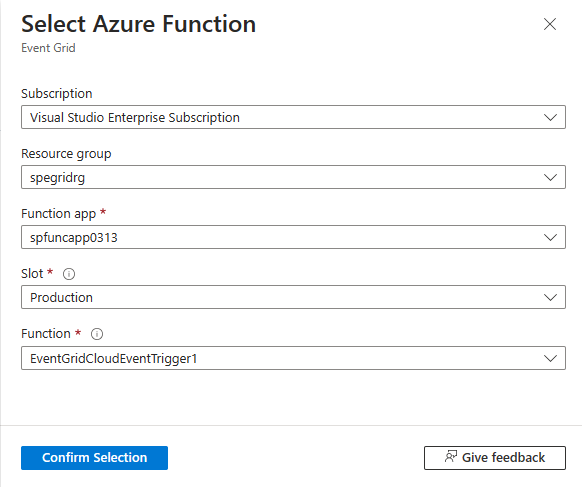
On the Select Azure function page, do these steps:
For Subscription, select your Azure subscription.
For Resource group, select the resource group that has your Azure function.
For Function app, select the Functions app that has the function.
For Slot, select Production.
For Function, select your Azure function.
Then, select Confirm selection at the bottom of the page.
On the Create Event Subscription page, select Create.
On the Event Subscriptions page, you should see the subscription you created.


Create namespace, clients, topic spaces, and permission bindings
Follow instructions from Quickstart: Publish and subscribe to MQTT messages using an Event Grid namespace with Azure portal to:
- Create an Event Grid namespace.
- Create two clients.
- Create a topic space.
- Create publisher and subscriber permission bindings.
- Test using MQTTX app to confirm that clients are able to send and receive messages.
Enable managed identity for the namespace
In this section, you enable system-assigned managed identity for the Event Grid namespace. Then, grant identity the send permission to the Event Grid custom topic you created earlier so that it can route message to the custom topic. You do so by adding the managed identity to the Event Grid Data Sender role on the custom topic.
On the Event Grid Namespace page, select Identity on the left navigation menu.

Navigate to the Event Grid Topic for your Event Grid custom topic.
Select Access control on the left navigation bar.
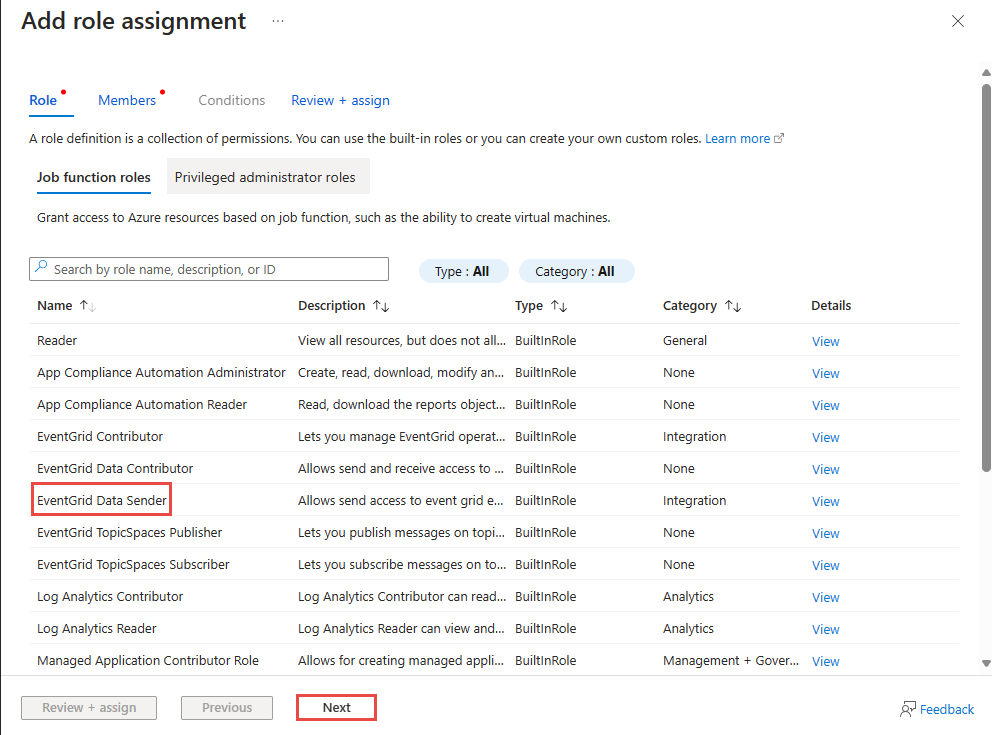
On the Access control page, select Add, and then select Add role assignment.
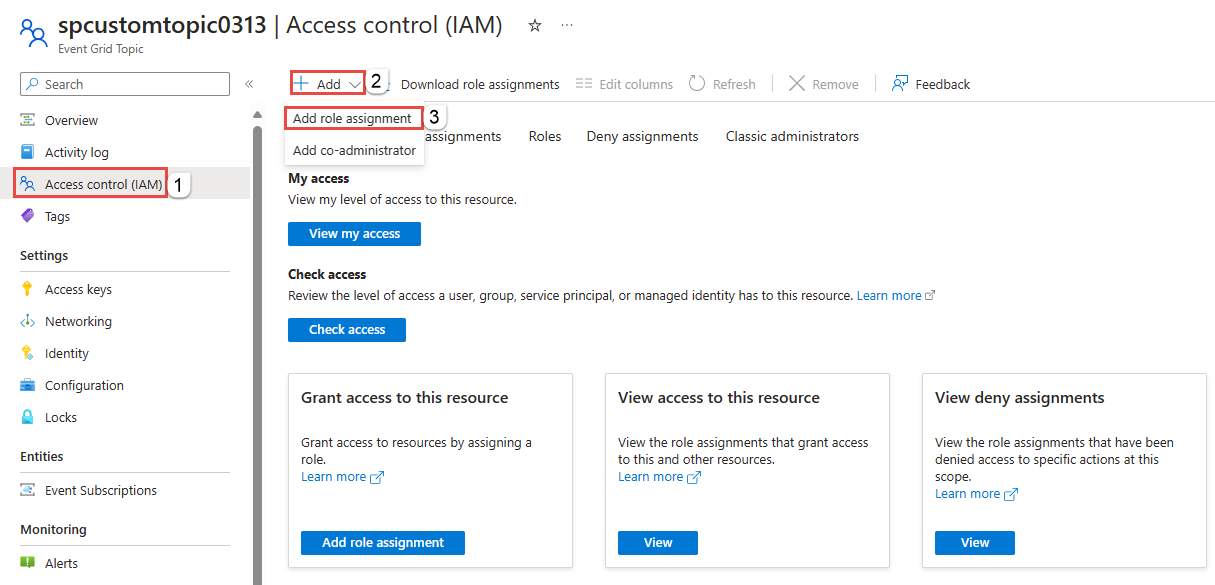
On the Role page of the Add role assignment wizard, select Event Grid Data Sender role, and select Next at the bottom of the page.
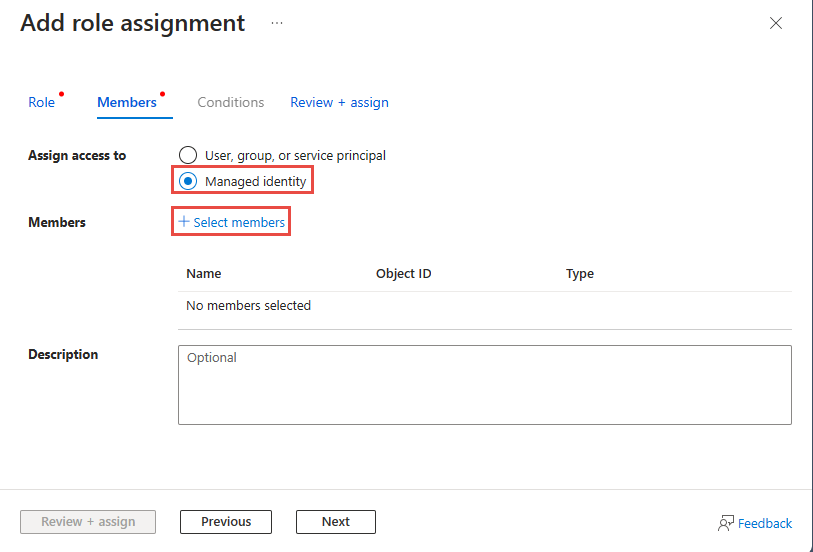
On the Members page of the Add role assignment wizard, select Managed identity, and then choose Select members.
On the Select managed identities page, do these steps:
Select your Azure subscription.
For Managed identity, select Event Grid Namespace.
Select the managed identity that has the same name as the Event Grid namespace.
Choose Select at the bottom of the page.

On the Add role assignment page, select Next at the bottom of the page.
On the Review + assign page, review settings, and then select Review + assign at the bottom of the page.


Configure routing messages to Azure function via custom topic
In this step, you configure routing for the Event Grid namespace so that the messages it receives are routed to the custom topic you created.
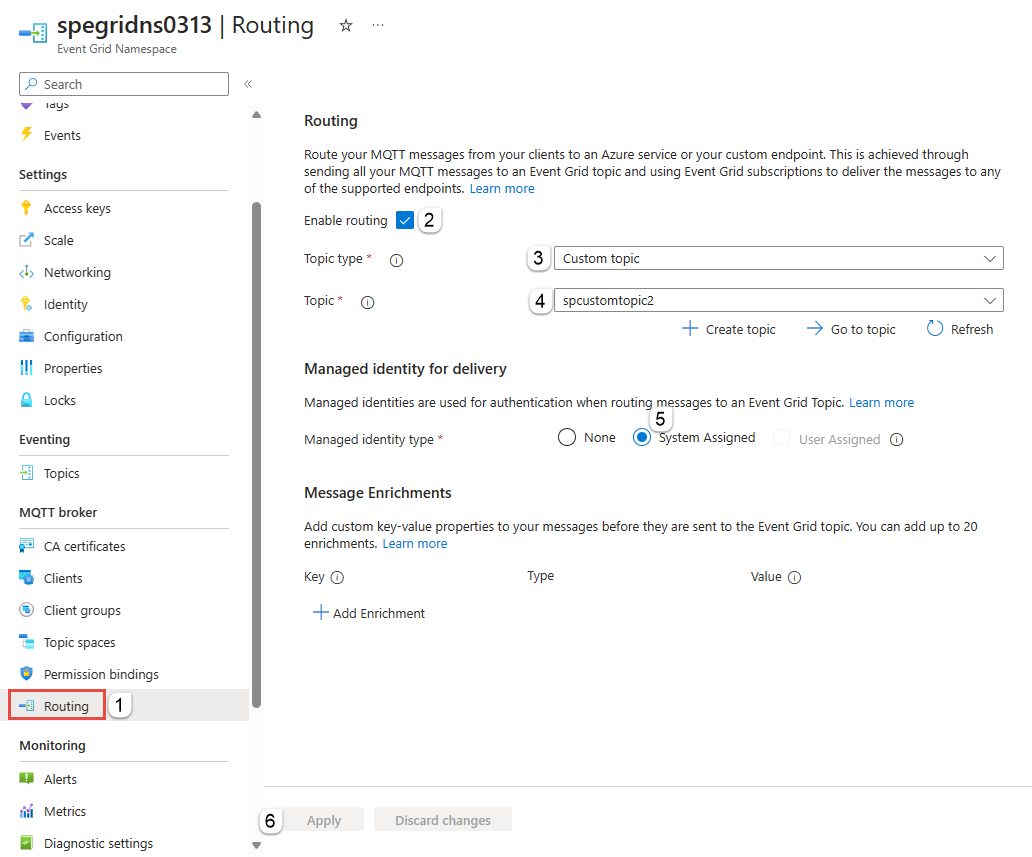
On the Event Grid Namespace page, select Routing on the left navigation bar.
On the Routing page, select Enable routing.
For Topic type, select Custom topic.
For Topic, select the custom topic you created for this tutorial.
For Managed identity for delivery, select System Assigned.
Select Apply at the bottom of the page.

Send test MQTT messages using MQTTX
Send test MQTT messages to the namespace and confirm that the function receives them.
Follow instructions from the Publish, subscribe messages using MQTTX app article to send a few test messages to the Event Grid namespace.
Here's the flow of the events or messages:
MQTTX sends messages to the topic space of the Event Grid namespace.
The messages get routed to the custom topic that you configured.
The messages are forwarded to the event subscription, which is the Azure function.
Use the logging feature to verify that the function has received the event.


Next step
See code samples in this GitHub repository.
Feedback
Coming soon: Throughout 2024 we will be phasing out GitHub Issues as the feedback mechanism for content and replacing it with a new feedback system. For more information see: https://aka.ms/ContentUserFeedback.
Submit and view feedback for