Change IoT Central application settings
This article describes how you can manage an application. You can change the application name and URL, upload a logo, and delete an application in your Azure IoT Central application.
To access and use the Settings > Application and Settings > Customization sections, you must be in the Administrator role for an Azure IoT Central application. If you create an Azure IoT Central application, you're automatically assigned to the Administrator role for that application.
Change application name and URL
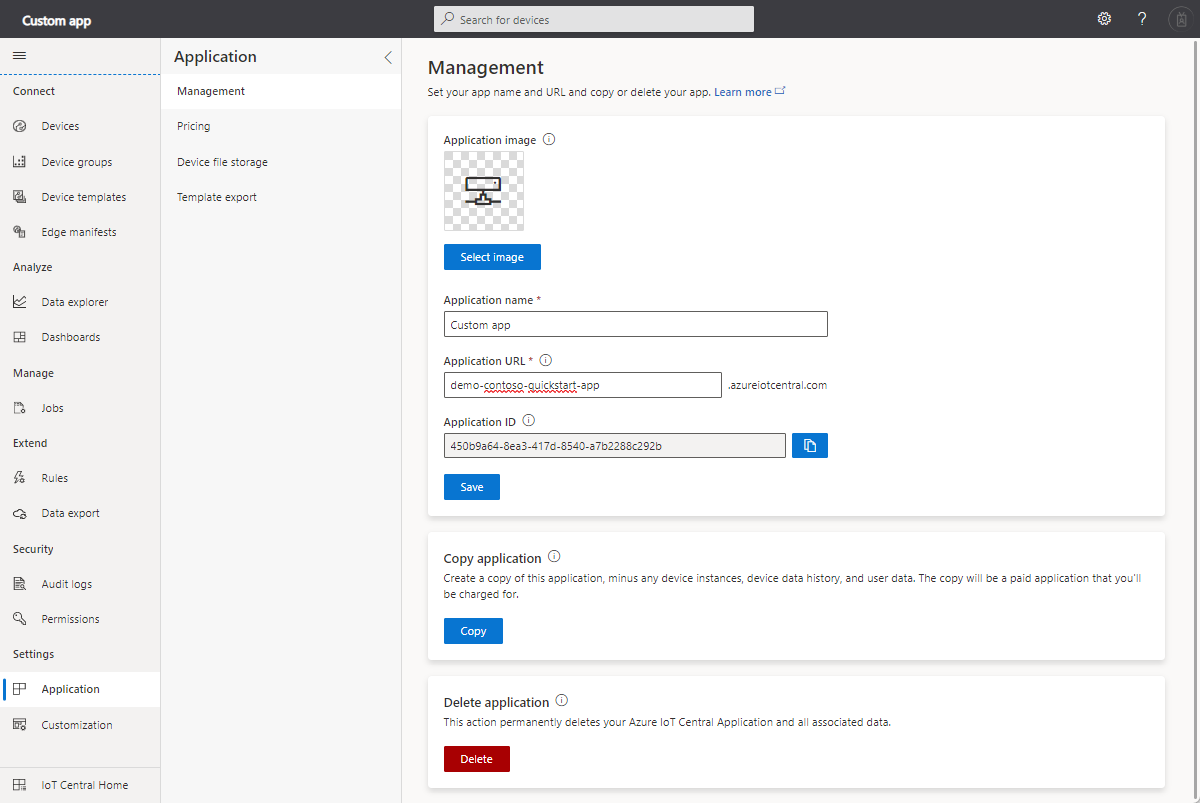
In the Application > Management page, you can change the name and URL of your application, then select Save.
If your administrator creates a custom theme for your application, this page includes an option to hide the Application Name in the UI. This option is useful if the application logo in the custom theme includes the application name. For more information, see Customize the Azure IoT Central UI.
If you change your URL, another Azure IoT Central customer can take your old URL. When you change your URL, the old URL no longer works, and you need to notify your users about the new URL to use.
Delete an application
Use the Delete button to permanently delete your IoT Central application. This action permanently deletes all data that's associated with the application.
To delete an application, you must also have permissions to delete resources in the Azure subscription you chose when you created the application. To learn more, see Assign Azure roles to manage access to your Azure subscription resources.
Important
If you delete and IoT Central application, it's not possible to recover it. It is possible to create a new application with the same name, but it will be a new application with no data. You need to wait for several minutes before you can create a new application with the same name.
Manage programmatically
IoT Central Azure Resource Manager SDK packages are available for Node, Python, C#, Ruby, Java, and Go. You can use these packages to create, list, update, or delete IoT Central applications. The packages include helpers to manage authentication and error handling.
You can find examples of how to use the Azure Resource Manager SDKs at https://github.com/Azure-Samples/azure-iot-central-arm-sdk-samples.
To learn more, see the following GitHub repositories and packages:
Next steps
Now that you've learned about how to administer your Azure IoT Central application, the suggested next step is to learn about Manage users and roles in Azure IoT Central.
Feedback
Coming soon: Throughout 2024 we will be phasing out GitHub Issues as the feedback mechanism for content and replacing it with a new feedback system. For more information see: https://aka.ms/ContentUserFeedback.
Submit and view feedback for
