Tutorial: Connect an IoT Edge device to your Azure IoT Central application
This tutorial shows you how to connect an IoT Edge device to your Azure IoT Central application. The IoT Edge device runs a module that sends temperature, pressure, and humidity telemetry to your application. You use a device template to enable views and forms that let you interact with the module on the IoT Edge device.
In this tutorial, you learn how to:
- Import an IoT Edge deployment manifest into your IoT Central application.
- Add an IoT Edge device that uses this deployment manifest to your application.
- Connect the IoT Edge device to your application.
- Monitor the IoT Edge runtime from your application.
- Add a device template with views and forms to your application.
- View the telemetry sent from the device in your application.
Prerequisites
To complete the steps in this tutorial, you need:
An active Azure subscription. If you don't have an Azure subscription, create a free account before you begin.
An IoT Central application created from the Custom application template. To learn more, see Create an IoT Central application and About your application.
You also need to be able to upload configuration files to your IoT Central application from your local machine.
Import a deployment manifest
A deployment manifest specifies the configuration of an IoT Edge device including the details of any custom modules the device should download and run. IoT Edge devices that connect to an IoT Central application download their deployment manifests from the application.
To add a deployment manifest to IoT Central to use in this tutorial:
Download and save the EnvironmentalSensorManifest-1-4.json deployment manifest to your local machine.
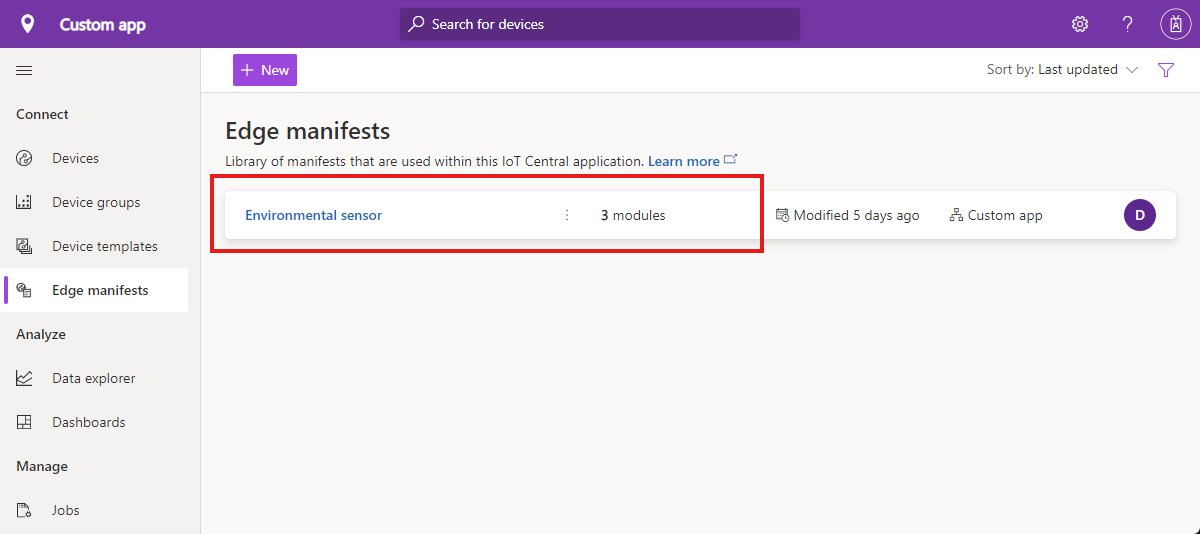
In your IoT Central application, navigate to the Edge manifests page.
Select + New.
On the Customize page, enter Environmental Sensor as the name and then upload the EnvironmentalSensorManifest-1-4.json file.
After the manifest file is validated, select Next.
The Review and finish page shows the modules defined in the manifest, including the SimulatedTemperatureSensor custom module. Select Create.
The Edge manifests list now includes the Environmental sensor manifest:
Add an IoT Edge device
Before the IoT Edge device can connect to your IoT Central application, you need to add it to the list of devices and get its credentials:
In your IoT Central application, navigate to the Devices page.
On the Devices page, make sure that All devices is selected. Then select + New.
On the Create a new device page:
- Enter Environmental sensor - 001 as the device name.
- Enter env-sens-001 as the device ID.
- Make sure that the device template is unassigned.
- Make sure that the device isn't simulated.
- Set Azure IoT Edge device to Yes.
- Select the Environmental sensor IoT Edge deployment manifest.
Select Create.
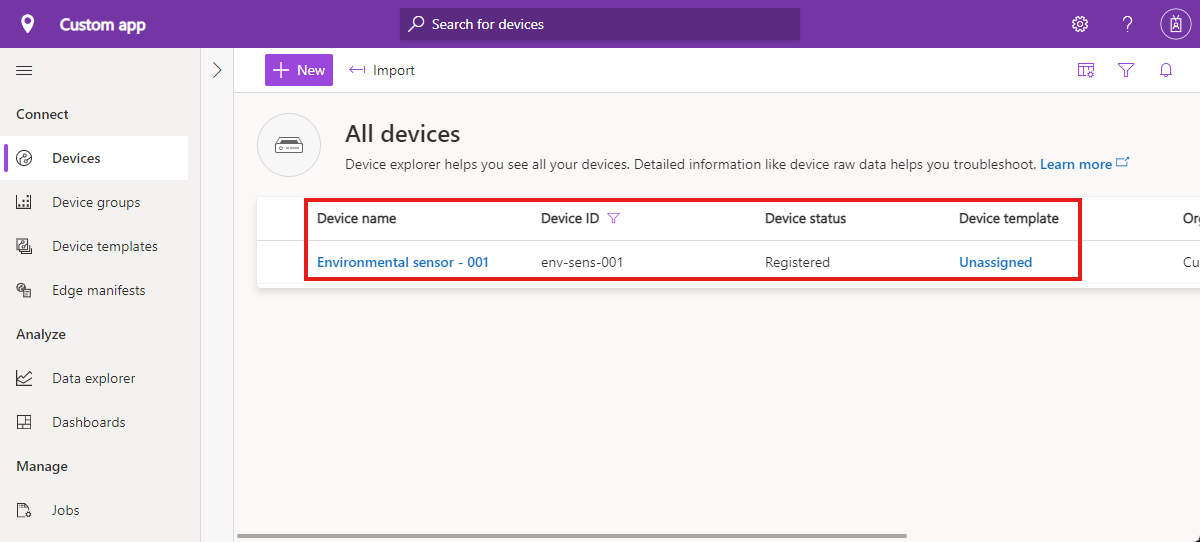
The list of devices on the Devices page now includes the Environmental sensor - 001 device. The device status is Registered:
Before you deploy the IoT Edge device, you need the:
- ID Scope of your IoT Central application.
- Device ID values for the IoT Edge device.
- Primary key values for the IoT Edge device.
To find these values, navigate to the Environmental sensor - 001 device from the Devices page and select Connect. Make a note of these values before you continue.
Deploy the IoT Edge device
In this tutorial, you deploy the IoT Edge runtime to a Linux virtual machine in Azure. To deploy and configure the virtual machine, select the following button:
On the Custom deployment page, use the following values to complete the form:
| Setting | Value |
|---|---|
Resource group |
Create a new resource group with a name such as MyIoTEdgeDevice_rg. |
Region |
Select a region close to you. |
Dns Label Prefix |
A unique DNS prefix for your virtual machine. |
Admin Username |
AzureUser |
Admin Password |
A password of your choice to access the virtual machine. |
Scope Id |
The ID scope you made a note of previously. |
Device Id |
The device ID you made a note of previously. |
Device Key |
The device key you made a note of previously. |
Select Review + create and then Create. Wait for the deployment to finish before you continue.
Manage the IoT Edge device
To verify the deployment of the IoT Edge device was successful:
In your IoT Central application, navigate to the Devices page. Check the status of the Environmental sensor - 001 device is Provisioned. You might need to wait for a few minutes while the device connects.
Navigate to the Environmental sensor - 001 device.
On the Modules page, check the status of the three modules is Running.
On the Modules page, you can view status information about the modules and perform actions such as viewing their logs and restarting them.
View raw data
On the Raw data page for the Environmental sensor - 001 device, you can see the telemetry it's sending and the property values it's reporting.
At the moment, the IoT Edge device doesn't have a device template assigned, so all the data from the device is Unmodeled. Without a device template, there are no views or dashboards to display custom device information in the IoT Central application. However, you can use data export to forward the data to other services for analysis or storage.
Add a device template
A deployment manifest can include definitions of properties exposed by a module. For example, the configuration in the deployment manifest for the SimulatedTemperatureSensor module includes the following:
"SimulatedTemperatureSensor": {
    "properties.desired": {
        "SendData": true,
        "SendInterval": 10
    }
}
The following steps show you how to add a device template for an IoT Edge device and the module property definitions from the deployment manifest:
In your IoT Central application, navigate to the Device templates page and select + New.
On the Select type page, select Azure IoT Edge, and then Next: Customize.
On the Customize page, enter Environmental sensor as the device template name. Select Next: Review.
On the Review page, select Create.
On the Create a model page, select Custom model.
On the Environmental sensor page, select Modules, then Import modules from manifest.
In the Import modules dialog, select the Environmental sensor deployment manifest, then Import.
The device template now includes a module called SimulatedTemperatureSensor, with an interface called management. This interface includes definitions of the SendData and SendInterval properties from the deployment manifest.
A deployment manifest can only define module properties, not commands or telemetry. To add the telemetry definitions to the device template:
Download and save the EnvironmentalSensorTelemetry.json interface definition to your local machine.
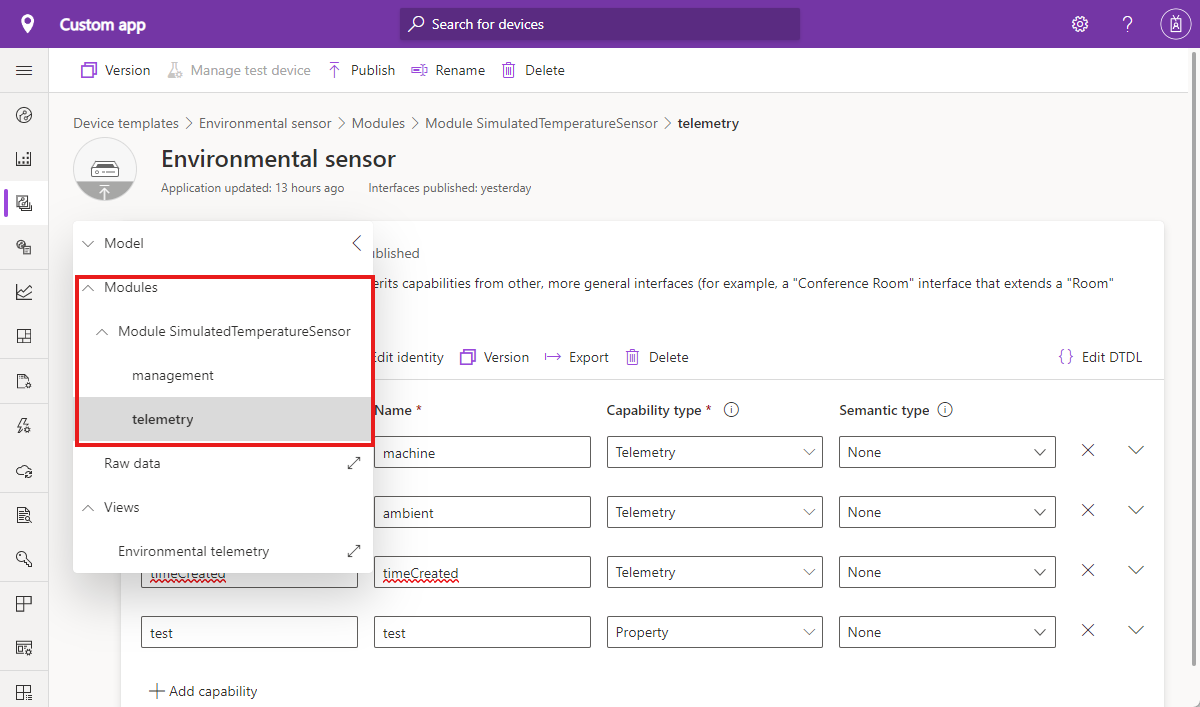
Navigate to the SimulatedTemperatureSensor module in the Environmental sensor device template.
Select Add inherited interface (you might need to select ... to see this option). Select Import interface. Then import the EnvironmentalSensorTelemetry.json file you previously downloaded.
The module now includes a telemetry interface that defines machine, ambient, and timeCreated telemetry types:
To add a view that plots telemetry from the device:
In the Environmental sensor device template, select Views.
On the Select to add a new view page, select Visualizing the device.
Enter Environmental telemetry as the view name.
Select Start with devices. Then add the following telemetry types:
- ambient/temperature
- humidity
- machine/temperature
- pressure
Select Add tile, then Save.
To publish the template, select Publish.
View telemetry and control module
To view the telemetry from your device, you need to attach the device to the device template:
Navigate to the Devices page and select the Environmental sensor - 001 device.
Select Migrate.
In the Migrate dialog, select the Environmental sensor device template, and select Migrate.
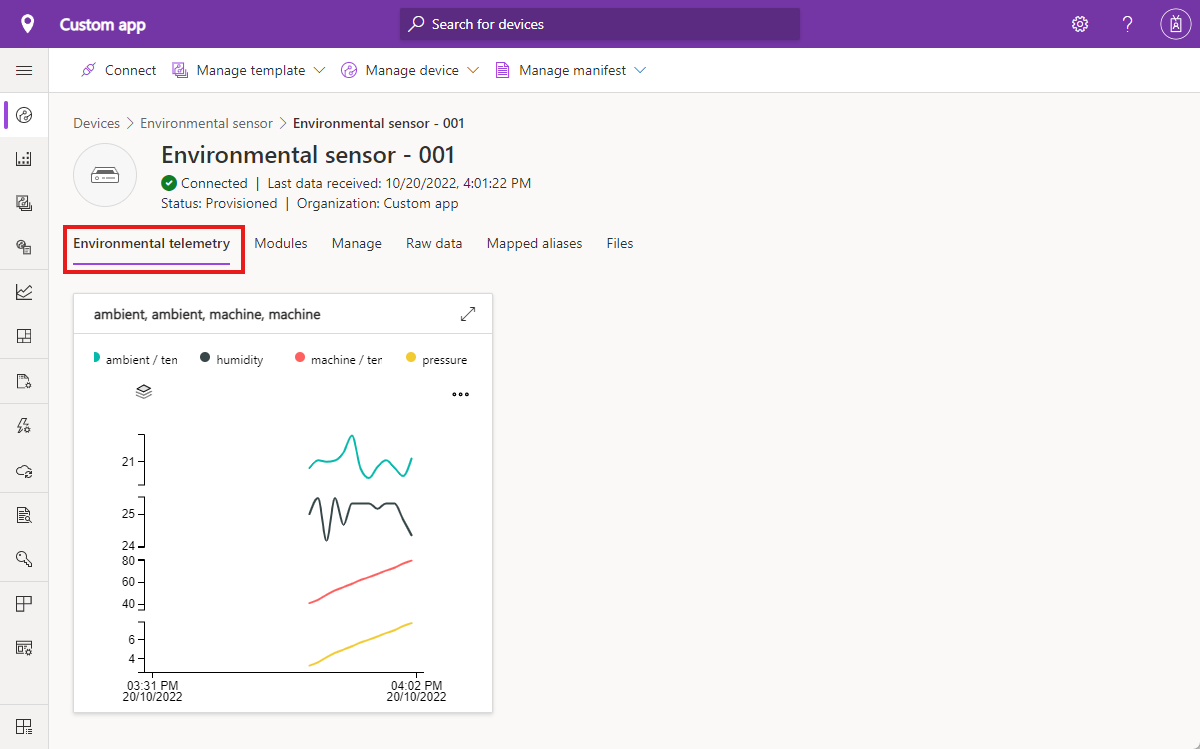
Navigate to the Environmental sensor - 001 device and select the Environmental telemetry view.
The line chart plots the four telemetry values you selected for the view:
The Raw data page now includes columns for the ambient, machine, and timeCreated telemetry values.
To control the module by using the properties defined in the deployment manifest, navigate to the Environmental sensor - 001 device and select the Manage view.
IoT Central created this view automatically from the manage interface in the SimulatedTemperatureSensor module. The Raw data page now includes columns for the SendData and SendInterval properties.
Clean up resources
If you don't plan to complete any further IoT Central quickstarts or tutorials, you can delete your IoT Central application:
- In your IoT Central application, navigate to Application > Management.
- Select Delete and then confirm your action.
To remove the virtual machine that's running Azure IoT Edge, navigate to the Azure portal and delete the resource group you created previously. If you used the recommended name, your resource group is called MyIoTEdgeDevice_rg.
Next steps
If you'd prefer to continue through the set of IoT Central tutorials and learn more about building an IoT Central solution, see:
Feedback
Coming soon: Throughout 2024 we will be phasing out GitHub Issues as the feedback mechanism for content and replacing it with a new feedback system. For more information see: https://aka.ms/ContentUserFeedback.
Submit and view feedback for