Capture data from Event Hubs in Parquet format
This article explains how to use the no code editor to automatically capture streaming data in Event Hubs in an Azure Data Lake Storage Gen2 account in the Parquet format.
Prerequisites
An Azure Event Hubs namespace with an event hub and an Azure Data Lake Storage Gen2 account with a container to store the captured data. These resources must be publicly accessible and can't be behind a firewall or secured in an Azure virtual network.
If you don't have an event hub, create one by following instructions from Quickstart: Create an event hub.
If you don't have a Data Lake Storage Gen2 account, create one by following instructions from Create a storage account
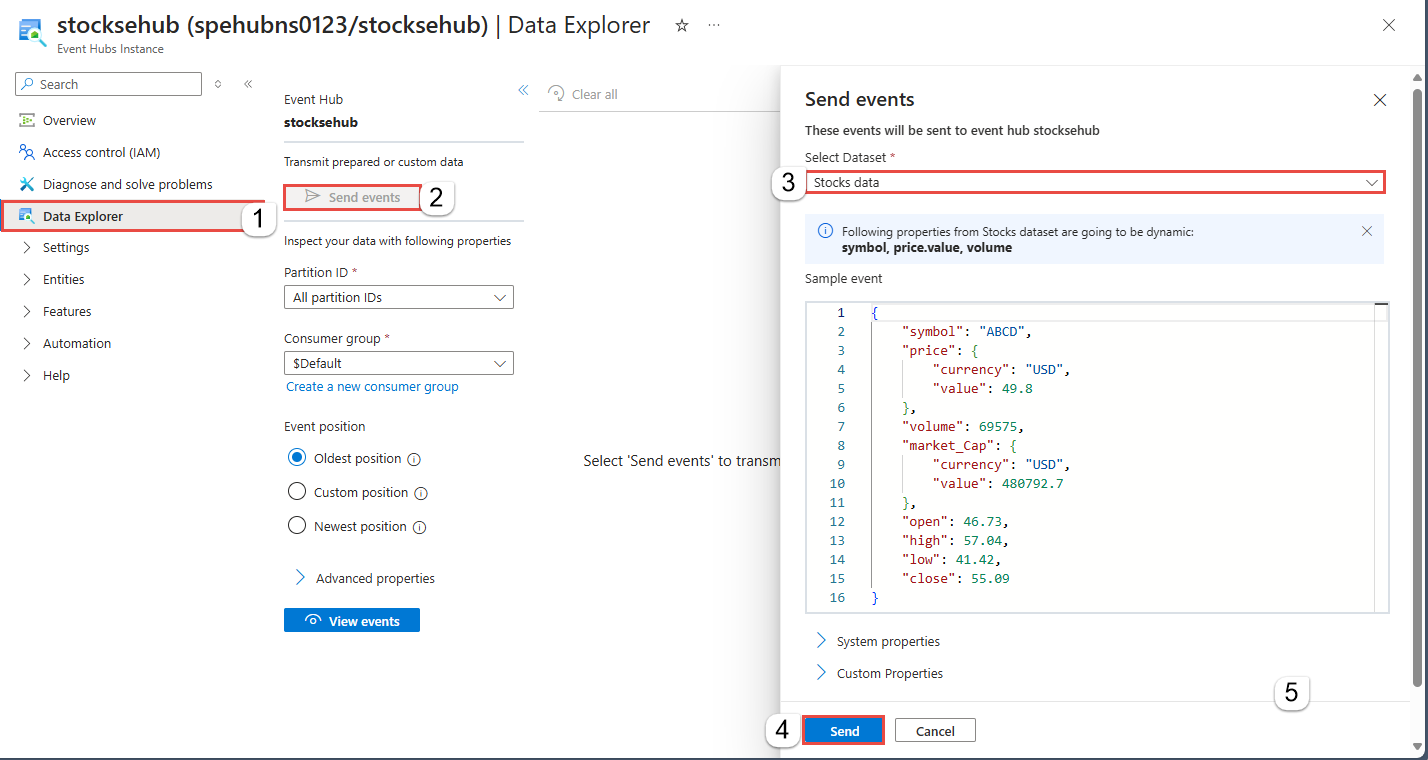
The data in your Event Hubs must be serialized in either JSON, CSV, or Avro format. For testing purposes, select Generate data (preview) on the left menu, select Stocks data for dataset, and then select Send.

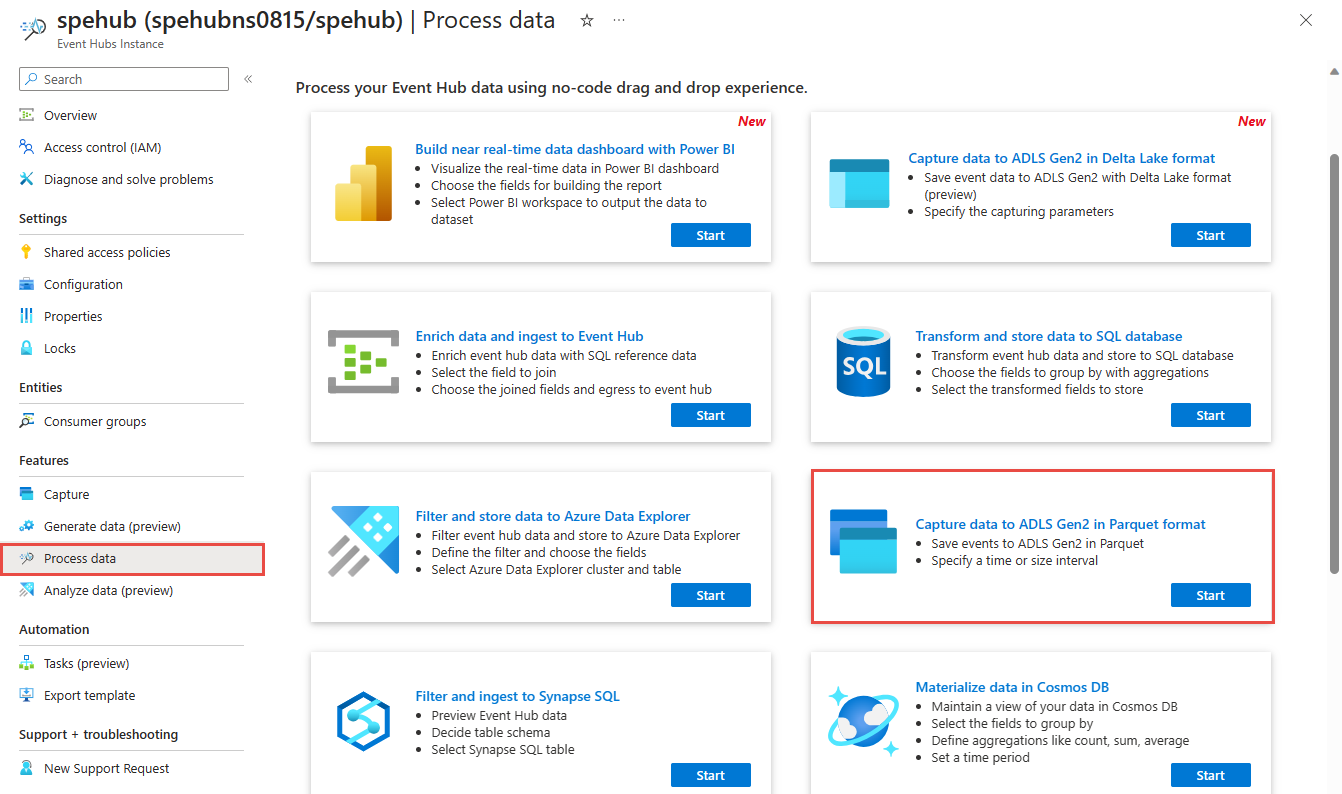
Configure a job to capture data
Use the following steps to configure a Stream Analytics job to capture data in Azure Data Lake Storage Gen2.
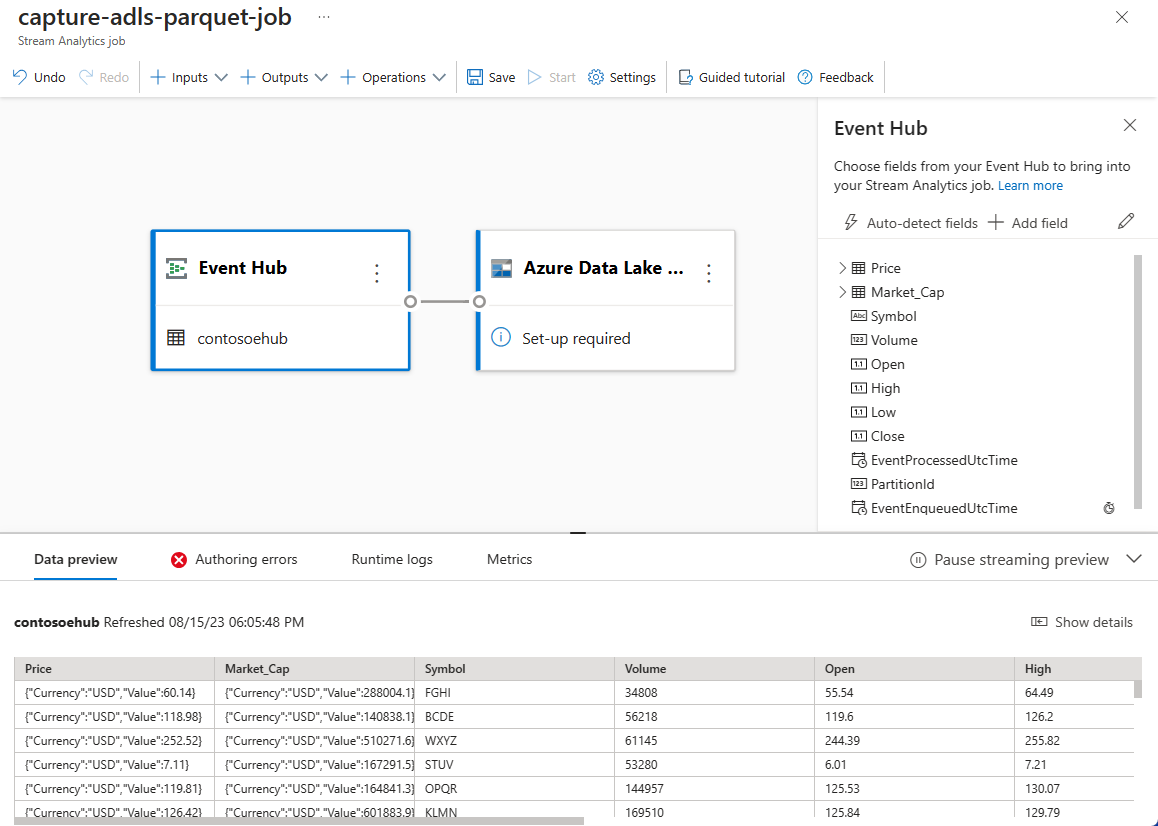
In the Azure portal, navigate to your event hub.
On the left menu, select Process Data under Features. Then, select Start on the Capture data to ADLS Gen2 in Parquet format card.
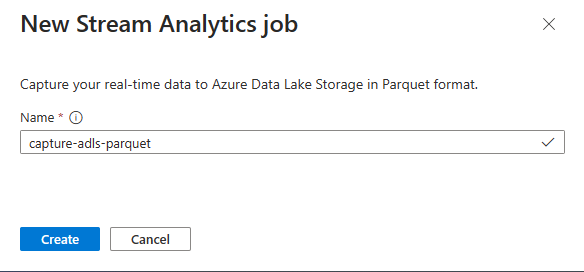
Enter a name for your Stream Analytics job, and then select Create.
Specify the Serialization type of your data in the Event Hubs and the Authentication method that the job uses to connect to Event Hubs. Then select Connect.
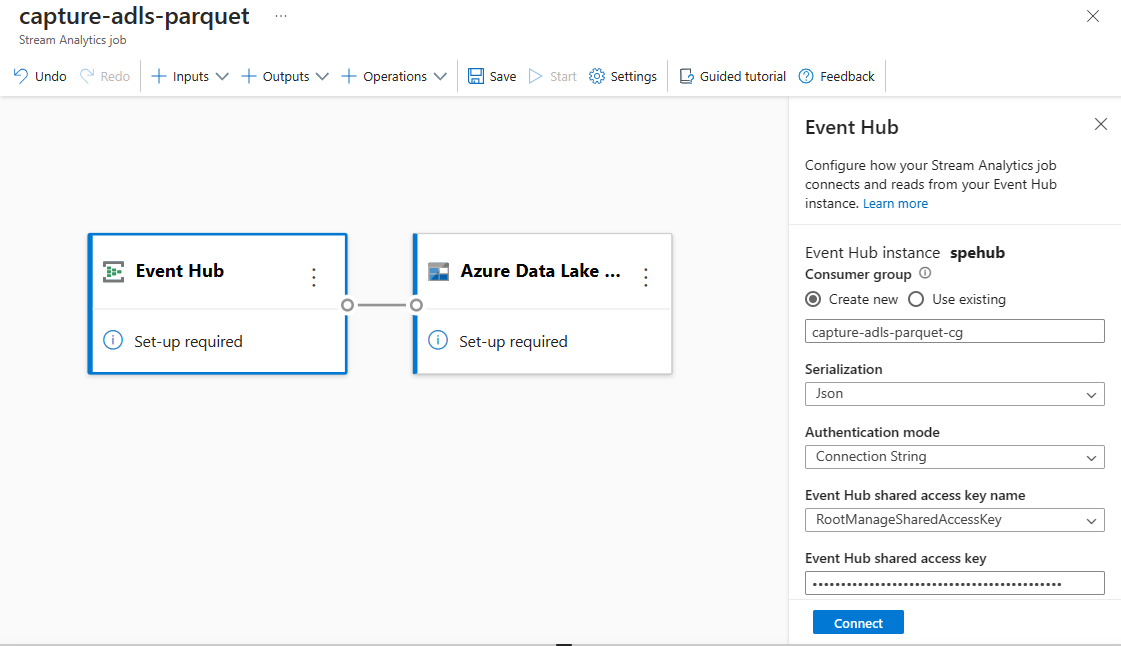
When the connection is established successfully, you see:
Fields that are present in the input data. You can choose Add field or you can select the three dot symbol next to a field to optionally remove, rename, or change its name.
A live sample of incoming data in the Data preview table under the diagram view. It refreshes periodically. You can select Pause streaming preview to view a static view of the sample input.
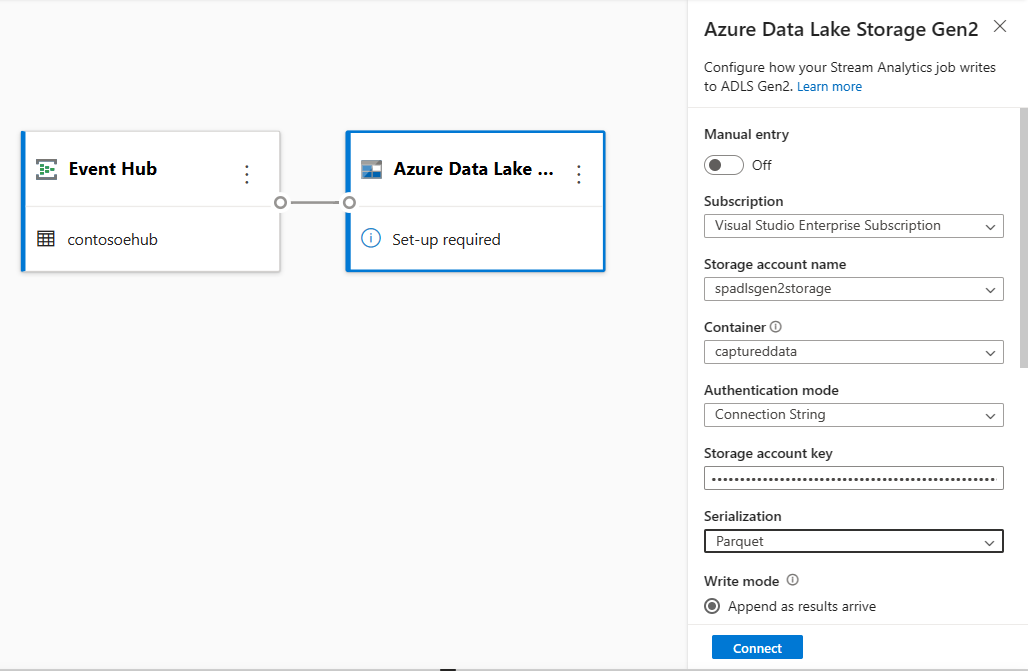
Select the Azure Data Lake Storage Gen2 tile to edit the configuration.
On the Azure Data Lake Storage Gen2 configuration page, follow these steps:
Select the subscription, storage account name and container from the drop-down menu.
Once the subscription is selected, the authentication method and storage account key should be automatically filled in.
Select Parquet for Serialization format.
For streaming blobs, the directory path pattern is expected to be a dynamic value. It's required for the date to be a part of the file path for the blob – referenced as
{date}. To learn about custom path patterns, see to Azure Stream Analytics custom blob output partitioning.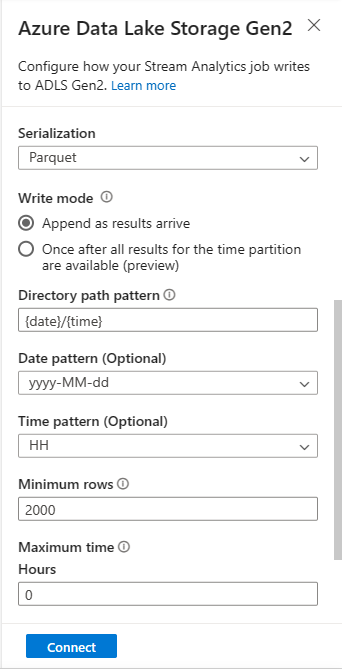
Select Connect
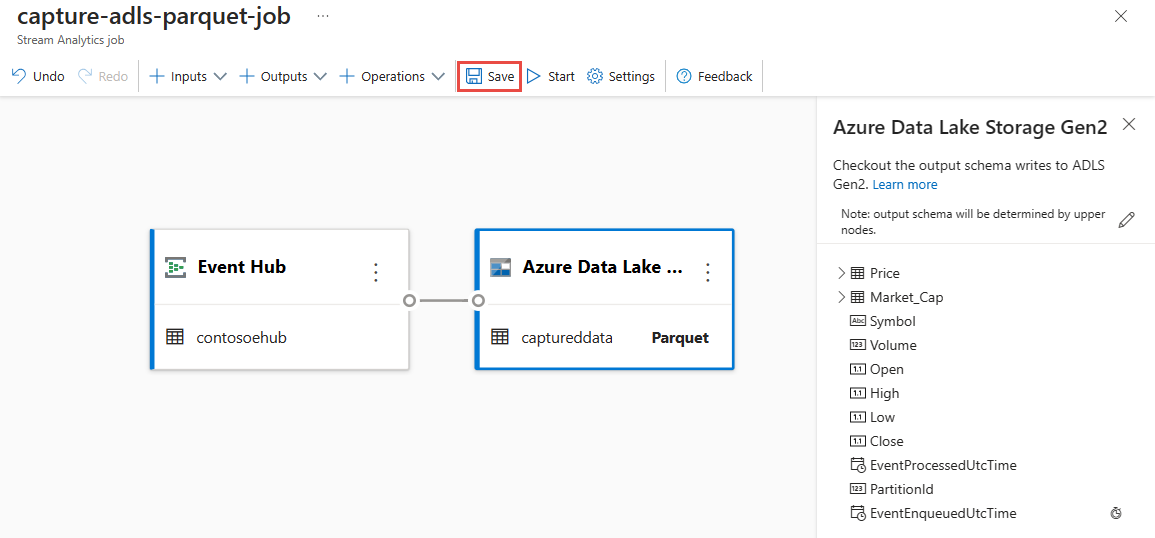
When the connection is established, you see fields that are present in the output data.
Select Save on the command bar to save your configuration.
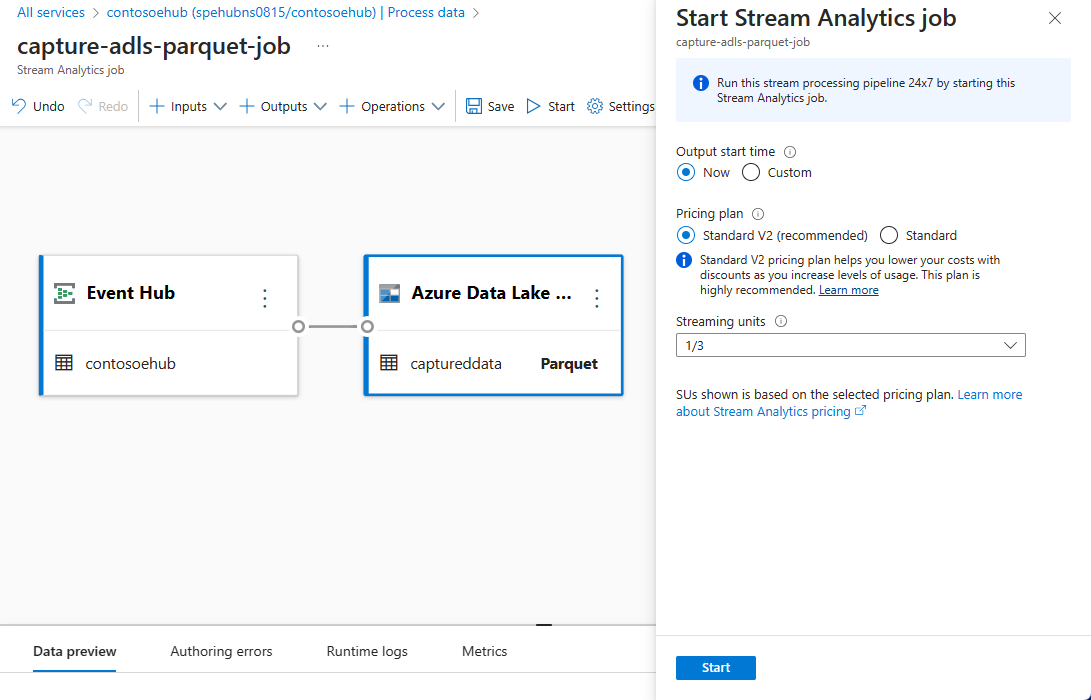
Select Start on the command bar to start the streaming flow to capture data. Then in the Start Stream Analytics job window:
Choose the output start time.
Select the pricing plan.
Select the number of Streaming Units (SU) that the job runs with. SU represents the computing resources that are allocated to execute a Stream Analytics job. For more information, see Streaming Units in Azure Stream Analytics.
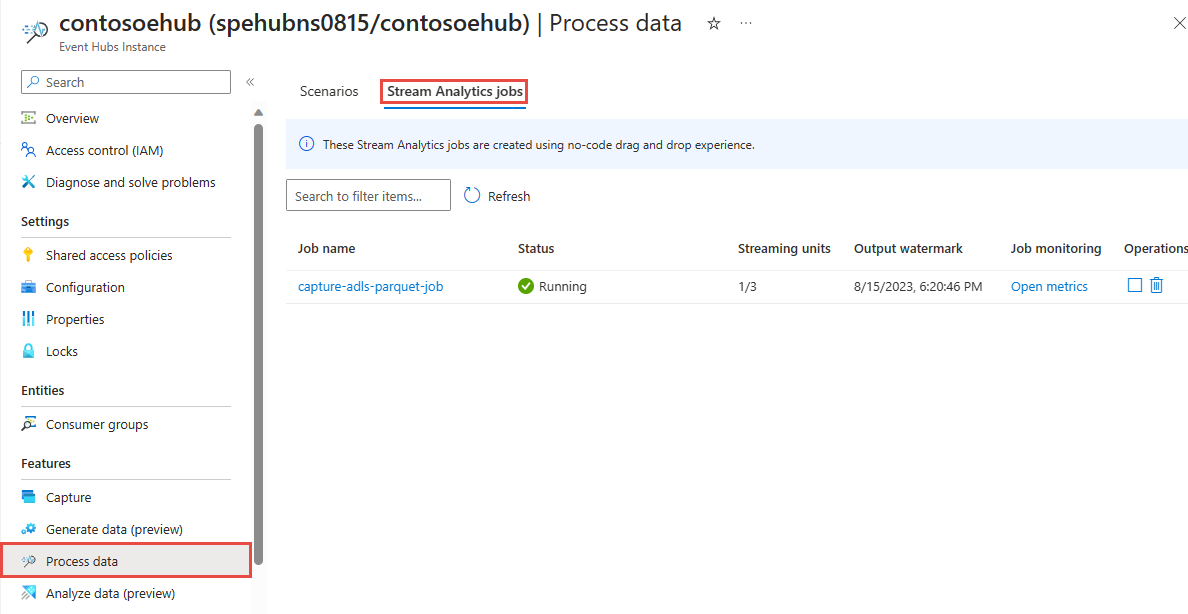
You should see the Stream Analytic job in the Stream Analytics job tab of the Process data page for your event hub.


Verify output
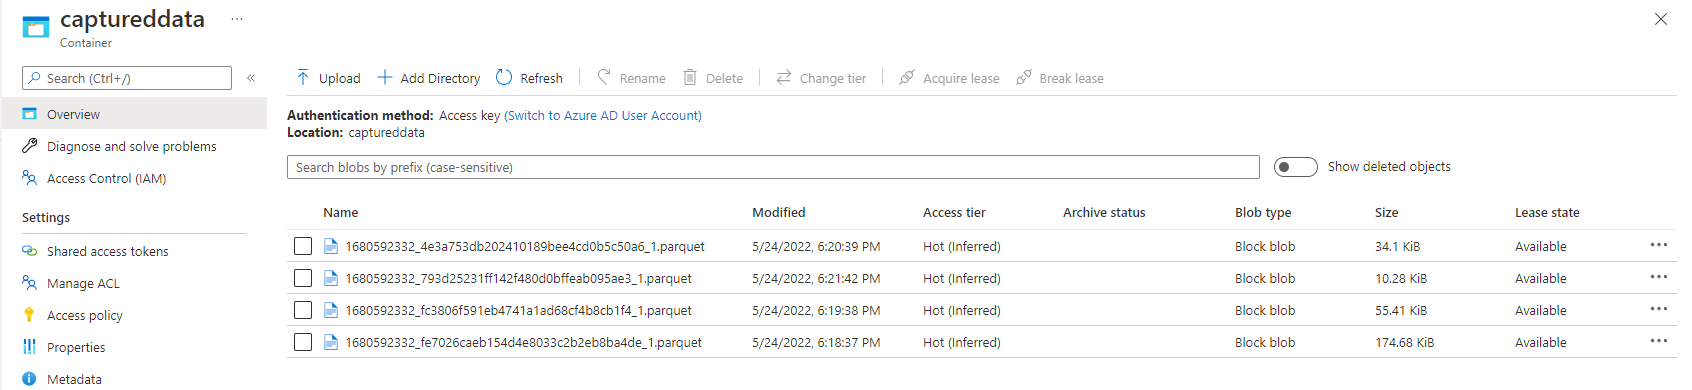
On the Event Hubs instance page for your event hub, select Generate data, select Stocks data for dataset, and then select Send to send some sample data to the event hub.
Verify that the Parquet files are generated in the Azure Data Lake Storage container.
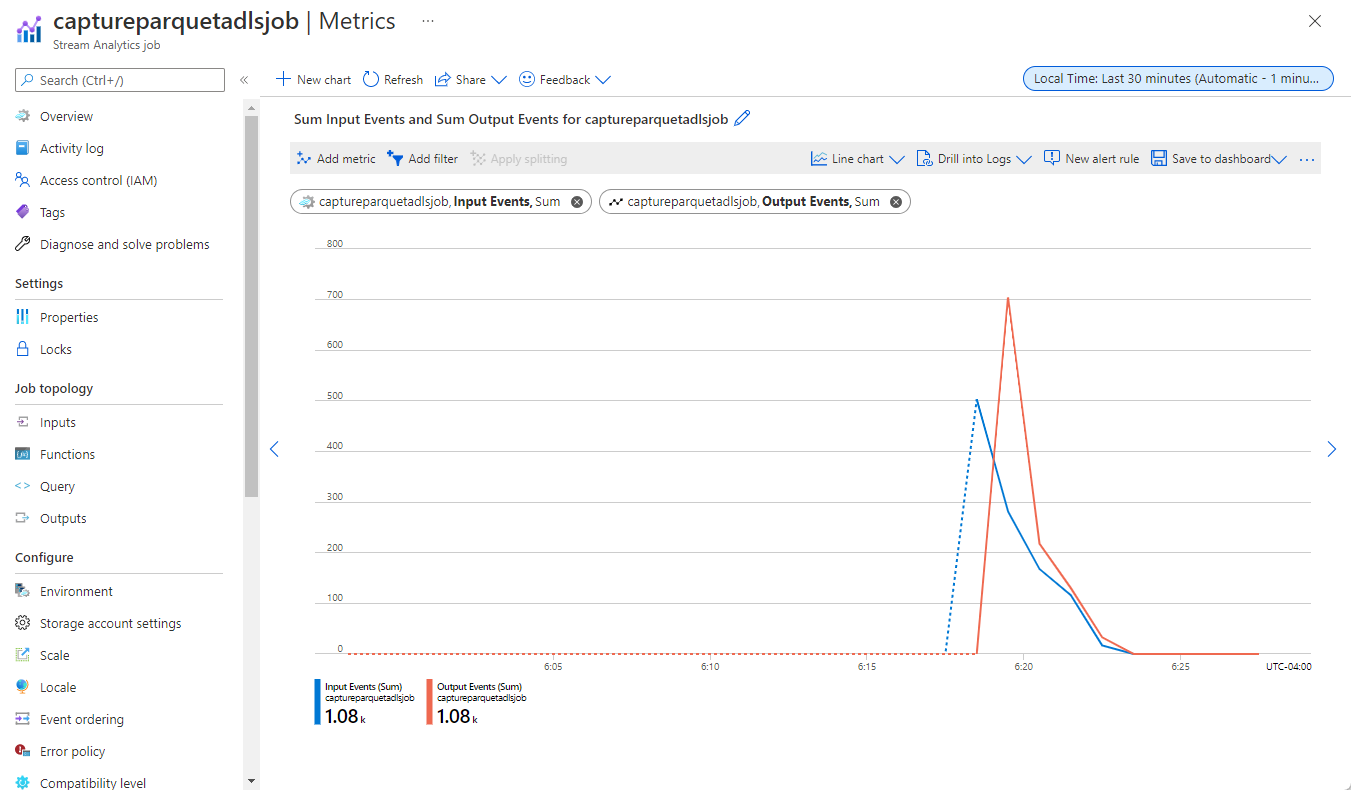
Select Process data on the left menu. Switch to the Stream Analytics jobs tab. Select Open metrics to monitor it.
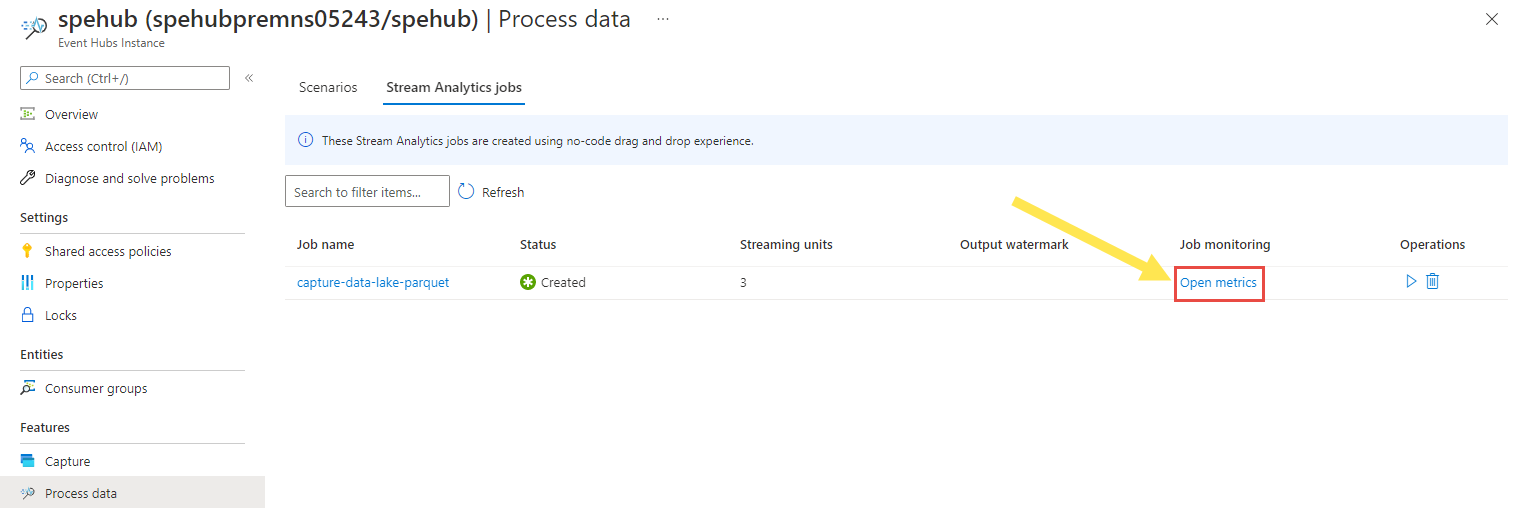
Here's an example screenshot of metrics showing input and output events.


Next steps
Now you know how to use the Stream Analytics no code editor to create a job that captures Event Hubs data to Azure Data Lake Storage Gen2 in Parquet format. Next, you can learn more about Azure Stream Analytics and how to monitor the job that you created.
Feedback
Coming soon: Throughout 2024 we will be phasing out GitHub Issues as the feedback mechanism for content and replacing it with a new feedback system. For more information see: https://aka.ms/ContentUserFeedback.
Submit and view feedback for