Service level agreements (SLA) for work orders
Dynamics 365 Field Service builds on the Service Level Agreement (SLA) functionality of Dynamics 365 Customer Service.
SLAs help organizations ensure work orders get the right level of attention in a timely manner.
For example, a field service organization offers an SLA to their customers. They promise that field technicians arrive within 3 hours from the time a work order is created. The organization wants a warning status displayed after 90 minutes and to use the SLA timer during the scheduling process.
For more information on SLAs, go to Define SLAs.
In this article, you'll learn how to associate SLAs to Field Service work orders.
Prerequisites
- Field Service v8.3+
- Knowledge of Dynamics 365 Service Level Agreements
Enable SLA functionality for Field Service
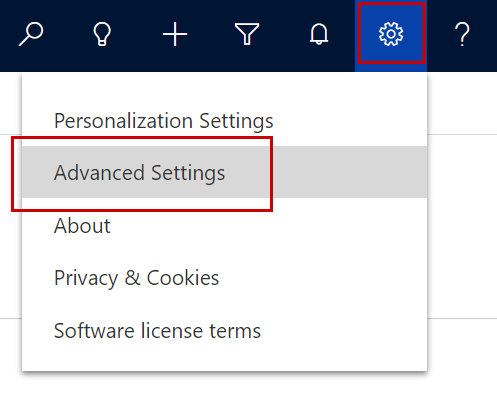
Go to Advanced Settings.
Go to Customizations > Customize the System.
Expand Entities and select Work Order.
In the Communication & Collaboration section, select Enable for SLA.
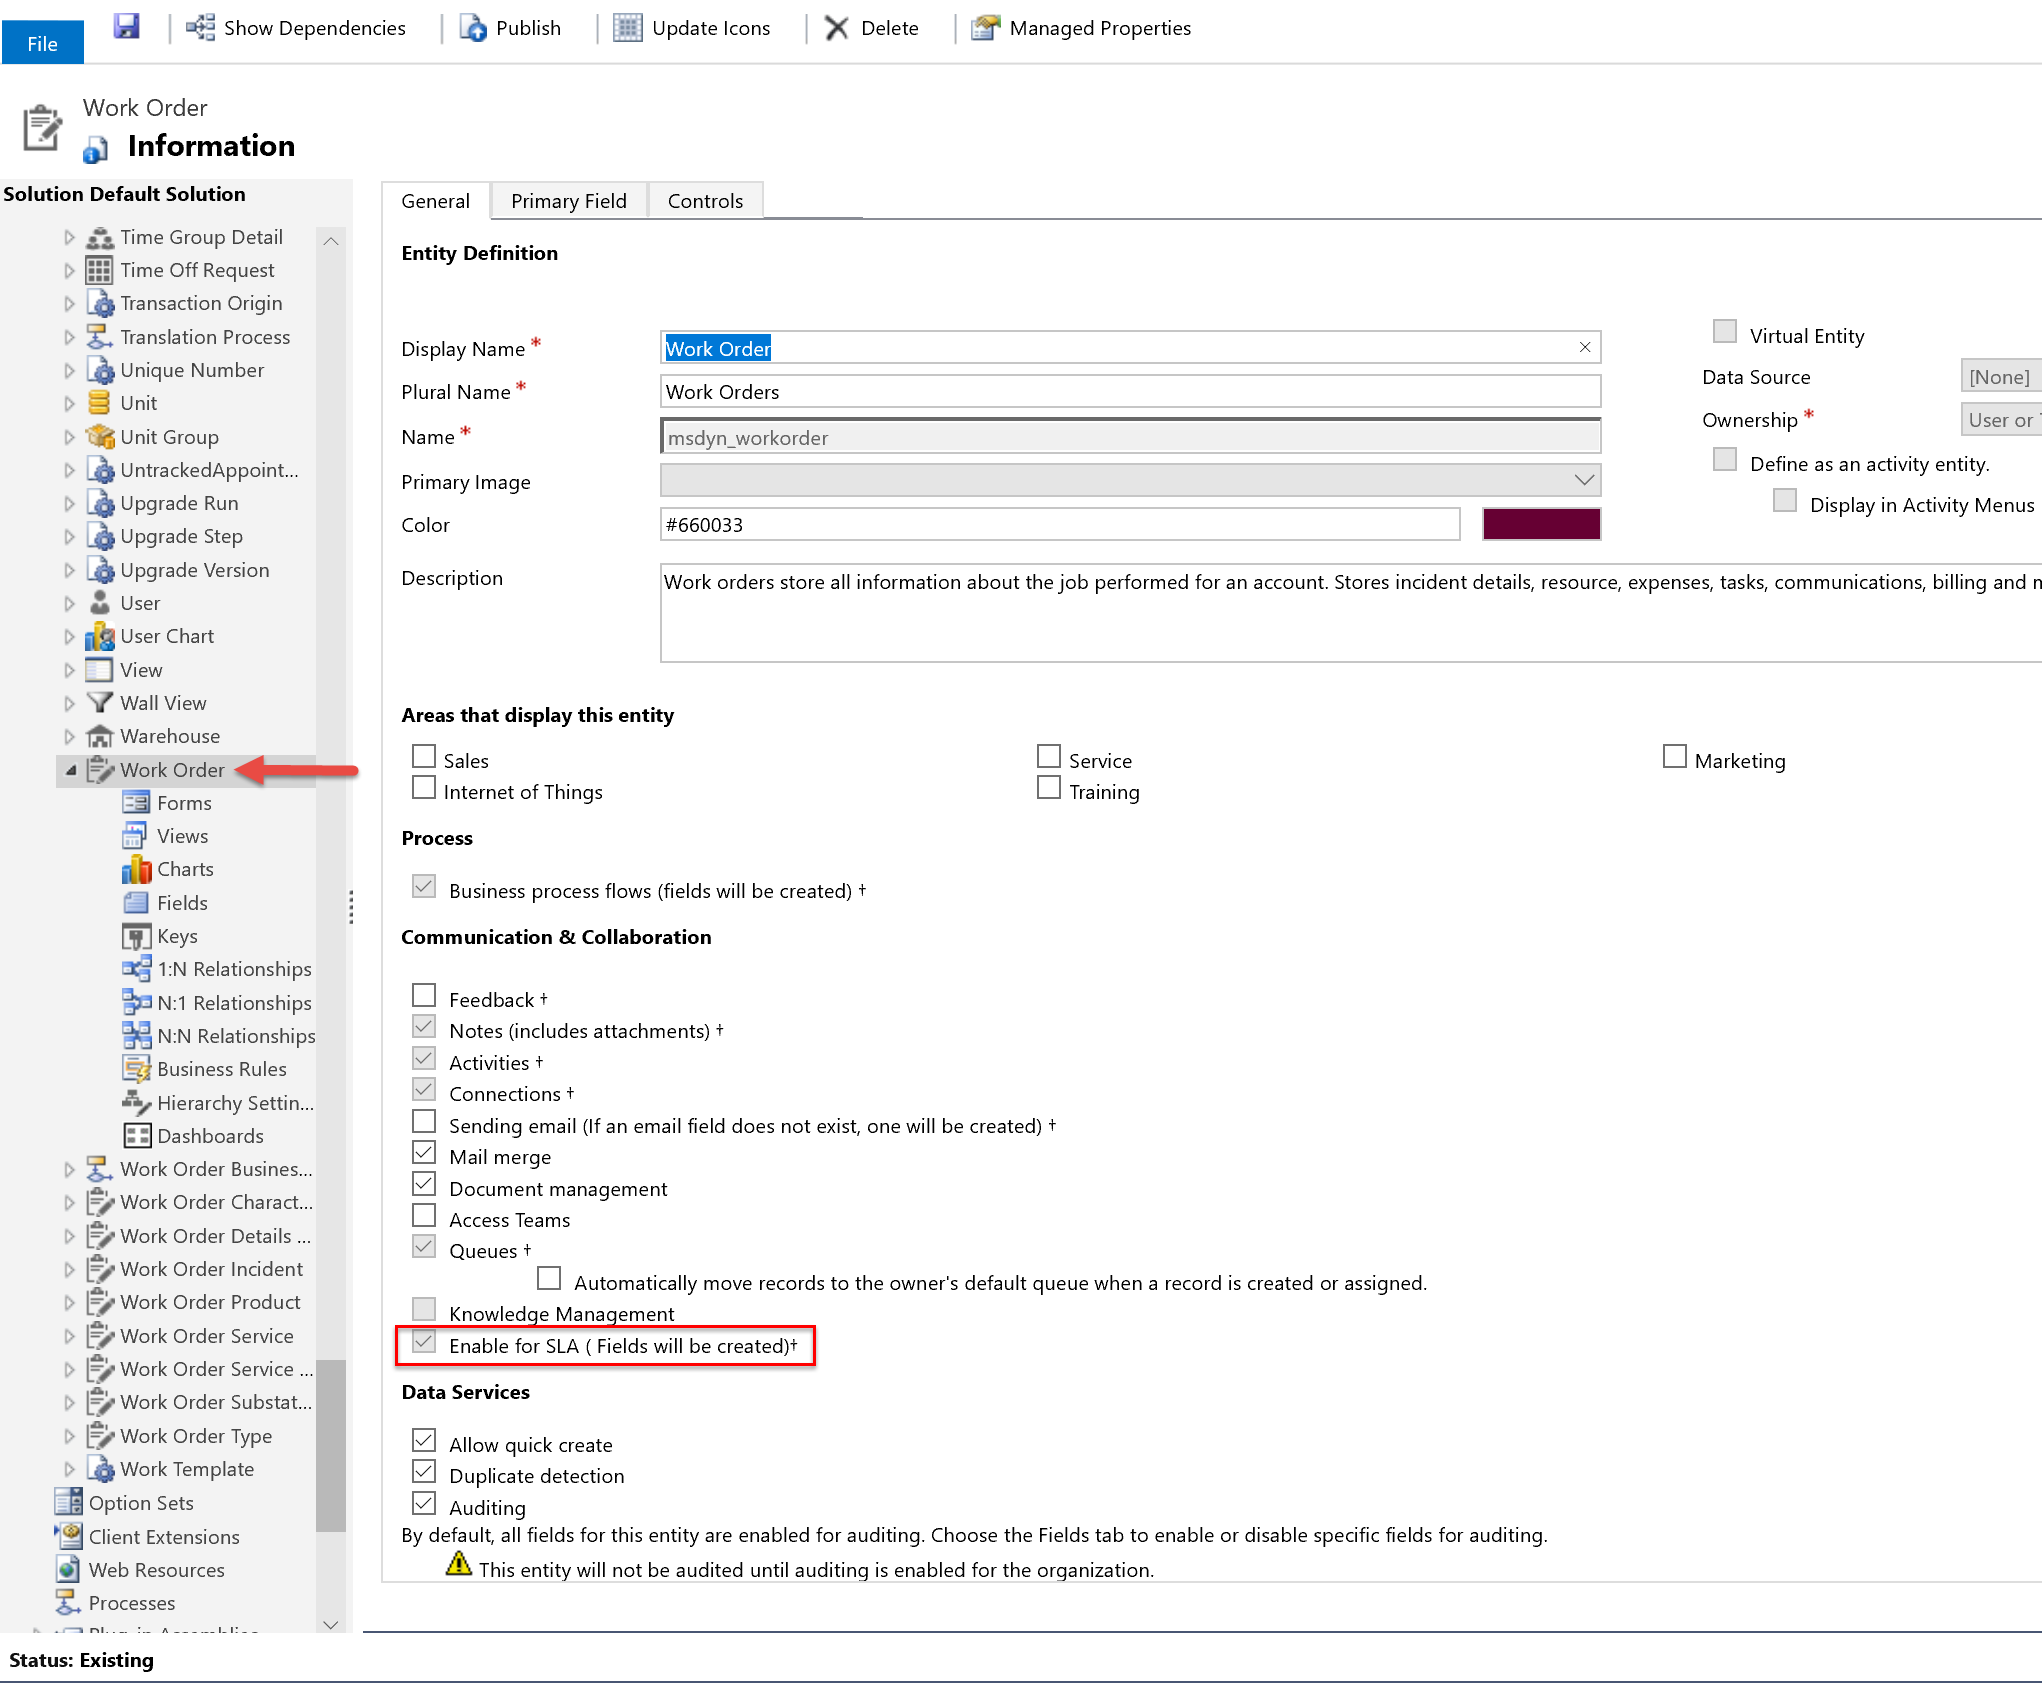
Select Save and Publish Customizations.
Create SLA KPIs
You can create new SLA KPI instances by going to Advanced Settings > Customizations > Customize the System > Entities > SLA KPI Instance > 1:N Relationships > New 1-to-Many Relationship.

Add SLA KPIs to Field Service
In Field Service change to the Settings area. In the General section, select Field Service Settings.
Go to the Field Service SLA Configuration tab to select the SLA KPI Instances for Field Service. By default, there's an SLA related to work order arrival times.
SLA KPI instances help track how often your organization meets SLAs by establishing a relationship between the SLA and work order entities. An SLA can have multiple SLA KPI Instances. If more than one SLA KPI matches for a work order, the one that was first created applies with priority.
Create SLA
Now we're going to create a new SLA.
Go to Advanced Settings.
Go to Service Management > Service Level Agreements
Select New.
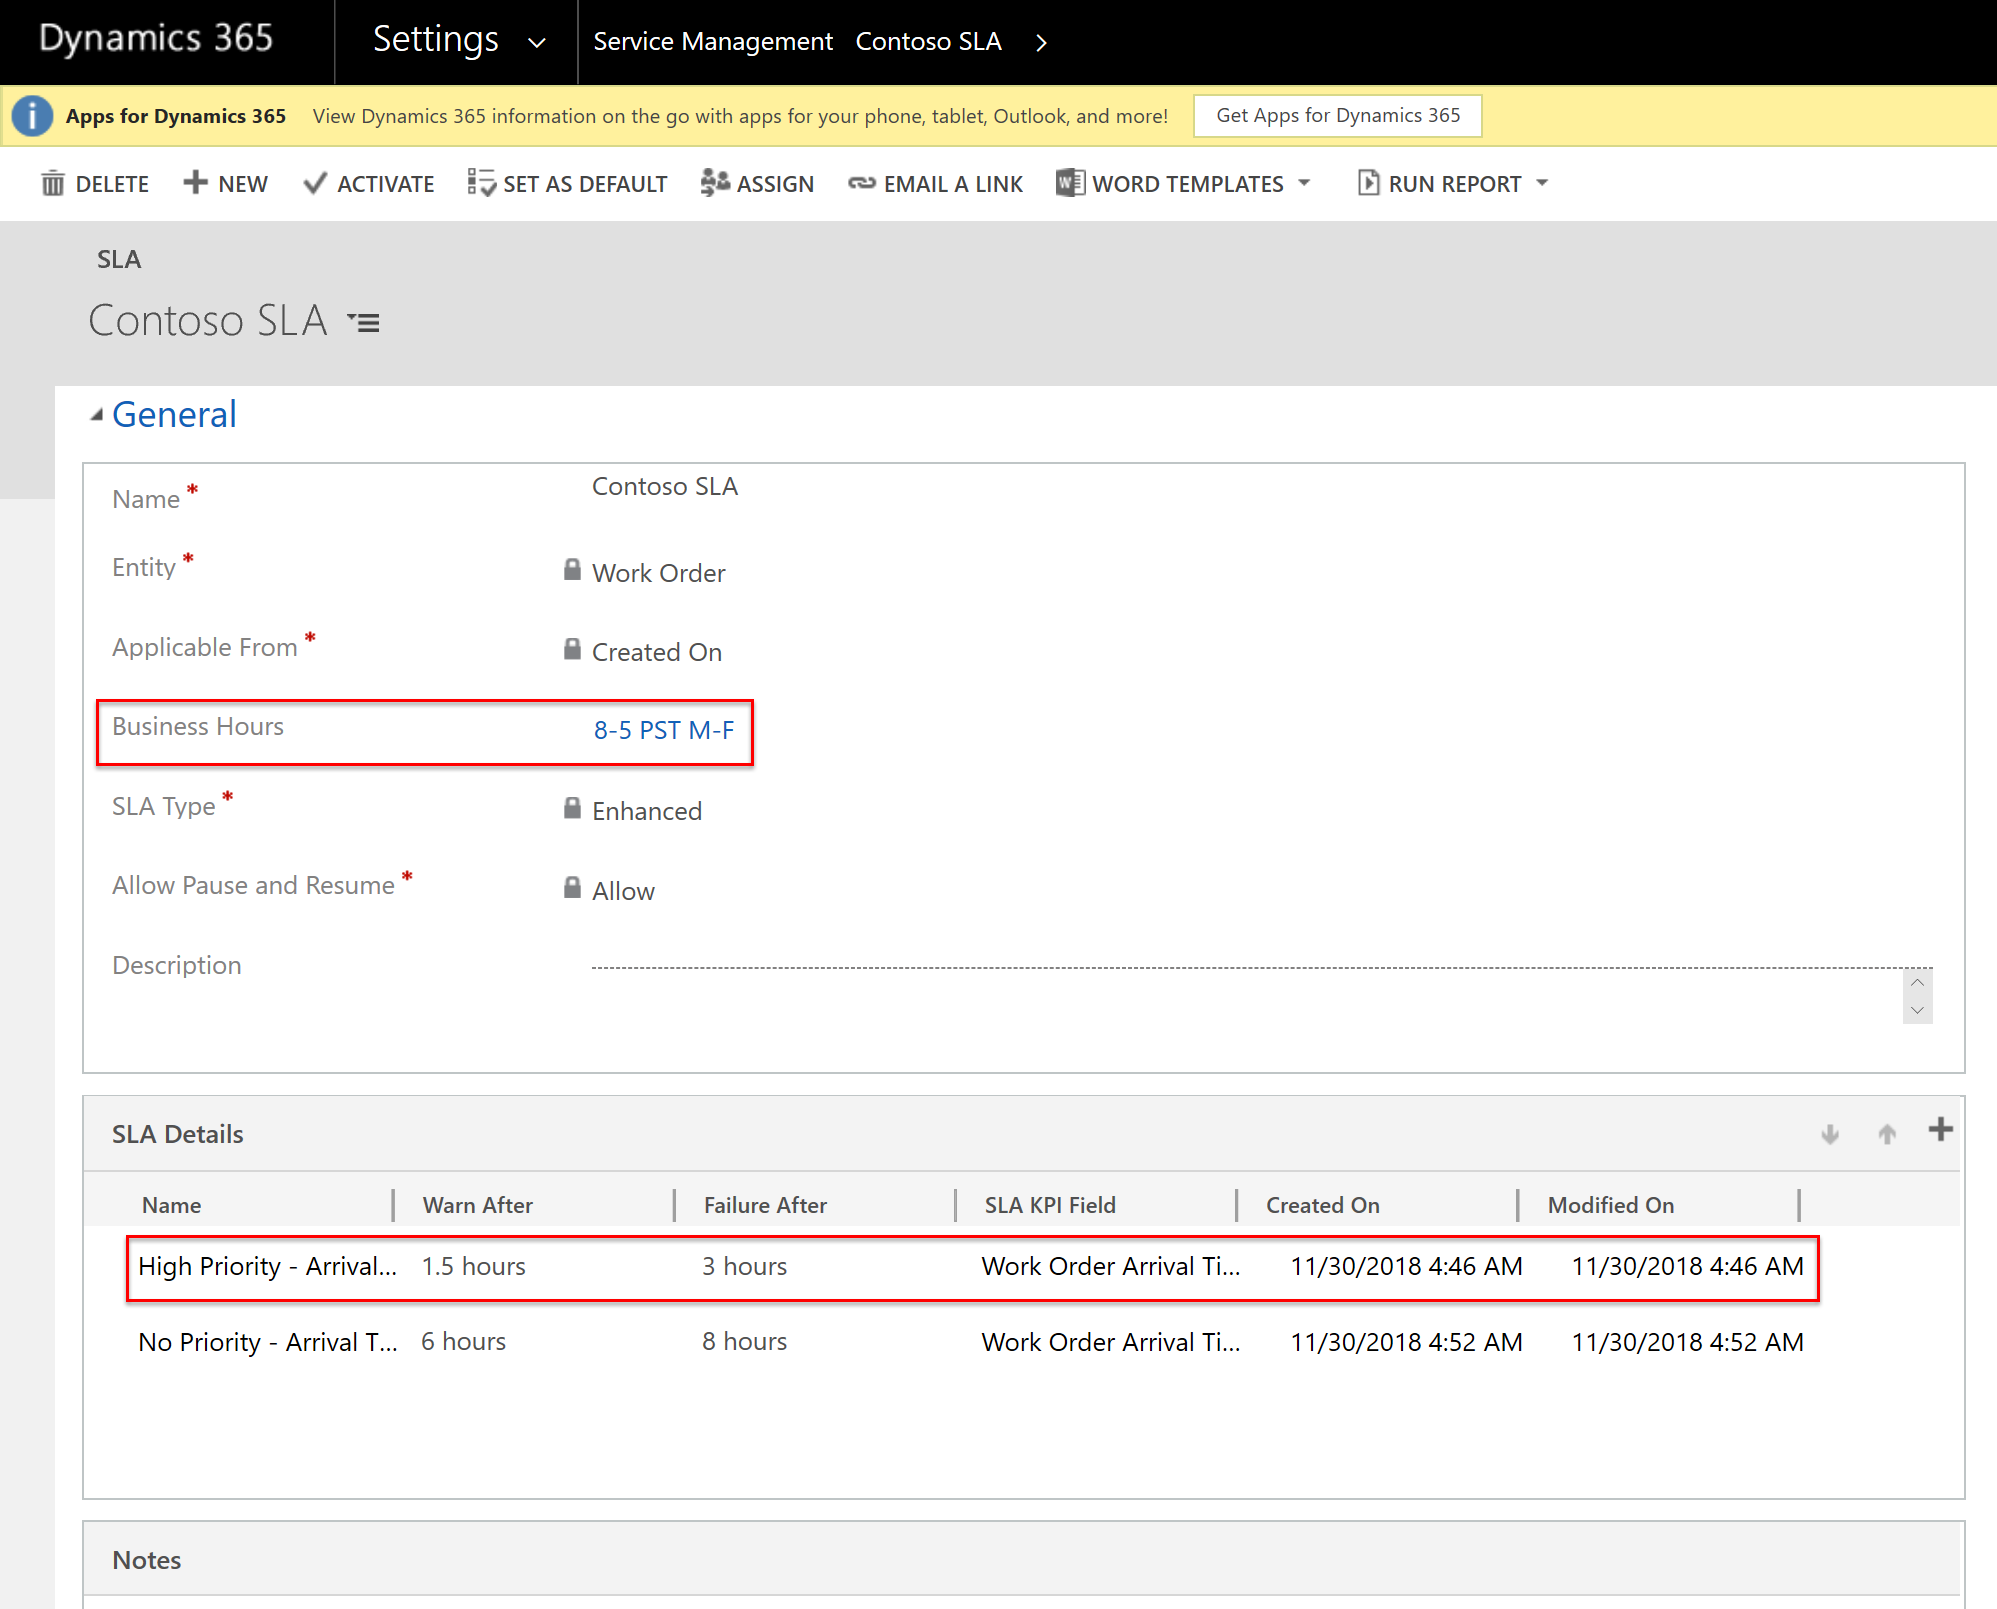
Enter a Name and choose Work Order from the Entity list.
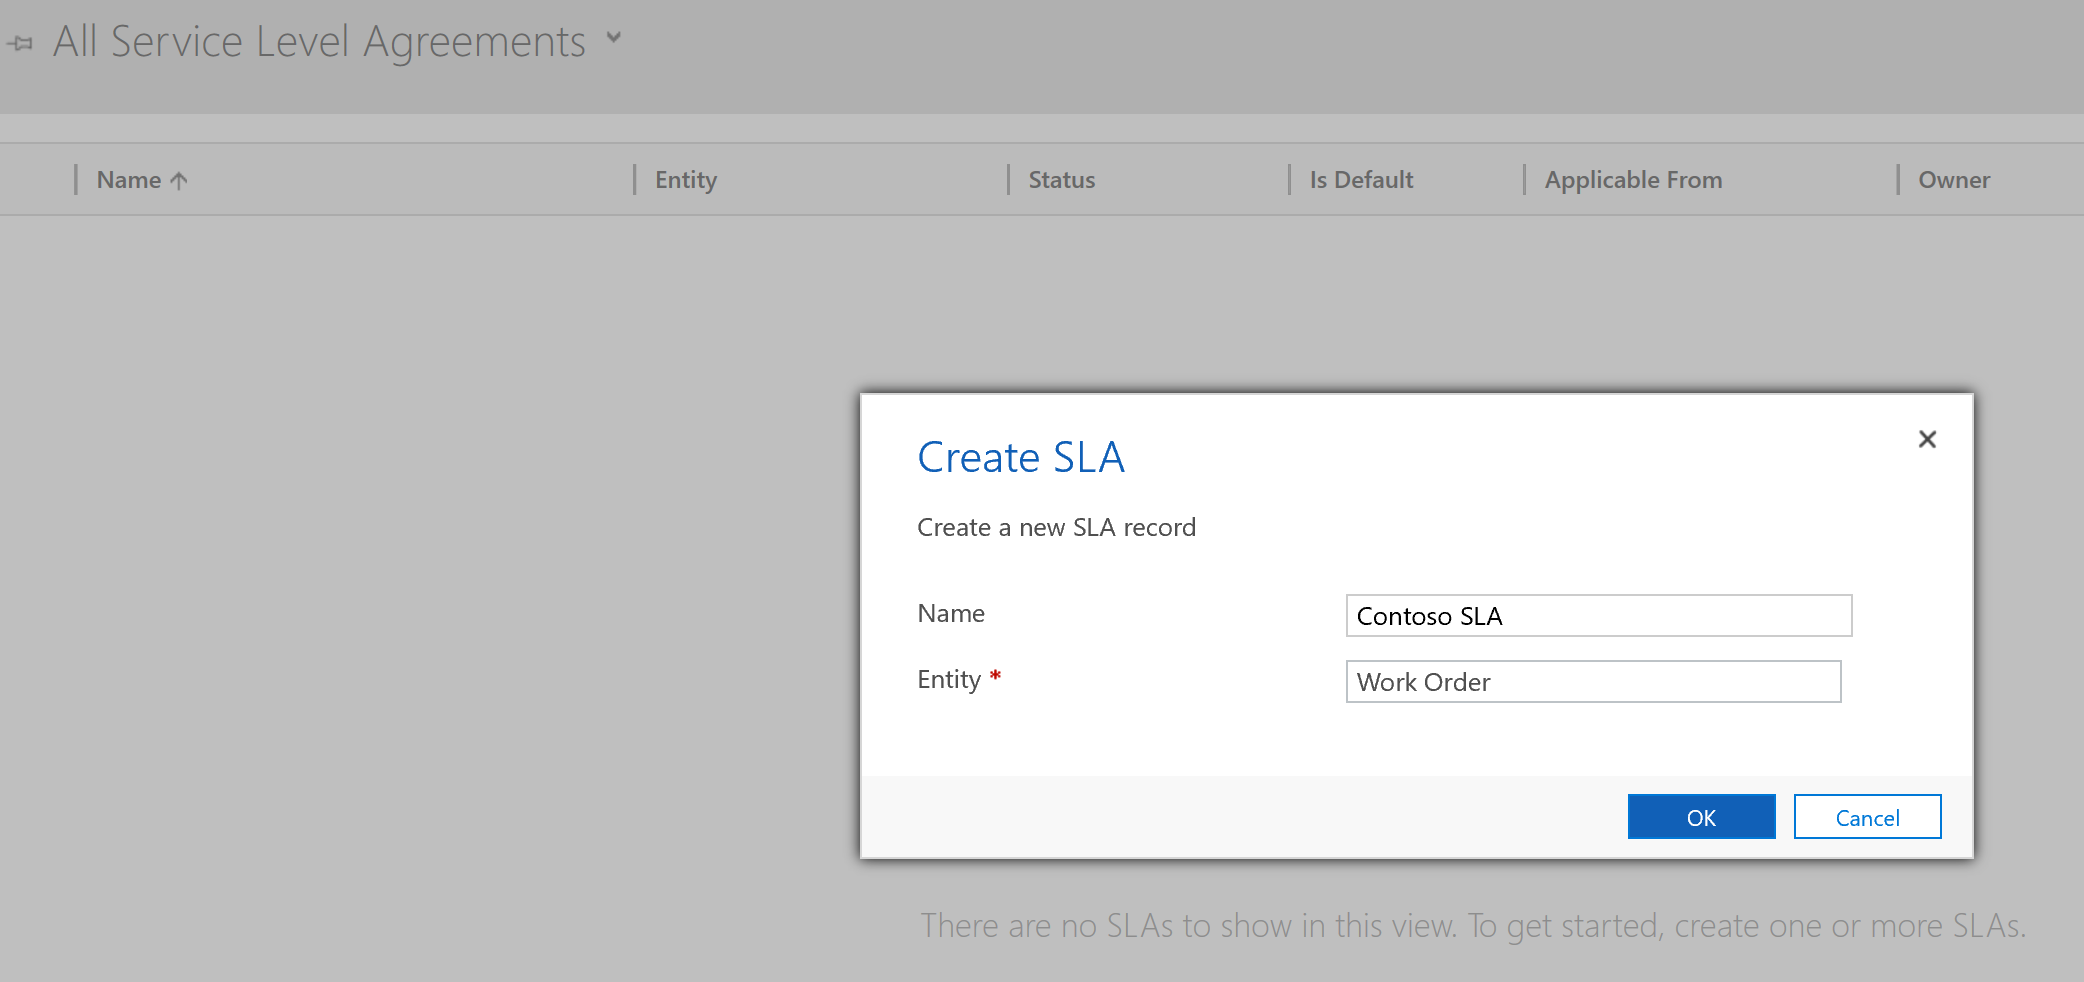
If applicable, assign a business hours calendar and select Save.
Note
You can create multiple SLAs and business hour calendars. However, a work order can only have one SLA assigned.
In the SLA Details section, select New to add details to the SLA:
- Name: Name of the SLA detail.
- SLA KPI: Choose the SLA KPI this SLA item relates to.
- Applicable When: Define the clauses that this SLA applies to. For example, if a work order priority is high.
- Success Criteria: Define the clauses that are considered a successful completion of a work order within an SLA. For example, if a field technician arrives on site and the work order system status changes to Open-In Progress.
- SLA Item Failure: Choose the time frame in which the work order must meet the success criteria. This setting respects the business hours of the SLA. Example: An SLA has a success parameter of 3 hours. Business hours are Monday through Friday from 9 AM to 5 PM. A work order created at 4 PM on Friday is within the SLA if success criteria are met by Monday at 11 AM.
- SLA Item Warning: Choose the time frame after which a warning shows on the work order.
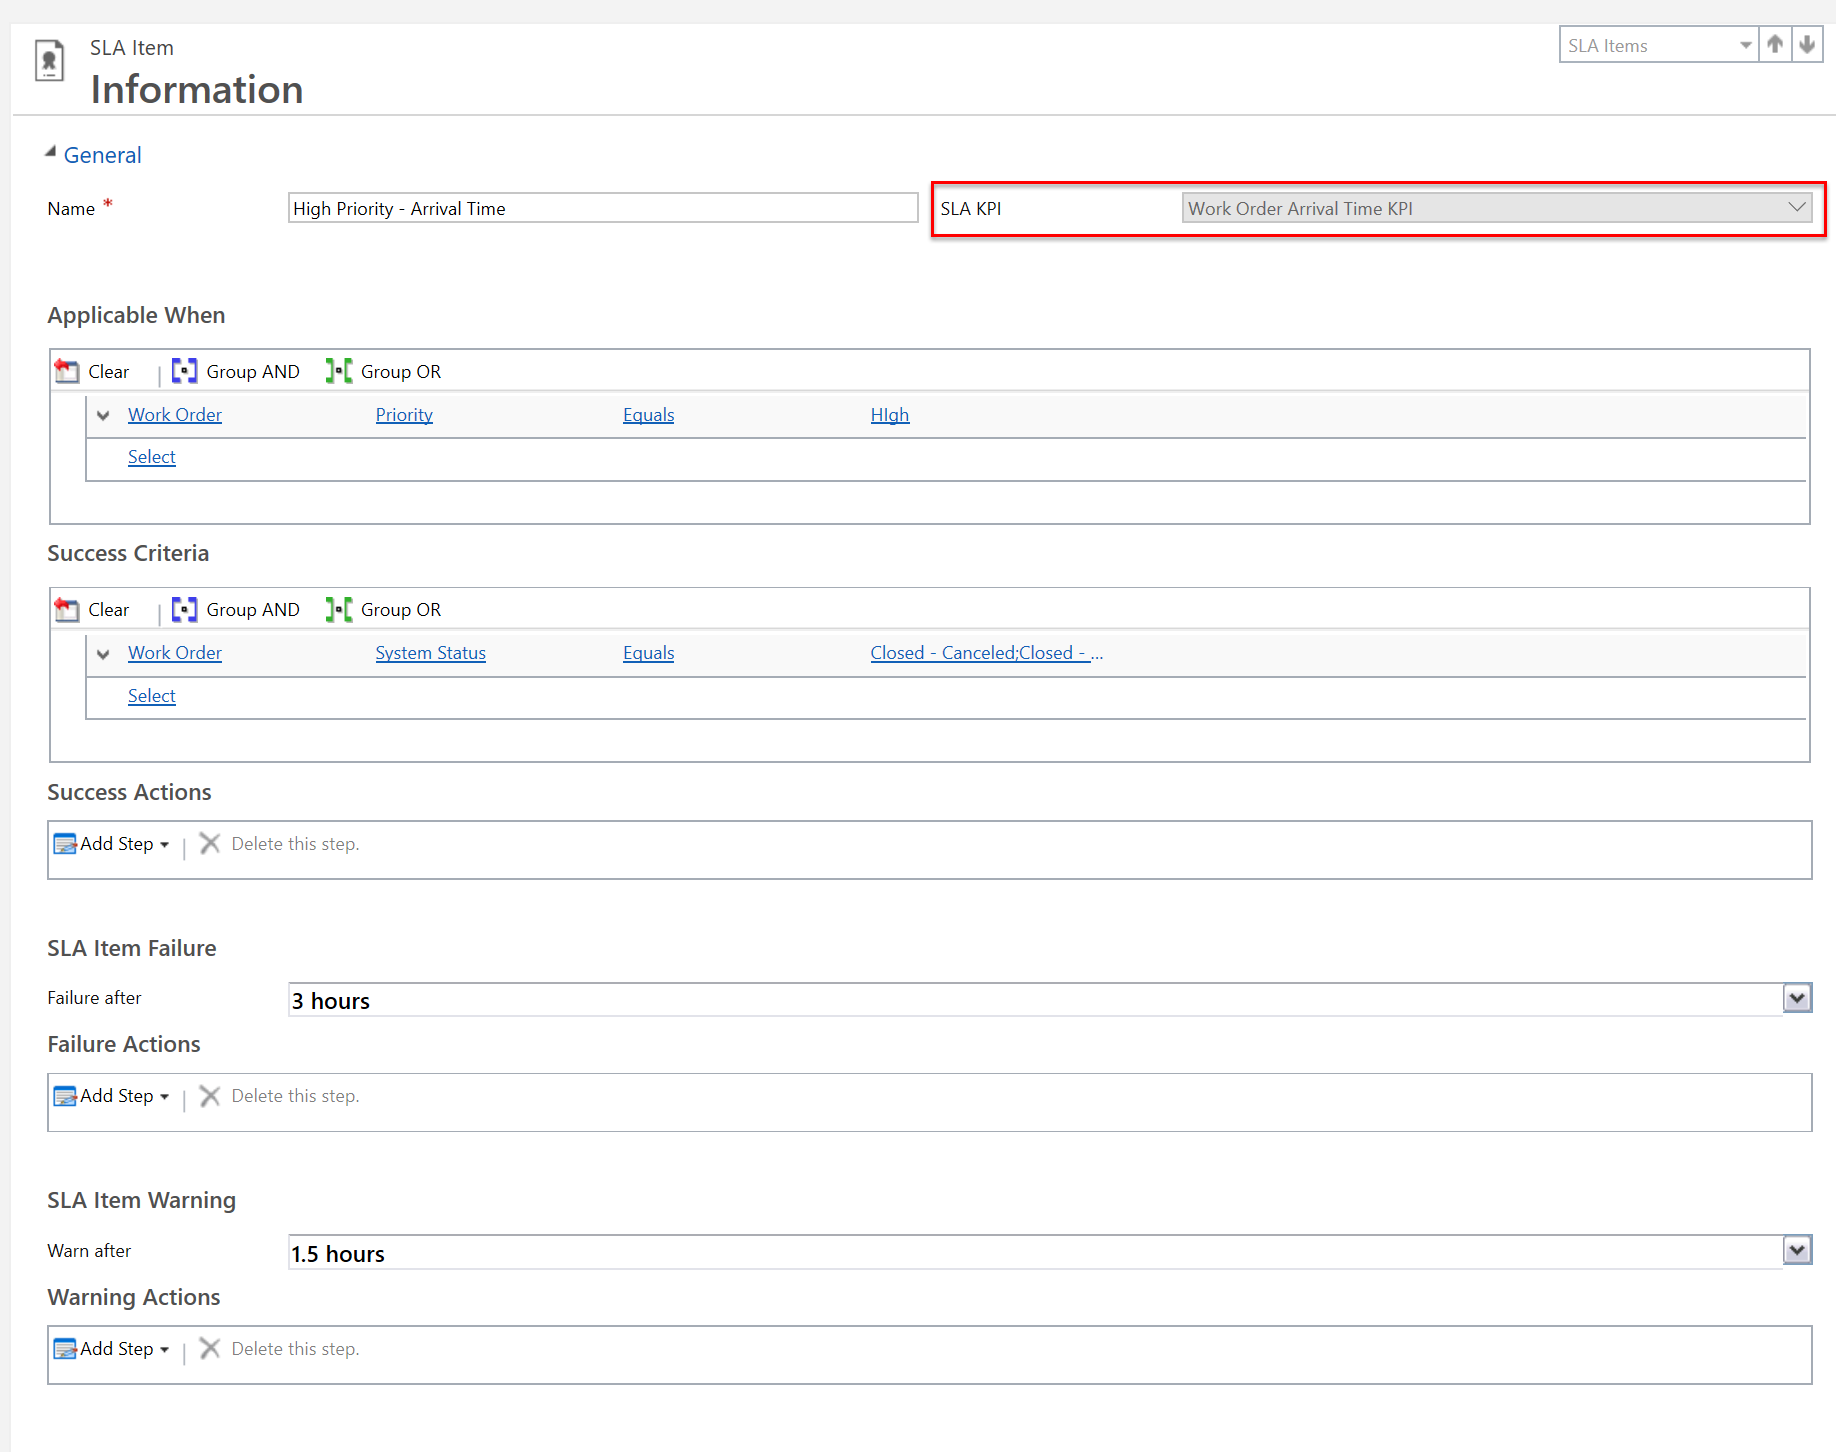
Save & Close the SLA item and select Activate on the SLA.
Add the SLA to a work order
Go to Advanced Settings > Customizations > Customize the System.
Expand Components > Entities > Work Order > Forms. Select the Work Order form.
Add the SLA field to the form. The SLA field is created when SLA functionality is enabled for the work order entity.
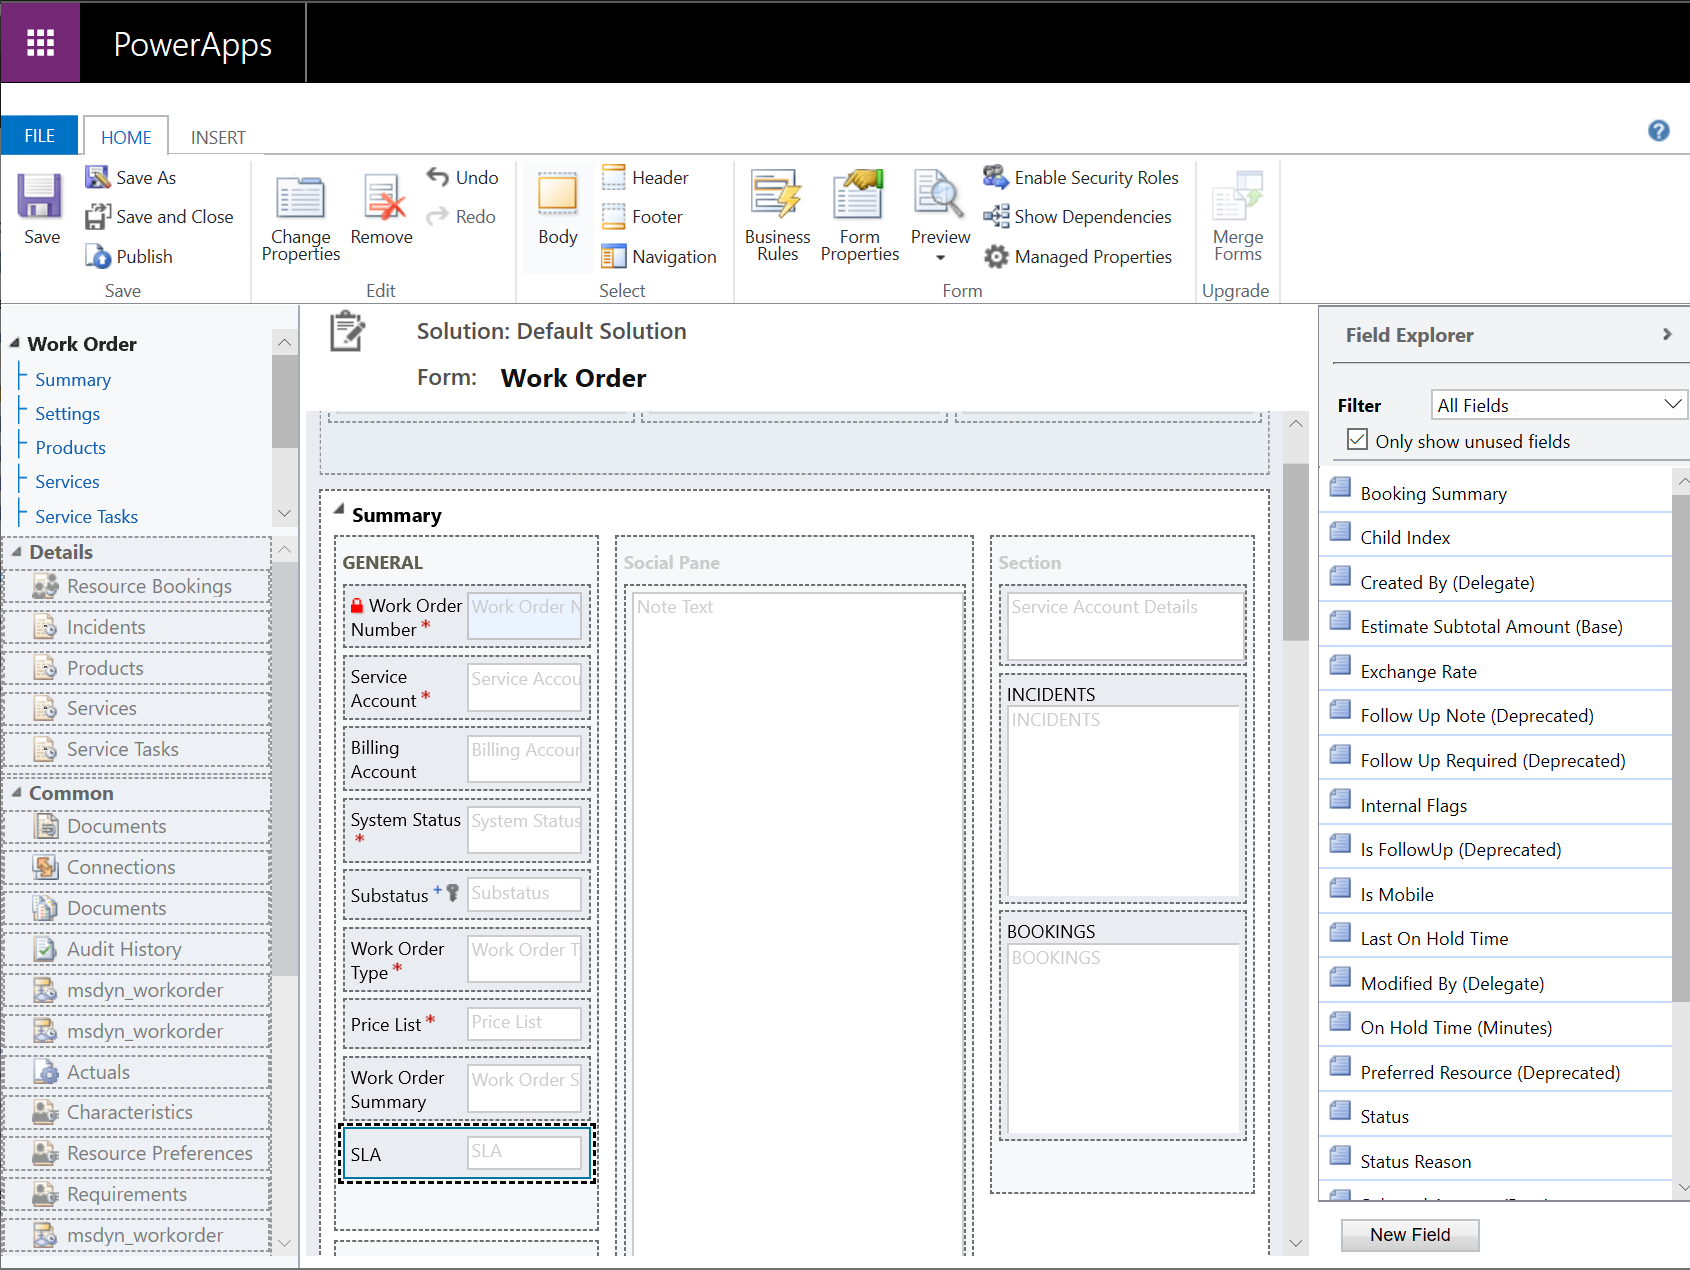
Save the form and select Publish All Customizations.
Moving forward, you can associate an SLA on a work order record.
Schedule a work order to meet SLA
Once a work order is associated with an SLA, the Time From Promised and Time To Promised fields will be populated on the work order according to the SLA, appropriate SLA Item, and business hours of the SLA. These fields will populate along with other system jobs, which may typically take up to 5 minutes.
Scheduling capabilities like the schedule assistant consider these fields and therefore will respect the SLA.
Pausing an SLA timer on the work order will update Time From Promised and Time To Promised fields when resumed.
Feedback
Coming soon: Throughout 2024 we will be phasing out GitHub Issues as the feedback mechanism for content and replacing it with a new feedback system. For more information see: https://aka.ms/ContentUserFeedback.
Submit and view feedback for