Publish Teams apps using Teams Toolkit
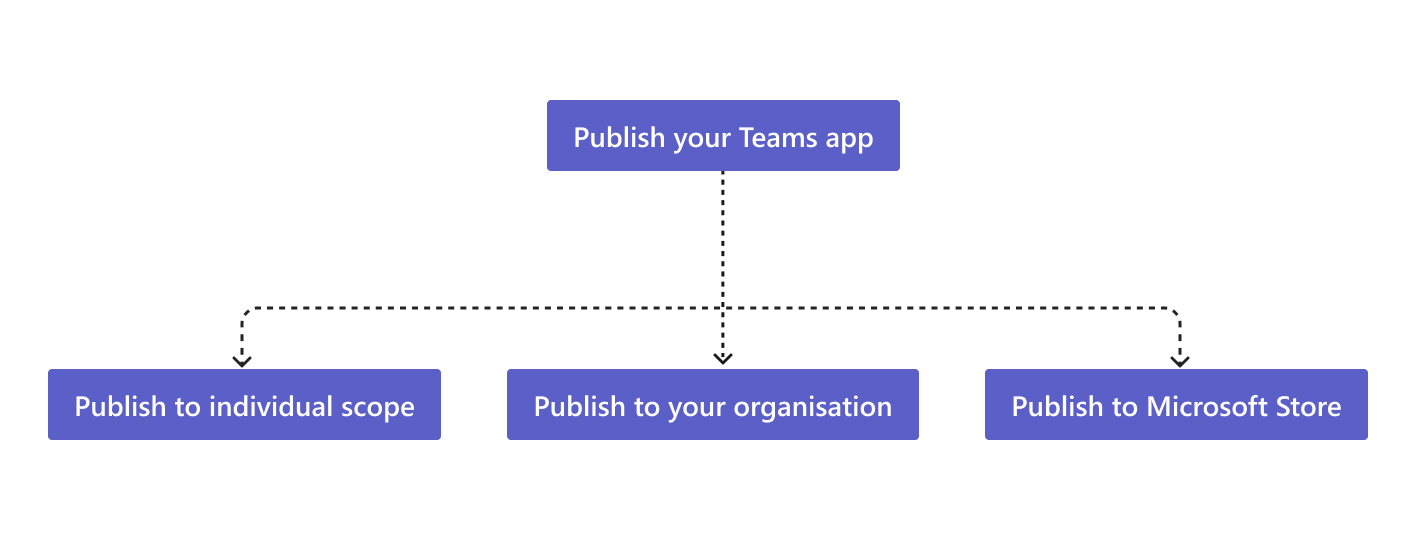
After creating the app, you can distribute your app to different scopes, such as an individual, a team, or an organization. The distribution depends on multiple factors such as needs, business and technical requirements, and your goal for the app. Distribution to different scope may need different review process. In general, the bigger the scope, the more review the app needs to go through for security and compliance concerns.
Here's what you'll learn in this section:
- Publish to individual scope or custom app upload permission
- Publish to your organization
- Publish to Microsoft Teams Store
Prerequisites
- Ensure to create your app package and validate it for errors.
- Enable custom app uploading in Teams.
- Ensure that your app is running and accessible using HTTPs.
- Ensure you have followed set of guidelines in the publish your app to the Teams Store to publish your app.
Publish to individual scope or custom app upload permission
You can add a custom app to Microsoft Teams by uploading an app package in .zip file directly to a team or in personal context. Adding a custom app by uploading an app package is known as custom app upload. It allows you to test app while being uploaded in Teams. You can build and test app in the following scenarios:
- Test and debug an app locally.
- Build an app for yourself, such as to automate a workflow.
- Build an app for small set of users, such as, your work group.
You can build an app for internal use and share it with your team without submitting it to the Microsoft Teams app catalog in the Teams Store . For more information, see how to upload your app in Teams.
Build app package
You need to run Provision in the cloud before you build the app package. The following step helps you to build the app package:
Select Zip Teams App Package > UTILITY.
The generated app package is located in {your project folder}\appPackage\build\appPackage.{env}.zip.
Upload app package
Perform the following steps to upload app package:
In the Teams client, select Apps > Manage your apps > Upload an app.
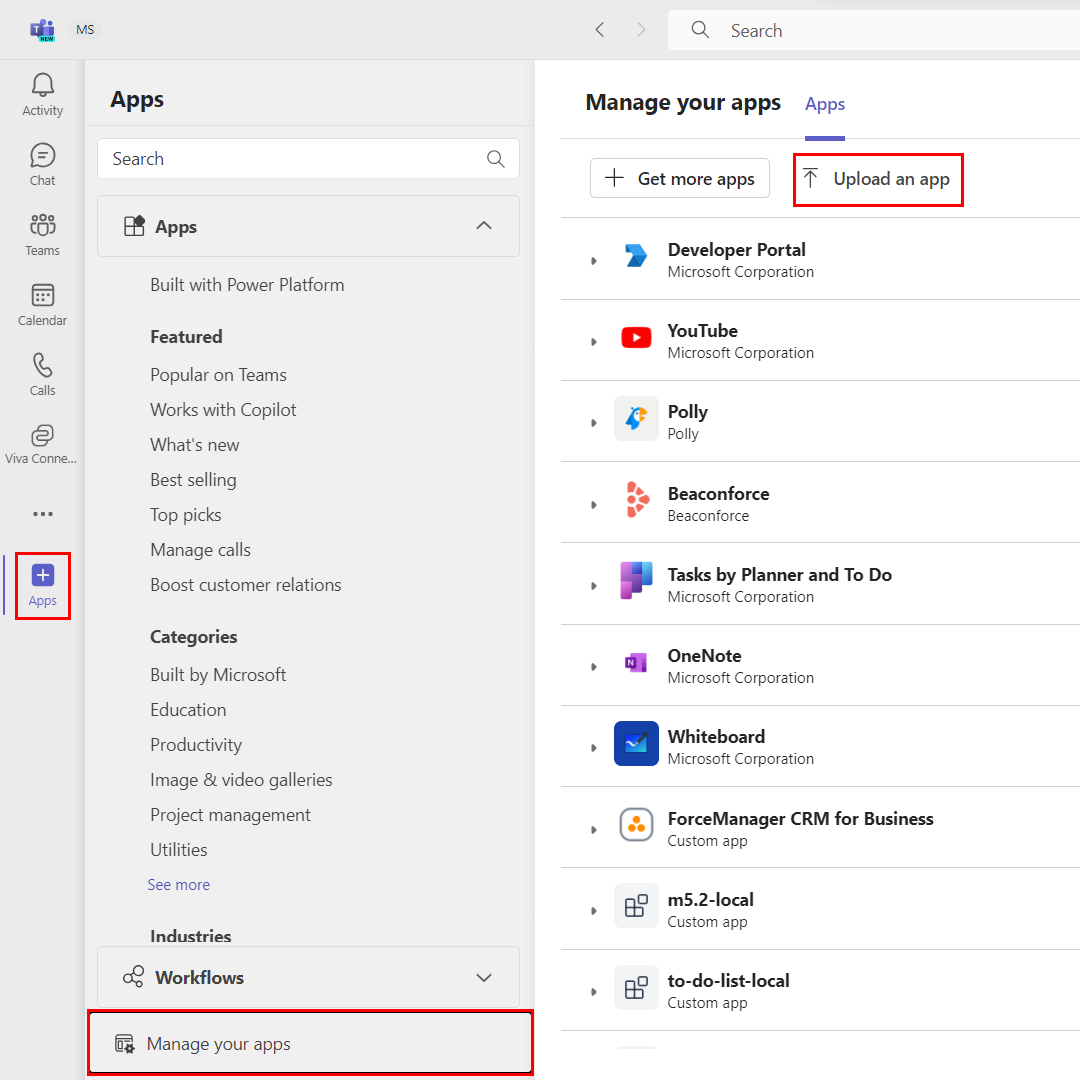
The Upload an app window appears.
Select Upload a custom app.
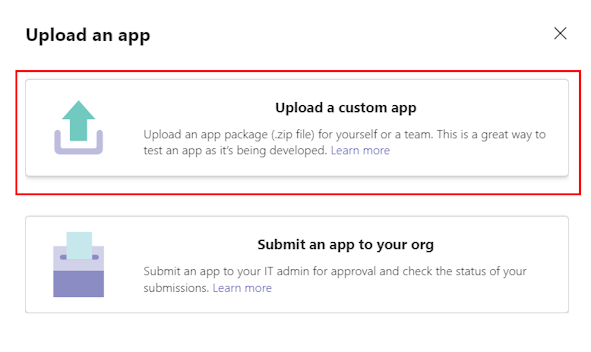
Now, the custom app is uploaded into the Teams client and you can add and view it.
Publish to your organization
When the app is ready for use in production, you can submit the app using the Teams app submission API, called from Microsoft Graph API. Teams app submission API is an integrated development environment (IDE) such as Microsoft Visual Studio Code installed with Microsoft Teams Toolkit. The following steps help you to publish the app to your organization:
Publish from Teams Toolkit
Note
You can use CICD pipelines to publish your Teams app. For more information, see set up CI/CD pipelines.
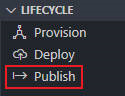
The following steps help you to publish the app from Teams Toolkit:
You can publish your Teams app in one of the following ways:
Select Publish under LIFECYCLE.
Select View > Command Palette... > Teams: Publish.
Select your environment, Teams Toolkit runs the
publishlifecycle defined inteamsapp.yml.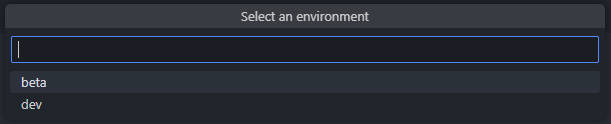
Now the app is available on the Manage apps of Microsoft Teams admin center, where you and the admin can review and approve it.
Note
The app doesn't publish to your organization's app store yet. The step submits the app to the Teams admin center where you can approve it for publishing to your organization's app store.
Approve on admin center
Teams toolkit for Visual Studio Code built on top of the Teams App Submission API and it allows you to automate the submission-to-approval process for custom apps on Teams.
Note
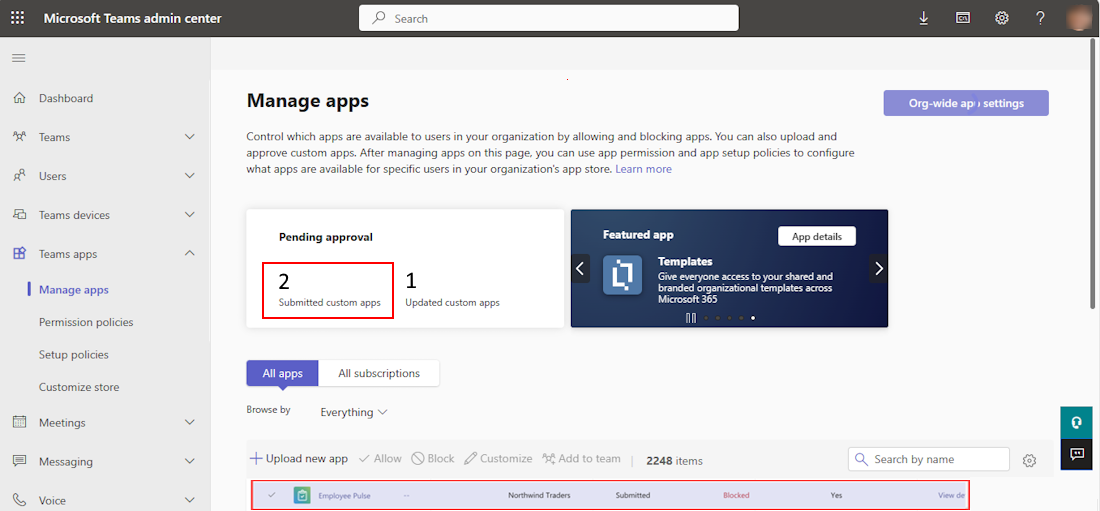
Ensure that you have Teams app project in Visual Studio code. As an admin, Manage apps in the Microsoft Teams admin center is where you can view and manage all Teams apps for your organization. You can do the following activities in the admin center:
- See the org level status and properties of apps.
- Approve or upload new custom apps to your organization's app store.
- Block or allow apps at the org level.
- Add apps to Teams.
- Purchase services for third-party apps.
- View permissions requested by apps.
- Grant admin consent to apps in manage org wide app settings..
The following steps help you to approve from admin center:
Select Go to admin portal.
Select the
 icon > Teams apps > Manage apps.
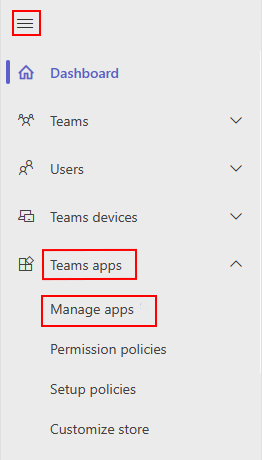
You can view all Teams app for your organization.
In the Pending approval widget at the top of the page, lets you know when a custom app is submitted for approval. In the table, a newly submitted app automatically publishes the status of submitted and blocked apps. You can sort the publishing status column in descending order to find the app.
Select the app name to go to the app details page. On the About tab, you can view details about the app, including description, status, and app ID.
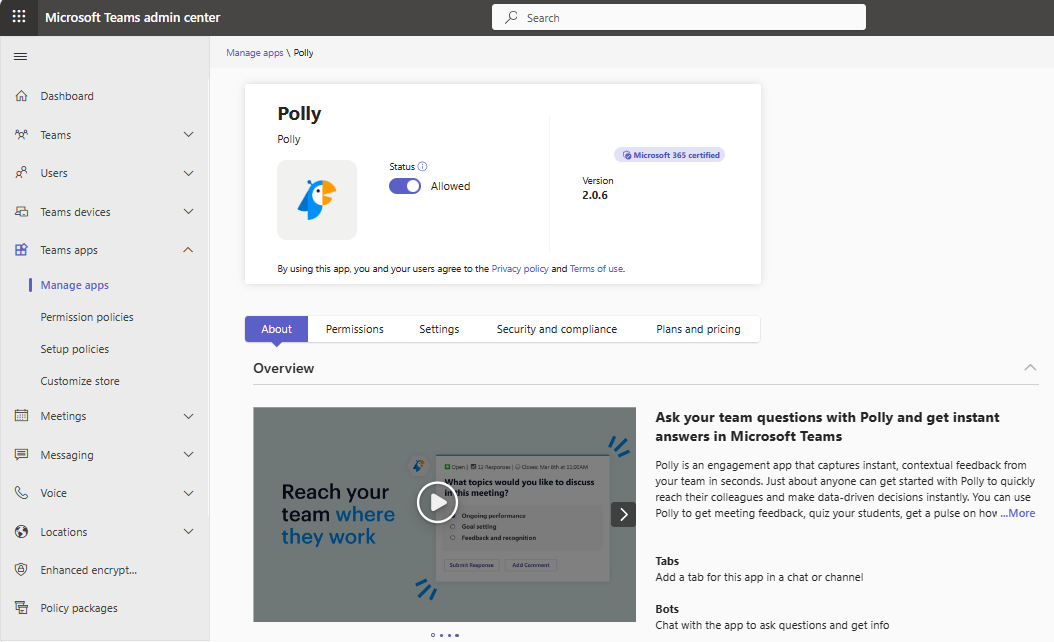
Select the status dropdown and change from Submitted to Publish.
After you publish the app, the publishing status changes to Published and the status automatically changes to Allowed.
For more information, see Publish to your org
Publish to Teams Store
You can distribute your app directly to the Teams Store inside Microsoft Teams and reach millions of users around the world. If your app is also featured in the Teams Store, you can instantly reach potential customers. The apps published to the Teams Store also automatically list on Microsoft AppSource, which is the official marketplace for Microsoft 365 apps and solutions.
For more information, see how to publish to the Teams Store.
See also
Platform Docs
Feedback
Coming soon: Throughout 2024 we will be phasing out GitHub Issues as the feedback mechanism for content and replacing it with a new feedback system. For more information see: https://aka.ms/ContentUserFeedback.
Submit and view feedback for